Search across all sections, modules, and workflows
1. Introduction
The Magnar HCM HR & Payroll web application is the central platform for all human resource and payroll operations within your organization. This manual is intended exclusively for authorized HR and Payroll administrators who are responsible for managing employee records, processing payroll, overseeing leave and attendance, and maintaining HR configuration across one or more company entities.
The system is accessed via a standard web browser at hcm.magnarsystems.com:XXXX and supports multiple languages including English, Arabic (RTL), and Spanish, adapting its layout automatically based on the selected language.
This manual covers the HR & Payroll administrator portal. For the employee-facing self-service mobile and desktop app, refer to the separate Magnar HCM ESS User Manual.
Who This Manual Is For
This guide is designed for users who have been granted one or more of the following roles within Magnar HCM:
- HR Administrator — Manages employee records, organizational structure, leave policies, and HR workflows.
- Payroll Administrator — Responsible for payroll runs, salary structures, deductions, allowances, and payslip generation.
- HR & Payroll Manager — Has combined access to both HR and payroll functions, including approvals and reporting.
Access is role-based. The screens and menu items you see may differ depending on the permissions granted to your user account. Contact your system administrator if you require access to additional modules.
2. Logging In
The Magnar HCM portal is a web-based application. You do not need to install any software — simply open a supported web browser (Google Chrome, Microsoft Edge, or Mozilla Firefox) and navigate to the login URL provided by your system administrator.
Login URL: hcm.magnarsystems.com:XXXX/login
The system displays version v5.0.0 at the bottom of the login form.
2.1 Language Selection
Before logging in, you can switch the interface language using the language selector located in the top-right corner of the login page (top-left when Arabic is selected, as the layout switches to right-to-left). The system currently supports:
Selecting a language applies it immediately to the entire interface — all labels, buttons, and messages will appear in the chosen language. The Arabic interface uses a right-to-left (RTL) layout, and the decorative banner panel moves to the right side of the screen.

2.2 Login Steps
- Open your browser and go to hcm.magnarsystems.com:XXXX/login.
- If needed, select your preferred language from the dropdown in the top-right corner of the page.
- Enter your Email address in the Email field (e.g., username@gmail.com).
- Enter your Password in the Password field.
- Click the Log In button (or Acceso / تسجيل الدخول in other languages).
- If your account has Two-Factor Authentication (2FA) enabled, you will be prompted to enter a verification code. See your system administrator for 2FA setup.
- After successful authentication, you will be directed to the Dashboard or prompted to select a company if your account is linked to multiple entities.
| Field | Description | Required |
|---|---|---|
| Your registered email address used to access Magnar HCM | Required | |
| Password | Your account password (case-sensitive) | Required |
Tip: Use a modern browser such as Google Chrome or Microsoft Edge for the best experience. Avoid using Internet Explorer.
2.3 Forgot Password
If you have forgotten your password, click the Forgot Password? link located below the Password field on the login page. You will be prompted to enter your registered email address, and a password reset link will be sent to your inbox.
- On the login page, click Forgot Password?
- Enter your registered email address.
- Check your inbox for a password reset email from Magnar HCM.
- Click the reset link in the email and follow the instructions to create a new password.
- Return to the login page and sign in with your new credentials.
If you do not receive the reset email within a few minutes, check your spam or junk folder. If the issue persists, contact your system administrator.
After logging in, you may be asked to select a company. See Section 3 — Dashboard & Navigation for next steps.
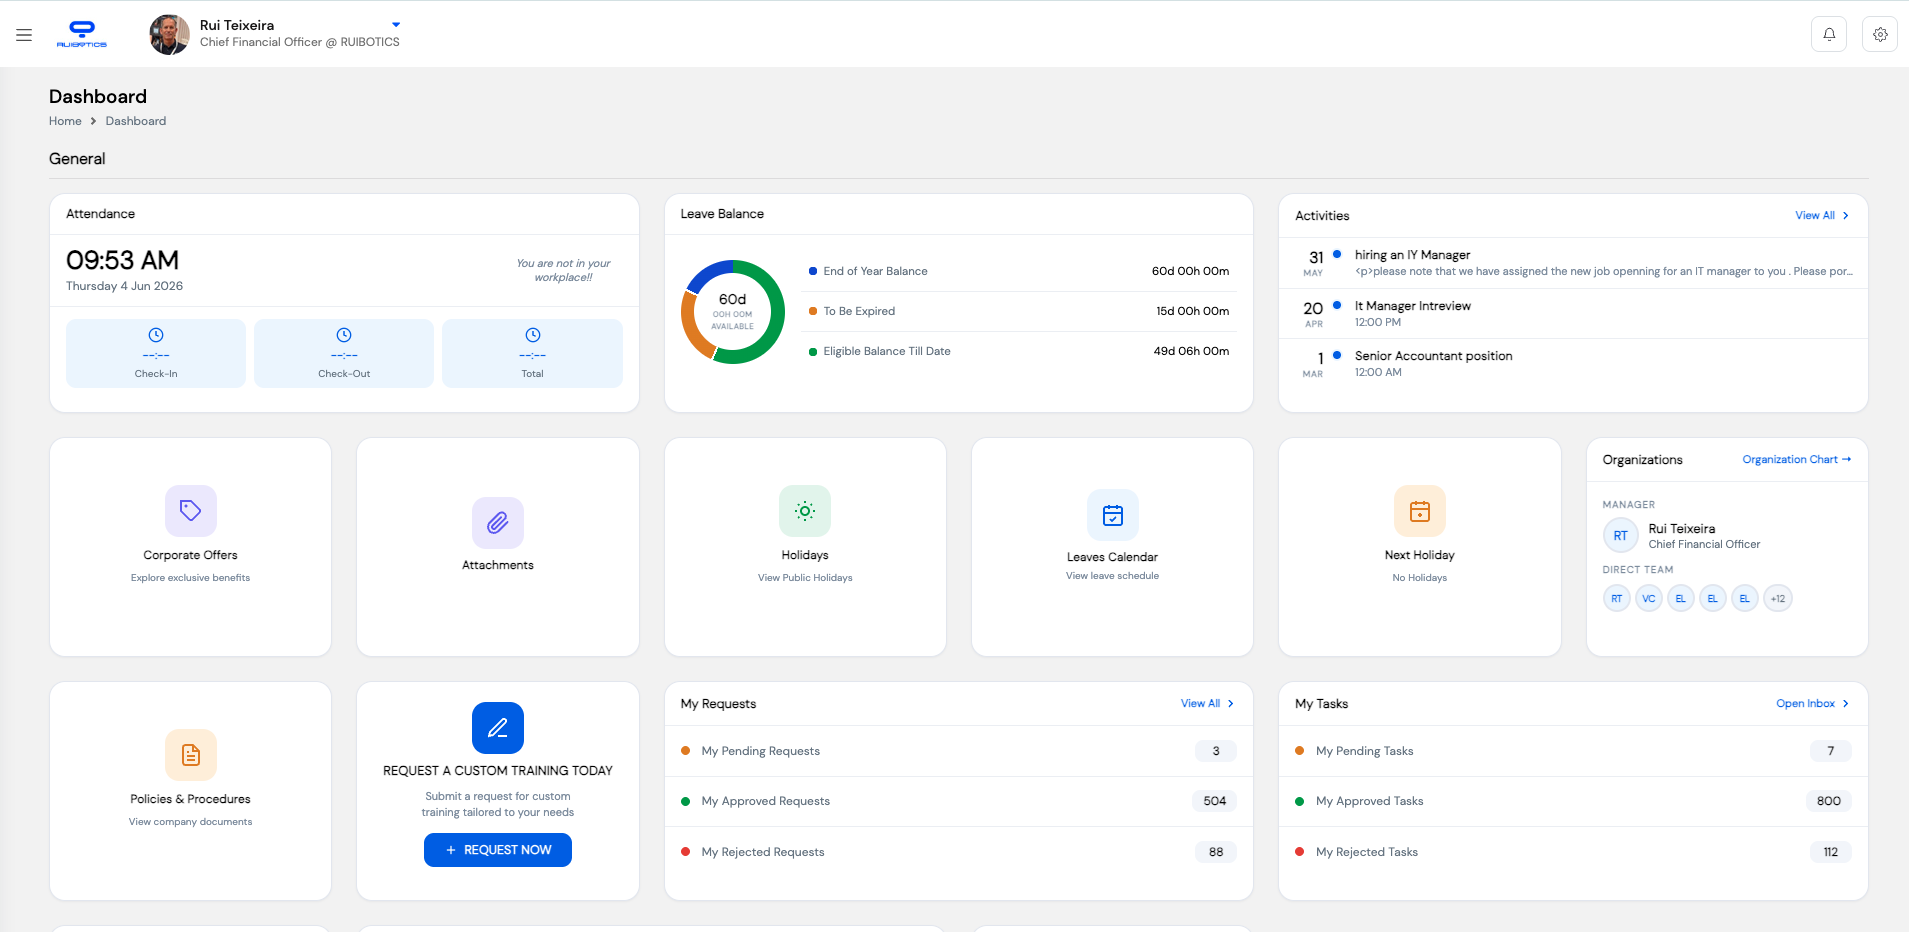
3. After Login — Navigating to HR & Payroll
After successfully logging in and selecting your company, the system will direct you to the ESS (Employee Self-Service) Dashboard — provided your account includes an ESS user profile. This is the employee-facing portal. To access the HR & Payroll administration system, you must navigate from the ESS Dashboard using the settings menu.
If your account does not have an ESS profile, you will be taken directly to the HR & Payroll system after login. The steps below apply to users who land on the ESS Dashboard first.
3.1 The ESS Dashboard
The ESS Dashboard provides a summary of your personal HR information — leave balances, timesheets, pending tasks, open trainings, holidays, and more. As an HR or Payroll administrator, this is not your primary workspace. You need to switch to the HR & Payroll system.
3.2 Switching to the HR & Payroll System
To navigate from the ESS Dashboard to the HR & Payroll administration system, click the Settings (⚙️) icon in the top-right corner of the screen. A dropdown menu will appear with the following options:
| Menu Option | Description |
|---|---|
| Personalize Group | Customize the layout and widget groups on your ESS Dashboard |
| English (United States) | Language selector — change the interface language |
| Go to payroll | Switch to the HR & Payroll administration system |
| Switch Company | Change the active company entity if your account has access to multiple companies |
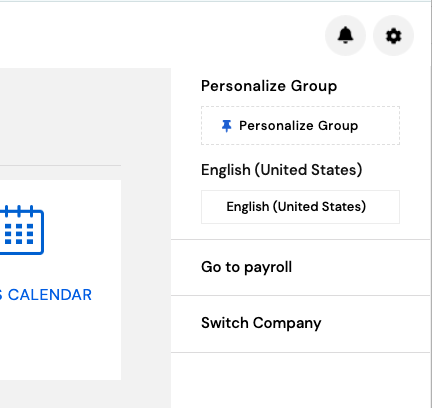
How to switch to HR & Payroll
- From the ESS Dashboard, click the ⚙️ Settings icon in the top-right corner of the screen.
- In the dropdown menu, click Go to payroll.
- The system will load the HR & Payroll Corporate Dashboard, which is your main workspace as an administrator.
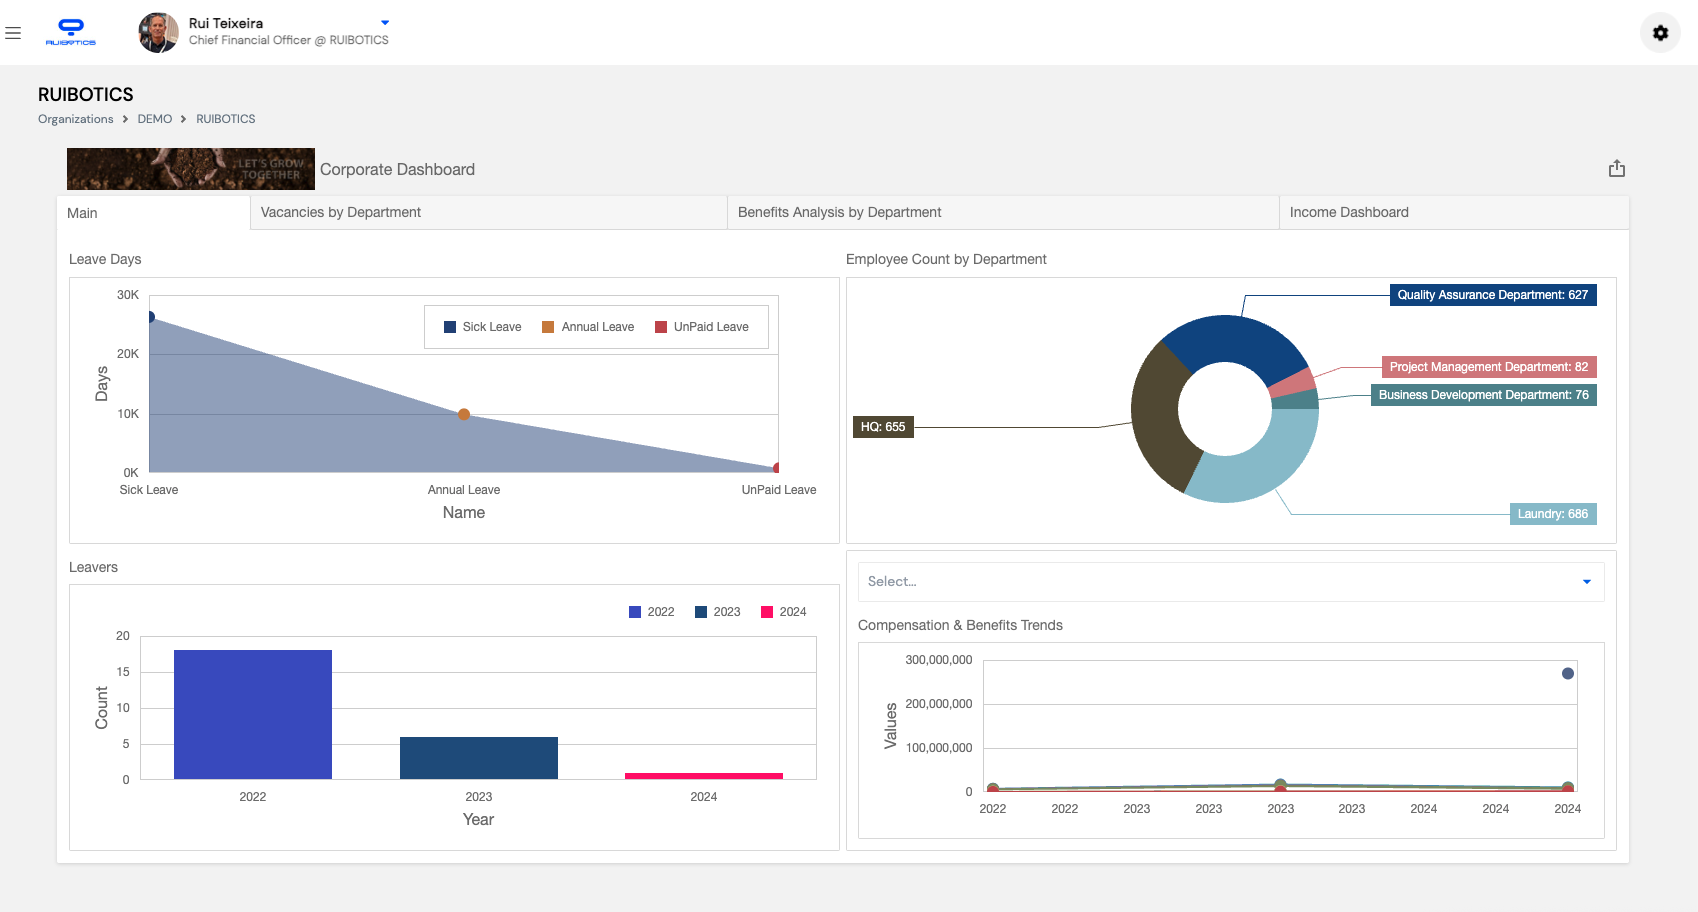
3.3 The HR & Payroll Dashboard
The HR & Payroll Dashboard is the central hub for all administrative operations. It features a left-side navigation menu with access to all modules, and a Corporate Dashboard in the main panel displaying key analytics including leave days, employee count by department, leavers over time, and compensation & benefits trends.
The left navigation menu provides access to the following modules:
- Dashboard — Corporate analytics and summary charts
- Company Details — Organization structure and company information
- Employees — Employee records and profiles
- Employee Transactions — HR transactions and employee movements
- Payroll Process Tool — Run and manage payroll cycles
- Setup — System configuration and HR settings
- Appraisals — Performance evaluation management
- Time and Attendance — Attendance records and shift management
- Salaries and Allowance — Salary structures, grades, and allowances
- Insurance — Employee insurance management
- Leaves — Leave policies, types, and balances
- End of Service — End of service calculations and management
- Configuration — Advanced system configuration
- Expenses — Expense management and reimbursements
- Send Payslip — Distribute payslips to employees
- Data Import — Bulk data import tools
- Financial Reports — Payroll and financial reporting
3.4 Returning to the ESS Portal
At any time while working in the HR & Payroll system, you can switch back to the ESS employee portal by clicking the ⚙️ Settings icon in the top-right corner and selecting Go to ESS.
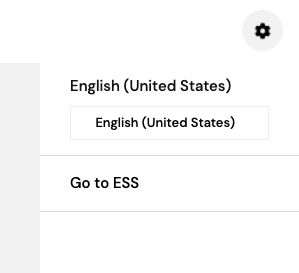
You can switch freely between the ESS portal and the HR & Payroll system at any time without logging out. Your session remains active across both interfaces.
For a detailed walkthrough of each module, see the sections that follow starting with Section 4 — Employee Management.
4. Currency Management
The Currencies module allows authorized HR & Payroll administrators to define and maintain the currencies used across the system — for payroll processing, salary structures, expenses, and financial reporting. It is accessed via Organizations → [Your Company] → Currencies.
4.1 Currencies List
The Currencies list displays all currencies currently configured in the system. Each row shows the currency's ID, Code, Description, and ISO name. You can sort any column by clicking its header, search for a specific currency, or create a new one using the + New button.
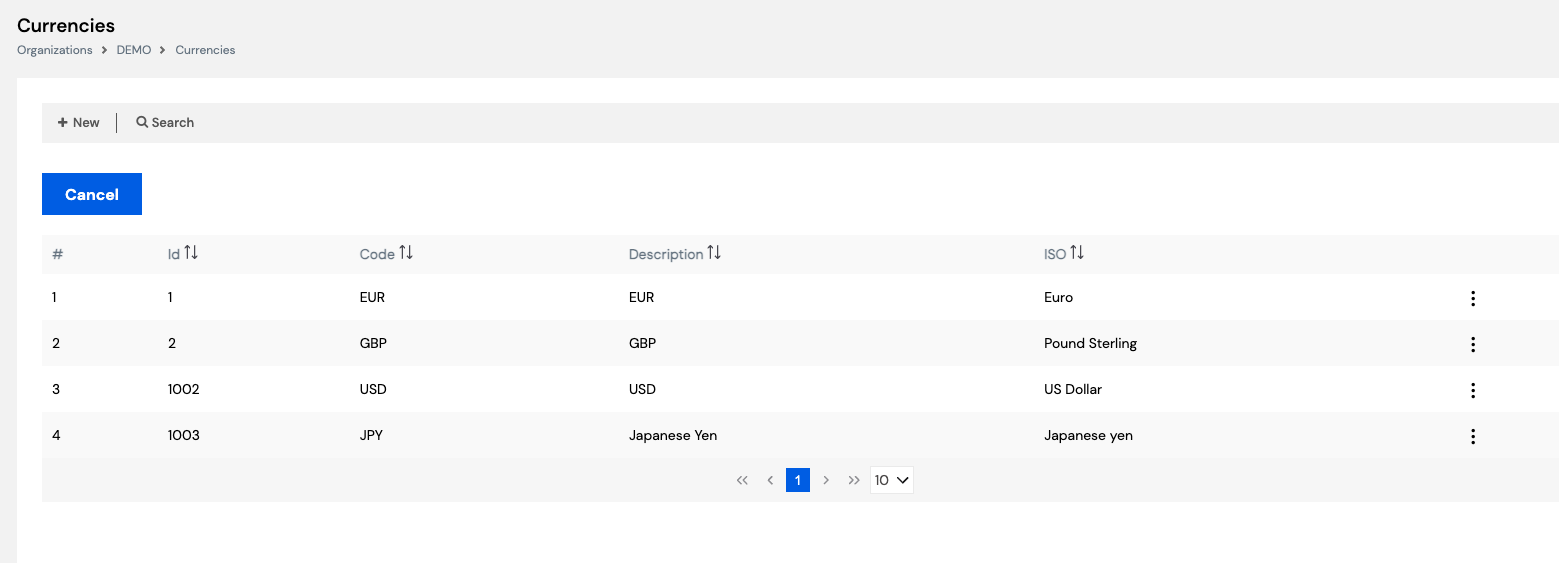
| Column | Description |
|---|---|
| # | Row number in the current list view |
| Id | System-generated unique identifier for the currency record |
| Code | The currency code (e.g., EUR, USD, GBP, JPY) — auto-populated from the ISO selection |
| Description | A short label for the currency (e.g., EUR, US Dollar, Japanese Yen) |
| ISO | The full ISO currency name (e.g., Euro, Pound Sterling, US Dollar) |
Click the ⋮ (three-dot menu) at the end of any row to access quick actions such as Edit or Delete for that currency.
4.2 Creating a New Currency
To add a currency that is not yet in the system, click the + New button on the Currencies list page. The Create form will open with three required fields.
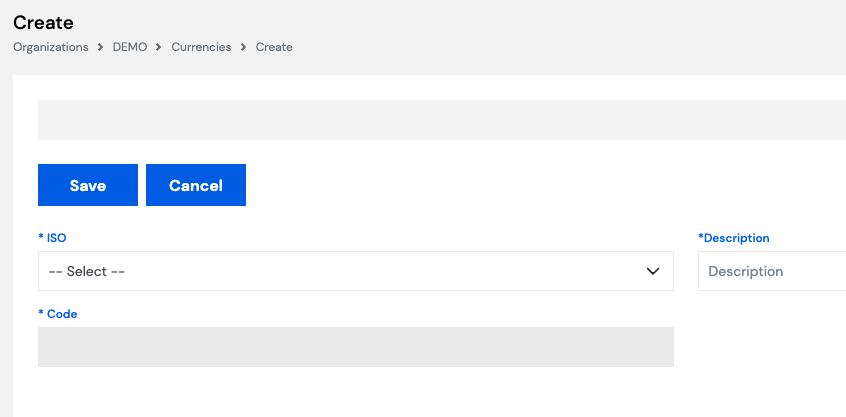
How to create a new currency
- From the Currencies list, click + New.
- In the ISO dropdown, select the currency standard (e.g., Euro, US Dollar). This field drives the Code automatically.
- Enter a Description for the currency (e.g., EUR, USD) in the Description field on the right.
- The Code field will be populated automatically based on the ISO selection. Verify it is correct.
- Click Save to create the currency, or Cancel to discard.
| Field | Description | Required |
|---|---|---|
| ISO | Select the international standard currency name from the dropdown (e.g., Euro, Pound Sterling) | Required |
| Description | A short label or display name for the currency (e.g., EUR, GBP) | Required |
| Code | The currency code — auto-populated from the ISO selection (read-only after auto-fill) | Required |
Always select the ISO field first — it automatically populates the Code field, reducing data entry errors.
4.3 Editing an Existing Currency
To modify an existing currency, click the ⋮ menu on the currency row in the list and select Edit. The Edit form opens pre-populated with the current values, allowing you to update any of the fields.
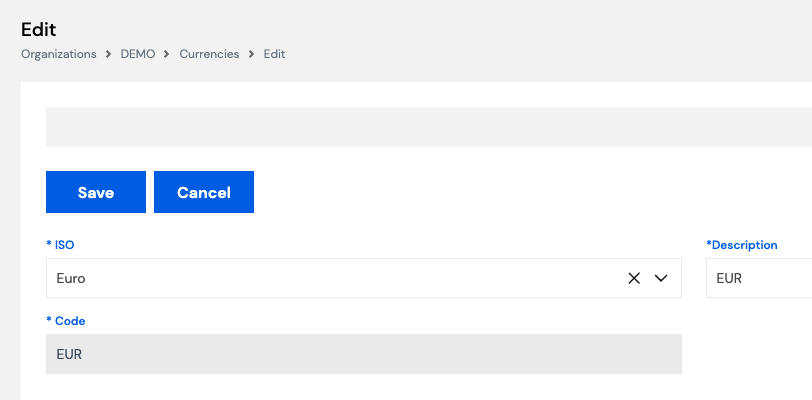
How to edit a currency
- From the Currencies list, click the ⋮ menu on the row you want to edit.
- Select Edit from the menu.
- Update the ISO, Description, or Code fields as needed.
- Click Save to apply the changes, or Cancel to discard.
Editing a currency that is already linked to active payroll records or salary structures may affect existing data. Consult your system administrator before modifying a currency that is in use.
Currencies are referenced in Salary Structures and Payroll Processing. Ensure the correct currency is configured before running payroll.
5. Exchange Rates
The Exchange Rates module allows administrators to define monthly currency conversion rates between the base currency and all other configured currencies in the system. It is accessed via Organizations → [Your Company] → Exchange Rates.
This section is only required if your organization:
- Runs payroll in multiple currencies (e.g., paying employees in USD, EUR, and GBP), or
- Allows employees to file expenses in currencies other than the base currency.
If your organization operates in a single currency only, you can skip this section.
5.1 How Exchange Rates Work
Exchange rates in Magnar HCM are defined per month and per year. Each row in the grid represents a day of the selected month, and each column represents a configured currency. The system uses these rates when converting amounts between currencies during payroll processing or expense calculations.
The base currency (typically EUR in the example below) is always set to 1. All other currencies (GBP, USD, Japanese Yen, etc.) must have their daily exchange rate entered relative to the base currency.
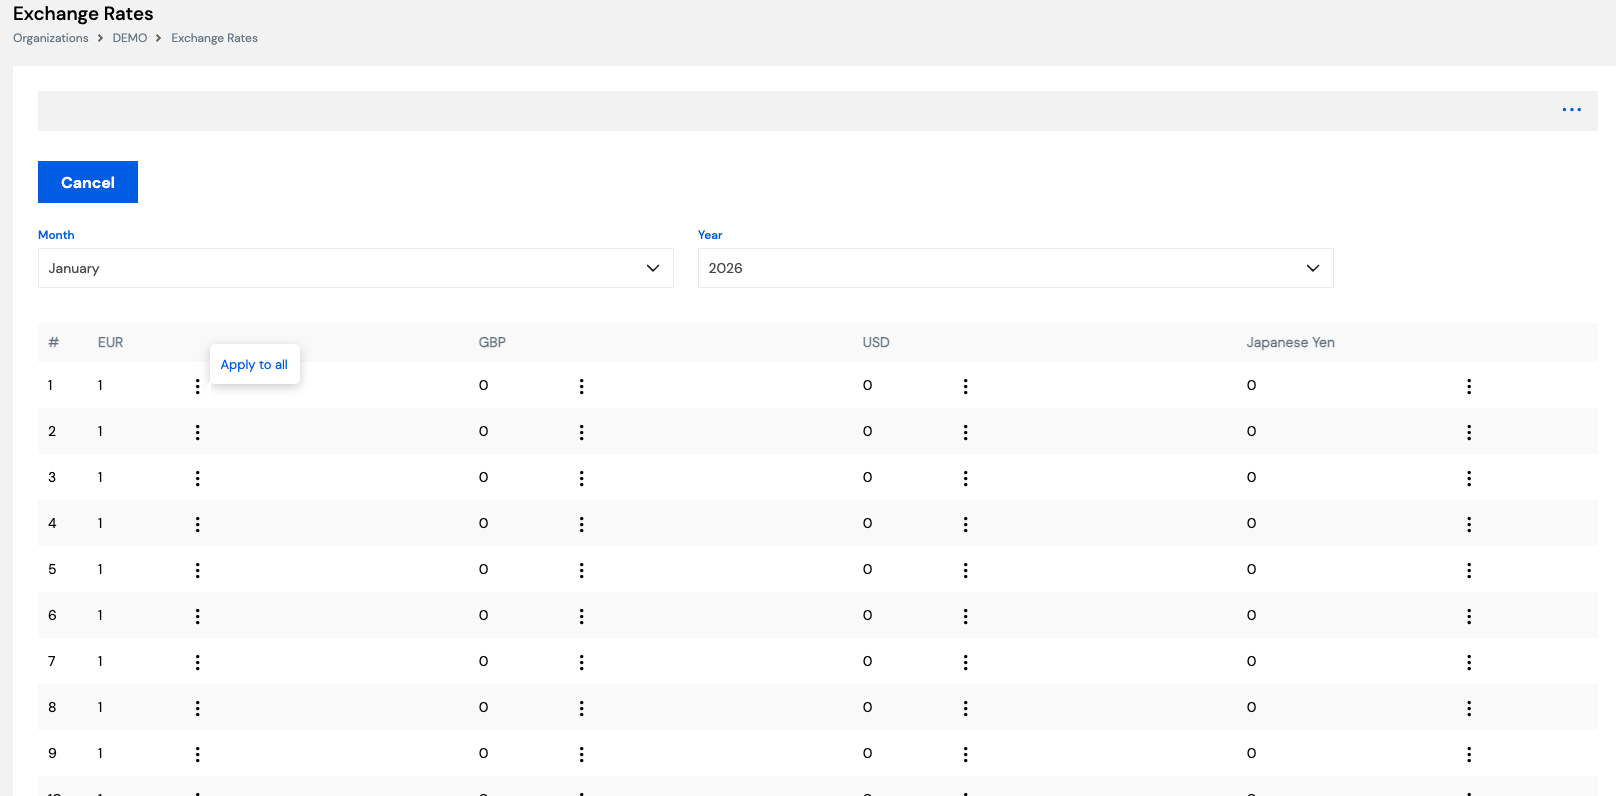
5.2 Setting Exchange Rates
How to enter exchange rates for a month
- Navigate to Organizations → [Your Company] → Exchange Rates.
- Select the Month from the Month dropdown (e.g., January).
- Select the Year from the Year dropdown (e.g., 2026).
- The grid will display one row per day of the selected month, with a column for each configured currency.
- Click the ⋮ menu next to a rate value in a cell to edit that specific day's rate for a currency.
- To apply the same rate to all days in the month for a currency, click the ⋮ menu on any cell and select Apply to all. This fills every row in that column with the same value — useful when the exchange rate is fixed for the entire month.
- Once all rates are entered, click Save (or navigate away — rates are saved per cell).
- Click Cancel at any time to discard unsaved changes.
| Field / Control | Description |
|---|---|
| Month | The month for which exchange rates are being defined (January–December) |
| Year | The year for which exchange rates apply |
| # (Row number) | Represents the day of the month (1 = 1st day, 2 = 2nd day, etc.) |
| Currency columns | One column per configured currency (e.g., EUR, GBP, USD, Japanese Yen). The base currency is always 1. |
| ⋮ (Row menu) | Opens options to edit a rate or use Apply to all to fill the entire column with that value |
| Apply to all | Copies the current cell's rate value to all rows in the same currency column for the selected month |
Tip: If your exchange rate is fixed for the entire month, enter the rate for day 1 and use Apply to all to populate all remaining days instantly.
Exchange rates must be configured before running payroll for any month in which multi-currency calculations are required. Missing rates may cause payroll processing errors.
Exchange rates work in conjunction with Section 4 — Currency Management. Ensure all required currencies are created before entering their exchange rates.
6. Tax Brackets Setup
The Tax Brackets Setup module allows authorized administrators to define the income tax brackets used by the payroll engine when calculating employee income tax deductions. This configuration directly reflects the income tax law of the country in which the company operates and must be kept in sync with any legislative changes.
Restricted Access. You must have the appropriate administrative permission to view and modify Tax Brackets. If you cannot see this section in your menu, contact your system administrator to request access.
Country-specific configuration. Tax brackets vary between countries and are governed by local income tax law. The brackets configured here must match the official tax tables published by the relevant tax authority for your country. This setup should only be modified by a qualified payroll or finance administrator familiar with the applicable tax legislation.
When to update. This section should be reviewed and updated whenever there is a change in the country's income tax law — for example, at the start of a new fiscal year when revised tax brackets are announced by the government.
6.1 Tax Definition
The Tax Brackets setup is organized into three tabs: Tax Definition, Tax Amount Exclusions, and NSSF Setup. The primary configuration is done on the Tax Definition tab, where you define the taxable income base, any exemptions, and the progressive tax bracket table.
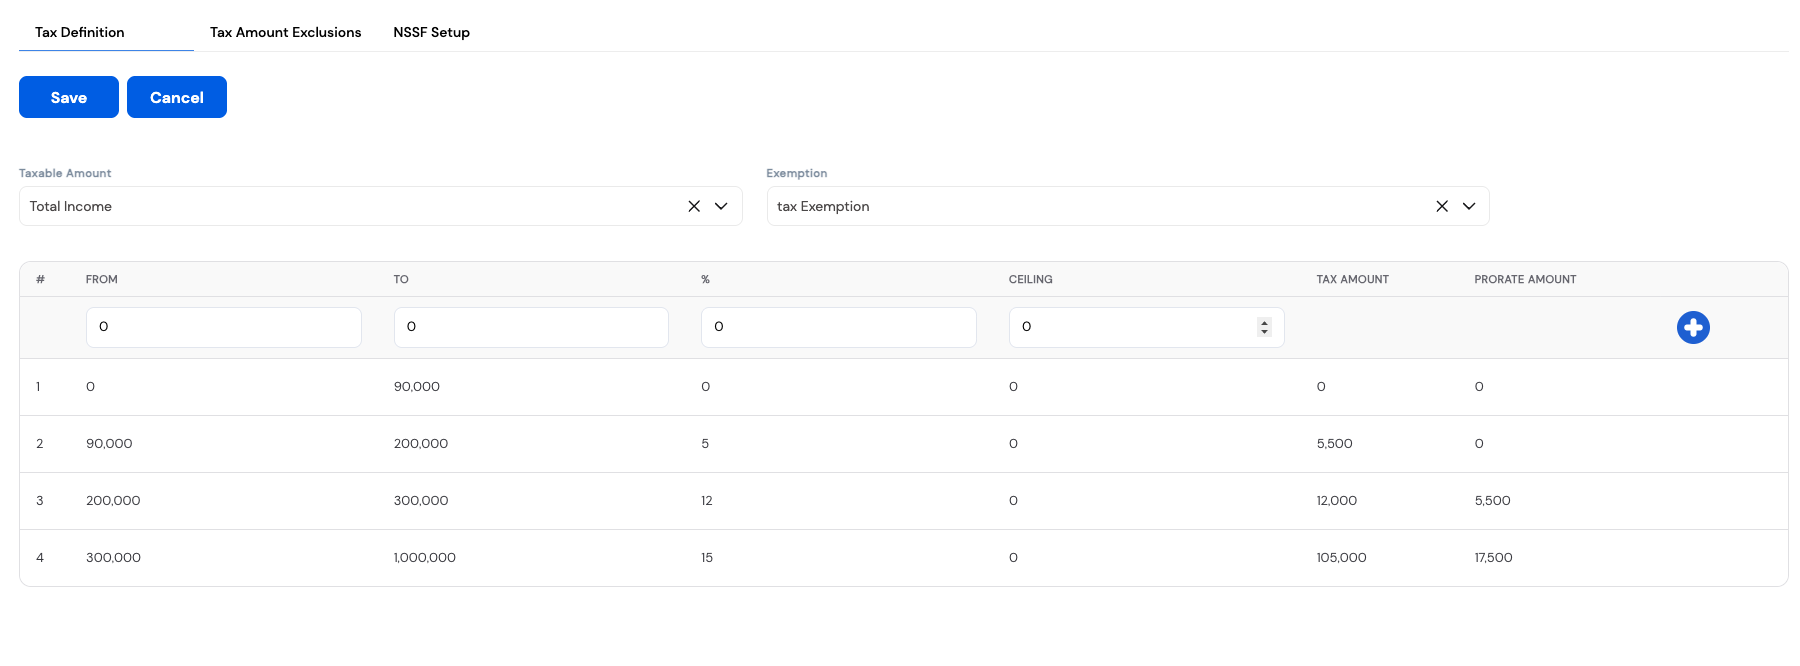
Top-level settings
| Field | Description |
|---|---|
| Taxable Amount | Defines the income base used for tax calculation (e.g., Total Income). This determines which earnings components are subject to income tax. |
| Exemption | Specifies the exemption rule applied before calculating tax (e.g., Tax Exemption). Exempted amounts are deducted from the taxable base before brackets are applied. |
Tax Bracket Grid
The bracket grid defines the progressive tax structure. Each row represents one income band, and together they form the full tax schedule applicable to employees. A new bracket row can be added using the + button on the right side of the input row at the top of the grid.
| Column | Description |
|---|---|
| # | Row number — the order in which brackets are evaluated (lowest income band first) |
| From | The lower bound of the income range for this bracket (inclusive) |
| To | The upper bound of the income range for this bracket (inclusive) |
| % | The tax rate (percentage) applied to income that falls within this bracket |
| Ceiling | An optional maximum tax amount that can be charged within this bracket, regardless of the calculated percentage |
| Tax Amount | The system-calculated tax amount for this bracket based on the From–To range and the percentage. This is auto-calculated — do not enter manually. |
| Prorate Amount | The cumulative tax amount carried forward from all lower brackets, used in progressive tax calculations |
Example tax bracket table
The screenshot above shows the following bracket configuration (for illustrative purposes):
| # | From | To | % | Tax Amount | Prorate Amount |
|---|---|---|---|---|---|
| 1 | 0 | 90,000 | 0% | 0 | 0 |
| 2 | 90,000 | 200,000 | 5% | 5,500 | 0 |
| 3 | 200,000 | 300,000 | 12% | 12,000 | 5,500 |
| 4 | 300,000 | 1,000,000 | 15% | 105,000 | 17,500 |
6.2 Adding a New Tax Bracket
How to add a bracket row
- Navigate to the Tax Brackets Setup screen and open the Tax Definition tab.
- In the input row at the top of the grid, enter the From, To, %, and Ceiling values for the new bracket.
- Click the + (blue plus button) on the right side of the input row to add it to the bracket table.
- Verify that the Tax Amount and Prorate Amount columns are calculated correctly by the system.
- Click Save to apply, or Cancel to discard all changes.
Important — Always use Annual Income amounts. Tax bracket values (From, To, Tax Amount, Prorate Amount) must always be entered based on the employee's annual salary, regardless of how frequently payroll is run. Even if income tax is calculated and deducted on a monthly basis, the bracket thresholds in the system must reflect the full annual income figures as published in the country's tax law — never monthly equivalents. The system handles the monthly proration automatically.
Brackets must be entered in ascending order — from the lowest income band to the highest. Ensure the To value of one bracket matches the From value of the next to avoid gaps in the tax schedule.
Changes to tax brackets take effect on the next payroll run. If payroll has already been processed for the current period using the old brackets, a correction run may be required. Always coordinate with your payroll team before updating tax brackets mid-period.
6.3 Tax Amount Exclusions
The Tax Amount Exclusions tab allows you to define fixed annual deduction amounts that reduce an employee's taxable income based on their family and dependent status. This feature applies in countries where tax law grants personal relief allowances — for example, a reduction for the employee themselves, their spouse, children, or other dependents.
These exclusions are subtracted from the employee's gross taxable income before the tax brackets are applied, resulting in a lower effective tax liability for qualifying employees.
Country-specific. Not all countries provide tax exclusions based on family status. This tab should only be configured if the applicable tax law in your country grants income tax relief for dependents. Leave the amounts at zero if no such relief applies.
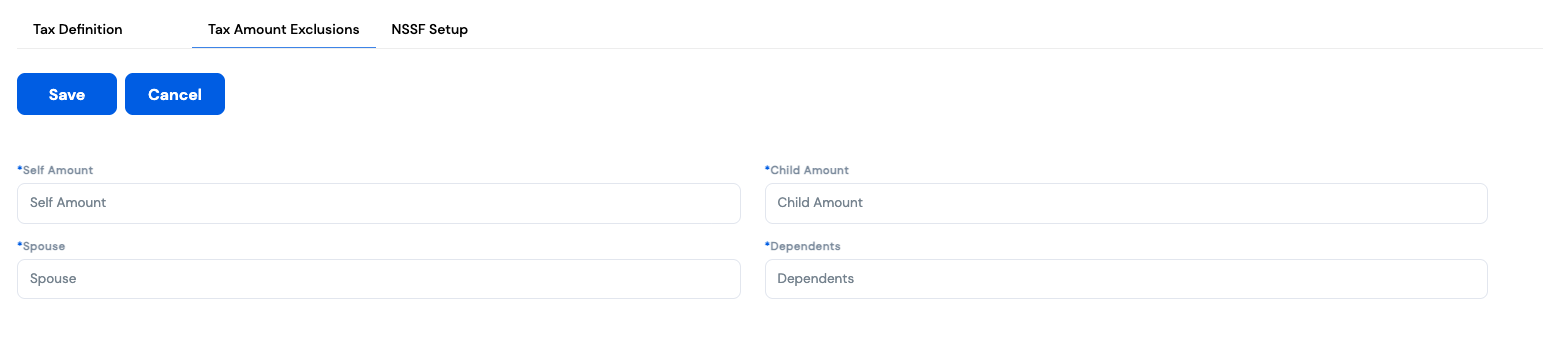
| Field | Description | Required |
|---|---|---|
| Self Amount | The annual tax relief amount granted to the employee for themselves, regardless of family status | Required |
| Spouse | The annual tax relief amount granted when the employee has a legally recognized spouse | Required |
| Child Amount | The annual tax relief amount granted per qualifying child. This amount is multiplied by the number of eligible children up to the configured maximum (see note below) | Required |
| Dependents | The annual tax relief amount granted for other qualifying dependents (e.g., elderly parents or other family members recognized by the tax authority) | Required |
All amounts must be annual figures. Enter the relief amounts as published in the country's tax law on an annual basis — not monthly. The system automatically prorates these exclusions when calculating monthly payroll deductions.
Maximum number of children. Most tax authorities cap the child relief at a maximum number of qualifying children (e.g., 4 children). Ensure the system is configured with this ceiling so that the child relief is not applied beyond the legally permitted number of dependents. Consult the applicable tax law for the maximum number of children that qualify for relief in your country.
How to configure Tax Amount Exclusions
- In the Tax Brackets Setup screen, click the Tax Amount Exclusions tab.
- Enter the Self Amount — the annual relief for the employee themselves.
- Enter the Spouse amount — the annual relief for a qualifying spouse.
- Enter the Child Amount — the annual relief per qualifying child, as defined by local tax law.
- Enter the Dependents amount — the annual relief for other qualifying dependents.
- Ensure that the maximum number of children entitled to relief is configured in the system settings (consult your system administrator if this limit is not visible on this screen).
- Click Save to apply, or Cancel to discard.
The Tax Brackets setup is used during Payroll Processing. Ensure both the bracket table and exclusion amounts are correctly configured and up to date before initiating a payroll run.
7. Employee Type
Employee Type is one of the foundational configuration elements in Magnar HCM. It provides a flexible way to group employees based on their employment category — such as full-time monthly staff, daily workers, subcontractors, or any other classification relevant to your organization.
Employee Type is not just a label — it drives key payroll and HR behaviors across the system:
- Benefits & Compensation — Salary structures, allowances, and benefit plans can be linked to specific employee types, ensuring each group receives the correct entitlements automatically.
- Payroll Runs — Payroll can be executed by employee type, giving you the flexibility to process monthly staff and daily workers in separate payroll runs on different schedules.
- Reporting & Filtering — Employee type is a common filter in HR and payroll reports, making it easier to analyze data by workforce category.
Employee Type is accessed via Organizations → [Your Company] → Employee Type. Plan your employee types carefully before onboarding employees, as changing an employee's type after payroll has been processed may affect historical records.
7.1 Employee Type List
The Employee Type list displays all types currently configured for your organization. Each record has a system-generated ID and a Code which serves as the name or label for that employee grouping. You can sort by ID or Code, search for a specific type, or create a new one using the + New button.
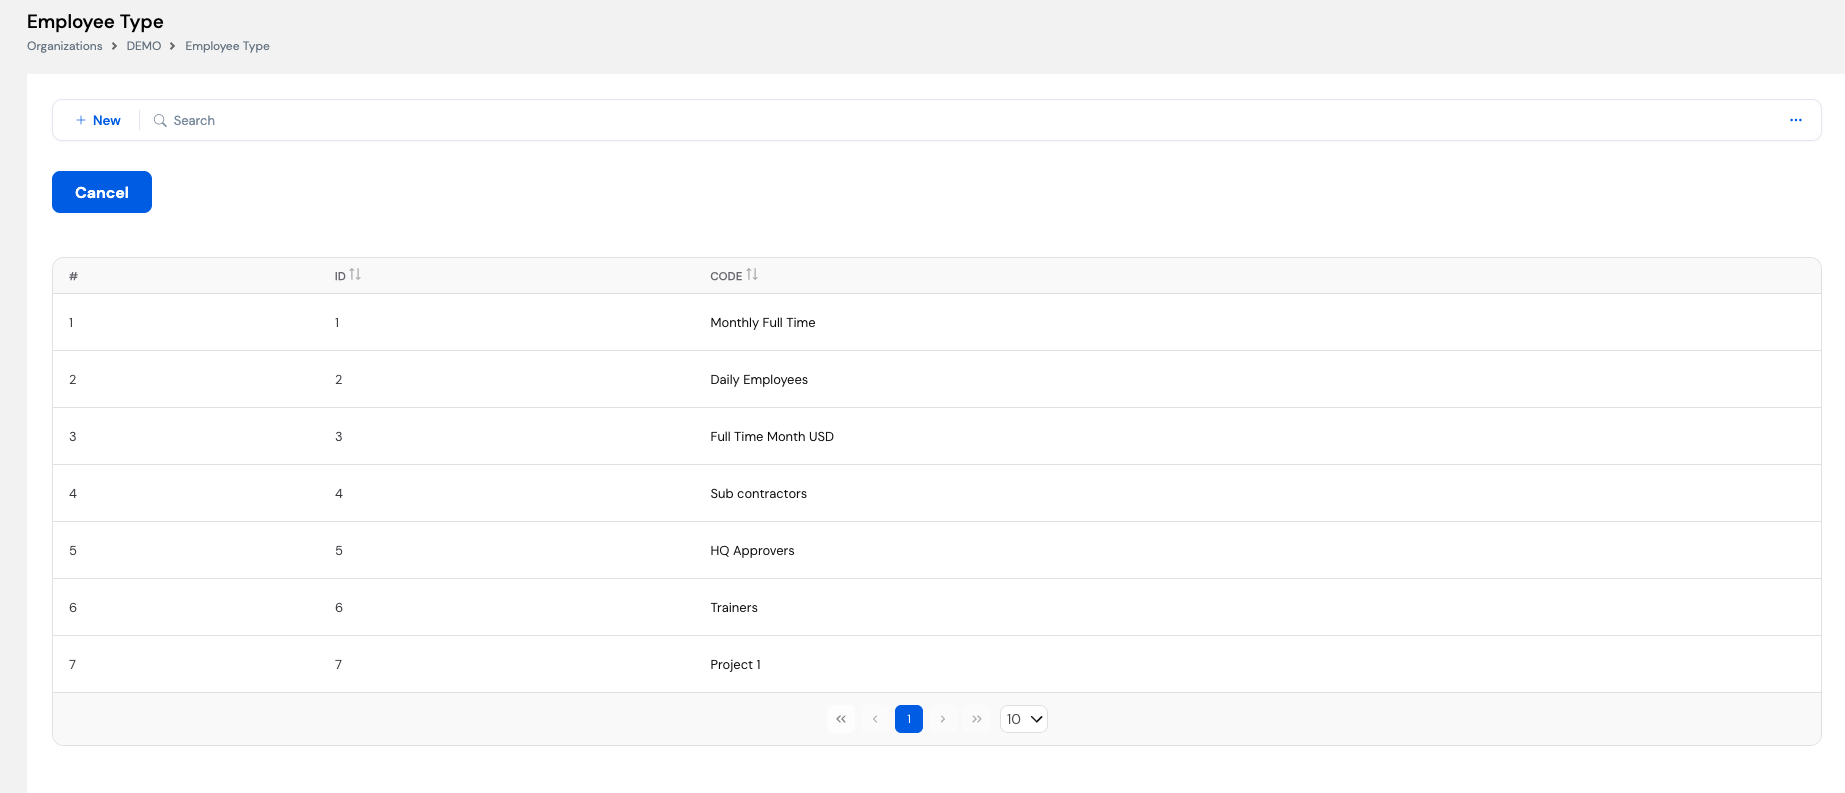
| Column | Description |
|---|---|
| # | Row number in the current list view |
| ID | System-generated unique identifier for the employee type record |
| Code | The name or label for the employee type (e.g., Monthly Full Time, Daily Employees, Sub contractors) |
7.2 Creating a New Employee Type
To add a new employee type, click the + New button on the Employee Type list page and enter the Code (name) for the new type. Click Save to confirm.
Naming convention tip: Use clear, descriptive names that reflect both the work schedule and pay basis — for example, Monthly Full Time, Daily Employees, or Full Time Month USD (for staff paid in a foreign currency). This makes it easier to select the correct type during employee onboarding and payroll configuration.
7.3 How Employee Type Is Used in Magnar HCM
| Where Used | How Employee Type Applies |
|---|---|
| Employee Profile | Each employee is assigned an Employee Type upon creation. This drives their payroll behavior and benefit eligibility. |
| Salary & Benefits Setup | Salary structures, allowances, and deductions can be configured per Employee Type, ensuring the correct pay components apply to each group automatically. |
| Payroll Process Tool | When running payroll, you can filter and execute runs by Employee Type — for example, running monthly staff payroll on the last day of the month and daily worker payroll on a weekly basis. |
| Reports & Analytics | Employee Type is available as a filter in payroll and HR reports, allowing you to compare headcount, cost, and entitlements across workforce categories. |
Employee Type should be defined before employees are onboarded and before salary structures are configured. Changing an employee's type after payroll has been processed may require manual adjustments to historical records and should be done with caution.
Employee Type is referenced during Employee Profile setup, Salary & Allowance configuration, and Payroll Processing. Configure all required types before proceeding with those modules.
8. Profession
The Profession module allows you to define a list of job professions or occupations that can be assigned to employee profiles. It is accessed via Organizations → [Your Company] → Profession.
Informational only. Profession has no effect on payroll calculations, salary structures, or benefits. It is used purely for reporting and informational purposes — to classify employees by their professional role or occupation for HR records and workforce analytics.
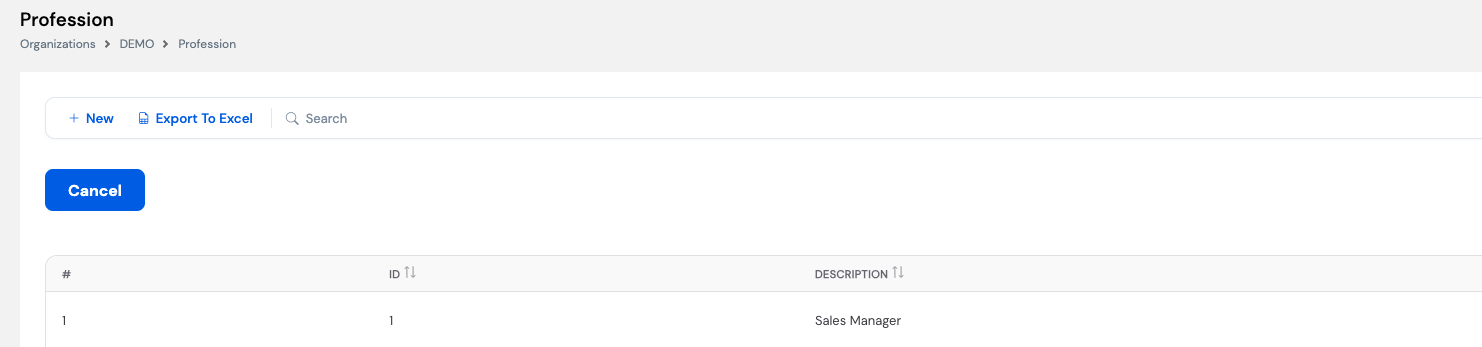
| Column | Description |
|---|---|
| # | Row number in the current list view |
| ID | System-generated unique identifier for the profession record |
| Description | The name of the profession (e.g., Sales Manager, HR Officer, Software Engineer) |
8.1 Creating a New Profession
Click + New, enter the profession name in the Description field, and click Save. To export the full profession list to Excel, use the Export to Excel button on the list toolbar.
Keep profession names consistent and aligned with your organization's job classification framework or any government labor reporting requirements. Since this field is used for reporting, standardized naming makes filtering and analysis easier.
9. Employee Group
The Employee Group module allows you to define custom groupings that can be assigned to employee profiles. It is accessed via Organizations → [Your Company] → Employee Group.
Informational only. Like Profession, Employee Group has no effect on payroll calculations, salary structures, or benefits. It is used purely for reporting and informational purposes — providing an additional dimension for classifying and filtering employees in HR reports.

To add a new group, click + New, enter a name in the Description field, and click Save.
Employee Groups can be used to segment employees in ways that don't fit other classifications — for example, by project team, business unit, or any internal grouping meaningful to your HR reporting needs.
10. Nationality
The Nationality module allows you to define and maintain the list of nationalities that can be assigned to employee profiles. It is accessed via Organizations → [Your Company] → Nationality.
While nationality is primarily an informational field used in employee records and HR reporting, it carries additional importance in certain countries where an employee's nationality directly affects payroll calculations — such as income tax rates, social security contributions, or statutory deductions that differ between nationals and expatriates.
Payroll impact in some countries. In certain jurisdictions, nationality determines whether an employee is subject to local income tax, a different tax rate, or specific social security schemes. For example, some countries exempt foreign nationals from certain contributions, or apply different tax brackets to expatriates. Ensure nationalities are correctly assigned to employee profiles before running payroll in such environments.
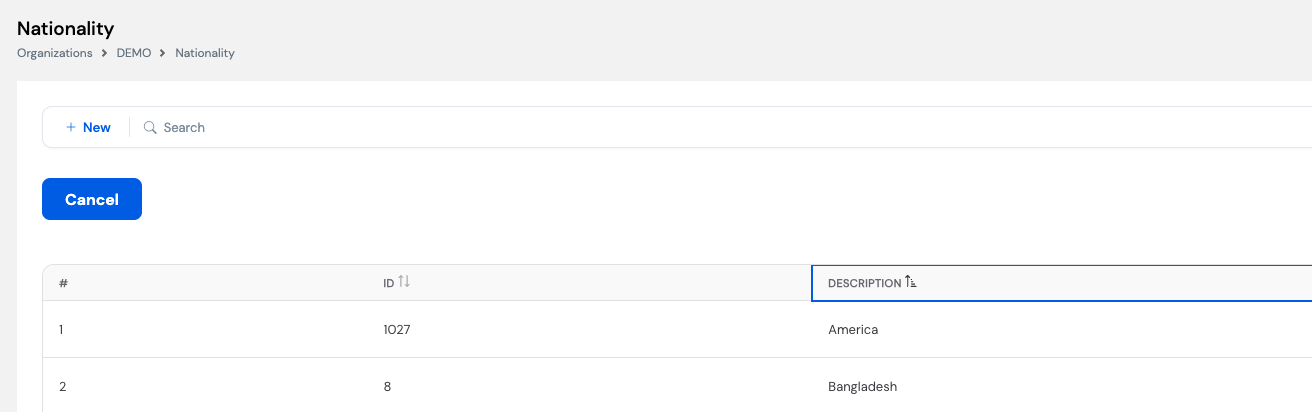
10.1 Nationality List
The Nationality list displays all nationalities currently configured in the system. Each record includes a system-generated ID and a Description (the nationality name).
10.2 Creating a New Nationality
To add a nationality, click + New on the list page. The Create form has three fields.
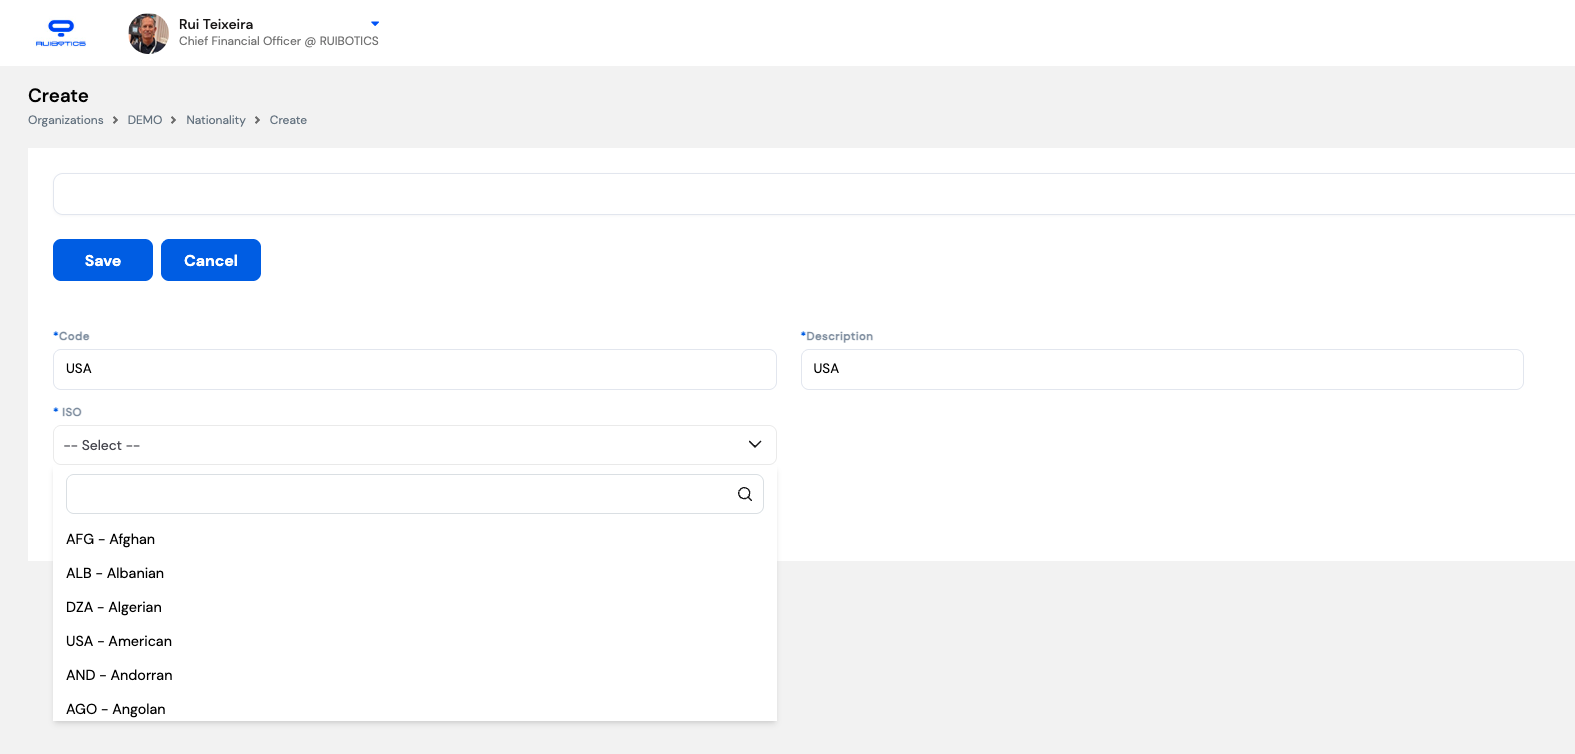
| Field | Description | Required |
|---|---|---|
| Code | A short identifier for the nationality (e.g., USA, GBR, SAU). Typically the ISO 3166-1 alpha-3 country code. | Required |
| Description | The full name or label for the nationality as it will appear in employee profiles and reports (e.g., American, British, Saudi) | Required |
| ISO | Select the standardized nationality from the searchable ISO dropdown (e.g., AFG – Afghan, USA – American). This links the record to the international standard. | Required |
How to create a new nationality
- From the Nationality list, click + New.
- Enter the Code (e.g., USA).
- Enter the Description (e.g., American).
- Click the ISO dropdown and use the search box to find and select the correct nationality (e.g., USA – American).
- Click Save to confirm, or Cancel to discard.
Use the search box inside the ISO dropdown to quickly find a nationality by country code or name rather than scrolling through the full list.
Nationalities are assigned in the Employee Profile. In countries where nationality affects tax or social security, ensure the correct nationality is set on each employee record before running payroll.
11. Pay Elements
Pay Elements (also referred to simply as Elements) are the fundamental building blocks of the payroll structure in Magnar HCM. Every monetary component that appears on an employee's payslip — whether it is earned, deducted, or calculated — is defined as a Pay Element.
Examples of Pay Elements include: Basic Salary, Housing Allowance, Transportation Allowance, Food Allowance, Mobile Allowance, Income Tax, Social Security, Other Deduction, Penalty, and Provision Days Basis. Each element defines not just a label, but how it behaves — whether it is a fixed amount or variable, whether it is manually entered or system-calculated, and whether it is an earning or a deduction.
Pay Elements are accessed via Organizations → [Your Company] → Elements. They must be configured before building salary structures, as salary structures are composed of Pay Elements assigned to employee types.
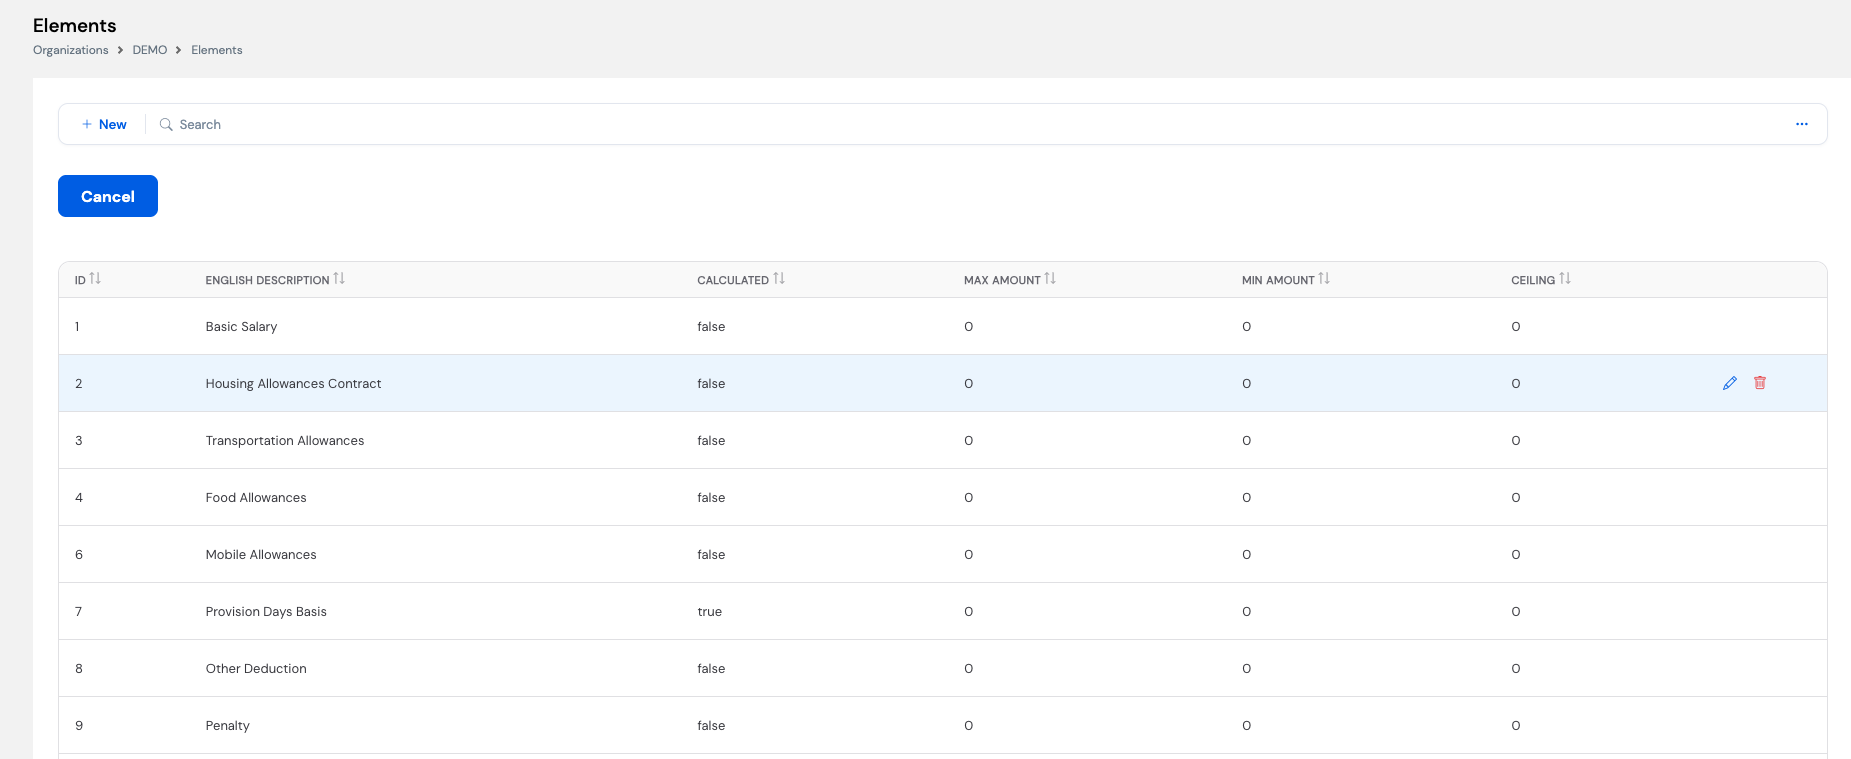
11.1 Elements List
The Elements list shows all Pay Elements configured for the organization. Each row displays the element's ID, English Description, whether it is Calculated by the system, and its Max Amount, Min Amount, and Ceiling constraints. Inline edit (✏️) and delete (🗑️) actions appear when hovering over a row.
11.2 Element Configuration
The element form has two tabs: Element (the main configuration) and Element Accountings (for linking to the chart of accounts, if applicable).
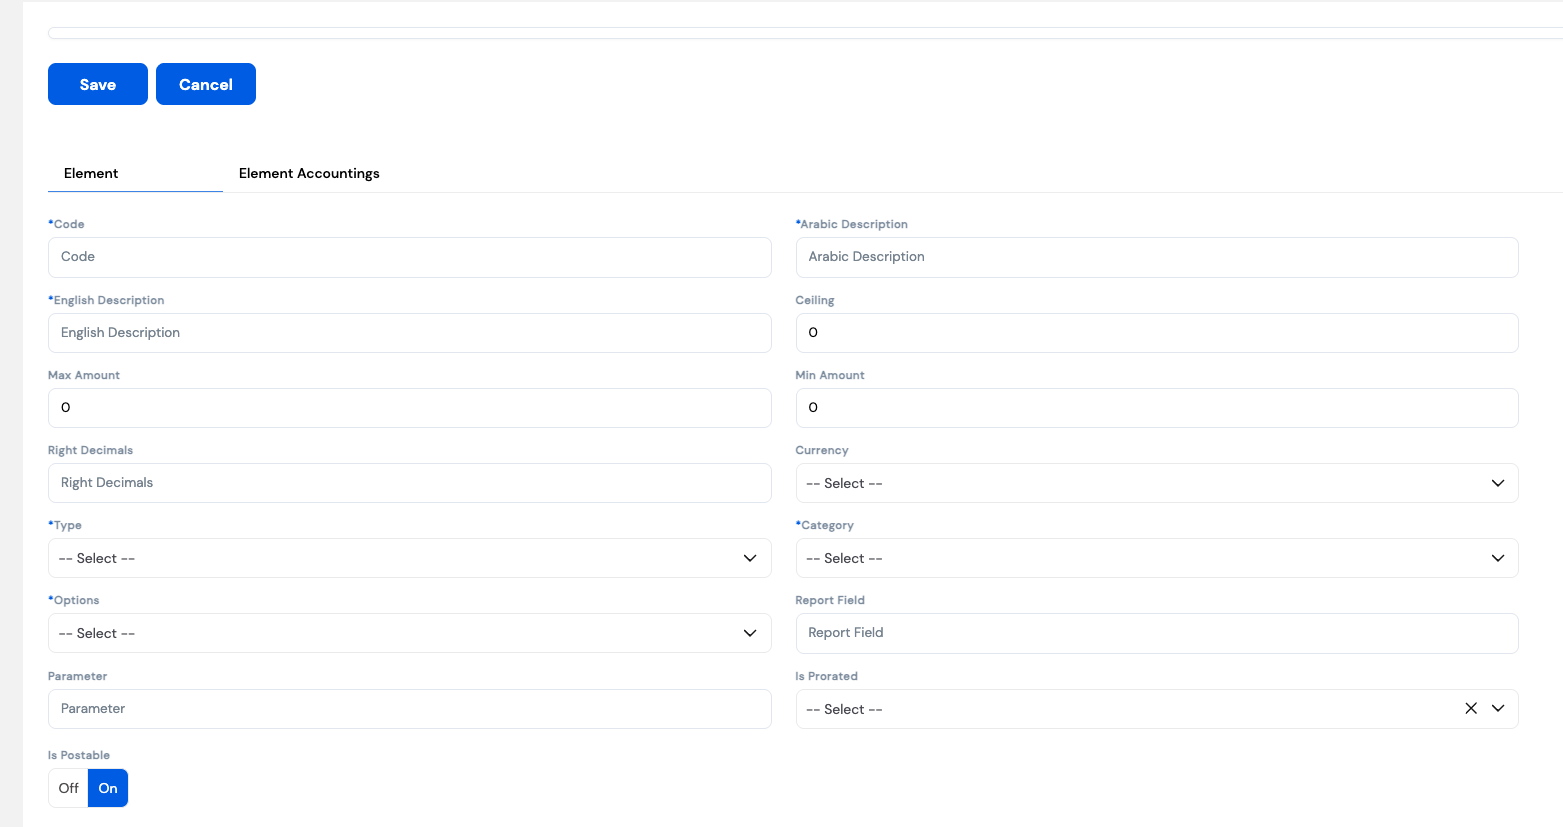
| Field | Description | Required |
|---|---|---|
| Code | A unique short identifier for the element (e.g., BASIC, HOUSE, TRANS). Used internally and in reports. | Required |
| English Description | The element name as it appears on payslips and reports in English (e.g., Basic Salary, Housing Allowance) | Required |
| Arabic Description | The element name in Arabic — displayed on Arabic-language payslips | Required |
| Ceiling | The maximum cap for this element. If the calculated or entered amount exceeds this value, it will be capped at the ceiling. Set to 0 for no ceiling. | Optional |
| Max Amount | The maximum allowable value for this element during data entry. Used as a validation limit. | Optional |
| Min Amount | The minimum allowable value for this element during data entry. | Optional |
| Right Decimals | The number of decimal places to apply when calculating or displaying this element's value. | Optional |
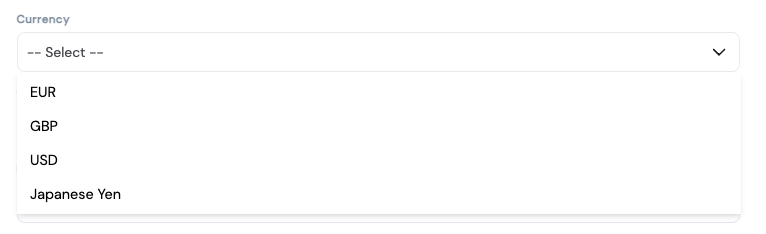
| Currency | The currency in which this element is denominated. Leave blank to use the company's base currency. Set a specific currency (e.g., USD, GBP) for elements paid in a foreign currency. | Optional |
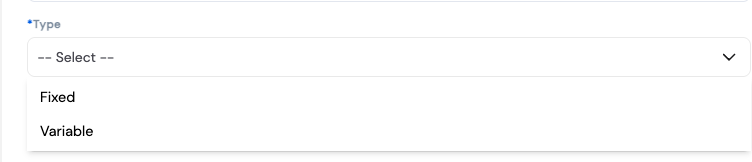
| Type | Defines how the element value is determined — Fixed (same amount every period) or Variable (amount changes each payroll run) | Required |
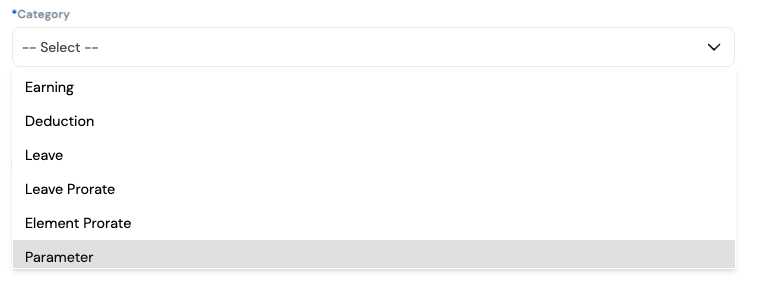
| Category | Classifies the element's payroll behavior — see Section 11.3 below | Required |
| Options | Determines how the element amount is sourced — see Section 11.4 below | Required |
| Report Field | A custom label used to map this element to specific fields in payroll reports or external integrations | Optional |
| Parameter | Used when the element's calculation references a system parameter (applicable when Options is set to Calculated or Plugin) | Optional |
| Is Prorated | Determines whether this element is prorated when an employee joins or leaves mid-period (e.g., a housing allowance prorated for partial months) | Optional |
| Is Postable | Toggle — when On, this element's value is posted to the accounting system during payroll posting. Turn off for informational or non-accounting elements. | Optional |
11.3 Element Category
The Category field classifies the element's purpose within the system. It has no direct effect on payroll calculations — it does not change how amounts are computed — but it is used by certain system configurations, reports, and workflows to identify and group elements correctly.
| Category | Description |
|---|---|
| Earning | A positive pay component that adds to the employee's gross pay — e.g., Basic Salary, Housing Allowance, Transportation Allowance, Bonuses |
| Deduction | A negative pay component that reduces the employee's net pay — e.g., Income Tax, Social Security, Loan Repayment, Penalty, Other Deduction |
| Leave | An element that accepts leave days as its value. Used to represent leave-related pay components (e.g., paid leave payout) that are driven by the number of leave days rather than a monetary amount entered directly. |
| Leave Prorate | A leave provision element. Used to accrue leave entitlement on a monthly basis. For example, if an employee is entitled to 15 leave days per year, the Leave Prorate element automatically accrues 1.25 days every month (15 ÷ 12). |
| Element Prorate | A monetary provision element that accumulates a portion of an amount each payroll period, representing a liability that will be paid out or settled in the future. For example, provisioning a portion of an annual bonus or an end-of-service benefit each month. |
| Parameter | A non-payable reference element used as an input or basis for calculating other elements — e.g., a daily rate or hourly rate parameter referenced in overtime or leave calculations. Does not appear on the payslip as a standalone amount. |
| Other | A general-purpose category for elements that do not fit neatly into the specific categories above. Used for miscellaneous or custom pay components. |
| Basic Salary | A dedicated placeholder category for the basic salary element. Certain system configurations and calculations reference the element marked with this category specifically to identify the employee's base pay. |
| Allowance | A placeholder category for fixed monthly allowances — recurring components paid alongside the basic salary each period (e.g., Housing Allowance, Transportation Allowance, Food Allowance). Used by system configurations that need to distinguish allowances from other earning types. |
11.4 Element Options
The Options field controls how the element's amount is sourced during a payroll run.
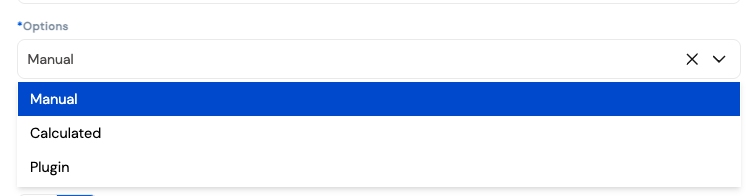
| Option | Description |
|---|---|
| Manual | The amount is entered manually by the payroll administrator each pay period. Used for variable components such as bonuses, commissions, or one-off deductions. |
| Calculated | The element amount is derived automatically from a custom formula built using the system's built-in Formula Builder. No coding is required — see below for details. |
| Plugin | The element amount is returned by a system plugin — a pre-built engine that performs complex calculations or data lookups that would be too difficult to express in the Formula Builder. See Section 11.4.2 below. |
11.4.1 The Formula Builder (Calculated Elements)
When an element's Option is set to Calculated, the system exposes a Custom Calculation Setup screen — a visual formula builder that works similarly to an Excel formula engine. It allows implementers and system administrators to define complex payroll calculation logic without any programming or coding knowledge.
Common use cases for calculated elements include: unpaid days deductions, social security contributions based on salary thresholds, overtime pay, nationality-based tax rules, and any element whose value depends on other elements, parameters, or employee attributes.
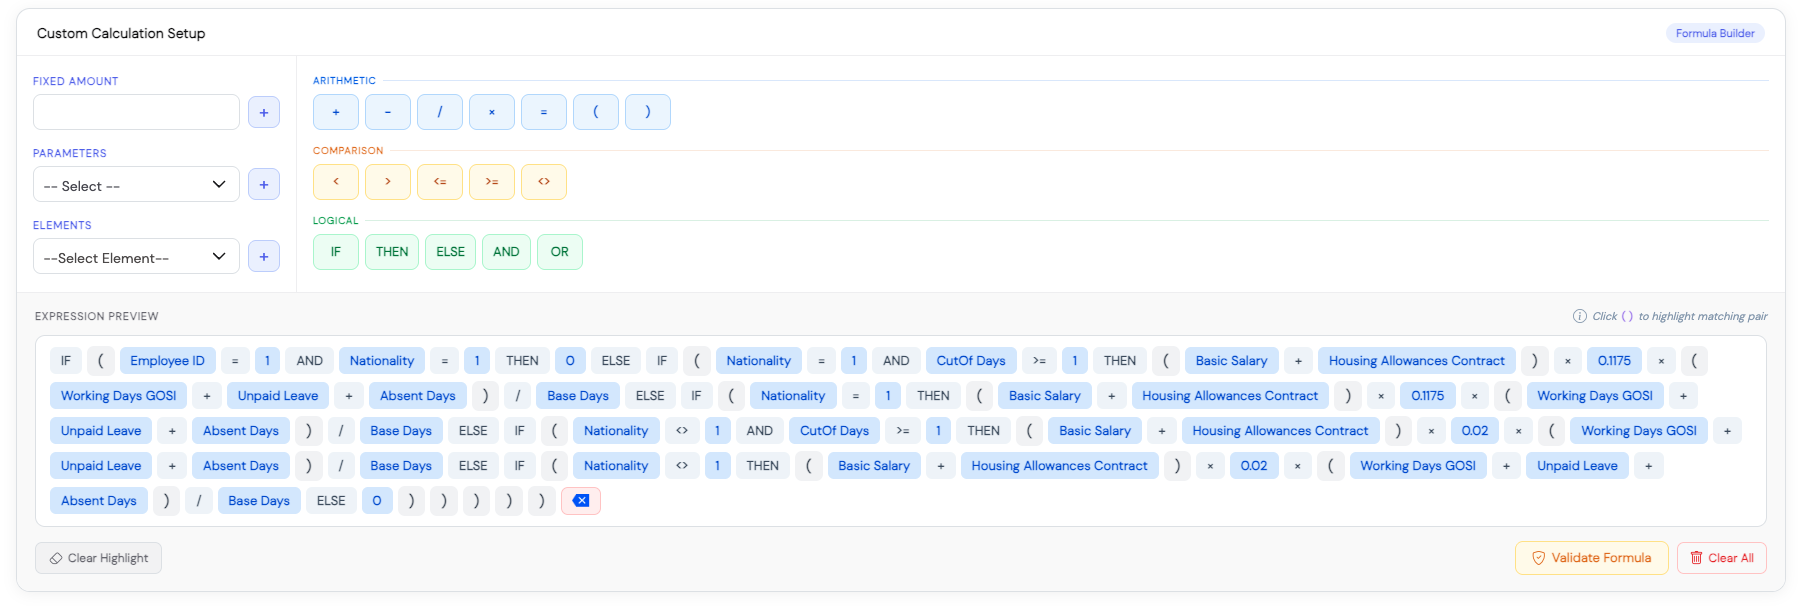
The Formula Builder is made up of the following components:
| Component | Description |
|---|---|
| Fixed Amount | Enter a constant numeric value to insert directly into the formula (e.g., a fixed rate or percentage like 0.1175) |
| Parameters | Select a system parameter to insert into the formula — e.g., Base Days, Working Days, Cut-Off Days. Parameters represent system-level values available during a payroll run. |
| Elements | Select another Pay Element to reference in the formula — e.g., Basic Salary, Housing Allowances Contract. This allows one element's amount to be used in calculating another. |
| Arithmetic operators | Standard math operators: + (add), − (subtract), / (divide), × (multiply), = (assign), ( ) (grouping brackets) |
| Comparison operators | Used in conditional logic: <, >, <=, >=, <> (not equal to) |
| Logical operators | IF / THEN / ELSE for conditional branching, AND / OR for combining multiple conditions |
| Expression Preview | Displays the full formula as it is being built, with each token shown as a colored chip. Click any bracket ( ) to highlight its matching pair and verify grouping. |
| Validate Formula | Checks the formula for syntax errors before saving. Always validate before saving a calculated element. |
| Clear All | Removes the entire formula from the expression preview, allowing you to start over. |
Example: The formula shown above calculates a social security contribution differently based on the employee's Nationality and whether a Cut-Off Days threshold is met — applying a rate of 11.75% for one nationality group and 2% for another, prorated by (Working Days + Unpaid Leave + Absent Days) ÷ Base Days. This entire logic is built visually with no code.
Always click Validate Formula before saving a calculated element. An invalid formula will cause errors during the payroll run. Only users with sufficient system knowledge should build or modify calculated element formulas.
11.4.2 Plugins (Plugin Elements)
When an element's Option is set to Plugin, the system links the element to a pre-built calculation engine — a plugin — that automatically computes and returns a value to the element during each payroll run. Plugins are used for scenarios that are either too complex for the Formula Builder or that require the system to retrieve or aggregate data from other modules.
When Plugin is selected, a Plugin dropdown appears allowing you to choose which plugin to attach to the element. Each plugin is purpose-built to handle a specific payroll calculation or data retrieval task and will return its result directly to the element.
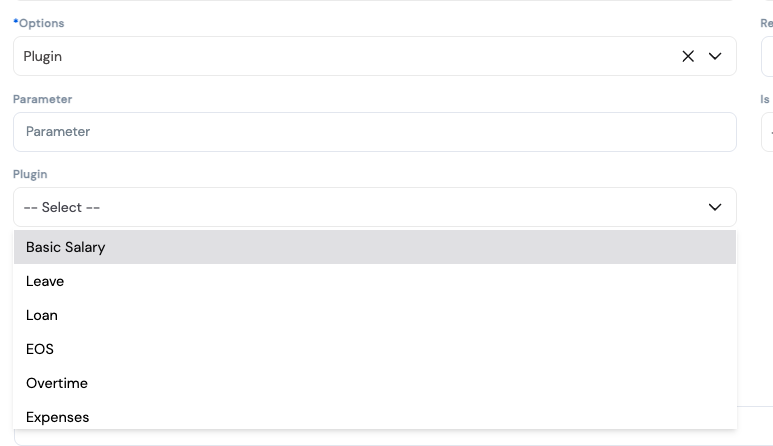
Each available plugin is covered in detail in the Plugins section of this manual. For now, the key point is that a Plugin element does not require manual input or a formula — the plugin handles all logic internally and passes the result directly to the element during the payroll run.
Plugin elements rely on data from other modules (Leave, Loans, Attendance, etc.) being correctly configured and up to date. Missing or incomplete data in those modules may cause the plugin to return zero or an incorrect value during the payroll run.
11.5 Element Type
| Type | Description |
|---|---|
| Fixed | The element carries the same value every payroll period as defined in the employee's salary structure. Examples: Basic Salary, Housing Allowance, Transportation Allowance. |
| Variable | The element value changes from one payroll period to another. The amount is entered or calculated fresh each run. Examples: Overtime pay, commissions, ad hoc bonuses, attendance-based deductions. |
11.6 Element Currency
By default, elements use the company's base currency. If an element is paid in a different currency — for example, an expatriate allowance denominated in USD — select the appropriate currency from the Currency dropdown. The system will use the configured exchange rates to convert the amount to the base currency during payroll processing.
If you assign a foreign currency to an element, ensure the corresponding Exchange Rates are configured for the relevant months before running payroll. Missing exchange rates will cause calculation errors for those elements.
Plan your elements before configuring salary structures. Once elements are referenced in active salary structures, modifying their Category or Type may affect existing payroll results. Add new elements for new pay components rather than repurposing existing ones.
Pay Elements are used in Salary Structures to build each employee type's compensation package, and in the Payroll Process Tool during payroll runs. See Section 5 — Exchange Rates for foreign currency element prerequisites.
12. Plugins
Plugins are pre-built system engines attached to Pay Elements with the Plugin option. Each plugin performs a specific calculation or data retrieval task and returns a single value to its element during the payroll run. Unlike the Formula Builder, plugins handle logic that is too complex to express as a visual formula — such as progressive tax calculations, cumulative social security, or end-of-service computations.
The plugins available in Magnar HCM are listed below, organized by functional area.
12.1 Salary & Earnings Plugins
| Plugin | Description |
|---|---|
| Basic Salary | Returns the employee's total basic salary as defined in the Salaries and Allowances section of Magnar HCM. The system reads the salary records configured for the employee — which may include multiple entries with different effective dates and retroactive adjustments — and returns the applicable amount for the current payroll period. |
| Fixed Allowance | Similar to the Basic Salary plugin. Returns the value of the fixed allowance assigned to the employee as defined in the Salaries and Allowances section of Magnar HCM — for example, Housing Allowance, Transportation Allowance, or Hourly Rate. Each allowance element linked to this plugin will return its corresponding amount for the employee in the current payroll period. |
| Retroactive Salary | Calculates retroactive salary adjustments based on the salary history defined in the Salaries and Allowances section. When a salary record has Is Retroactive checked and a Retroactive From date is set, this plugin automatically calculates the difference owed to the employee — from the retroactive start date up to the current payroll run date — and returns it as a back-pay amount in the current payroll period. |
12.2 Tax Plugins
Tax plugins calculate income tax deductions automatically based on the employee's taxable income, the configured tax brackets, and applicable exemptions. Each plugin is tailored to the tax law of a specific country or calculation method.
| Plugin | Description |
|---|---|
| Monthly Tax | The standard monthly income tax plugin. Applies the configured tax brackets (Section 6) to the employee's taxable income for the month, accounting for exemptions (Self, Spouse, Children, Dependents) and returns the income tax deduction amount. |
| Tax (Generic) | Similar to the Monthly Tax plugin but operates as a cumulative tax calculator. Instead of calculating tax purely on the current month's income, it always bases its calculation on the employee's projected annual income and works backward to determine the correct monthly deduction. This approach is common in countries where income tax is assessed on an annual basis, as it ensures that the tax deducted each month stays aligned with the employee's full-year liability — significantly reducing or eliminating the need for end-of-year tax reconciliations. |
| Tax — Egypt | Calculates income tax according to Egyptian income tax law, applying the country-specific tax brackets, exemptions, and rules mandated by the Egyptian Tax Authority. |
| Tax — Lebanon | Calculates income tax according to Lebanese income tax law, applying the applicable brackets and deductions as defined by the Lebanese Ministry of Finance. |
| Monthly Tax — Lebanon | A monthly variant of the Lebanese tax plugin, designed for payroll runs processed on a monthly basis under the Lebanese tax schedule. |
| Monthly Tax — Costa Rica | Calculates monthly income tax according to Costa Rican income tax law, applying the brackets and rates defined by the Ministerio de Hacienda. |
| Bi-Monthly Tax — Costa Rica | Calculates income tax for organizations running payroll on a bi-monthly (twice-monthly) cycle under Costa Rican tax rules. To specify which income element should be projected for the tax calculation, enter its Element ID in the element's Parameter field. If the Parameter field is left empty, the plugin defaults to using the employee's Basic Salary as the basis for the tax projection. |
| Daily Rate — Costa Rica | Calculates the average daily rate of a specified element over a configurable number of historical days. To use this plugin, the element's Parameter field must be populated with three values separated by commas: (1) the Element ID of the income element to average, (2) the Element ID of the days element to use as the denominator, and (3) the number of days to go backwards in history for the calculation. For example, to calculate the average daily rate based on total income over the past 90 days, you would enter the Element ID of the total income element, the Element ID of the working days element, and 90 — separated by commas — in the Parameter field. |
12.3 Social & National Security Plugins
| Plugin | Description |
|---|---|
| National Security | Calculates the employee's social or national security contribution for the current period based on the applicable rate, the employee's nationality, and any salary thresholds defined in the configuration. Returns the deduction amount to the linked element. |
| Cumulative National Security | A variant of the National Security plugin that applies a cumulative calculation — tracking total contributions year-to-date and ensuring the correct amount is deducted once thresholds or ceilings are reached, rather than applying a flat rate each month. |
12.4 Leave Plugins
| Plugin | Description |
|---|---|
| Deduction | The opposite of the Overtime plugin. Calculates a salary deduction based on the number of hours or days that an employee was absent or short of the required working time, as recorded in the timesheet or attendance system. The plugin computes the value of those missing hours or days and deducts the corresponding amount from the employee's salary for the current payroll period. |
| Earned Days | Returns the number of additional days earned by the employee and recorded in the Leave Balance screen. Earned days are granted in specific scenarios — for example, when an employee works on a public holiday and is entitled to a compensatory day added to their leave balance. Earned days can be linked to any leave type (Annual Leave, Sick Leave, etc.) and are picked up by this plugin during the payroll run to be reflected in the employee's entitlements. |
| Leave | Returns the number of days taken for a specific leave type during the payroll period. The plugin sums all leave days recorded within the current payroll run's period, and also picks up any leave days taken in a previous period that were not processed in that period's payroll run — ensuring no leave days are missed regardless of when they were submitted or approved. |
| Expired Leave Days | Identifies and returns the number of leave days that have expired without being taken, based on the company's leave expiry policy. Used to apply forfeiture rules or calculate any payout associated with expired leave entitlements. |
| Leave Encashment | Returns the number of annual leave days that have been approved for encashment within a specific period — i.e., leave days that the employee is entitled to cash out rather than take as time off. The plugin picks up approved leave encashment requests and passes the corresponding number of days to the element for payroll processing. |
| Off-Cycle Leave Rate | Calculates the leave pay rate for employees processed in an off-cycle payroll run — for example, when leave is paid out separately from the regular monthly payroll. |
| Sick Leave Percentage | Returns the number of sick leave days that will not be paid, based on the percentage tiers configured in the sick leave policy. For example, if the policy pays 100% for the first 30 days and 50% for the next 30 days, the plugin calculates the equivalent unpaid portion of the days taken and returns that value — which is then used as a deduction from the employee's pay for the period. |
12.5 End of Service & Provisioning Plugins
| Plugin | Description |
|---|---|
| End of Service | This plugin operates in two scenarios depending on the payroll run type:
1. Final Settlement (Employee Exit): Returns the number of days to be paid as End of Service based on the EOS policy configured in Magnar, the employee's exit reason, and their number of years of service. The exit reason may affect the number of entitled days — for example, resignation versus termination may yield different EOS entitlements. If a reduction needs to be applied to the days of service (e.g., deducting unpaid leave days), the Element ID of the reduction element can be passed in the Parameter field. 2. Regular Payroll (Monthly Provision): Returns the EOS provision amount to be accrued for the current period, calculated based on the EOS rules and the employee's last salary. The daily rate element ID must be passed in the element's Parameter field for the plugin to compute the correct provision amount. |
| Provisioning | A flexible summation engine that accumulates the value of a specified element based on one of three calculation modes configured in the plugin. The mode determines how the element's historical values are aggregated and returned to the payroll run:
1. Prorated: Accrues a prorated portion of an element's value each payroll period and pays out the accumulated total in one or more specified months of the year. When this mode is selected, two additional configurations are required:
2. Period Summation: Sums an element's values going backwards over a specified number of payroll periods. When this mode is selected, two configurations are required:
💡 Tip: If the element being summed is placed before the Provisioning plugin in the payroll profile order, the current period's value will be included in the summation. If it is placed after, the current period will not be included.
3. Yearly Summation: Similar to Period Summation but operates on full years in arrears. The plugin takes the specified element, goes backwards by the number of years defined in the Summation Number field, and returns the total accumulated value across those full historical years. Unlike Period Summation which works on payroll period intervals, this mode aggregates by complete calendar or fiscal years going backwards.
💡 Tip: If the element being summed is placed before the Provisioning plugin in the payroll profile order, the current period's value will be included in the summation. If it is placed after, the current period will not be included.
|
12.6 Overtime & Time Plugins
| Plugin | Description |
|---|---|
| Overtime | Returns the weighted overtime hours by multiplying the number of overtime hours registered for the employee by the overtime rate defined in the overtime setup. The result is an adjusted hour count rather than a monetary amount — for example, if an employee worked 2 overtime hours and the overtime rate is 1.5, the plugin returns 3 hours. This value is then used by the payroll engine to compute the actual overtime pay based on the employee's hourly rate. |
| Worksheet Overtime | Magnar includes a Worksheet form used to record working hours and overtime hours broken down by project. This plugin returns the overtime hours entered in the worksheet for the current payroll period — used when overtime is tracked per project via the worksheet module rather than through the standard attendance system. |
| Worksheet Working Hours | Returns the total working hours logged by the employee in the worksheet for the current period. Used for hourly-rate employees or for elements whose value depends on actual hours worked. |
| Timesheet Working Days | Returns the number of working days as recorded in the employee's timesheet for the current payroll period. Used to prorate salary or allowances for employees whose pay is driven by timesheet submissions. |
| Transportation Days | Returns the number of days for which a transportation allowance should be paid, based on actual attendance or working days recorded. Used when transportation is paid per day of attendance rather than as a flat monthly amount. |
| Off-Cycle Normal Days | Calculates the number of normal working days applicable in an off-cycle payroll run — used when processing a mid-month or supplementary payroll where only part of the period is being paid. |
12.7 Expenses Plugin
| Plugin | Description |
|---|---|
| Expense | Retrieves the total value of approved expense claims submitted by the employee for the current payroll period and returns that amount as a reimbursement earning on the payslip. Requires expense claims to be approved in the Expenses module before payroll is run. |
All plugins rely on data from their respective modules being correctly configured and up to date before the payroll run. Review the relevant module (Leave, Attendance, Expenses, Loans, etc.) to ensure data is complete before processing payroll.
13. Dimensions
Dimensions define the different types of cost centers used in the organization. Each dimension represents a classification axis — such as Branch, Project, Department, Employee, or Sister Company — and can hold a list of related cost center values beneath it.
Dimensions are fundamental to cost allocation: when payroll is posted to an ERP or accounting system, the payroll costs are distributed and tagged against the relevant cost centers based on the dimensions configured here. This ensures that payroll expenses are accurately attributed to the correct business unit, project, or entity in the financial system.
Dimensions are accessed via Organizations → [Your Company] → Dimension. They are a prerequisite for ERP posting — cost centers must be defined under the appropriate dimensions before payroll can be posted with correct cost allocation.

| Column | Description |
|---|---|
| ID | System-generated unique identifier for the dimension |
| Code | The system code for the dimension (e.g., Dimension1, Dimension2). Used internally when mapping cost centers to ERP accounts. |
| Name | The descriptive name of the dimension type (e.g., Branch, Project, Department, Employee, Sister Company) |
The example above shows five configured dimensions — each representing a different cost allocation axis used when distributing payroll costs during ERP posting:
| Dimension | Name | Purpose |
|---|---|---|
| Dimension1 | Branch | Allocates payroll costs by physical branch or office location |
| Dimension2 | Project | Allocates payroll costs by project — used in project-based organizations to track labor cost per project |
| Dimension3 | Department | Allocates payroll costs by department within the organization |
| Dimension4 | Employee | Allocates payroll costs at the individual employee level — useful for detailed labor cost tracking |
| Dimension5 | Sister Company | Allocates payroll costs across related entities or sister companies — used in inter-company cost sharing scenarios |
Dimensions should be planned and configured in alignment with your organization's chart of accounts and ERP cost center structure. Consult your finance or ERP team before finalizing dimension names and their corresponding cost center values.
Cost center values are configured under each dimension and are used during Element Accountings (Pay Element setup) and ERP payroll posting to correctly distribute payroll expenses across the financial system.
13.2 Cost Centers
Once dimensions are created, the next step is to define the Cost Centers that belong to each dimension. A cost center is a specific value within a dimension — for example, HR Department or ALSTOM under the Department dimension, or Elevate DMC and Salario Owners under the Branch dimension.
Cost centers are accessed via Organizations → [Your Company] → Cost Center and can be linked to employee profiles — ensuring that each employee's payroll costs are posted to the correct cost center in the ERP system.
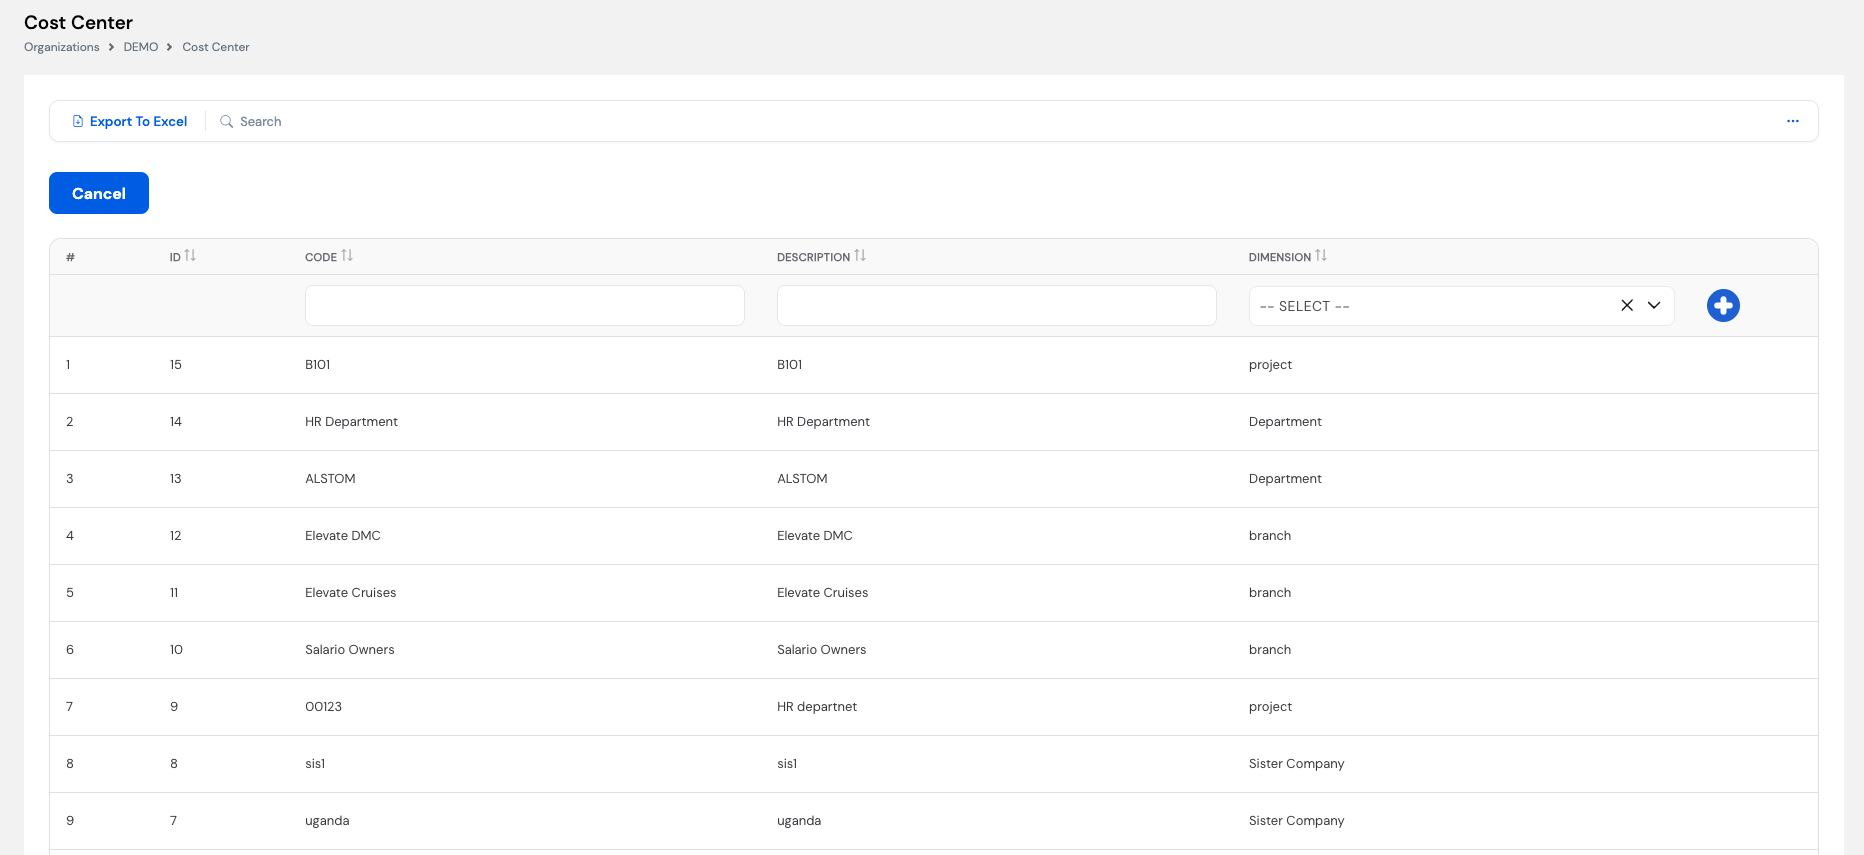
| Column | Description |
|---|---|
| # | Row number in the current list view |
| ID | System-generated unique identifier for the cost center record |
| Code | A short code for the cost center used in ERP mapping (e.g., B101, HR Department, ALSTOM) |
| Description | The full name or label of the cost center as it will appear in reports and ERP postings |
| Dimension | The dimension this cost center belongs to (e.g., project, Department, branch, Sister Company). Each cost center must be assigned to one dimension. |
How to create a new cost center
- Navigate to Organizations → [Your Company] → Cost Center.
- In the input row at the top of the list, enter the Code and Description for the new cost center.
- Select the Dimension it belongs to from the dropdown.
- Click the + button to add it to the list.
Cost centers can be exported to Excel using the Export to Excel button — useful for reviewing or sharing the full cost center list with your finance or ERP team.
After creating cost centers, they can be linked to employee profiles to ensure each employee's payroll costs are automatically attributed to the correct cost center during payroll posting.
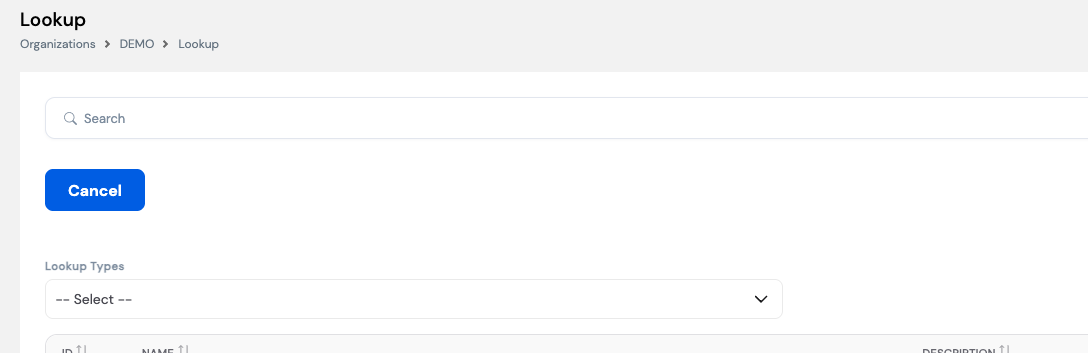
14. Lookups
The Lookups module is a centralized configuration area for defining reference lists used across Magnar HCM. Each lookup is organized under a Lookup Type — a category that groups related values together. These values are used as selectable options in various employee and payroll configuration screens throughout the system.
Lookups are accessed via Organizations → [Your Company] → Lookup. To view or manage a specific lookup, select the desired Lookup Type from the dropdown at the top of the screen.
14.1 Employee Grade
Employee Grade is one of the lookup types available in the system. It defines the list of grades or bands used to classify employees within the organization's job hierarchy — for example, Engineers, Executive Committee, Blue Collar, Grade 1, Grade 2A, etc.
Grades are configured here in the Lookup screen and are later linked to Jobs in the system. This allows each job position to carry a defined grade, which can then be used to drive compensation structures, reporting, and HR workflows based on the employee's grade level.
| Column | Description |
|---|---|
| ID | System-generated unique identifier for the lookup value |
| Name | The grade name as it will appear in employee profiles and reports (e.g., Engineers, Executive Committee) |
| Description | An optional short code or additional description for the grade |
How to add a new Employee Grade
- Navigate to Organizations → [Your Company] → Lookup.
- In the Lookup Types dropdown, select Employee Grade.
- In the input row at the top of the list, enter the Name and optionally a Description for the new grade.
- Click the + button to add it to the list.
Employee Grades are one of several lookup types available in the system. Use the Lookup Types dropdown to switch between different categories and manage their values from the same screen.
14.2 Employee Rank
Employee Rank is used when the organization operates a two-level grading system — where each Grade contains one or more Ranks beneath it. Ranks provide a finer level of classification within a grade, allowing organizations to distinguish between sub-levels of the same grade (e.g., Grade 1 → Rank 1A, Rank 1B, Rank 1C).
Ranks are defined here in the Lookup screen under the Employee Rank lookup type and are later linked to jobs alongside the grade, enabling precise job classification within the organization's grading structure.
Employee Rank is optional. It only needs to be configured if your organization uses a two-level grading structure (Grade + Rank). If a single grade level is sufficient, this lookup can be left empty.
14.3 Year
The Year lookup defines the list of years available for selection in various system screens — such as payroll period configuration, reports, and historical data views. Each year is added as a simple Name/Description entry (e.g., 2022, 2023, 2024).
Years must be added to this lookup before they can be used in payroll runs or reporting filters. Ensure that the current and upcoming fiscal years are always present in this list.
Start here. Adding the current year to this lookup is the first step you should perform when setting up a new organization in Magnar HCM. Many subsequent configurations and payroll runs depend on the year being available in the system.
Remember to add the new year to this lookup at the start of each fiscal year before processing the first payroll run of that year.
14.4 Per Diem Destinations
Per Diem Destinations defines the list of travel destinations used in the per diem and travel expense configuration. When employees submit travel requests or expense claims, the destination they select determines the applicable per diem rate for that trip.
Destinations can be broad categories (e.g., Domestic, GCC, International) or specific countries or cities (e.g., Germany, USA) — depending on how granularly the organization wants to manage per diem rates across different locations.
Keep destination names consistent with how they are referenced in your per diem policy. The destinations defined here will appear as selectable options when employees file travel requests through the ESS portal.
15. Security Groups
Security Groups control access to different areas of Magnar HCM by grouping users under named roles. Each group defines a set of permissions, and users assigned to a group inherit those permissions automatically. Security Groups are accessed via Organizations → [Your Company] → Security Group.
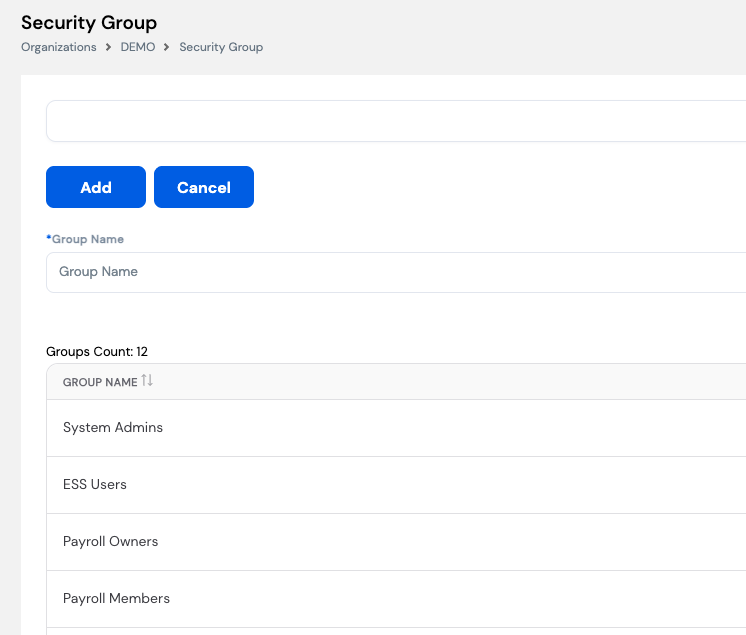
15.1 Creating a Security Group
To create a new security group, enter a Group Name in the input field at the top of the screen and click Add. The group will appear in the list and users can then be assigned to it.
Once a group is created, you can add users to it so they inherit the group's access permissions across the relevant modules and screens in Magnar HCM.
15.2 Assigning Users to a Security Group
After creating a group, open it to add the users who should belong to it. Each user added to a group will have the corresponding access rights applied to their account.
ESS Users are added automatically. Any employee who registers on the ESS portal is automatically added to the ESS Users security group — no manual assignment is needed for self-service access.
15.3 Default Security Groups
The system comes with pre-configured security groups to cover the most common access roles:
| Group Name | Description |
|---|---|
| System Admins | Full administrative access to all system settings, configurations, and modules across the organization |
| ESS Users | Access to the Employee Self-Service portal. Employees are added to this group automatically upon ESS registration. |
| Payroll Owners | Full access to payroll processing, salary structures, elements, and payroll configuration |
| Payroll Members | Limited payroll access — typically for users who can view or assist with payroll but do not have full processing rights |
Assign users to security groups carefully. Granting access to the wrong group — especially System Admins or Payroll Owners — may give users access to sensitive payroll and configuration data. Follow the principle of least privilege: only grant the access level each user genuinely requires.
16. EOS Setup
The EOS (End of Service) Setup module allows administrators to configure the rules used by the system to calculate End of Service entitlements. It is accessed via Organizations → [Your Company] → EOS Setup.
This setup is required for companies that pay End of Service benefits upon employee separation, or that want to track and provision EOS liabilities on a monthly basis in their payroll and accounting records. The configuration is defined per Employee Type, allowing different EOS rules to apply to different categories of employees.
Once configured, the system uses these rules for two purposes:
- Monthly Payroll — EOS Provision: During each regular payroll run, the system automatically calculates and accrues the monthly EOS provision for each employee, prorated according to the applicable country law and the number of days defined in the setup.
- Final Settlement — EOS Payment: When an employee exits the company, the system calculates the full EOS amount owed based on their years of service, employee type, and exit reason.
EOS Setup works in conjunction with the End of Service Plugin and the Provisioning Plugin (Section 12.5). The setup defines the entitlement rules; the plugins execute the calculations during payroll runs.
16.1 EOS Days
The EOS Days tab defines the number of days of salary an employee is entitled to per year of service, based on their Employee Type and the applicable service band (from year / to year).
Select the Employee Type from the dropdown, then configure the service bands in the grid. Each row defines a range of years of service and the corresponding number of EOS days applicable for that band.
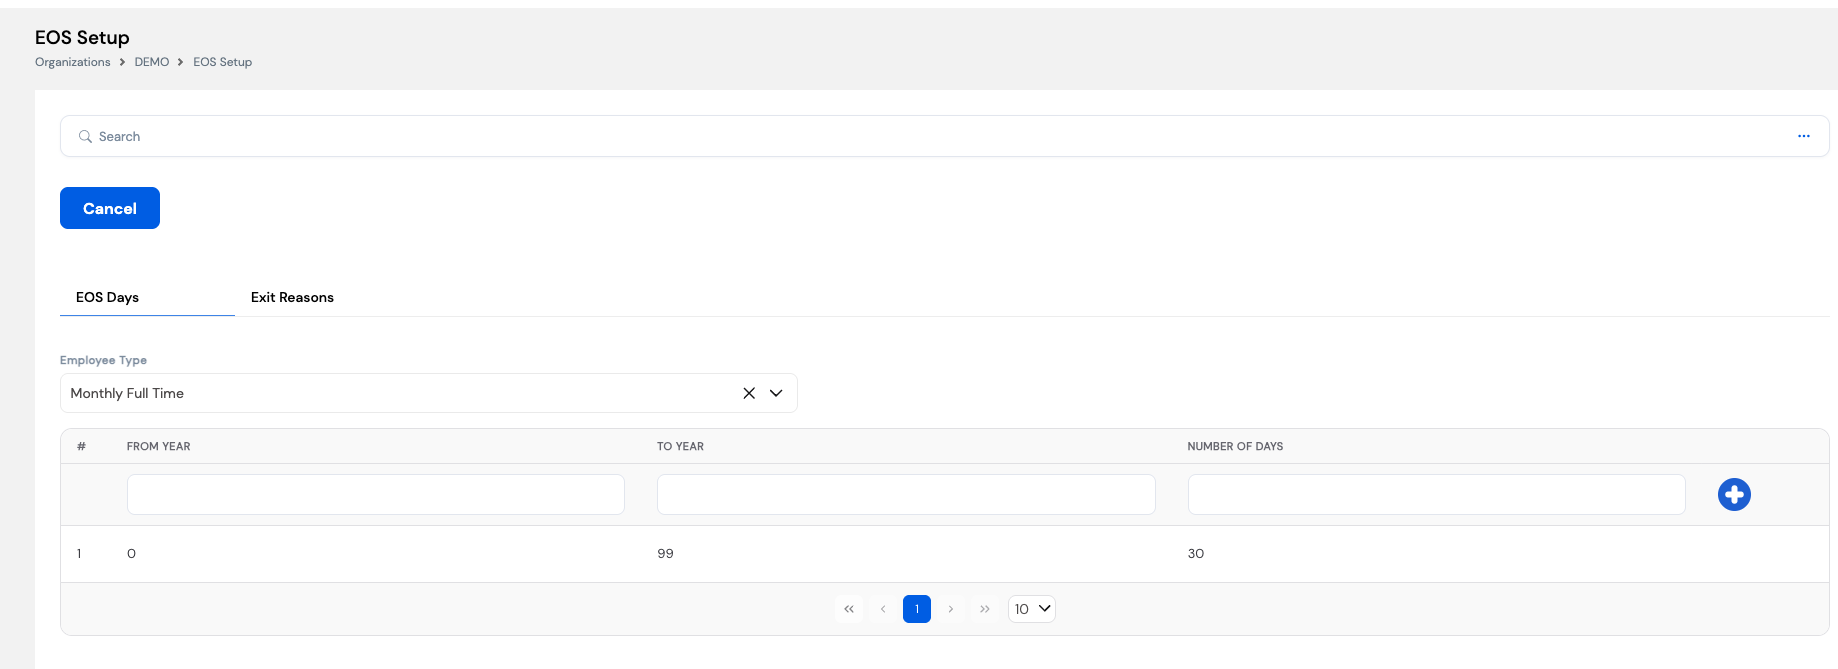
| Field / Column | Description |
|---|---|
| Employee Type | Select the employee type to which this EOS rule applies. Each employee type can have its own EOS schedule. |
| From Year | The start of the years-of-service range for this band (e.g., 0 = from day one) |
| To Year | The end of the years-of-service range (e.g., 99 = effectively no upper limit) |
| Number of Days | The number of days of salary the employee is entitled to per year of service within this band (e.g., 30 days per year) |
You can define multiple bands per Employee Type to reflect progressive EOS laws — for example, 15 days per year for the first 5 years, and 30 days per year thereafter. Add a new row for each band using the + button.
EOS entitlement rules are governed by the labor law of the country in which the employee works. Ensure the Number of Days and service bands are configured in accordance with the applicable legislation. Incorrect EOS setup will result in wrong provisions and settlement amounts.
16.2 Exit Reasons
The Exit Reasons tab defines the possible reasons for an employee's departure from the company (e.g., Resignation, Termination, Retirement). Each exit reason determines how much of the EOS entitlement is actually disbursed — since labor laws in many countries pay different percentages or amounts of EOS depending on why the employee left.
For each exit reason, you can configure service bands (From Month / To Month) with either a percentage of the provisioned EOS days or a fixed number of man days to be paid. This allows the system to handle progressive rules — for example, paying 0% EOS for resignations within the first year, 50% between years 1–3, and 100% thereafter.
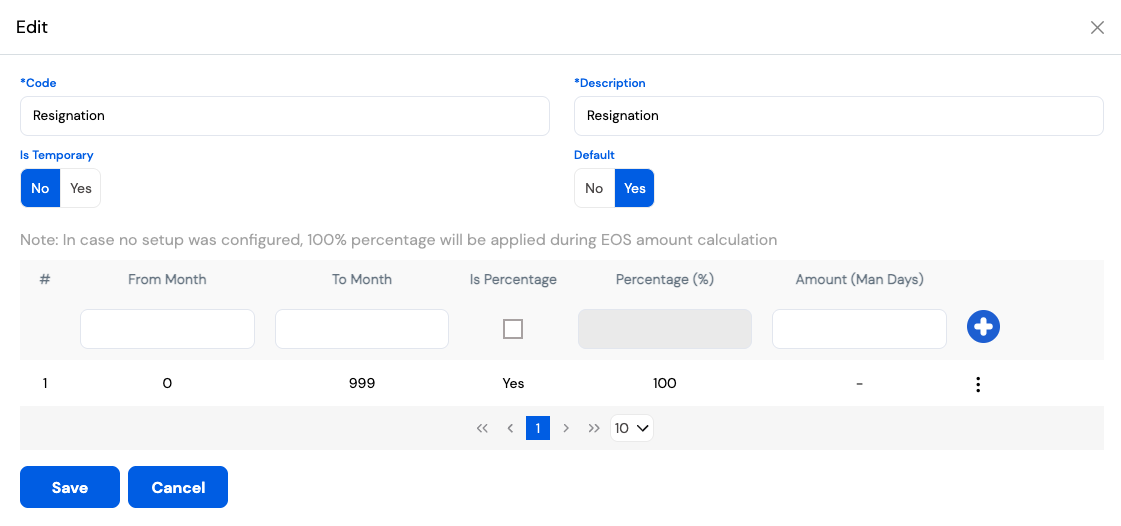
| Field / Column | Description |
|---|---|
| Code | A unique identifier for the exit reason (e.g., Resignation, Termination) |
| Description | The full name of the exit reason as it will appear on employee exit screens and reports |
| Is Temporary | Indicates whether this exit reason represents a temporary departure (e.g., a secondment or leave of absence) rather than a permanent separation |
| Default | When set to Yes, this exit reason will be pre-selected by default on the employee exit screen |
| From Month | The start of the months-of-service range for this disbursement band (e.g., 0 = from the first month) |
| To Month | The end of the months-of-service range (e.g., 999 = effectively no upper limit) |
| Is Percentage | If checked, the EOS amount for this band is calculated as a percentage of the provisioned EOS days. If unchecked, a fixed number of man days is used instead. |
| Percentage (%) | The percentage of the EOS entitlement to be paid for employees falling within this service band (active when Is Percentage is checked) |
| Amount (Man Days) | A fixed number of man days to be paid as EOS for employees in this service band (active when Is Percentage is unchecked) |
If no setup is configured for an exit reason, the system defaults to applying 100% of the EOS entitlement during the final settlement calculation.
Service bands are defined in months (not years) to allow precise control — for example, distinguishing between employees who resign after 6 months versus after 12 months.
EOS Setup is used exclusively by the End of Service Plugin during payroll runs. See Section 12.5 — End of Service & Provisioning Plugins for how the setup is applied in payroll calculations.
17. Elements Mapping
Elements Mapping is a critical configuration step that tells the system which Pay Elements represent the working days basis used for two key payroll calculations: Income Tax and Annual Leave Provision. It is accessed via Organizations → [Your Company] → Elements Mapping.
Getting this mapping right is essential for accurate calculations — particularly for employees who join or leave the company mid-month, where the number of applicable working days must be correctly prorated.
Critical setup. Incorrect or missing Elements Mapping will result in wrong income tax deductions and incorrect annual leave provision accruals. This must be configured before running payroll.

| Model Name | Element Name | Purpose |
|---|---|---|
| Working Days | The Pay Element that returns the number of working days for the current payroll period | Used as the days basis for Income Tax calculations. The tax engine uses this element to prorate the taxable income when an employee does not work the full period. |
| Provision Working Days | The Pay Element that returns the working days basis for leave provision accrual (e.g., Working Days for Leave Provisions) | Used as the days basis for Annual Leave Provision calculations. The leave prorate plugin uses this element to determine how many provision days to accrue in the current period. |
To configure a mapping, click on the row and select the appropriate Pay Element from the available elements list. The element selected must be one that is already configured in the system and returns the correct number of days during a payroll run.
Payroll profile element ordering matters. The element order within the payroll profile directly affects whether the correct day counts are used:
- The Working Days element must always be placed before the Annual Leave element in the payroll profile — so that the income tax calculation has the correct days basis available when it runs.
- The Provision Working Days element (base days for leave provision) can be placed after the Annual Leave element in the profile.
Elements Mapping works in conjunction with the Leave Prorate Plugin (Section 12.4) and the Tax Plugins (Section 12.2). Ensure the mapped elements are correctly configured and returning the right values before running payroll.
18. Company Setup
Once the organization-level configuration is complete — including currencies, tax brackets, employee types, pay elements, dimensions, lookups, security groups, and EOS setup — the next step is to set up the Company. A company in Magnar HCM is the legal entity or business unit under which employees are hired and payroll is processed.
One organization can contain multiple companies, each with its own configuration, employees, and payroll runs. The Company screen is accessed via Organizations → [Your Organization] → Company.
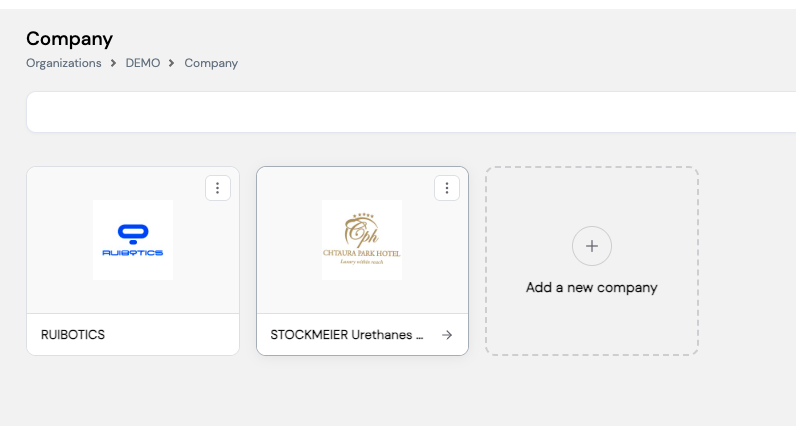
18.1 Adding or Editing a Company
To add a new company, click the + Add a new company card on the Company screen. To edit an existing company, click the ⋮ menu on the company's card and select Edit.
You can also edit company information at any time by navigating to Company → Company Details from within the company. This gives you access to the same fields and allows you to update company information without returning to the main Organizations screen.
Each company card displays the company logo and name. Keeping logos up to date ensures they appear correctly on payslips and reports generated for that company.
18.2 Company Creation Form
When creating or editing a company, the following form is presented. Fill in all required fields and click Save to create the company.
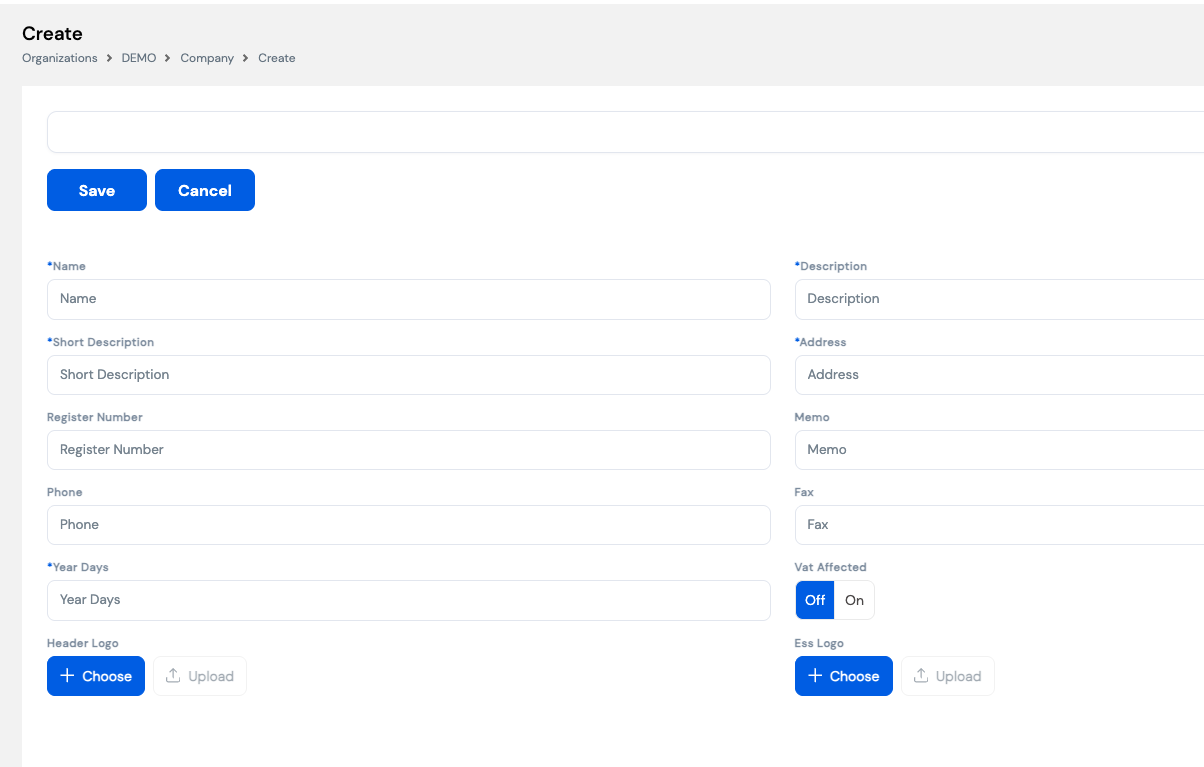
| Field | Description | Required |
|---|---|---|
| Name | The full legal name of the company as it will appear in reports and payslips | Required |
| Description | A longer description or secondary name for the company | Required |
| Short Description | A short abbreviated label for the company used in compact displays and reports | Required |
| Address | The registered address of the company | Required |
| Register Number | The company's official commercial registration number | Optional |
| Memo | Internal notes or additional information about the company | Optional |
| Phone | The company's main phone number | Optional |
| Fax | The company's fax number | Optional |
| Year Days | The number of working days in the year used as the basis for daily rate calculations (e.g., 260 for a 5-day work week, or 365 for calendar-day based calculations) | Required |
| VAT Affected | Toggle — set to On if the company's payroll postings are subject to VAT. Affects how payroll costs are posted to the accounting system. | Optional |
| Header Logo | The company logo displayed in the header of payslips and reports. Upload an image file using the Choose / Upload buttons. | Optional |
| ESS Logo | The logo displayed in the Employee Self-Service (ESS) portal for this company. Can differ from the header logo. | Optional |
Company configuration includes payroll periods, working calendars, bank details, and more — covered in the sections that follow. Ensure all organization-level setup (Sections 4–17) is complete before configuring individual companies.
19. Company Dashboard
After opening a company, the first screen you will see is the Corporate Dashboard. This provides a visual overview of key HR and payroll metrics for the company — including leave days by type, employee count by department, leavers over time, and compensation & benefits trends.
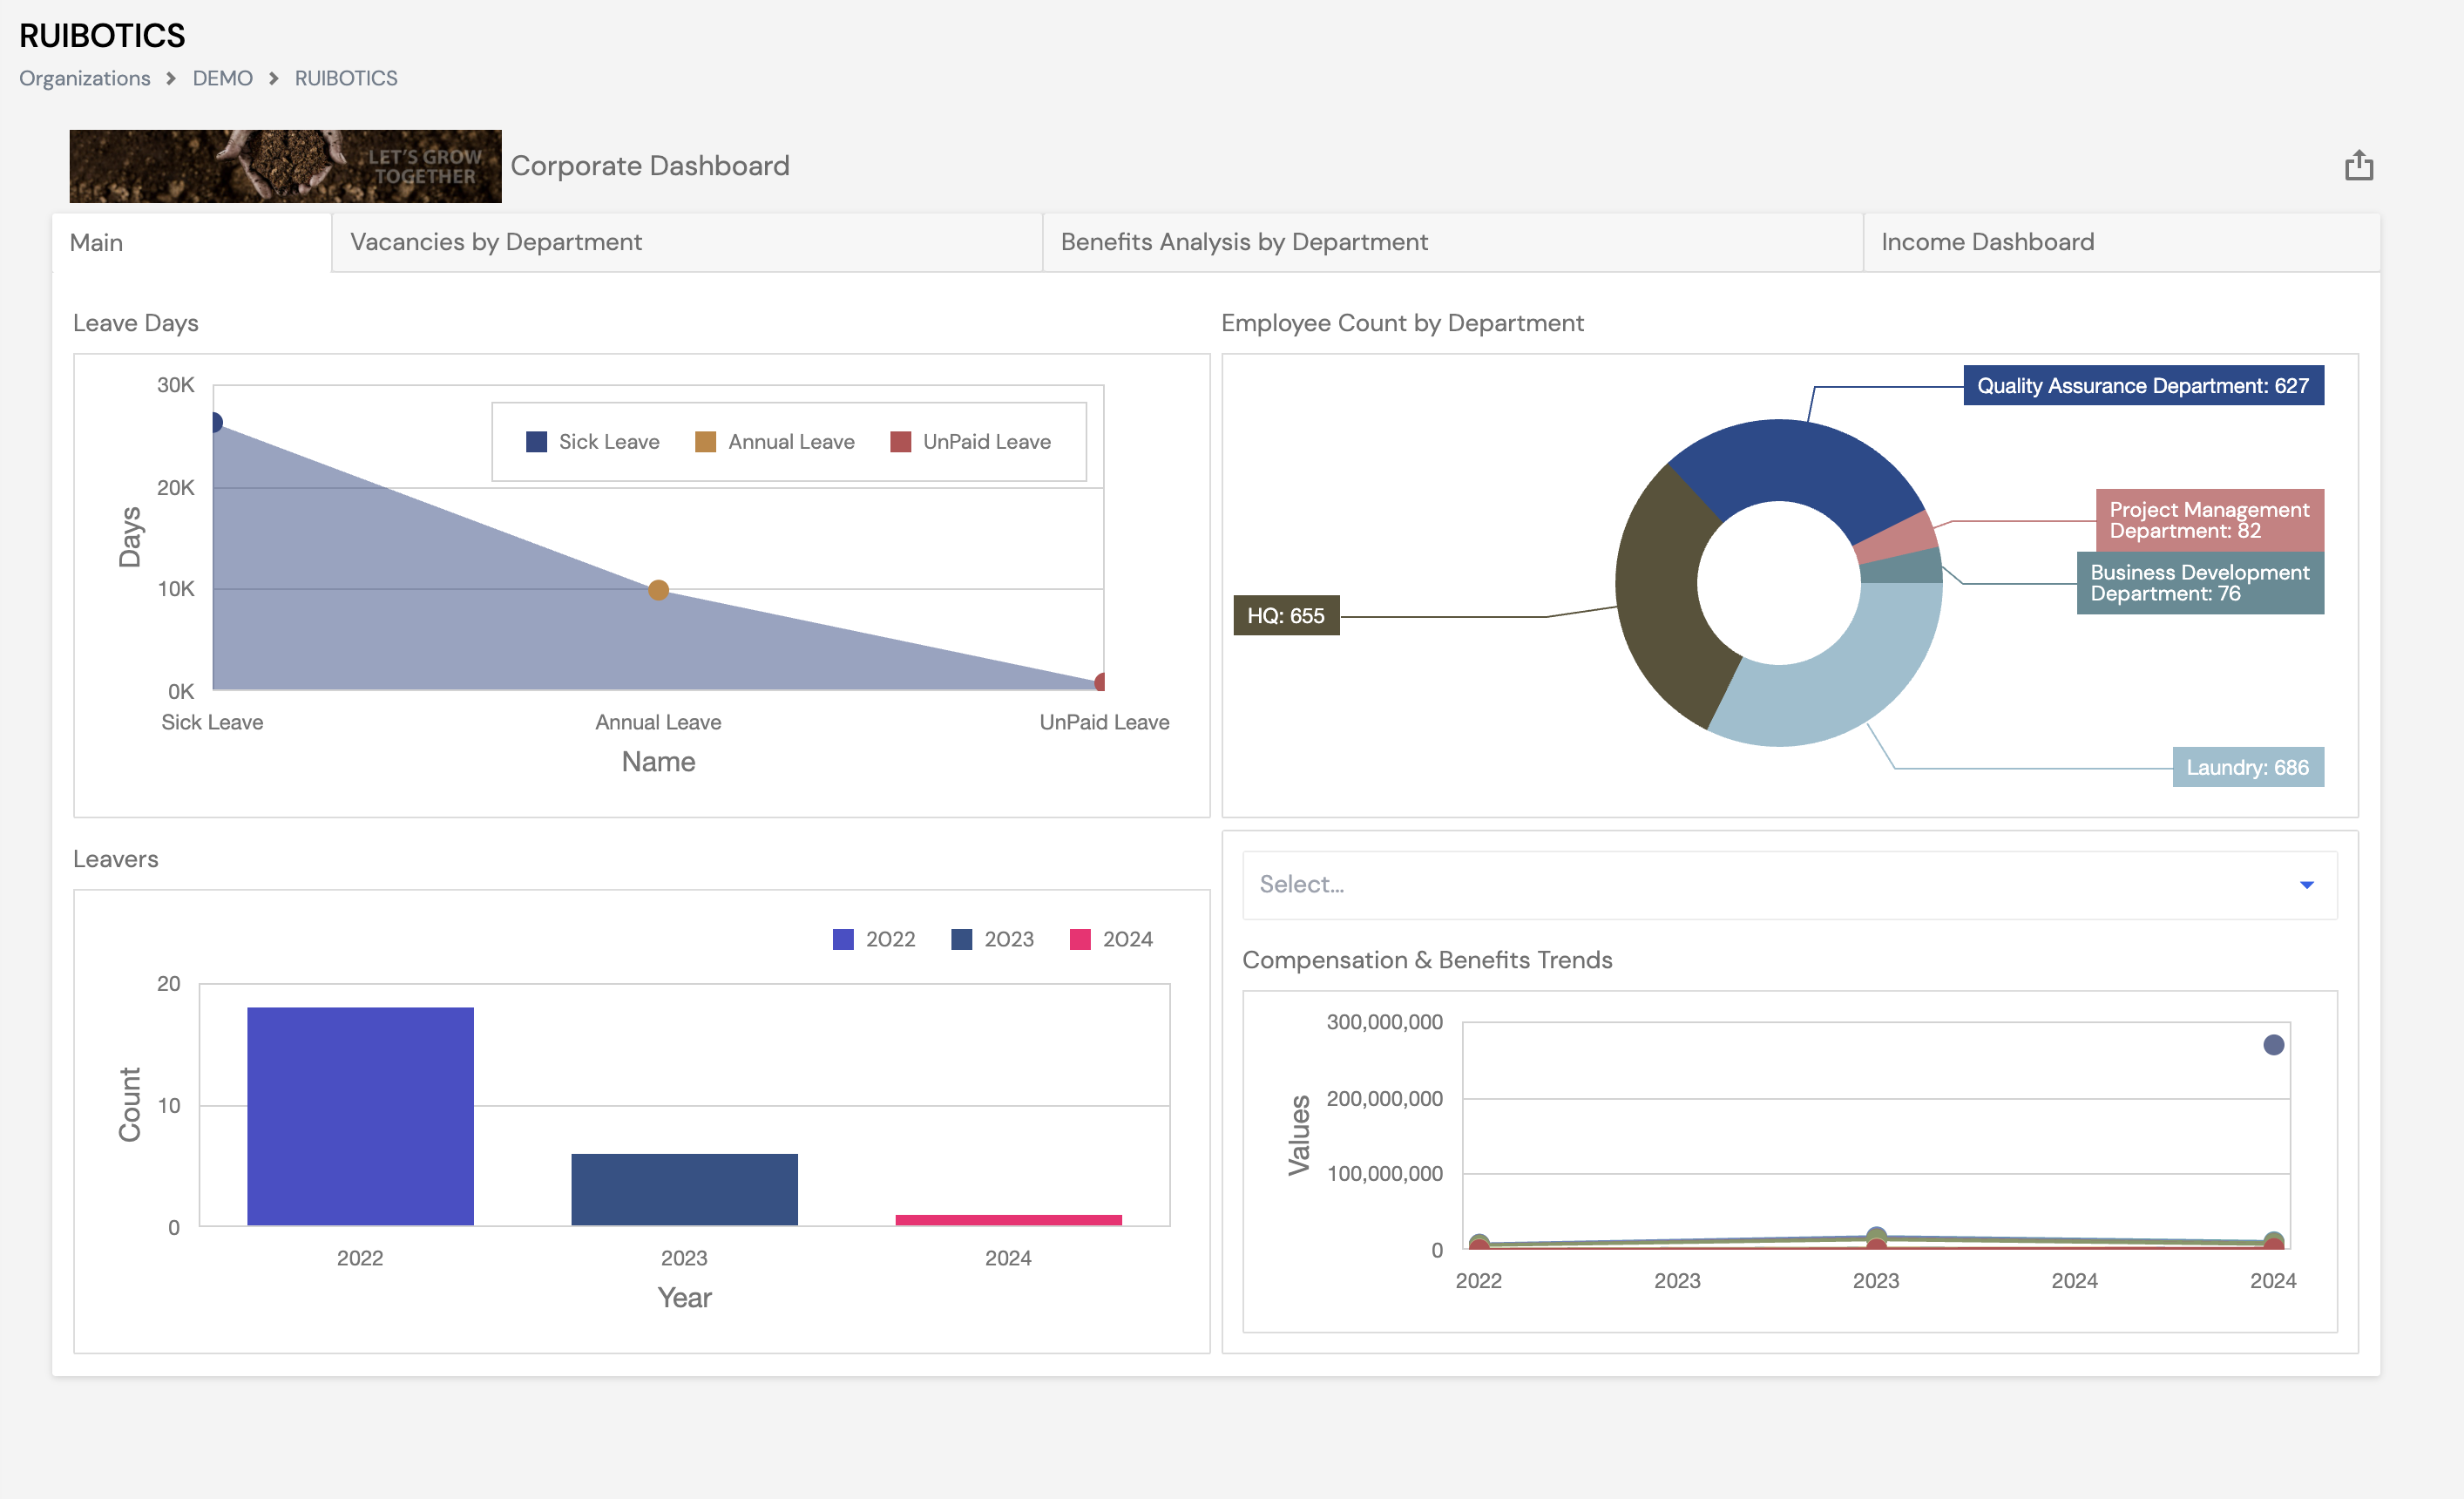
The dashboard shown above is an example only. The number of tabs, charts, and metrics displayed depends entirely on which dashboards have been installed and activated for your company. There is no fixed limit on the number of dashboard tabs — each organization can have a fully customized set tailored to their reporting needs.
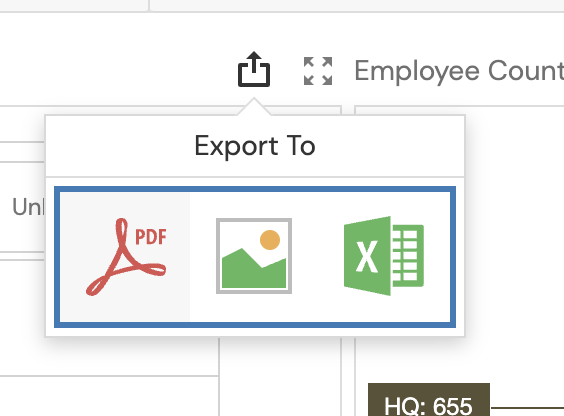
Export options. Any dashboard tab, chart, or sub-dashboard can be exported. To export, click the Export button (↑ share icon) located in the top-right corner of the dashboard or chart, then choose your preferred format from the Export To menu: PDF, Image (picture), or Excel.
Empty dashboards are normal for new companies. If no dashboard has been activated, or if the company has no payroll or HR data yet, the dashboard will appear empty. This is expected behavior for a newly configured company.
Dashboards must be installed and activated by your system administrator before they display data. Once your company has sufficient data in the system, contact your system admin to install and activate the relevant dashboards. Dashboards can also be created or customized using the Dashboard Designer tool.
20. Employee Profiles
The Employees module is where all employee records are created and managed. It is accessed via the left navigation menu under Employees. The list view shows all employees in the company with their System ID, Code, Name, Start Date, and Status.
Prerequisites — complete these before creating employees.
Required: The following must be configured before any employee can be created:
- Employee Type — Section 7
- Profession — Section 8
- Employee Group — Section 9
- Year — Section 14.3 (Lookups)
- Calendar — Section 23.7
Optional but recommended: Having these configured before adding employees will allow you to fully complete each employee profile:
- Jobs — Section 23.1.5
- Employee Grade — Section 14.1 (Lookups)
- Positions — Section 23.1.4
To add a new employee, click + New and complete the form. To invite all existing ESS-registered employees to the system, use the + Invite All button. The employee form is organized into the following sections:
20.1 Personal Information
The top section captures the employee's core personal details and profile photo.
| Field | Description | Required |
|---|---|---|
| Profile Photo | Click Edit on the avatar to upload the employee's photo. The Employee Code and Date of Join are displayed below the photo once saved. | Optional |
| First Name | Employee's first name | Required |
| Middle Name | Employee's middle name | Optional |
| Last Name | Employee's last name | Required |
| Employee's email address — used for ESS portal login and notifications | Optional | |
| Date of Birth | Employee's date of birth — used for age calculations and statutory reporting | Required |
| Nationality | Select from the nationalities configured in Section 10. May affect tax and social security calculations. | Required |
| Gender | Employee's gender | Required |
| Marital Status | Employee's marital status — used for tax exemption calculations (Section 6.3) | Required |
20.2 Employee Information
This section captures additional employee identifiers, system settings, and contact details.
| Field | Description | Required |
|---|---|---|
| Employee Code | A unique identifier for the employee within the company (e.g., EMP001). Used in payroll runs and reports. | Required |
| Level | The employee's level within the organization hierarchy | Optional |
| Blood Type | Employee's blood type — for HR records and emergency purposes | Optional |
| Register Number | The employee's official registration or HR number | Optional |
| Religion | Employee's religion — used in certain regional HR configurations | Optional |
| ID Number | National ID or residency ID number | Optional |
| ID Expiration Date | Expiry date of the employee's national or residency ID | Optional |
| Calendar | The working calendar assigned to this employee — determines working days, weekends, and public holidays used in payroll calculations. Calendars must be created in Setup → Calendar (Section 23.7) before employees can be added. | Required |
| Username | The employee's system login username for the HR & Payroll portal | Optional |
| External Code | An identifier used to link this employee to an external system (e.g., ERP, time & attendance) | Optional |
| Daily Rate Element | The Pay Element used to calculate this employee's daily rate — referenced by EOS and leave calculations | Optional |
| Sponsor File Number | Work permit or sponsor file number (applicable in countries with sponsorship systems, e.g., KSA, UAE) | Optional |
| Sponsor Name | Name of the employee's sponsor or employer of record | Optional |
| Sponsor File Expiry | Expiry date of the sponsor file or work permit | Optional |
| Mobile Number | Employee's mobile phone number | Optional |
| Phone Number | Employee's office or home phone number | Optional |
20.3 Company Information
This section links the employee to their position, employment type, contract, and statutory details within the company.
| Field | Description | Required |
|---|---|---|
| Branch | The branch or location the employee is assigned to | Optional |
| Employee Type | The employee type group (Section 7) — drives payroll behavior, benefits eligibility, and EOS rules | Required |
| Position | The employee's job position within the organizational structure | Optional |
| Effective From | The date from which the current company information record becomes effective | Optional |
| Employee Group | The employee group (Section 9) — used for reporting and classification | Required |
| Profession | The employee's profession (Section 8) — for reporting purposes only | Optional |
| Rank | The employee's rank within their grade (Section 14.2) | Optional |
| Passport | Primary passport number | Optional |
| Passport Expiry Date | Expiry date of the primary passport | Optional |
| Passport1 | Secondary passport number (for dual-nationality employees) | Optional |
| NSSF Number | The employee's National Social Security Fund registration number | Optional |
| Opening Balance | The employee's leave opening balance (carried forward from a previous system or period) | Optional |
| EOS Opening Balance | The EOS provision amount carried forward from a previous system — used when migrating employees with existing EOS accruals | Optional |
| Start Date | The employee's official start date with the company — used as the basis for EOS, leave, and service calculations | Required |
| NSSF Start | The date the employee's NSSF contributions began | Optional |
| Contract Start Date | The start date of the employee's current contract | Optional |
| Contract End Date | The end date of the employee's current contract — used for contract expiry alerts | Optional |
| Visa Expiration Date | The expiry date of the employee's work visa | Optional |
| Visa Number | The employee's work visa number | Optional |
| No Exemption | Override the standard tax exemption for this employee — used when a specific exemption rule applies that differs from the default tax setup | Optional |
20.4 Bank Details
The employee's bank account information used for payroll salary transfer.
| Field | Description | Required |
|---|---|---|
| Name | Select the employee's bank from the configured bank list | Optional |
| Country | The country where the bank is located | Optional |
| SWIFT | Auto-populated based on the selected bank — the bank's SWIFT/BIC code for international transfers | Auto |
| Bank Account Number | The employee's personal bank account number (IBAN or local account number) | Optional |
| City | The city of the bank branch | Optional |
| Street | The street address of the bank branch | Optional |
20.5 Dependents
Record the employee's dependents (spouse, children, or other family members). This information is used for tax exemption calculations (Section 6.3) and benefit eligibility. Click the + button to open the dependent form.
| Field | Description |
|---|---|
| Type | The relationship type of the dependent (e.g., Spouse, Child, Parent) |
| Name | Full name of the dependent |
| Date of Birth | Dependent's date of birth — used for age verification and child tax relief limits |
| Joining Date | The date from which this dependent is recognized for tax or benefit purposes |
| Passport Exp | Expiry date of the dependent's passport |
| Gender | Dependent's gender |
| Passport Number | Dependent's passport number |
| Identity Number | Dependent's national ID or identity document number |
| Is Working | Toggle — set to On if the dependent is currently employed. May affect tax exemption eligibility in certain countries. |
| Is Learning | Toggle — set to On if the dependent is a student. May affect eligibility for child tax relief beyond a certain age. |
| Is NSSF | Toggle — set to On if the dependent is registered under the employee's NSSF coverage |
| Is Deleted | Toggle — set to On to remove this dependent from active records without permanently deleting the entry |
20.6 Education
Record the employee's educational qualifications for HR records and reporting. Click the + button to open the education form.
| Field | Description |
|---|---|
| Date | The date the qualification was obtained or the graduation date |
| Degree | The academic degree or qualification (e.g., Bachelor's, Master's, PhD, Diploma) |
| College Name | The name of the university, college, or institution where the qualification was obtained |
| Field of Study | The subject or discipline of the qualification (e.g., Computer Science, Business Administration) |
| Remarks | Any additional notes or comments about the qualification |
20.7 Address
Record the employee's residential address. Multiple address records can be added by clicking the + button.
| Field | Description | Required |
|---|---|---|
| Street | Street name of the employee's address | Optional |
| Street Number | Building or house number on the street | Optional |
| Building Information | Building name, floor, or apartment details | Optional |
| Block | Block or zone identifier (common in Middle Eastern address formats) | Optional |
| Country | Country of residence | Required |
| State | State or province | Optional |
| Region | Region or district | Optional |
| City | City of residence | Required |
| Phone | Phone number associated with this address | Optional |
| Postal Code | Postal or ZIP code | Optional |
20.8 Skills
Record the employee's professional competencies and skill levels. Click the + button to add a skill entry.
| Field | Description |
|---|---|
| Competency | Select the skill or competency from the configured competency list (e.g., Leadership, Technical Writing, Project Management) |
| Competency Level | Select the employee's proficiency level for this competency (e.g., Beginner, Intermediate, Advanced, Expert) |
| Remark | Any additional notes about the employee's proficiency or context for this skill |
20.8 Personal Objectives
Assign personal performance objectives to the employee. Used in appraisal and performance management workflows. Click + Add to open the objectives form.
| Field | Description | Required |
|---|---|---|
| Name | The title or name of the personal objective | Required |
| Category | The category this objective belongs to (e.g., Performance, Development, Compliance) | Required |
| Due Date | The target completion date for this objective | Required |
| Department Objectives | Link this personal objective to a parent department-level objective | Required |
| Weight | The relative importance of this objective as a percentage of the total appraisal score (e.g., 30 means this objective contributes 30% to the overall rating) | Required |
| Completed (%) | The current completion percentage of this objective — updated as the employee progresses | Optional |
| Description & Target | A rich-text field to describe the objective in detail and define the measurable target or success criteria | Optional |
| Comment | A rich-text field for manager or employee comments related to the progress or outcome of this objective | Optional |
20.9 Employee Assets
Record company assets assigned to the employee — such as laptops, vehicles, mobile phones, or any other equipment. Click the + button to add a new asset entry.
| Column | Description |
|---|---|
| Name | Select the asset type from the configured asset list (e.g., Laptop, CAR, Mobile) |
| Description | A description or identifier for the specific asset — such as the model, serial number, or VIN (e.g., Lenovo SN#1784384, iPhone 16 SN# 6763473743467) |
| Modification Date | The date the asset record was last modified — auto-updated by the system |
20.10 Attachments
Upload and store documents related to the employee — such as ID copies, contracts, certificates, or any other supporting files. Enter a Name for the document, then click + Choose to select the file from your computer, and click the + button to add it to the list.
| Column | Description |
|---|---|
| Name | A label or title for the attached document (e.g., Passport Copy, Employment Contract, Certificate) |
| Modification Date | The date the attachment was uploaded or last modified — auto-updated by the system |
| File | Click + Choose to browse and select the file to upload |
Click the + button (blue circle) to add a new row in any of the grid sections (Dependents, Education, Address, Skills, Personal Objectives, Assets, Attachments). Click the history icon (🔄) to view the change history for that section.
20.11 Cost Center Assignment
Each employee can be assigned to specific cost centers across the dimensions configured in the system (Section 13). This determines how the employee's payroll costs are allocated and posted to the ERP or accounting system during payroll runs.
The available cost center fields correspond directly to the dimensions set up for your organization — for example, Branch, Project, Department, Employee, and Sister Company. Select the appropriate value for each dimension from the respective dropdown.
| Field (Dimension) | Description |
|---|---|
| Branch | The branch cost center this employee's costs are allocated to (e.g., Sales, HQ) |
| Project | The project cost center for project-based labor cost tracking |
| Department | The department cost center for departmental cost allocation |
| Employee | An employee-level cost center for individual labor cost tracking |
| Sister Company | The sister company cost center for inter-company payroll cost sharing (e.g., sis1) |
The dimension fields shown here are based on the cost centers configured in Section 13 — Dimensions. Your organization may have different dimension names or a different number of dimensions depending on your setup.
The Employee Type, Start Date, and Calendar fields are critical for payroll. Ensure these are correctly set before the employee's first payroll run — errors in these fields will affect EOS, leave accruals, and tax calculations.
21. Employee Transactions
The Employee Transactions module provides HR and Payroll administrators with direct access to manage employee-level transactions — including salary elements, loans, leave, travel, and overtime. It is accessed from the left navigation menu under Employee Transactions, which expands to reveal the following sub-modules:
- Employees Elements — Manage salary and pay element assignments per employee
- Employee Loan — Create and manage employee loan records
- Leave Transactions — View and manage employee leave records
- Travel Transactions — Manage travel and per diem requests
- Overtime Transaction — Record and manage overtime hours
When to use this module. Most of these transactions are typically initiated by employees and managers through the ESS/MSS (Employee/Manager Self-Service) portal and its approval workflows. However, this module is used in the following situations:
- The organization has not purchased or activated the ESS module
- An employee or manager does not have ESS access
- HR needs to enter, correct, or delete a transaction directly without going through the ESS approval workflow
- An override or administrative adjustment is required
Authorization required. Access to Employee Transactions is role-controlled. You must have the appropriate security group permissions to view, create, edit, or delete transactions in this module. Contact your system administrator if you cannot access a sub-module you need.
21.2 Employee Loan
The Employee Loan sub-module allows HR administrators to create and manage loan records on behalf of employees. Loans created here are linked directly to payroll — the repayment installments are automatically deducted from the employee's salary each period via the Loan Plugin (Section 12).
21.2.1 Creating a New Loan
Navigate to Employee Transactions → Employee Loan and click + New to open the loan creation form.
| Field | Description | Required |
|---|---|---|
| Reference No. | Auto-generated unique loan reference number (e.g., LN0506112). Read-only — assigned by the system. | Auto |
| Employee | Select the employee receiving the loan | Required |
| Amount | The total loan amount to be disbursed to the employee | Required |
| Loan | Select the loan type from the configured loan types (e.g., Personal Loan, Housing Loan). The loan type determines the rules and maximum amount applicable. | Required |
| Payment Date | The date on which the loan amount will be disbursed to the employee | Required |
| Installments Number | The number of monthly installments over which the loan will be repaid via payroll deductions | Required |
| Maximum Amount | Read-only — the maximum loan amount allowed for the selected loan type as configured in the system | Auto |
| Remarks | A free-text field for notes or the reason for the loan (e.g., I need this to pay the rent in advance) | Optional |
21.2.2 Generating the Repayment Schedule
After filling in the loan details and clicking Save, you must generate the repayment schedule by clicking the Schedule button. A dialog will appear asking for the First Payment Date — the date of the first payroll deduction.
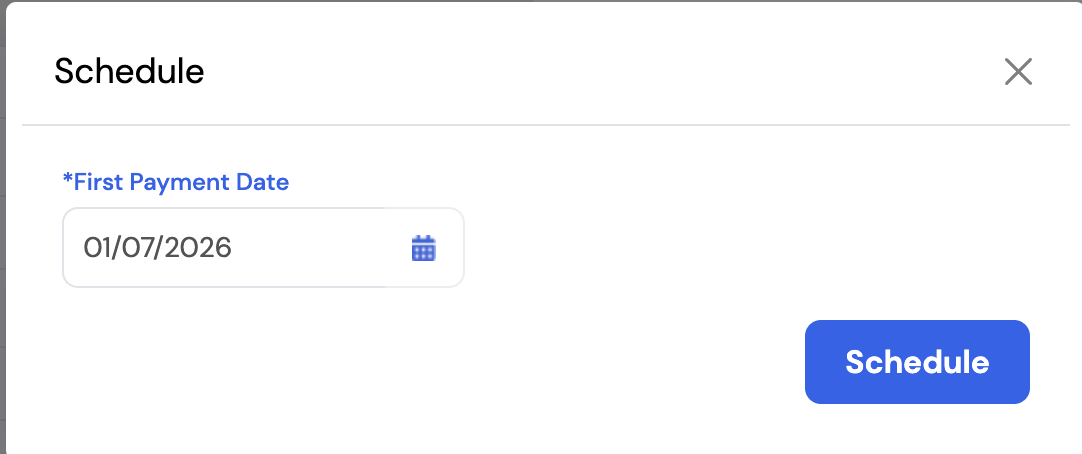
Once the first payment date is set and Schedule is clicked, the system automatically generates the full repayment schedule — one installment row per payroll period until the loan is fully repaid.
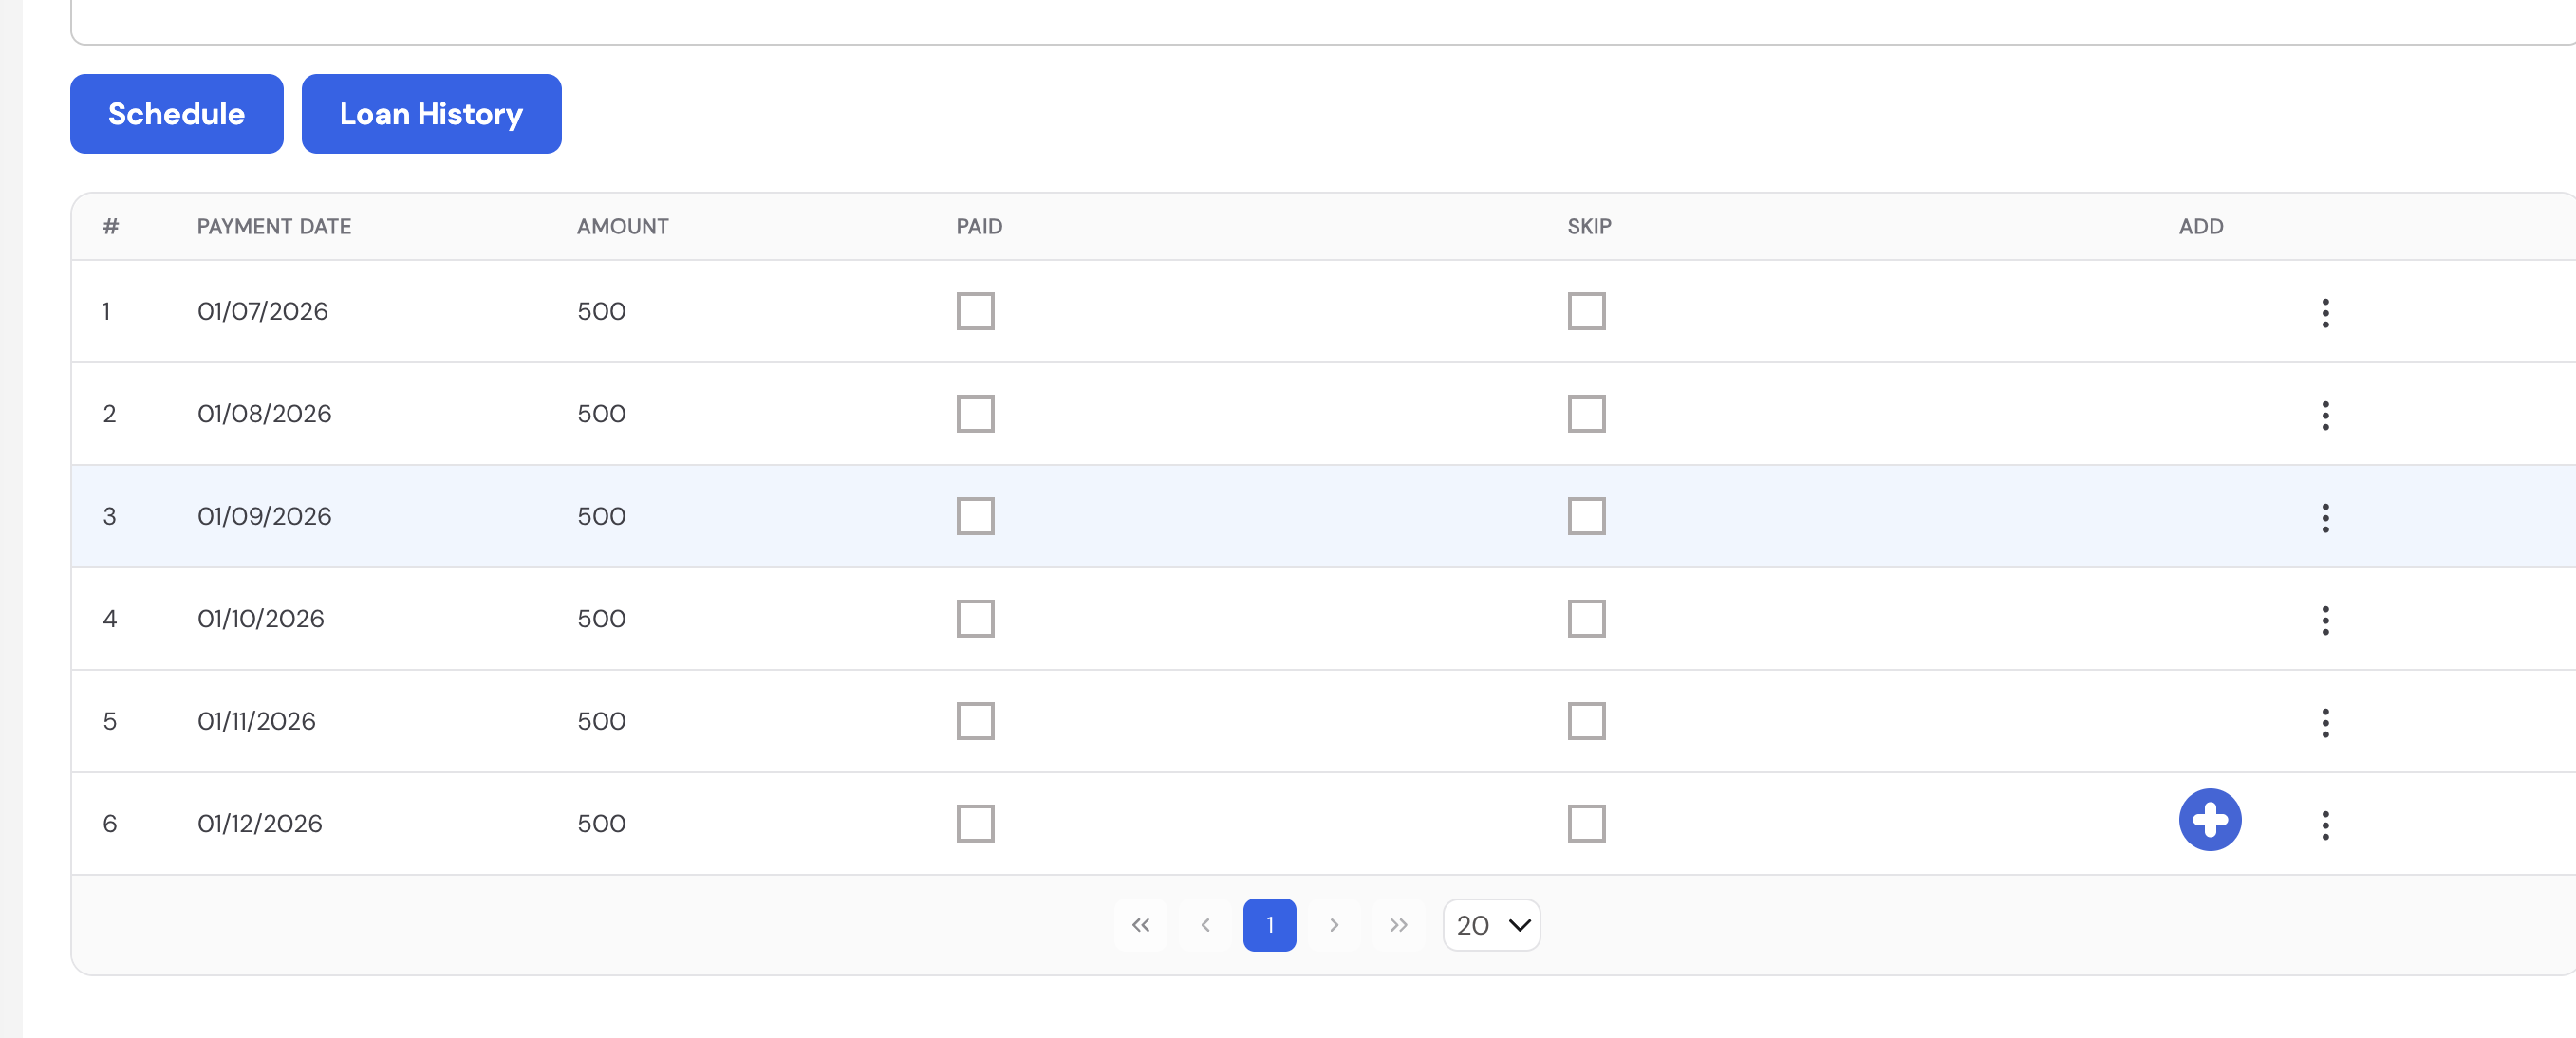
| Column | Description |
|---|---|
| # | Installment number |
| Payment Date | The date of each scheduled deduction |
| Amount | The installment amount (total loan ÷ number of installments) |
| Paid | Checkbox — automatically marked by the system once the installment is processed through payroll |
| Skip | Check to skip an installment for a specific period — the amount will not be deducted in that payroll run |
| Add | Use the + button to manually add an extra installment row if needed |
Use the Loan History button to view a full history of all changes, payments, and actions taken on this loan record.
The loan will only be deducted in payroll if the Loan Plugin is configured and linked to an active pay element in the employee's payroll profile. Ensure the loan element is set up before running payroll.
21.3 Leave Transactions
The Leave Transactions sub-module allows HR administrators to create, view, edit, or delete leave records on behalf of employees. Navigate to Employee Transactions → Leave Transactions and click + New to create a leave record.
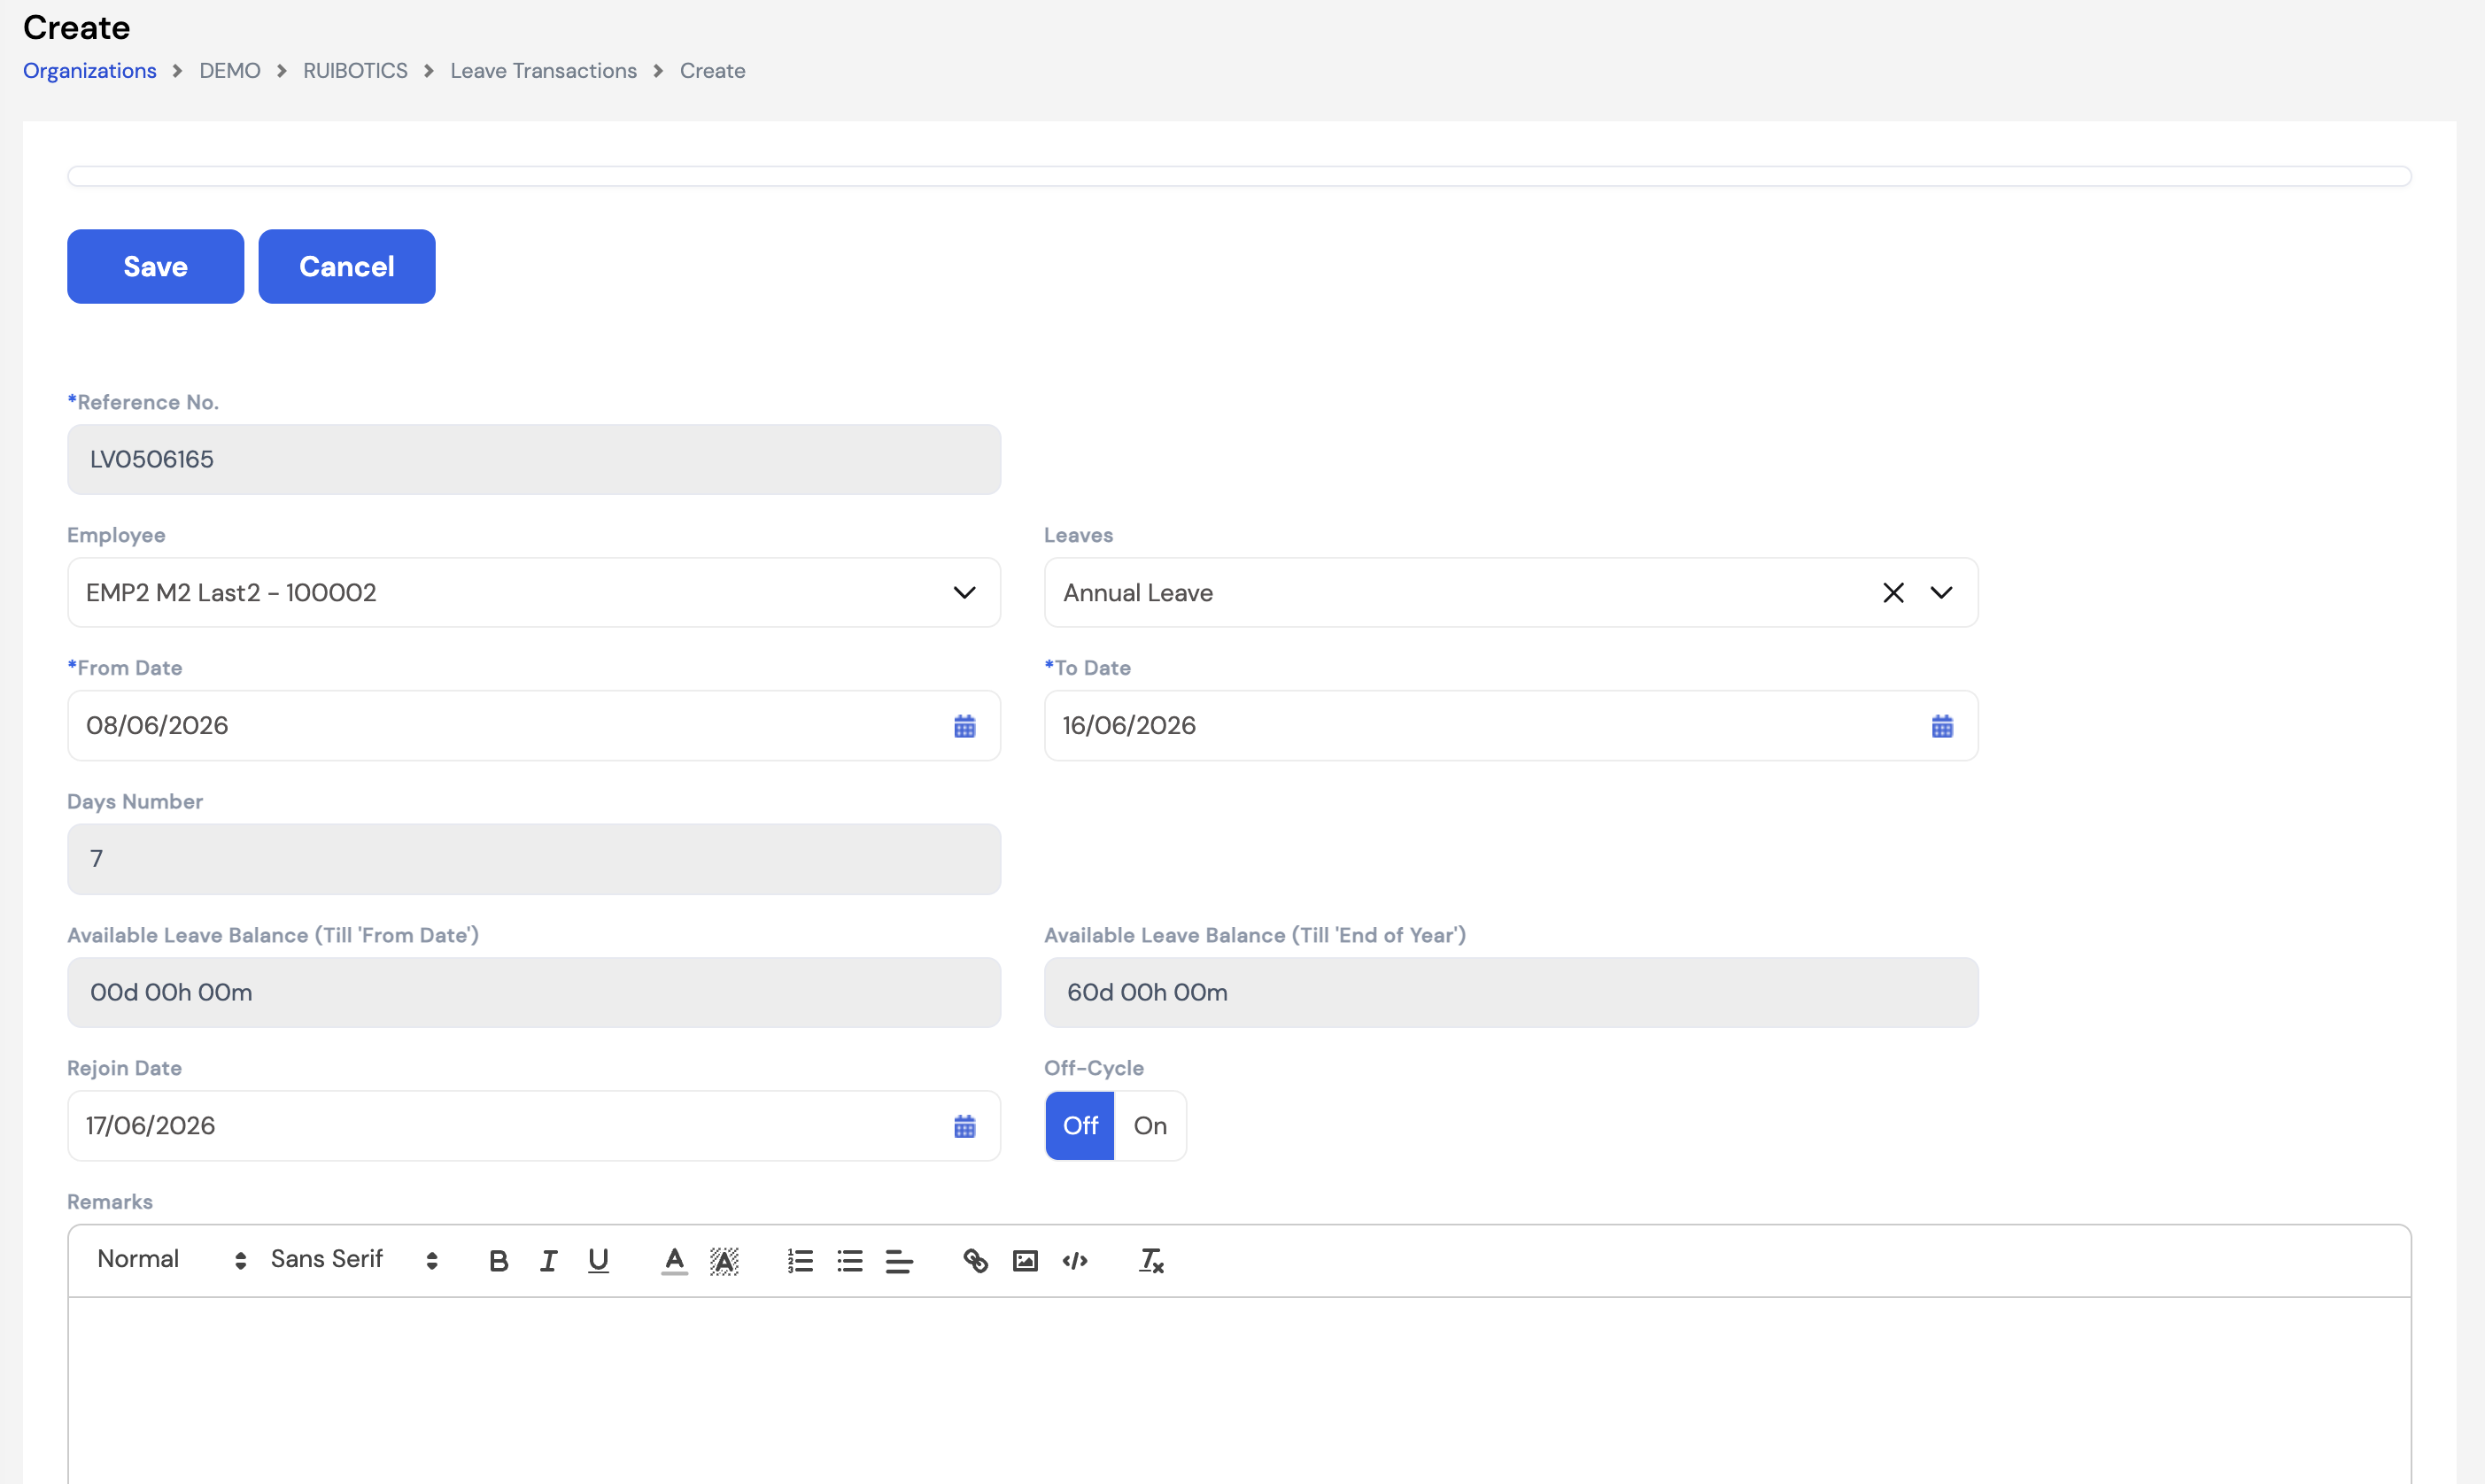
| Field | Description | Required |
|---|---|---|
| Reference No. | Auto-generated unique reference number for this leave record (e.g., LV0506165) | Auto |
| Employee | Select the employee for whom the leave is being recorded | Optional |
| Leaves | Select the leave type (e.g., Annual Leave, Sick Leave, Unpaid Leave) from the configured leave types | Optional |
| From Date | The first day of the leave period | Required |
| To Date | The last day of the leave period | Required |
| Days Number | Auto-calculated by the system based on the From and To dates and the employee's working calendar. Read-only. | Auto |
| Available Leave Balance (Till 'From Date') | Read-only — shows the employee's available leave balance as of the leave start date. Used to verify the employee has sufficient balance. | Auto |
| Available Leave Balance (Till 'End of Year') | Read-only — shows the employee's projected leave balance through the end of the year, including future accruals. | Auto |
| Rejoin Date | The date the employee is expected to return to work — auto-calculated as the day after the To Date based on the working calendar | Auto |
| Off-Cycle | Toggle — set to On if this leave should be processed in an off-cycle payroll run rather than the standard monthly payroll | Optional |
| Remarks | Free-text notes or reason for the leave entry | Optional |
The Days Number is calculated automatically based on the leave type configuration. All combinations are supported to give full flexibility: weekends and public holidays can be included or excluded independently — for example, a leave type can be set to include weekends but exclude public holidays, exclude both, or include both. This is configured per leave type in the Leave Setup module.
21.3.2 Leave Type Behavior
The fields displayed on the leave form vary depending on the leave type selected. The leave type's configuration in the system determines how the leave behaves — for example:
| Leave Attribute | How It Affects the Form & Payroll |
|---|---|
| Balance-based leave (e.g., Annual Leave) | Shows Available Leave Balance as of the from-date and end of year. HR can see if the employee has sufficient balance before approving. |
| Non-balance leave (e.g., Sick Leave) | No balance is shown. Instead, Consumed Days (Based on renewal) and the Renewal frequency (e.g., Yearly) are displayed to track usage within the renewal cycle. |
| Calendar days vs. Working days | Some leave types count all calendar days (including weekends) while others count only working days based on the employee's calendar. This is configured per leave type in the leave setup. |
| Mandatory attachment | Certain leave types (e.g., sick leave requiring a medical certificate) can be configured to make an attachment mandatory before the leave can be saved. |
| Balance renewal cycle | Leave balances can be configured to reset on a yearly, monthly, weekly, or employee start date basis — depending on the company policy and leave type setup. |
All leave type attributes are configured in the Leave Setup module. The form adapts dynamically based on those settings — so the fields you see will reflect the specific rules of the leave type selected.
Leave transactions created directly by HR bypass the ESS approval workflow. Ensure all necessary approvals have been obtained before entering the record manually.
21.4 Travel Transactions
The Travel Transactions sub-module allows HR administrators to record employee travel requests — for domestic or international trips related to business travel, training, or other company-approved purposes. Navigate to Employee Transactions → Travel Transactions and click + New to create a record.
Travel transactions are linked to the Per Diem Destinations configuration (Section 14.4), which determines the applicable daily allowance rates based on the destination country.
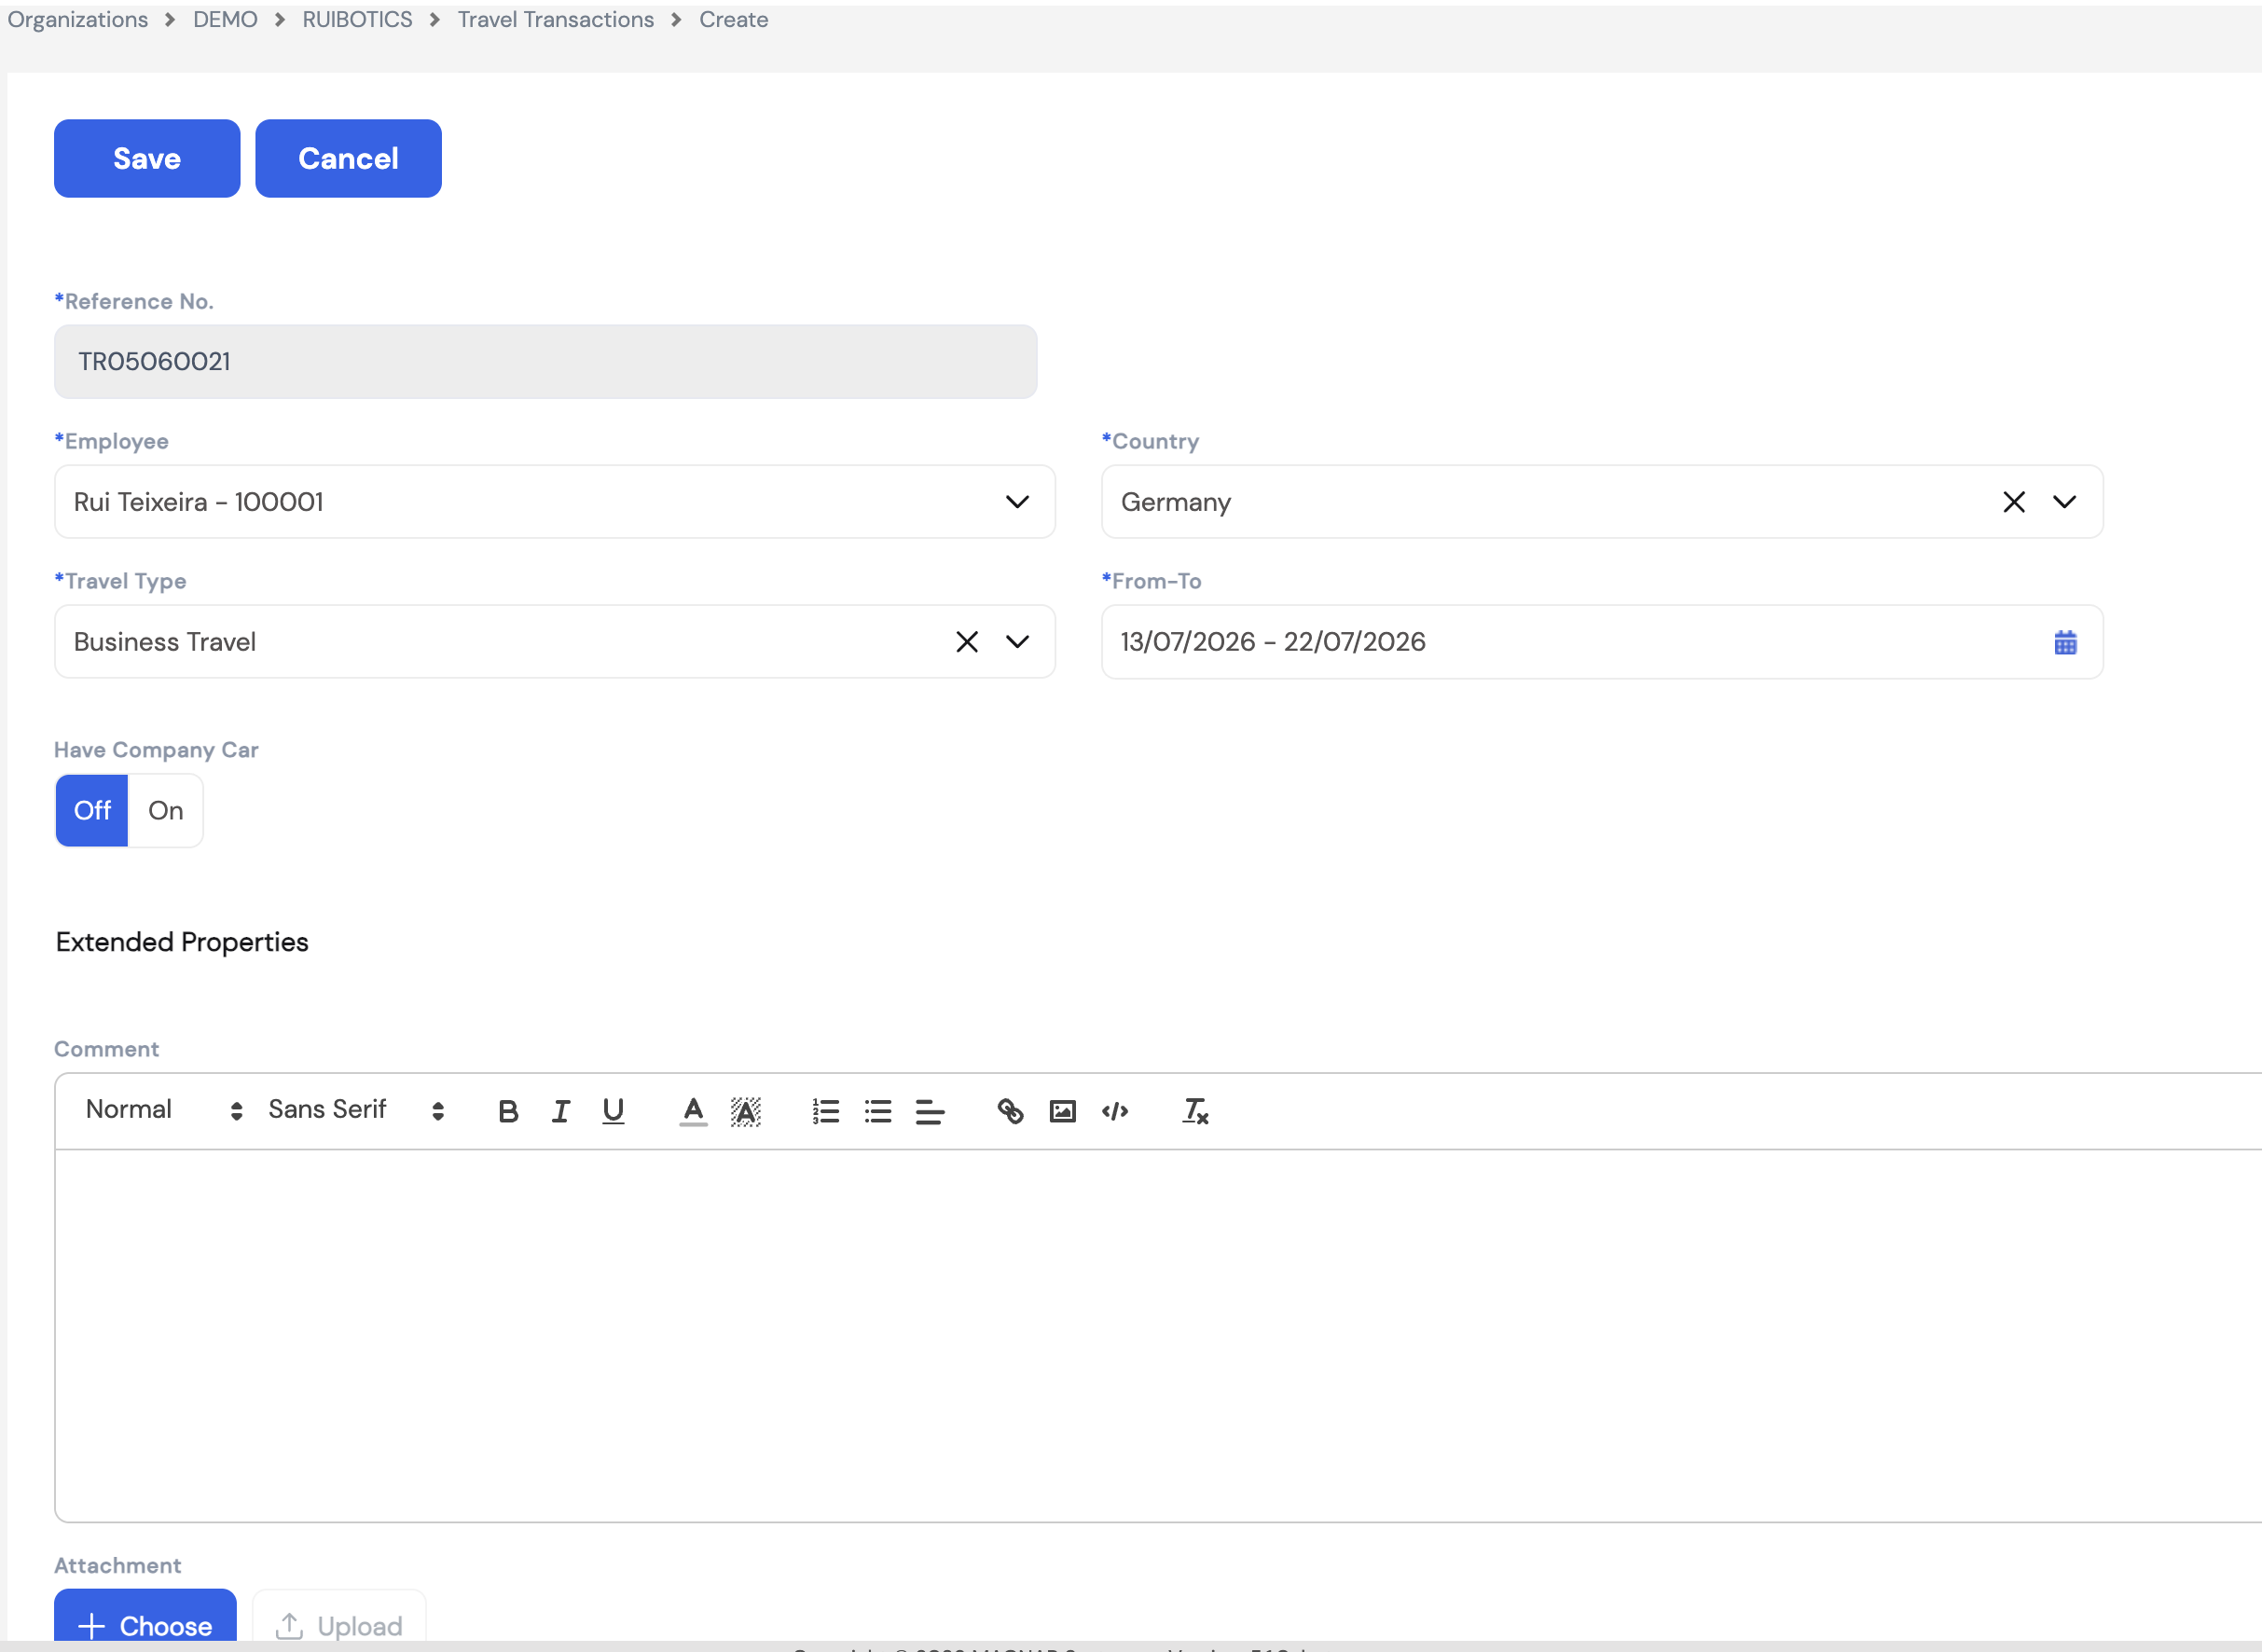
| Field | Description | Required |
|---|---|---|
| Reference No. | Auto-generated unique reference number for this travel record (e.g., TR05060021) | Auto |
| Employee | Select the employee who is travelling | Required |
| Country | The destination country for the trip — used to determine the applicable per diem rate based on the Per Diem Destinations setup | Required |
| Travel Type | The purpose of the travel (e.g., Business Travel, Training) — determines the type of allowances or policies that apply | Required |
| From–To | The travel date range — from departure date to return date. The system calculates the number of travel days based on this range. | Required |
| Have Company Car | Toggle — set to On if the employee is using a company vehicle during the trip. May affect transportation allowance eligibility. | Optional |
| Comment | A rich-text field for additional notes, trip details, or justification for the travel | Optional |
| Attachment | Upload supporting documents such as flight bookings, hotel confirmations, or training invitations using the + Choose button | Optional |
Travel transactions created directly by HR bypass the ESS approval workflow. Ensure all necessary manager approvals have been obtained before entering the record manually.
21.5 Overtime Transaction
The Overtime Transaction sub-module allows HR administrators to record overtime hours worked by employees. Navigate to Employee Transactions → Overtime Transaction and click + New to create a record.
Overtime is calculated by the Overtime Plugin (Section 12.6) during payroll runs. The plugin multiplies the recorded hours by the overtime rate configured for the overtime type — returning the weighted hours to be compensated. Overtime rules, rates, and daily/monthly hour limits are defined in the overtime setup and may vary based on company policy and applicable labor law.
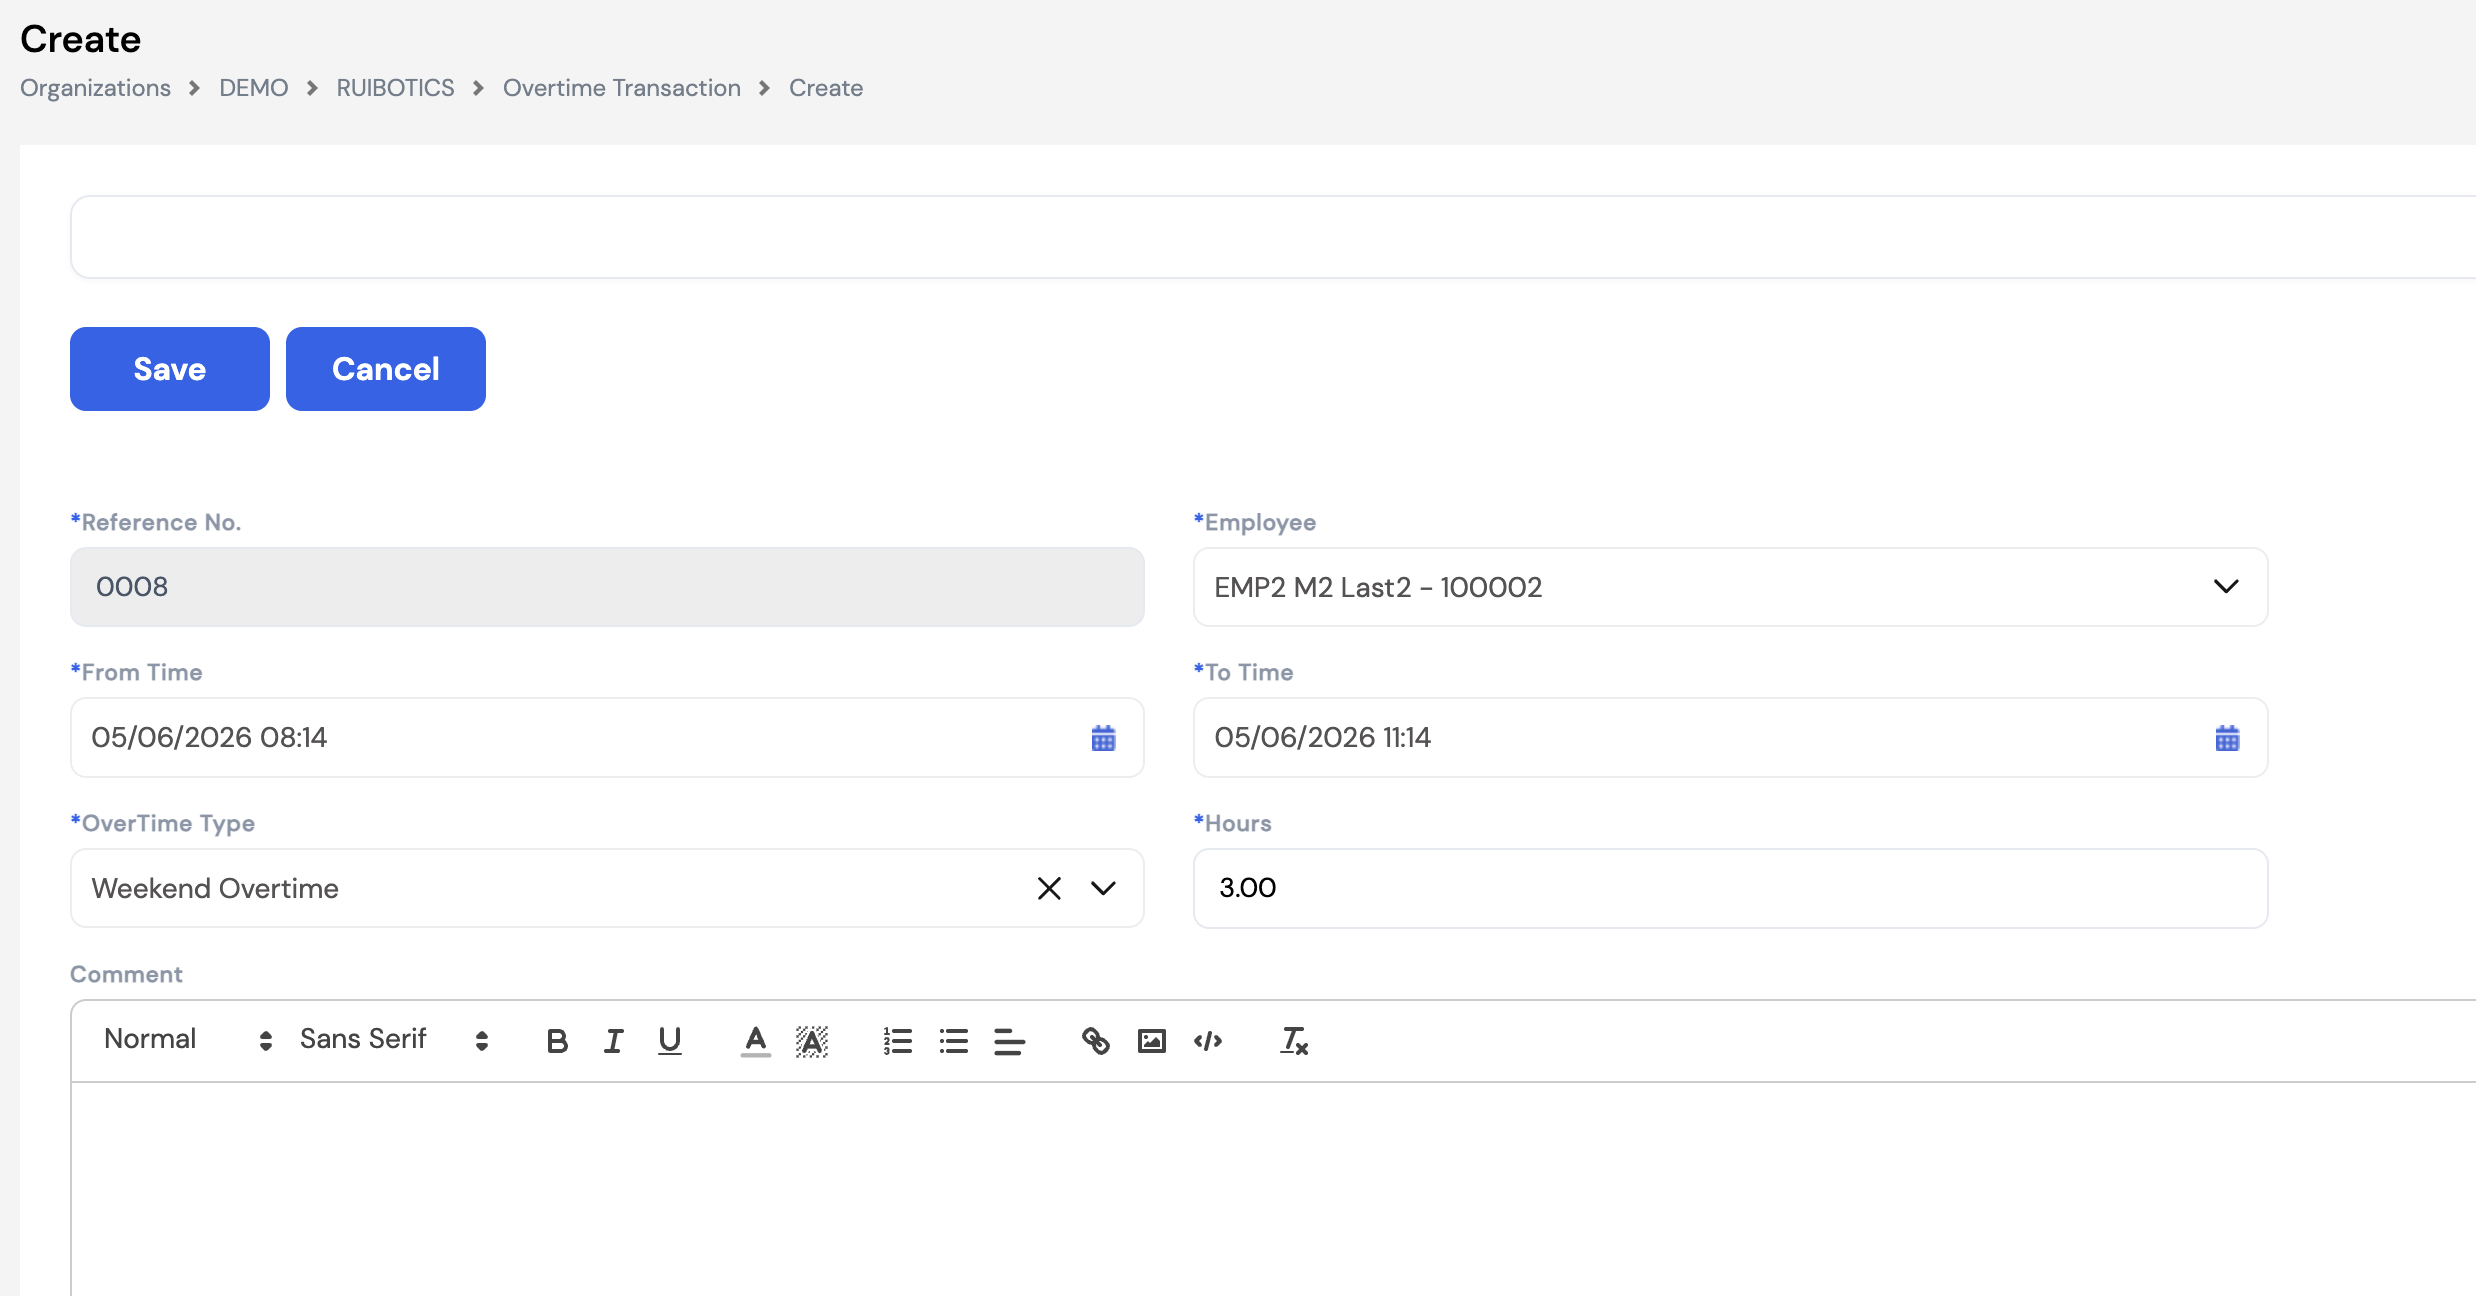
| Field | Description | Required |
|---|---|---|
| Reference No. | Auto-generated unique reference number for this overtime record (e.g., 0008) | Auto |
| Employee | Select the employee who worked the overtime | Required |
| From Time | The date and time when the overtime period started (e.g., 05/06/2026 08:14) | Required |
| To Time | The date and time when the overtime period ended (e.g., 05/06/2026 11:14) | Required |
| OverTime Type | Select the overtime category (e.g., Weekend Overtime, Public Holiday Overtime, Regular Overtime). The type determines the applicable rate multiplier configured in the overtime setup. | Required |
| Hours | The number of overtime hours — auto-calculated from the From Time and To Time difference. Can be manually adjusted if needed. | Required |
| Comment | Free-text notes or justification for the overtime entry | Optional |
Overtime limits and rates. Depending on company policy and labor law, overtime may be subject to daily or monthly hour caps. Different overtime types may carry different rate multipliers (e.g., 1.5× for weekday overtime, 2× for public holidays). These rules are configured in Section 23.2.1 — OverTime Type and enforced automatically during payroll processing.
Overtime transactions created directly by HR bypass the ESS approval workflow. Ensure all necessary manager approvals have been obtained before entering the record manually.
22. Payroll Process Tool
The Payroll Process Tool is the core module for executing all payroll-related financial operations in Magnar HCM. It is accessed from the left navigation menu under Payroll Process Tool, which expands to reveal the following sub-modules:
- Periodic Movement — The place to add manual payroll adjustments and review the results of the payroll run after execution
- Payroll Generation — Generate and review payroll output, payslips, and payment files
- Payroll History by Period — View historical payroll runs by period
- Off-Cycle Periodic Movement — Run off-cycle payroll for specific situations (e.g., mid-month joiners, leave payouts)
- Employee Exit — Process final settlement payroll for departing employees
- Off-Cycle Leave Process Wizard — Used to pay the employee's leave salary in advance before going on vacation. This is applicable in specific countries only where labor law requires leave salary to be paid prior to the leave period.
Restricted access. The Payroll Process Tool is only accessible to users with the appropriate payroll processing roles (e.g., Payroll Owners). Unauthorized access to this module is prevented by the security group configuration. Contact your system administrator if you require access.
What payroll processing does. Running payroll through this module calculates all employee earnings, deductions, and net pay for a given period. The output is used to:
- Generate payslips for employees
- Create bank transfer files for salary disbursement
- Generate accounting vouchers and journal entries to be posted to the ERP system
- Record payroll liabilities such as social security, income tax, and EOS provisions
22.1 Periodic Movement
Periodic Movement is one of the most important screens in the Payroll Process Tool. It serves two key purposes:
- Before payroll execution — Add manual adjustments (variable elements, one-off payments, corrections) for the current payroll period, either manually or via Excel upload.
- After payroll execution — Review payroll results, check element values per employee, export to Excel for verification, review accounting vouchers, and post or close the payroll period.
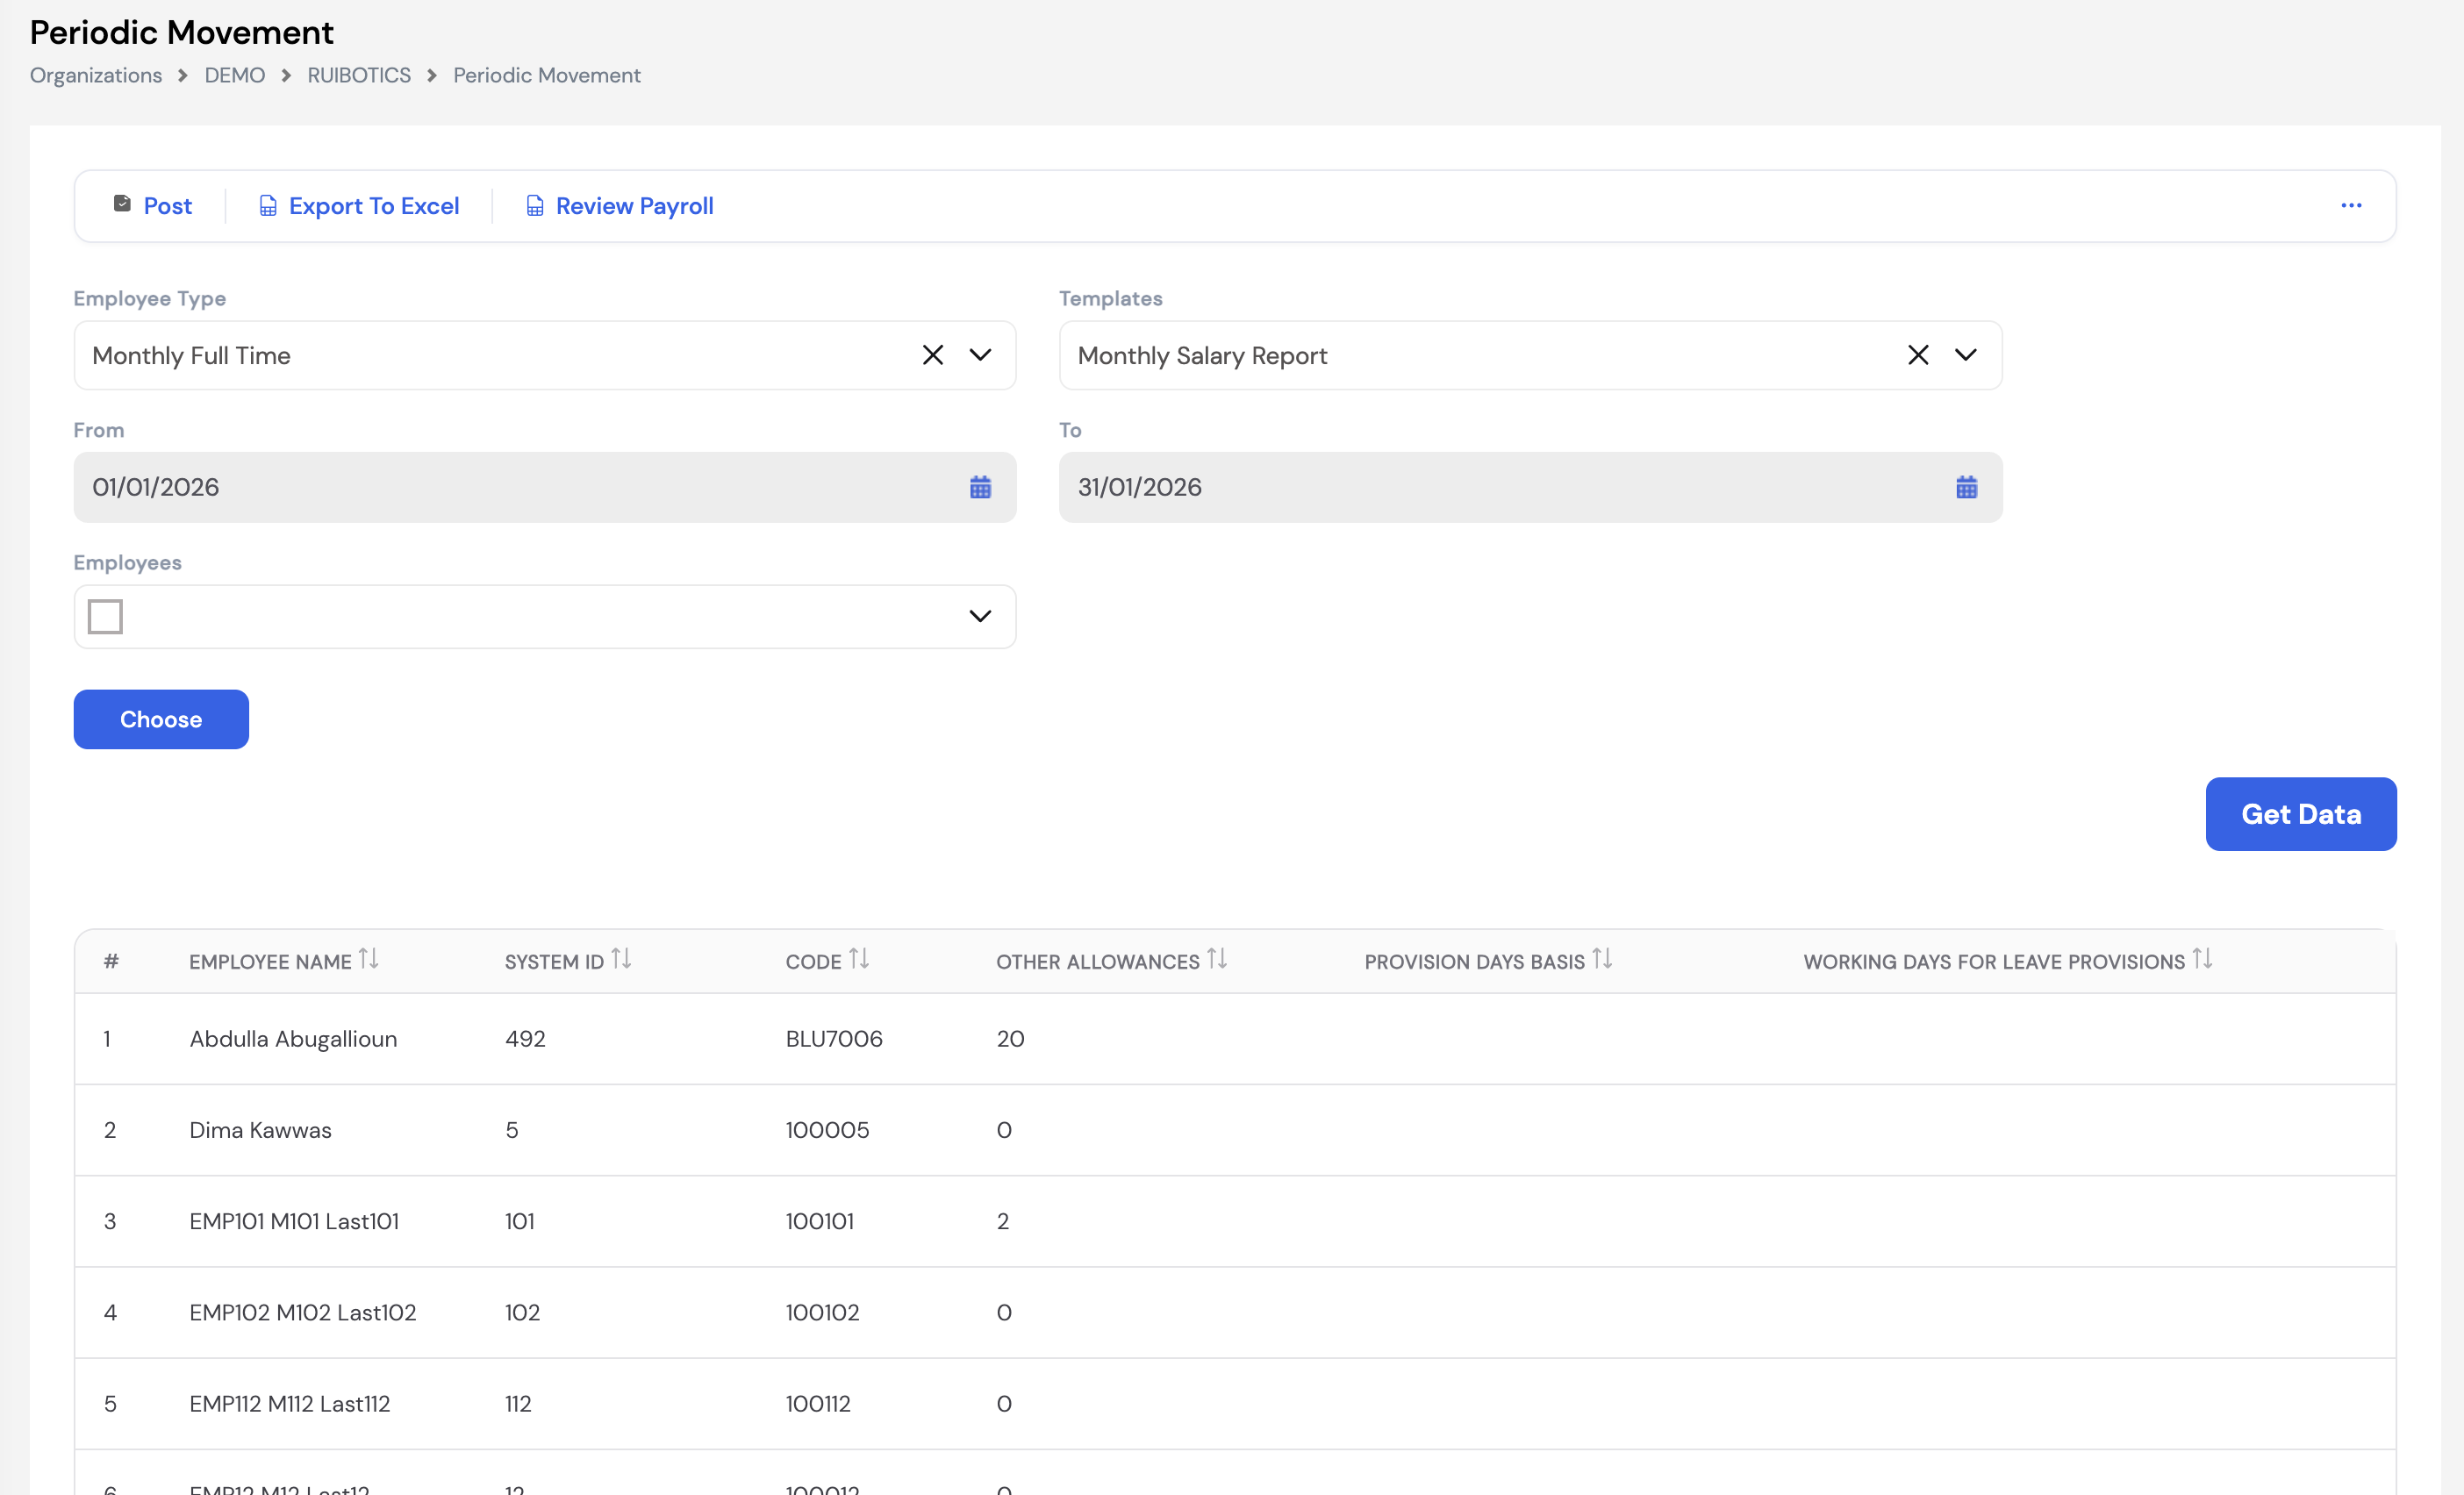
22.1.1 Filtering and Loading Data
Use the filters at the top of the screen to load the payroll data for the desired period and employee group, then click Get Data.
| Filter | Description |
|---|---|
| Employee Type | Select the employee type group to load (e.g., Monthly Full Time). Payroll is processed per employee type — run separately for each group if needed. |
| Templates | Select the payroll report template to use when reviewing or exporting results (e.g., Monthly Salary Report) |
| From / To | The payroll period date range — auto-populated based on the selected period. Read-only once the period is set. |
| Employees | Optionally filter to one or more specific employees. Leave blank to load all employees of the selected type. |
| Choose | Open the employee selector to pick specific employees for a targeted review or adjustment |
22.1.2 Adding Manual Adjustments (Before Payroll Run)
Before payroll is executed, the Periodic Movement screen allows payroll administrators to enter or upload variable element values — such as bonuses, commissions, penalties, or any other manually entered pay component — for the current period.
- Manual entry: Click on the relevant cell in the results grid and enter the value directly.
- Excel upload: Use the Export to Excel button to download the template, fill in the adjustments, and re-upload the file to apply all changes at once — useful for bulk updates.
Reverting a payroll run is required before making changes. If payroll has already been executed and you need to make corrections, the payroll run must first be reverted before any manual adjustments can be made. You cannot edit values in a processed payroll period without reverting first.
22.1.3 Reviewing Results (After Payroll Run)
After payroll is executed, return to the Periodic Movement screen to review the calculated results for each employee. The grid displays all pay elements and their computed values, allowing you to verify totals before posting.
- Click Export to Excel to download the full payroll results for detailed review and audit.
- Click Review Payroll to view the generated accounting vouchers and verify the payroll journal entries before posting to the ERP.
22.1.4 Posting and Closing the Payroll
Once the payroll results have been reviewed and approved, click Post to finalize the period. Posting closes the payroll run and triggers the creation of accounting vouchers to be sent to the ERP system. Depending on the company's configuration, the posting action may be subject to an approval workflow before it is finalized.
Once a payroll period is posted and closed, it cannot be edited without reverting. Always ensure all adjustments and reviews are complete before posting.
22.2 Payroll Generation
Payroll Generation is the core engine of the payroll process. This is where the actual payroll calculation is executed — computing all earnings, deductions, and net pay for each employee based on their salary structure, manual adjustments, transactions, and configured pay elements.
Payroll can be generated based on predefined payroll periods — monthly, bi-weekly, or any other frequency configured for the company. You can execute payroll for all employees of a selected type, or filter down to a specific employee, cost center, branch, project, or department using the available filters.
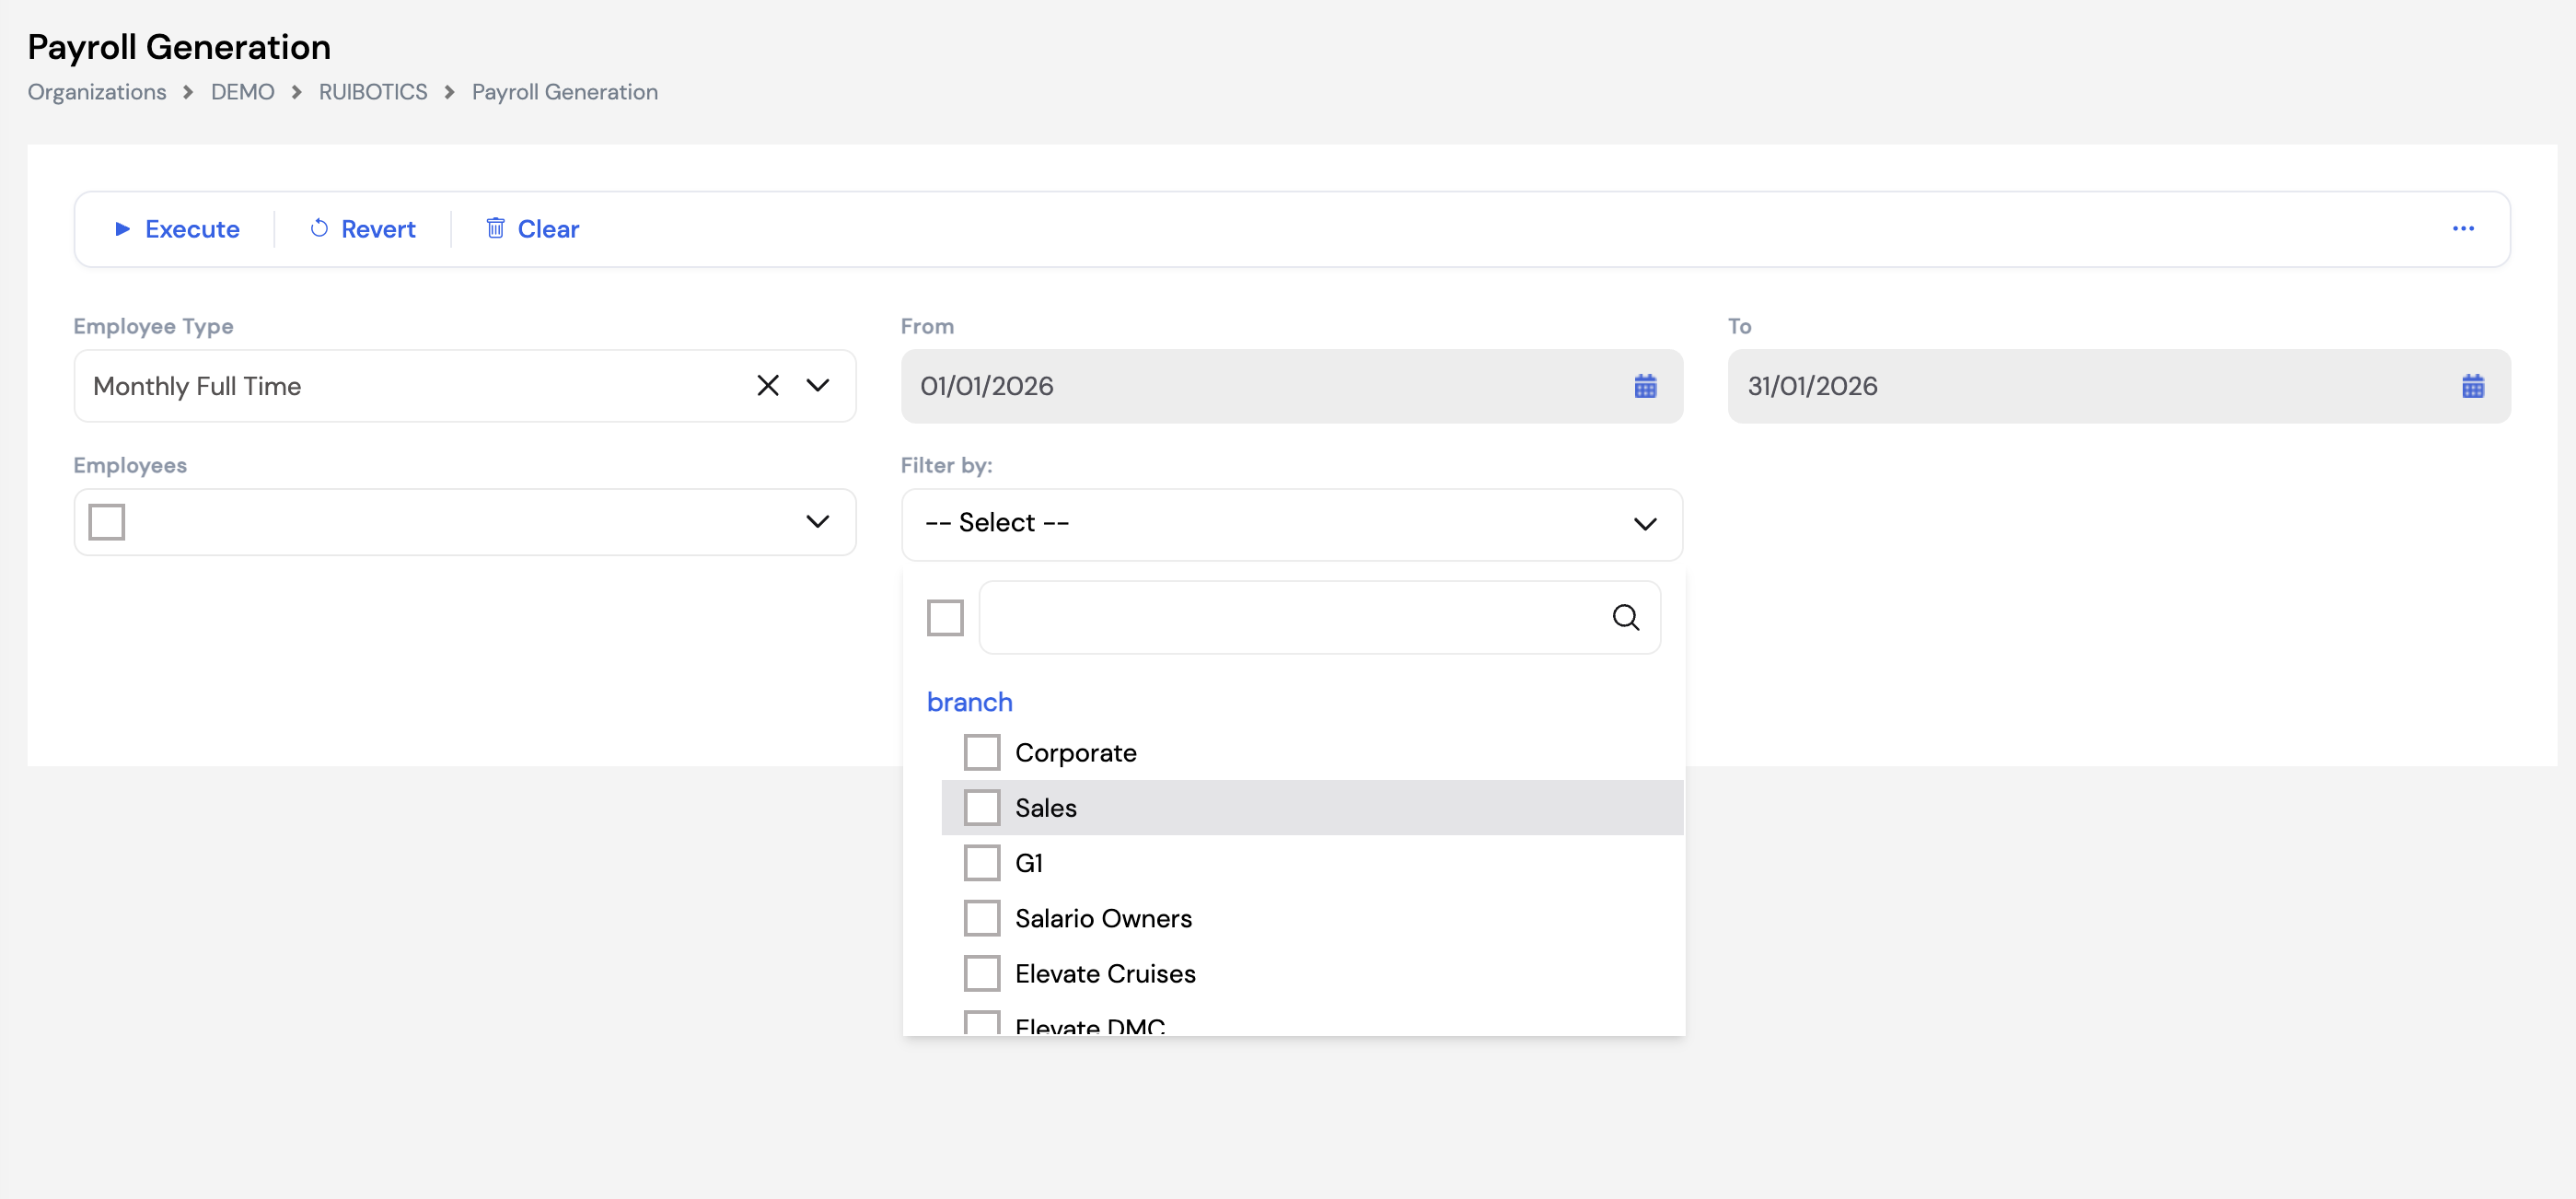
22.2.1 Filters
| Filter | Description |
|---|---|
| Employee Type | Select the employee type group to run payroll for (e.g., Monthly Full Time). Each employee type is processed separately. |
| From / To | The payroll period date range — defines the period for which payroll is being calculated |
| Employees | Optionally limit the run to one or more specific employees |
| Filter By | Filter payroll execution by a cost center dimension — such as Branch, Project, Department, or Sister Company. Useful for running payroll for a specific business unit only. |
22.2.2 Execute, Revert, and Clear
Three key actions are available at the top of the screen:
| Action | Description |
|---|---|
| ▶ Execute | Runs the payroll calculation for the selected period, employee type, and filters. All pay elements — fixed, variable, and plugin-based — are calculated and the results are stored for review in Periodic Movement. |
| ↺ Revert | Reverses the payroll calculation results but preserves all manual adjustments entered in Periodic Movement. Use Revert when you need to re-run payroll after a correction without losing the manual data already entered. You can revert and re-execute as many times as needed. |
| 🗑 Clear | Removes the payroll calculation results and deletes all manual adjustments from Periodic Movement for the selected period. Use Clear only when you want a completely fresh start — all manually entered data will need to be re-entered after clearing. |
Revert vs. Clear — use with caution. Revert is the safe option for corrections — it keeps your manual adjustments intact. Clear wipes everything and should only be used when you intentionally want to discard all manual data for the period. Always confirm with your team before using Clear.
You can execute and revert the payroll run as many times as needed before posting. Use this to validate results, make corrections in Periodic Movement, and re-execute until the payroll is correct.
22.3 Payroll History by Period
Payroll History by Period allows payroll administrators to look up and review the results of previously processed payroll periods. It provides a granular view of payroll element values per employee across past periods, which can be filtered by employee type, generation type, period, and individual employee.
This is not a reporting tool. Payroll History by Period is a data analysis aid for payroll administrators — designed to help compare values across periods, investigate discrepancies, and validate results. For formal payroll reports, use the Financial Reports module.
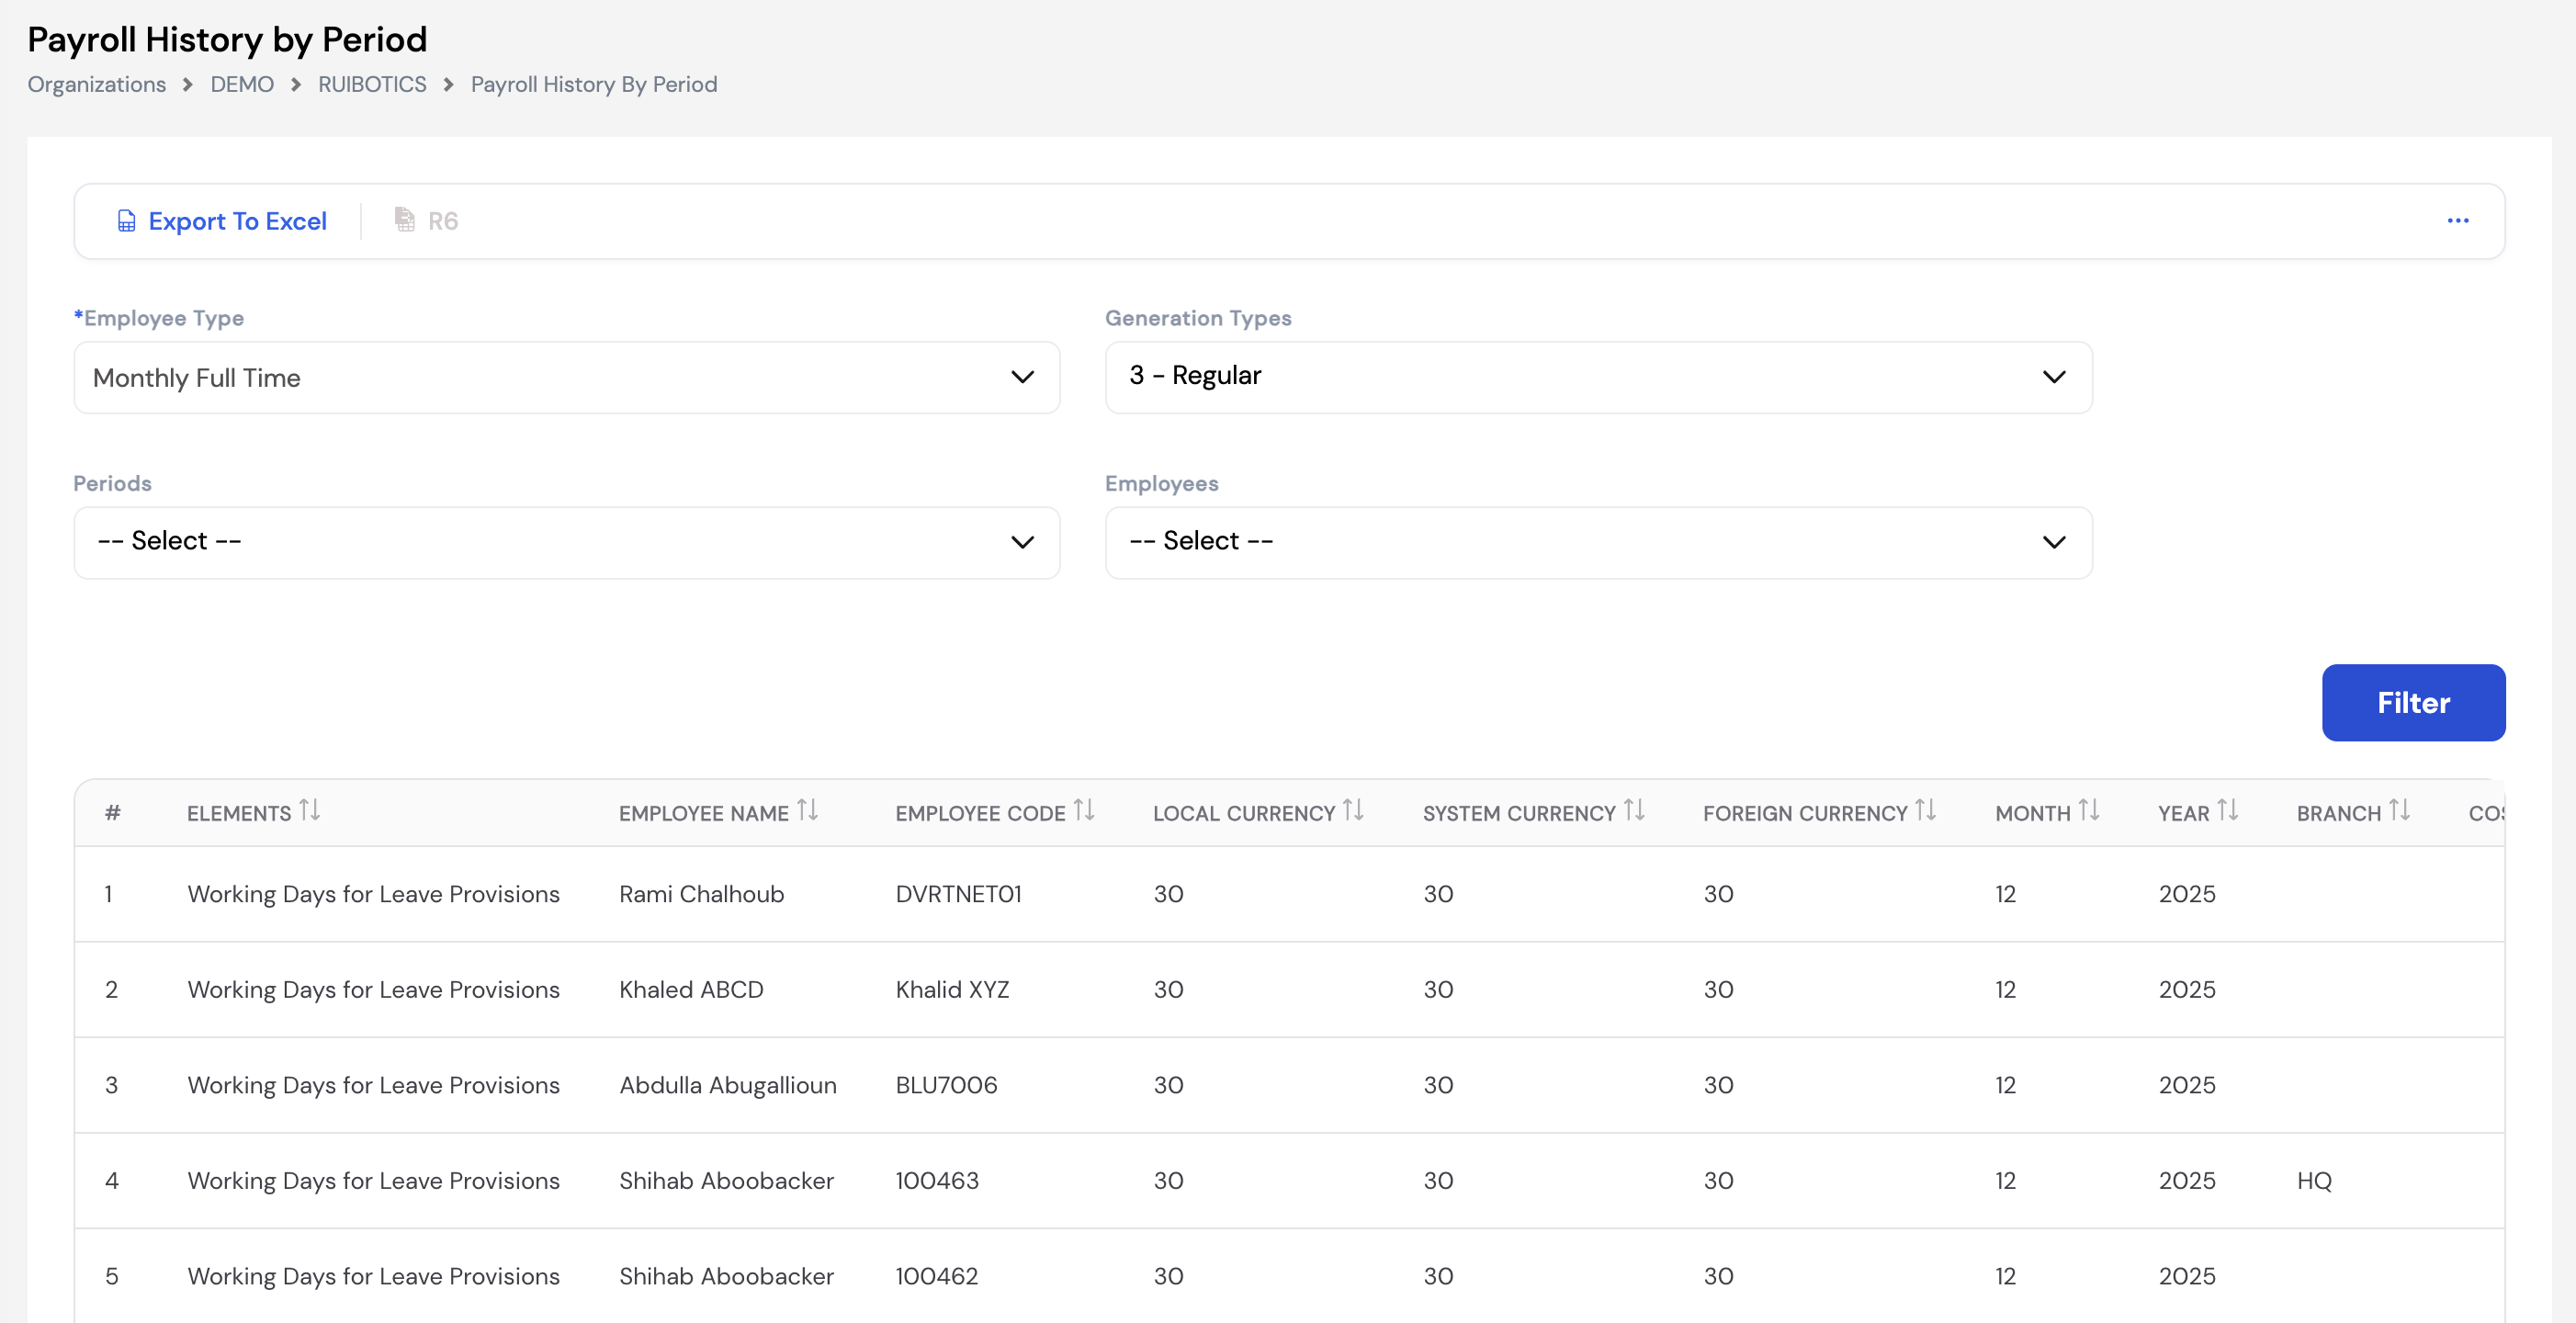
| Filter | Description |
|---|---|
| Employee Type | Select the employee type group to query (required) |
| Generation Types | Filter by payroll generation type (e.g., 3 – Regular, Off-Cycle, Final Settlement) |
| Periods | Select the historical period to view |
| Employees | Optionally filter to a specific employee |
The results grid displays one row per pay element per employee, showing values in:
- Local Currency — the amount in the company's base currency
- System Currency — the system-level currency amount
- Foreign Currency — the amount in the element's foreign currency (if applicable)
Additional columns include Month, Year, and Branch for further breakdown.
Use Export to Excel to download the filtered results for offline analysis, comparison across periods, or sharing with finance teams. The R6 button provides an alternative report format export.
22.4 Off-Cycle Periodic Movement
Off-Cycle Periodic Movement allows payroll administrators to run a supplementary payroll at any point in time — outside the regular monthly payroll cycle. Common use cases include paying a bonus, processing a commission, correcting a previous payroll period, or any other payment that needs to be made independently of the standard payroll schedule.
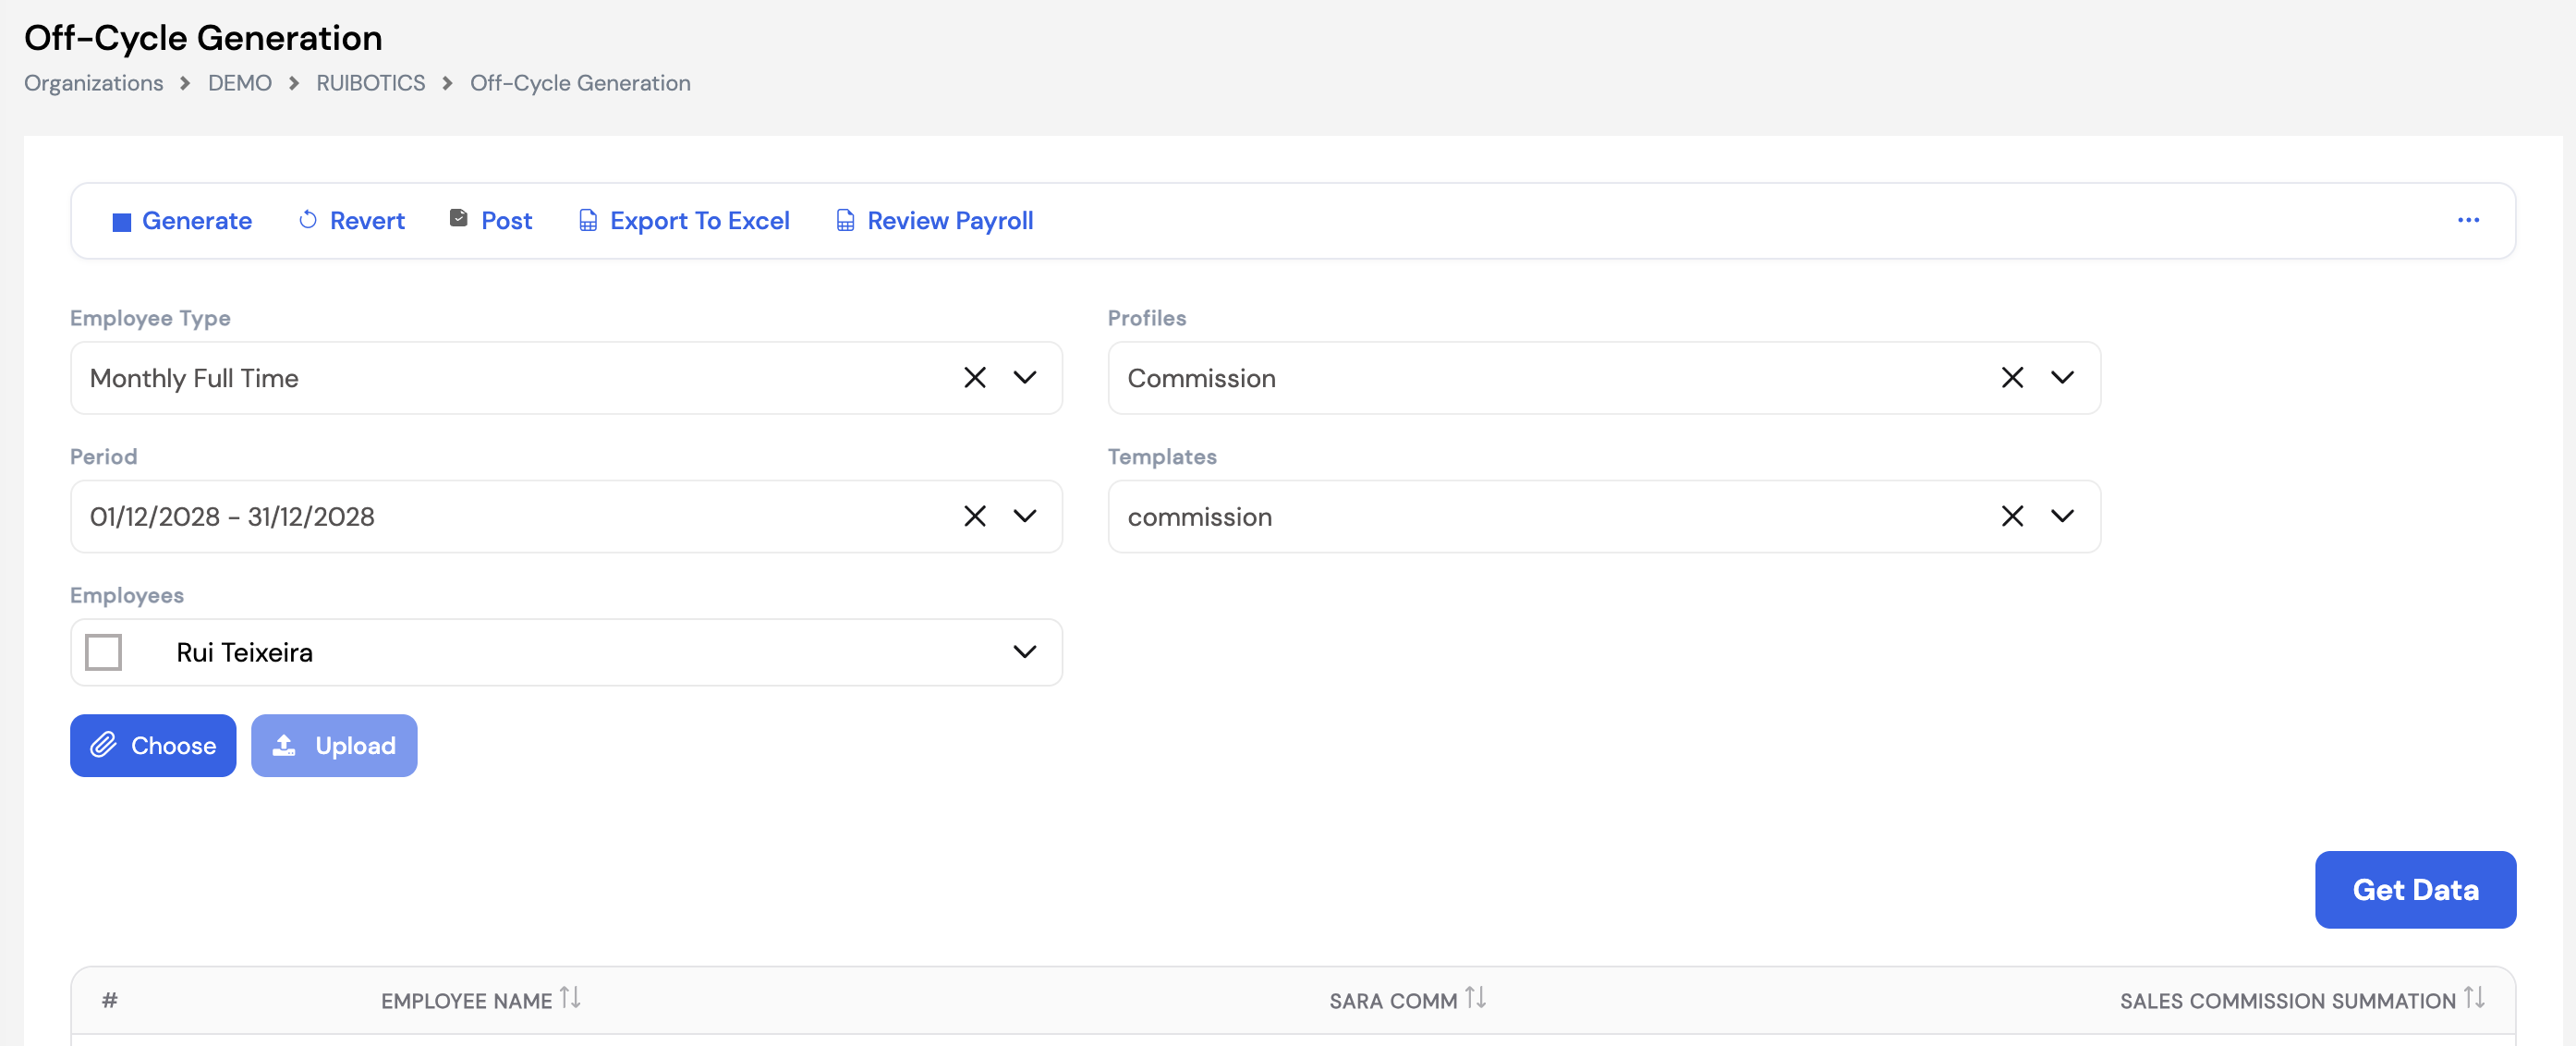
| Filter / Field | Description |
|---|---|
| Employee Type | The employee type group to include in this off-cycle run |
| Profiles | Select the off-cycle payroll profile to use (e.g., Commission) — defines which pay elements are included in this specific off-cycle run |
| Period | The payroll period this off-cycle run is associated with |
| Templates | The report template used for reviewing and exporting the off-cycle payroll output |
| Employees | Select specific employees to include, or leave blank for all employees of the selected type |
| Choose / Upload | Select employees manually or upload a file with employee and element values for bulk entry |
Access to off-cycle payroll must be carefully controlled. Unlike regular payroll — which can only be closed once per period — off-cycle payroll can be run multiple times for the same period and employee. This means the same payment could potentially be processed more than once if access is not properly restricted. Ensure only trusted, authorized users have permission to execute off-cycle payroll runs.
Revert in off-cycle clears manual adjustments. Unlike regular payroll where Revert preserves manual adjustments, Revert in off-cycle payroll also clears all manually entered data. Any manual adjustments will need to be re-entered after reverting an off-cycle run.
We strongly recommend multi-level approval for closing off-cycle payroll runs. Requiring a second or third approver before posting significantly reduces the risk of duplicate or unauthorized payments.
22.5 Employee Exit
Employee Exit is the module used to process the final settlement and last salary for employees who have been terminated or have resigned. It calculates all outstanding pay components — including the last month's salary, accrued leave, end of service entitlement, and any other applicable elements — based on the selected exit profile.
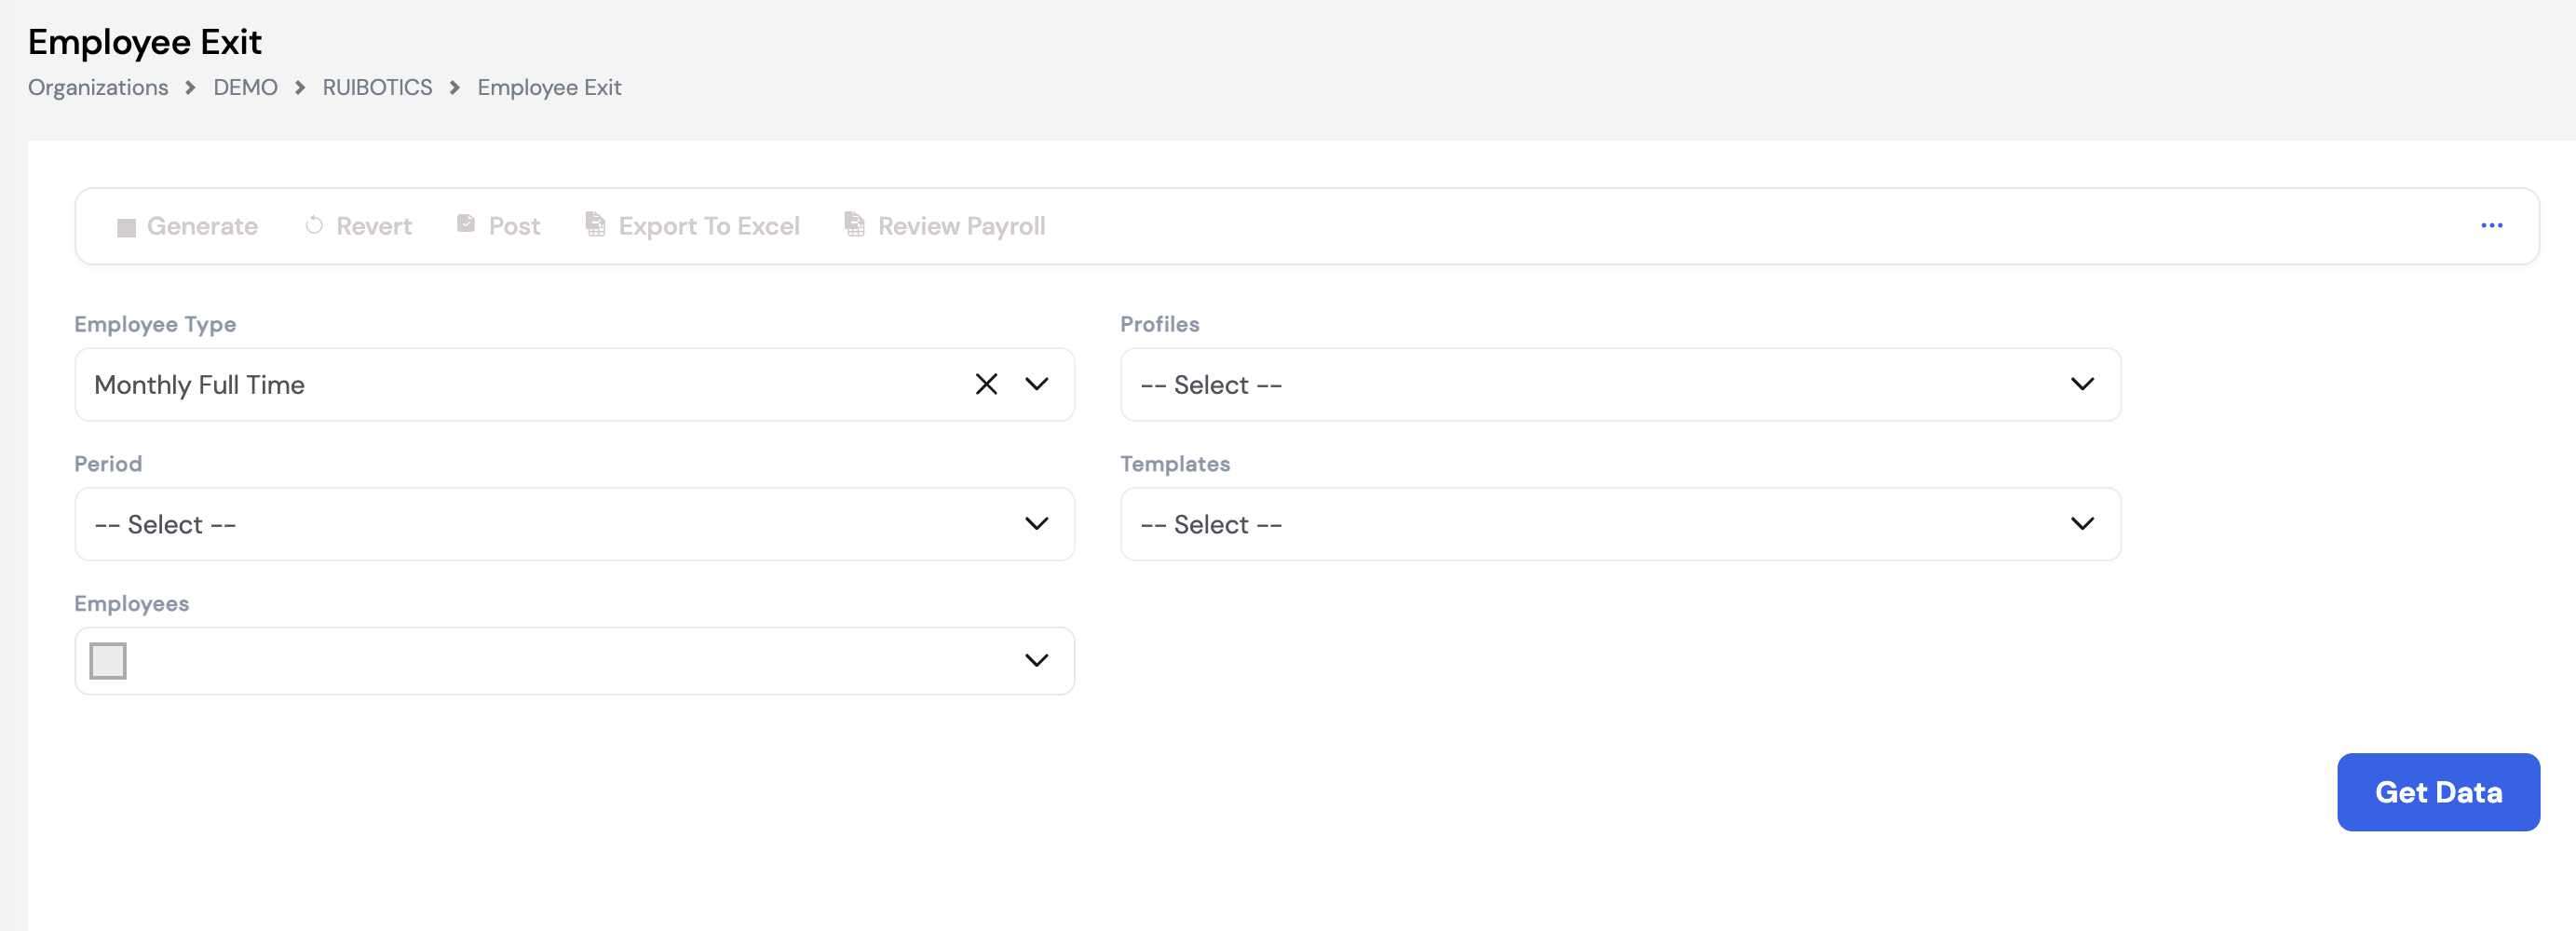
| Filter / Field | Description |
|---|---|
| Employee Type | The employee type group to include in this exit payroll run |
| Profiles | Select the exit payroll profile — defines which pay elements are included in the final settlement calculation (e.g., last salary, EOS, leave encashment) |
| Period | The period in which the employee's exit was recorded. Only employees terminated within this period will appear in the results. |
| Templates | The report template for reviewing and exporting the final settlement output |
| Employees | Select a specific terminated employee to process, or leave blank to load all employees exited in the selected period |
Only terminated employees appear. When you click Get Data, the system automatically filters to show only employees whose exit has been recorded within the selected period. No active employees will appear in the results.
Once the data is loaded, select the employee(s) to process and click Generate to calculate the final settlement. The same toolbar actions available in off-cycle payroll apply here — Generate, Revert, Post, Export to Excel, and Review Payroll.
Revert clears manual adjustments. Similar to off-cycle payroll, reverting an Employee Exit run will also delete any manual adjustments that were entered for that exit record. Manual data will need to be re-entered after reverting.
As with off-cycle payroll, we recommend applying a multi-level approval process before posting final settlements, given the financial significance and one-time nature of EOS payments.
22.6 Off-Cycle Leave Process Wizard
The Off-Cycle Leave Process Wizard is used to pay an employee's leave salary in advance before they go on vacation. This is a common practice in certain Middle Eastern countries — such as Saudi Arabia and Kuwait — where labor law or company policy requires that employees receive their salary (and sometimes their leave days pay) before departing on annual leave.
The process works as follows: when an employee submits a leave request via ESS and selects the Off-Cycle option, the system flags them as an off-cycle leave requester. The payroll administrator then runs the off-cycle leave payroll 2 to 3 days before the employee's leave starts, settling the employee's pay for that period in advance.
The settlement includes:
- The salary for the days worked in the current month up to the leave start date
- The salary for the leave days themselves
- Any applicable additions or deductions for the period
Only off-cycle leave employees appear. When you click Get Data, only employees who have been flagged as off-cycle leave requesters for the selected period will appear in the results list. Active employees without an approved off-cycle leave request will not be shown.
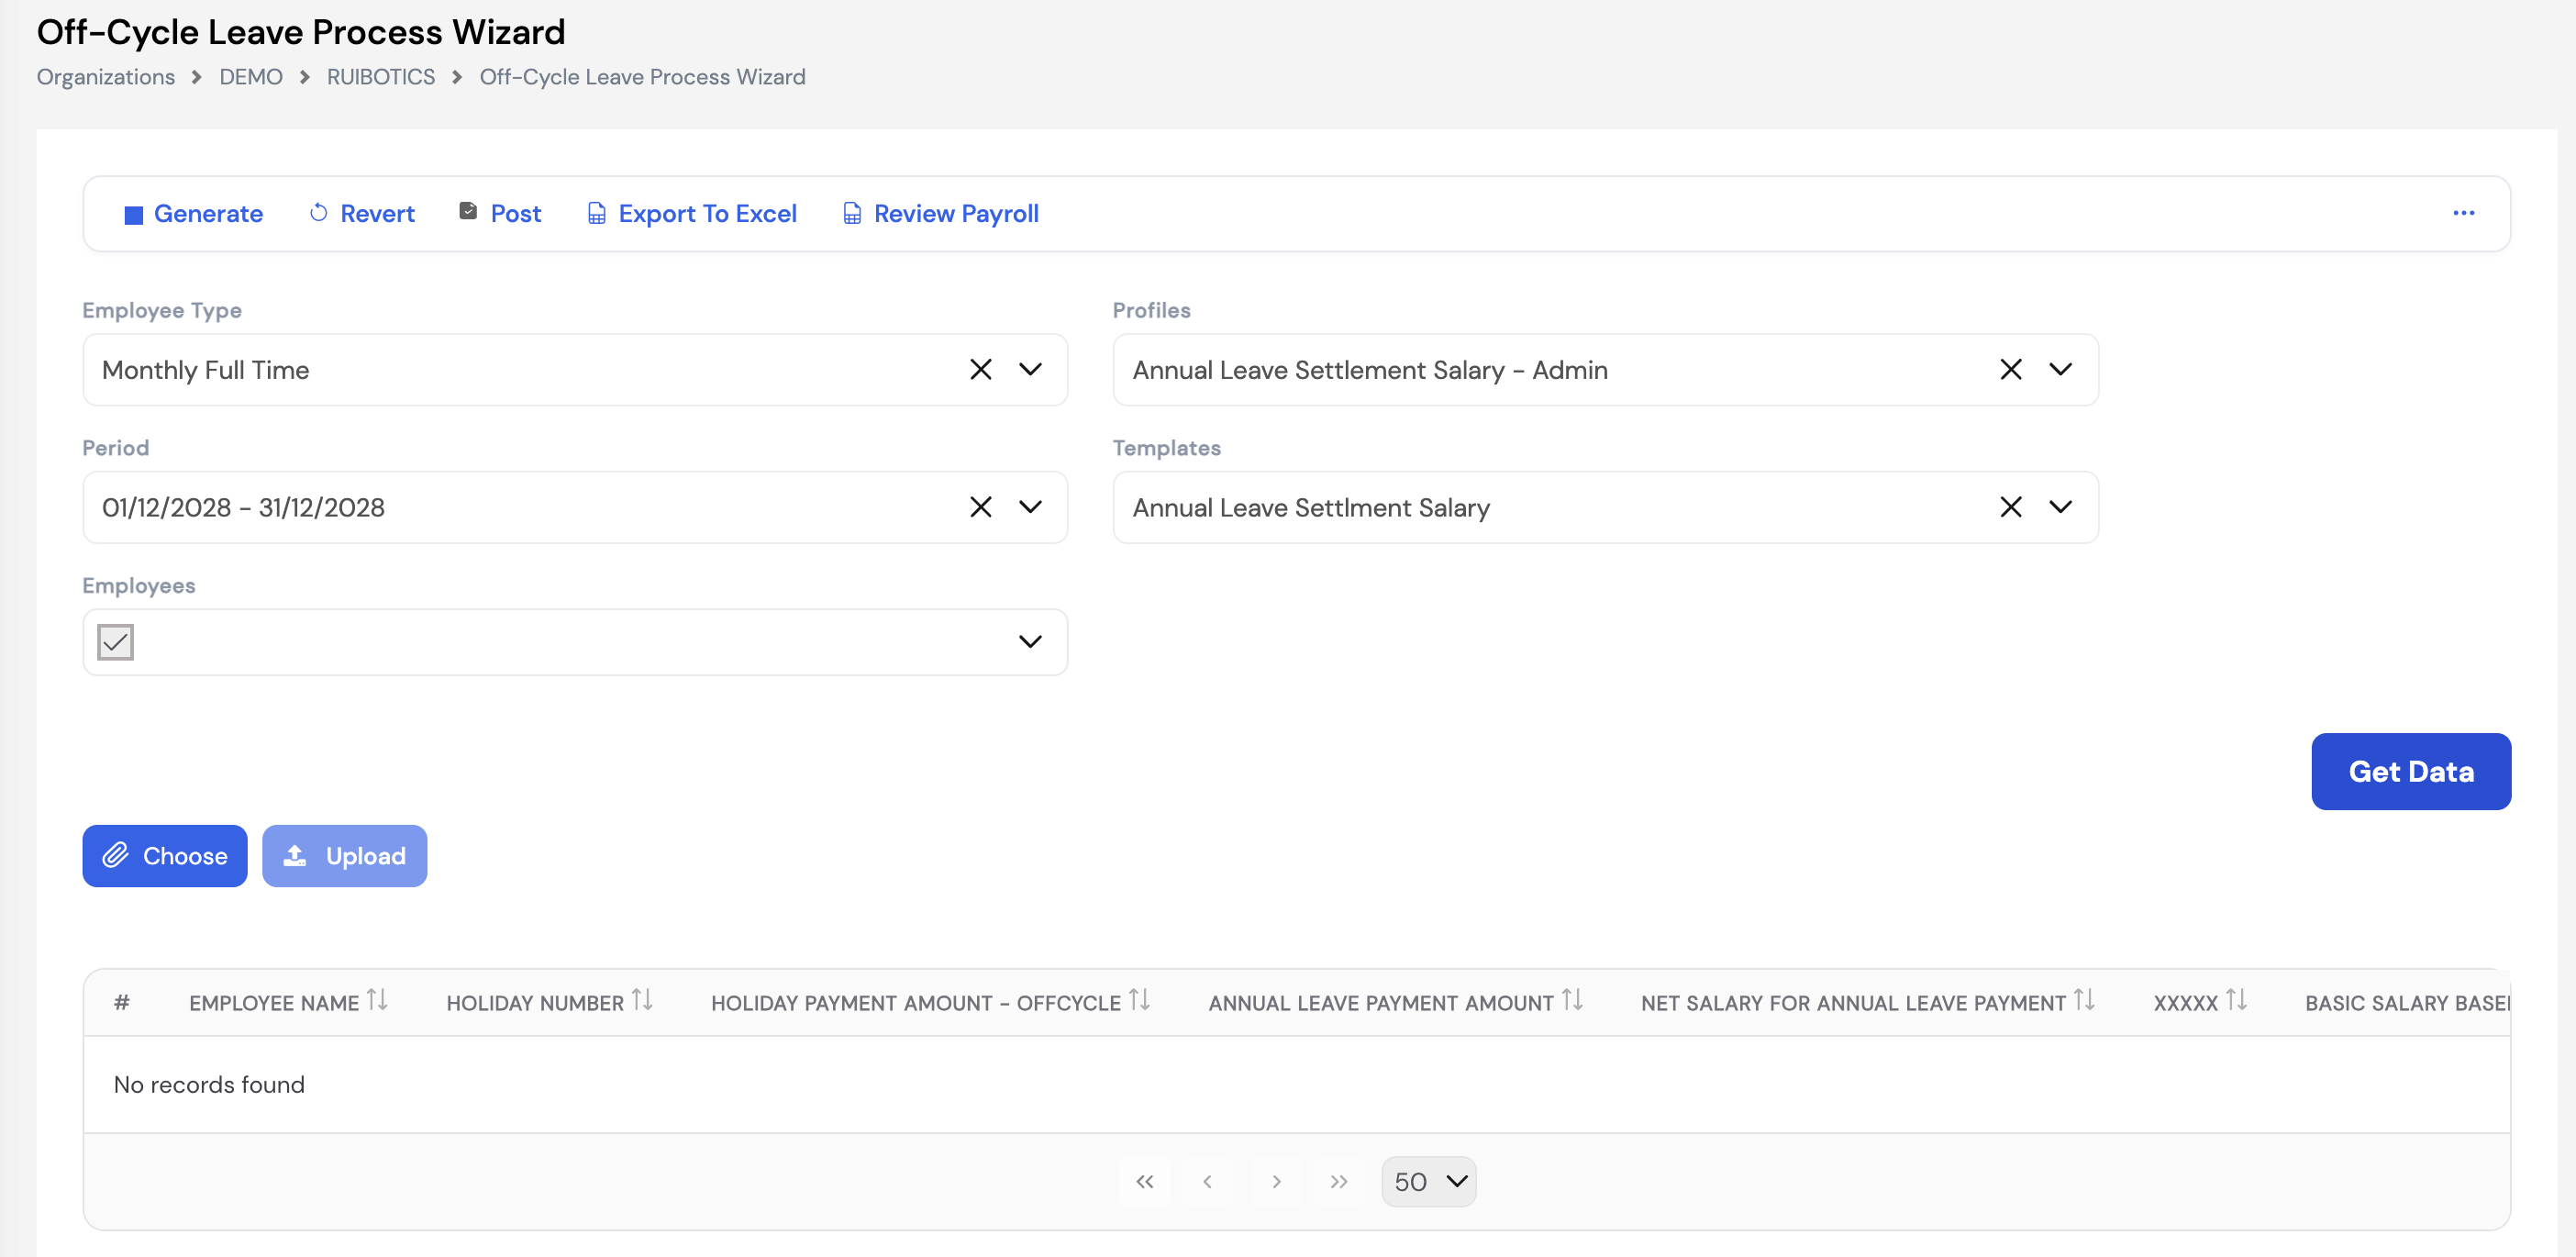
| Filter / Field | Description |
|---|---|
| Employee Type | The employee type group to include in this off-cycle leave run |
| Profiles | Select the off-cycle leave profile (e.g., Annual Leave Settlement Salary – Admin) — defines the elements to include in the advance payment calculation |
| Period | The payroll period the leave falls within |
| Templates | The report template for reviewing the off-cycle leave payroll output |
| Employees | Select the specific employee(s) going on off-cycle leave, or use Choose / Upload to select or bulk-load employees |
Employee suspension and rejoin. Once the off-cycle leave payroll is processed and posted, the employee is automatically temporarily suspended in the system — they will not be included in the regular payroll run while they are on leave. When the employee returns from vacation, HR must apply a Rejoin Transaction to reactivate the employee. Only after the rejoin is recorded will the employee resume appearing in normal payroll runs and start receiving their regular salary again.
Country-specific feature. The Off-Cycle Leave Process Wizard is only applicable in countries or companies where advance leave salary payment is required. If this practice does not apply to your organization, this module can be disregarded.
23. Setup
The Setup module contains all company-level configuration settings for Magnar HCM. This is where administrators define the rules, policies, templates, workflows, and reference data that drive the system's behavior across HR, payroll, attendance, training, and more. It is accessed from the left navigation menu under Setup.
The Setup module is organized into the following sub-sections:
| Sub-Module | Description |
|---|---|
| Organization Setup | Configure organizational structure settings including departments, positions, and related HR policies |
| Attendance Setup | Define attendance rules, shift schedules, and time tracking configurations |
| Training Setup | Set up training types, categories, and training-related configurations |
| Questionnaire Setup | Create and manage questionnaires used in appraisals, surveys, or onboarding workflows |
| Reports | Configure and manage HR and payroll report templates available to users |
| Dashboard Designer | Build and customize dashboard views and analytics panels for the corporate dashboard |
| Calendar | Define working calendars — including working days, weekends, and public holidays — assigned to employees |
| Loan | Configure loan types, maximum amounts, and applicable rules for employee loan management |
| General Request Types | Define the types of general HR requests employees can submit through ESS |
| Templates | Create and manage document and payroll report templates used across the system |
| Period | Define and manage payroll periods (monthly, bi-weekly, etc.) used in payroll generation |
| Profiles | Configure payroll profiles — the sets of pay elements included in regular, off-cycle, exit, and leave settlement payroll runs |
| Workflow Setup | Configure approval workflow rules and conditions for HR and payroll transactions |
| Workflow Designer | Visually design and manage multi-step approval workflows for ESS requests and payroll actions |
| Per Diem | Define per diem daily allowance rates by destination and travel type |
| Employment Letter | Create and manage employment letter templates issued to employees |
| Banks | Configure the banks available for employee bank account assignments and salary transfers |
| Projects | Define projects used for timesheet tracking, worksheet overtime, and cost allocation |
| Fixed Allowances | Configure fixed allowance structures linked to employee types and salary grades |
| Workplaces | Define physical workplace locations used in attendance and time tracking |
| Logs | View system audit logs tracking user actions and changes made across the system |
| Employee Fields | Configure custom fields added to employee profiles for organization-specific data capture |
| Employee Assets | Define the asset types available for assignment to employee profiles (e.g., Laptop, Car, Mobile) |
Each sub-module is covered in detail in the sections that follow. Most Setup configurations should be completed during the initial system implementation and updated only when company policies, structures, or legal requirements change.
23.1 Organization Setup
Organization Setup contains the foundational configurations that define the structural and operational framework of the company within Magnar HCM. It is accessed via Setup → Organization Setup and contains the following sub-sections:
23.1.1 Branch
Branch is the first step in the Organization Setup. Branches represent the physical locations or offices of the company. Each branch is linked to the Branch cost center dimension (Section 13), allowing payroll costs to be allocated per branch during ERP posting. Branches are also assigned to employee profiles to indicate which location the employee belongs to.
| Column | Description |
|---|---|
| ID | System-generated unique identifier for the branch |
| Code | A short code for the branch (e.g., HQ, DXB, RYD) used in reports and cost center mapping |
| Description | The full name of the branch |
| Short Description | An abbreviated label for the branch used in compact displays |
To add a new branch, click + New, enter the Code, Description, and Short Description, then click Save.
Setting up branches is the first step of the Organization Setup. Complete branch configuration before proceeding with Company Structure, Positions, and Jobs — as these may reference branches in their configuration.
23.1.2 Company Structure
Company Structure defines the organizational hierarchy of the company — including departments, branches, units, divisions, sections, or any other grouping that reflects how the company is organized. It is displayed as an interactive org chart showing each unit, its manager, and how units relate to each other through a parent-child hierarchy.
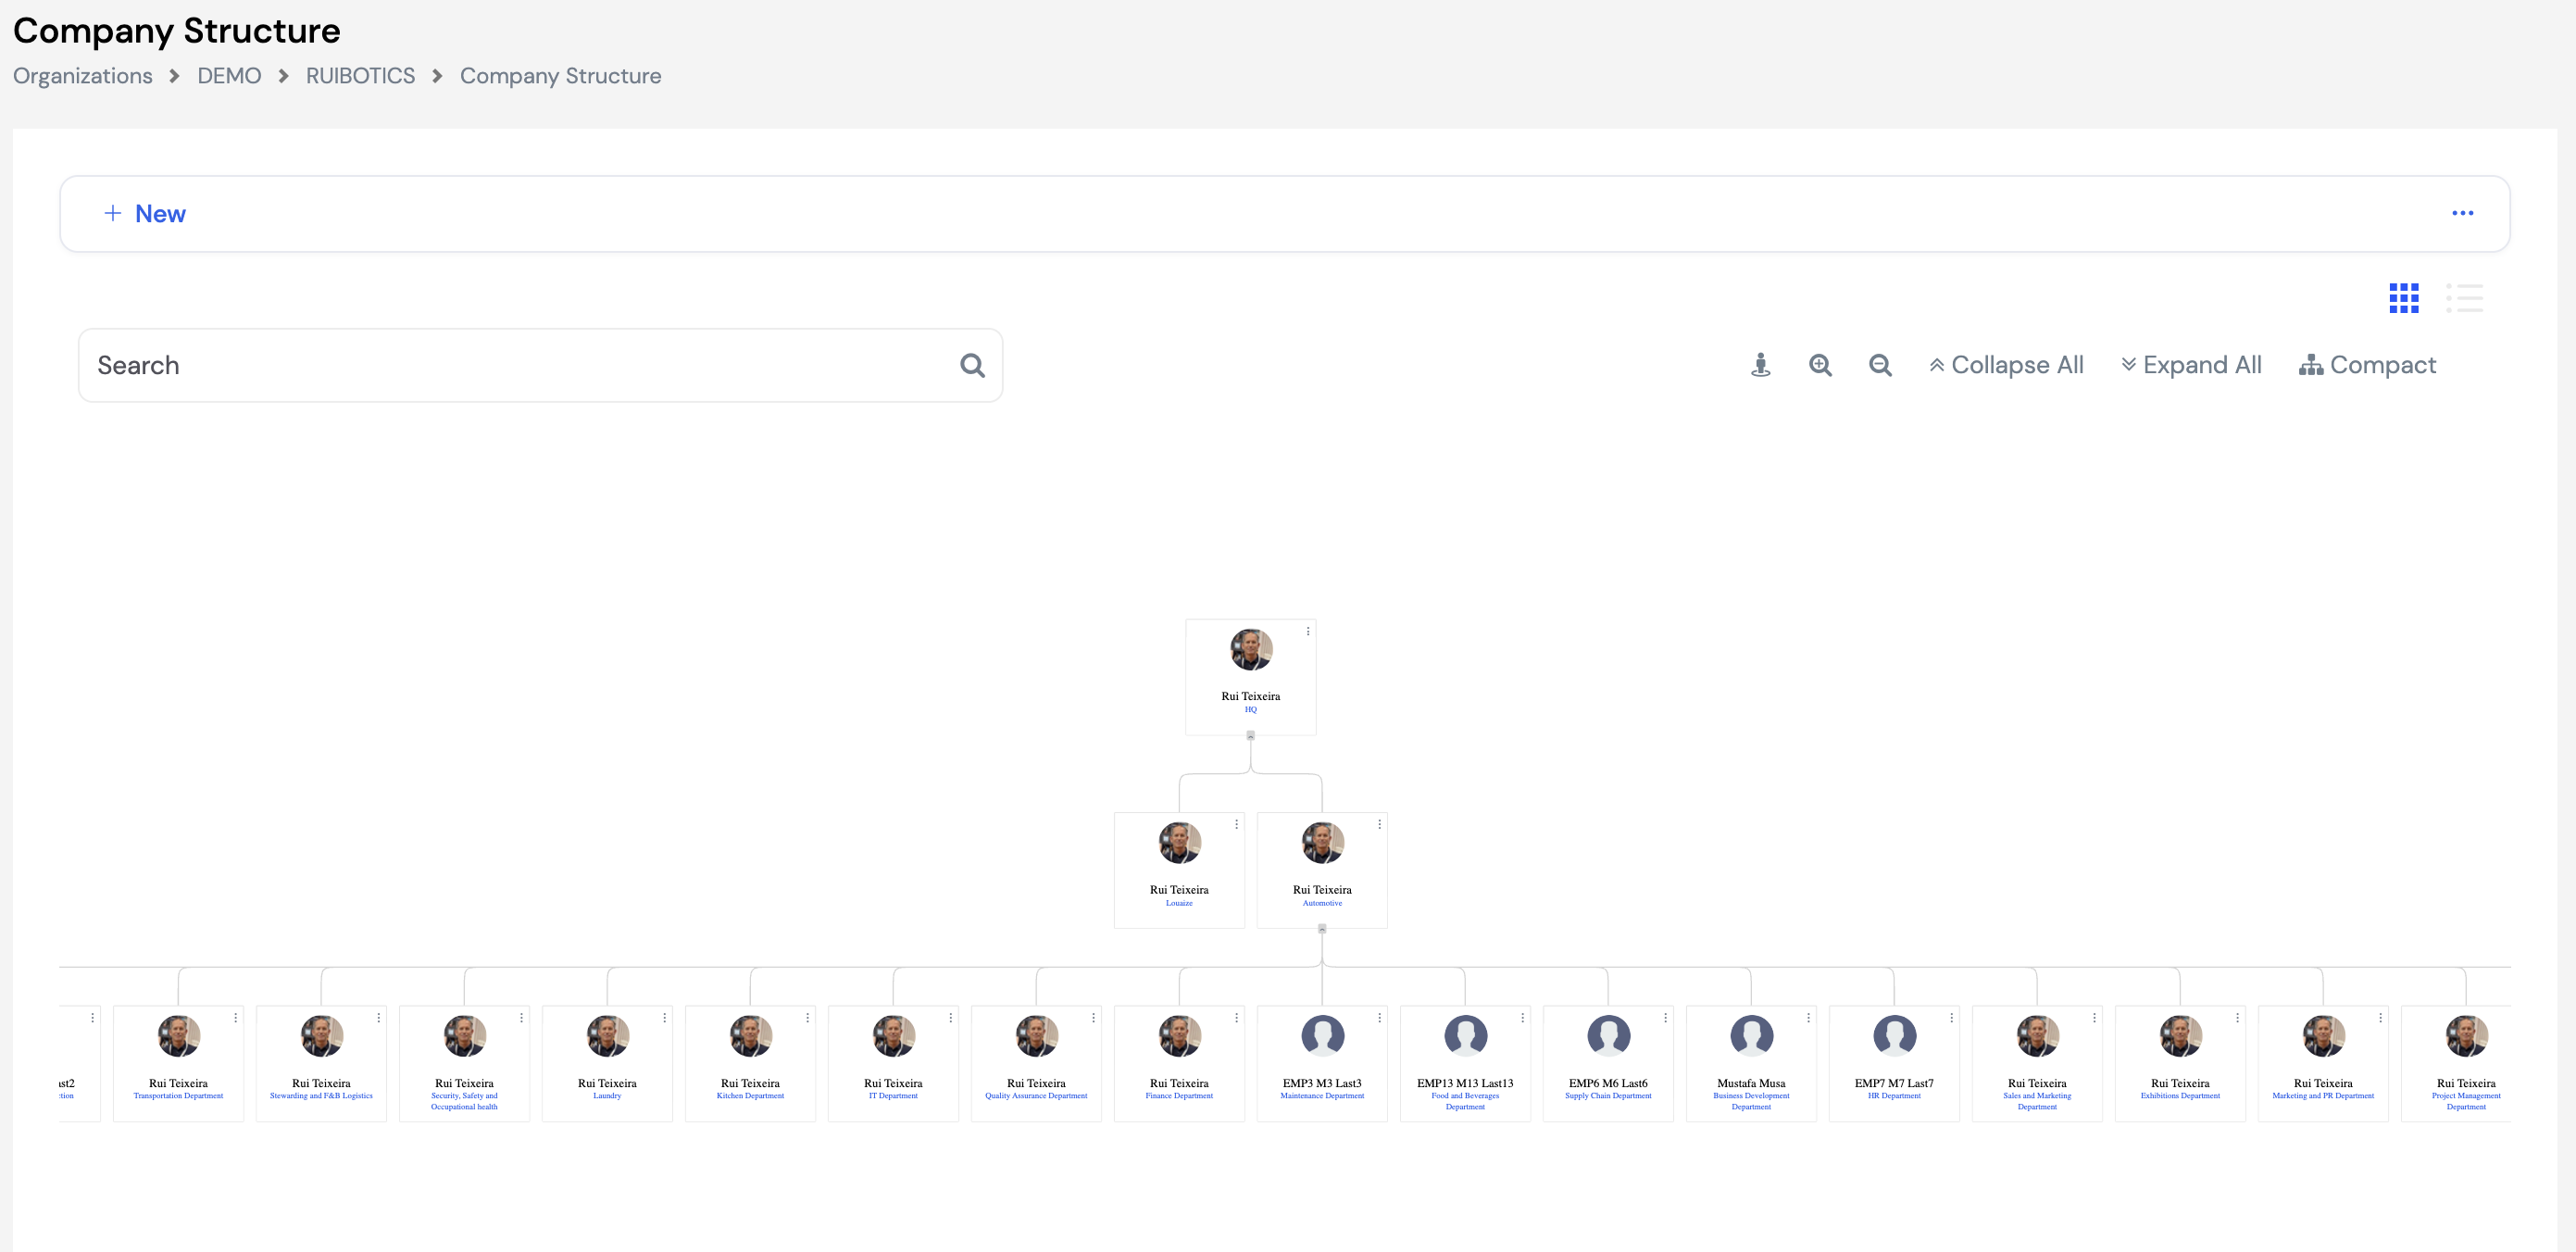
The org chart can be navigated using the toolbar controls: Search to find a specific unit, Collapse All / Expand All to show or hide child nodes, Compact for a condensed view, and the zoom controls to adjust the chart scale. You can also switch between the card view (org chart) and list view using the icons in the top-right corner.
Creating a New Unit
Click + New to add a new department, branch, division, or section to the company structure.
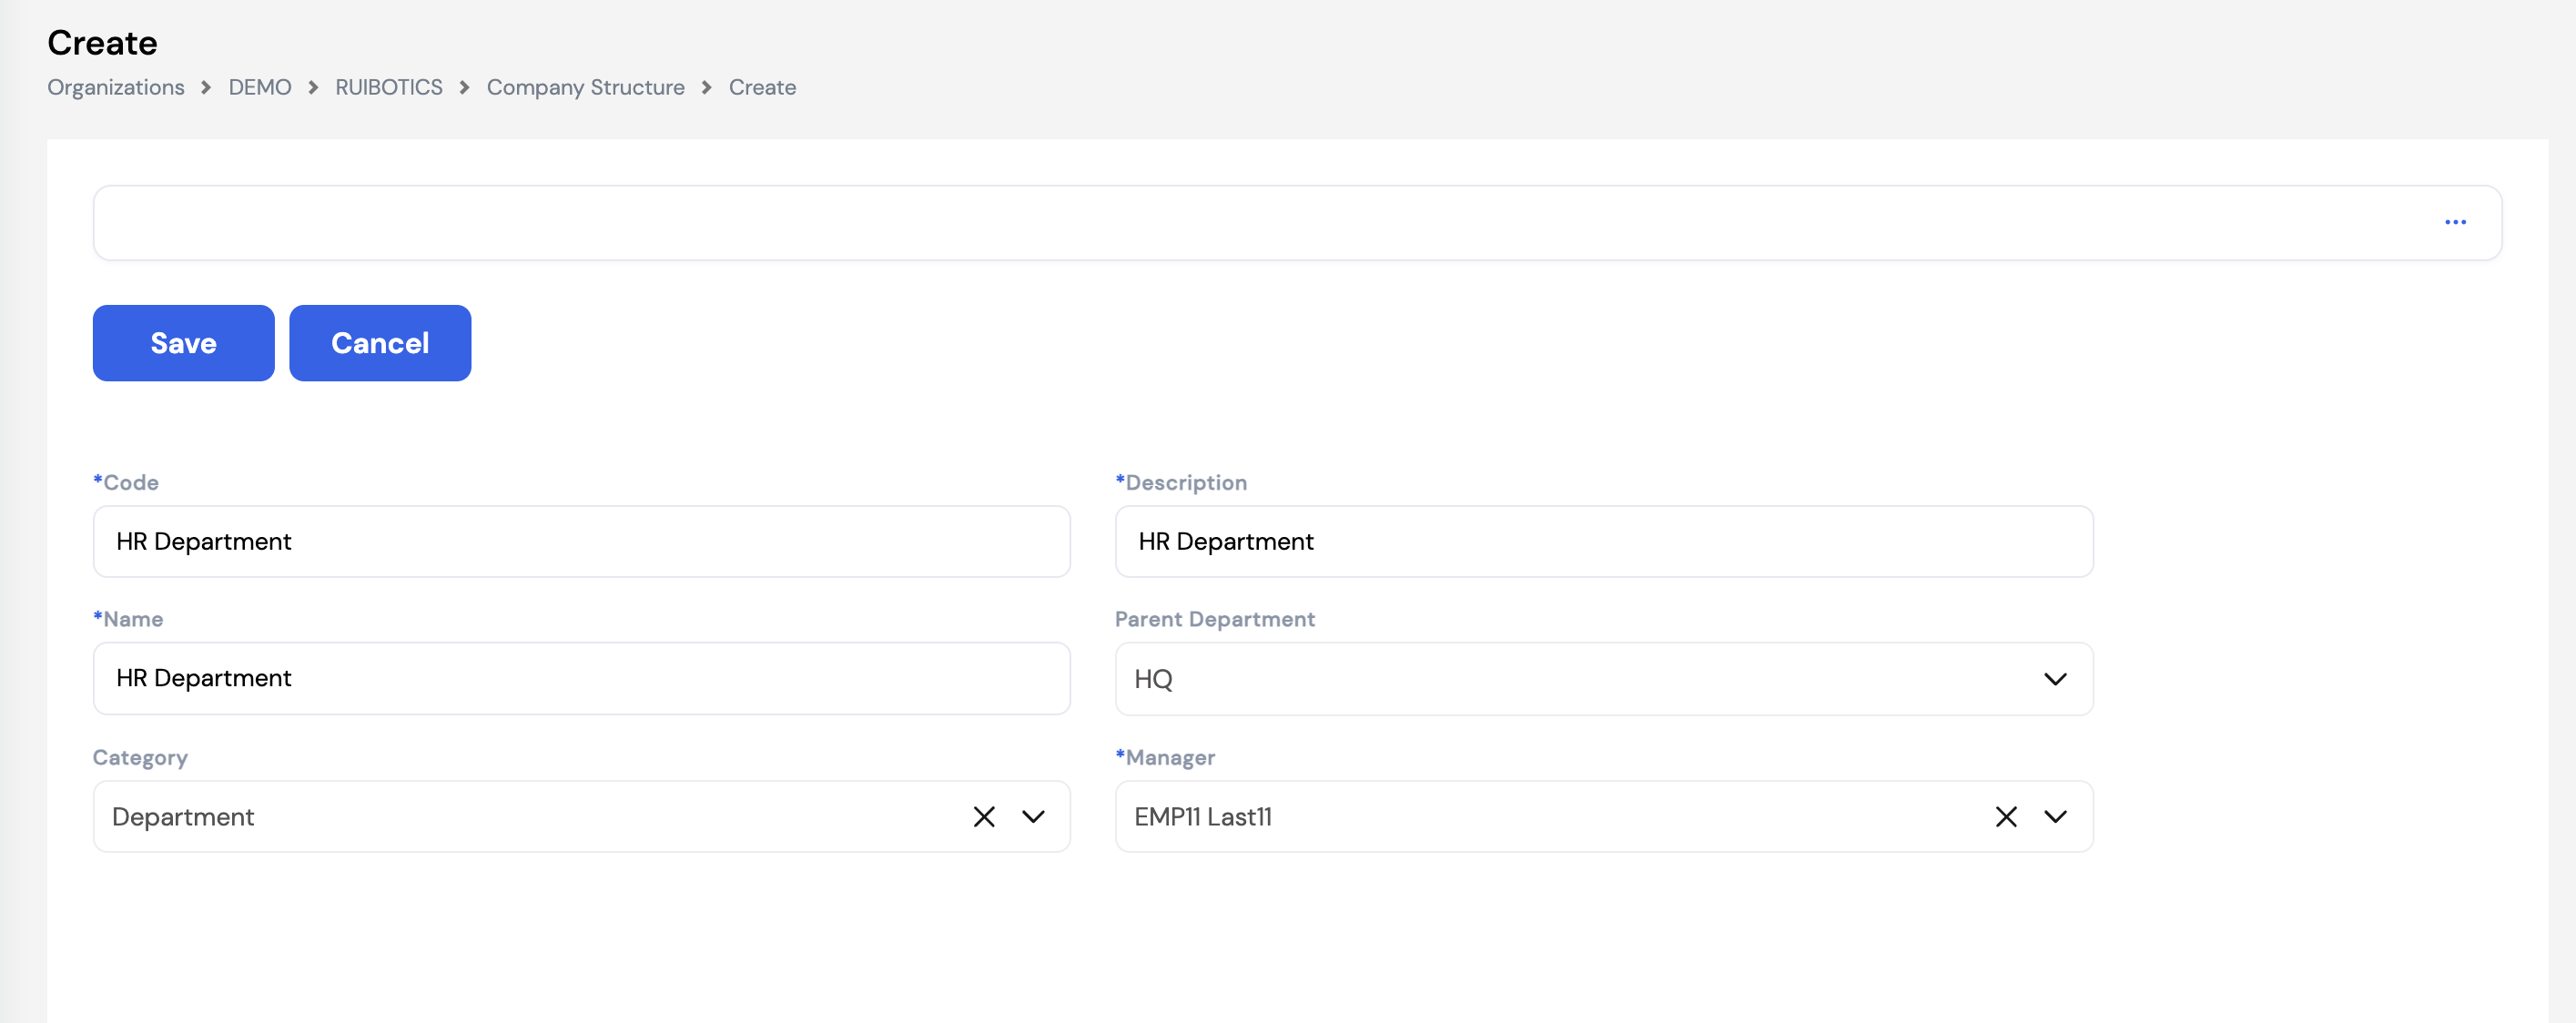
| Field | Description | Required |
|---|---|---|
| Code | A unique short code for the unit (e.g., HR, FIN, IT) | Required |
| Description | The full name of the unit (e.g., HR Department, Finance Department) | Required |
| Name | The display name used in the org chart and employee profiles | Required |
| Parent Department | Select the parent unit this unit reports to. The top-level unit (e.g., HQ) does not need a parent. | Optional |
| Category | Classify the unit type (e.g., Department, Division, Section, Branch) for reporting and filtering purposes | Optional |
| Manager | Select the employee who is the head or manager of this unit. Used in approval workflows and org chart display. | Required |
Always link each unit to its Parent Department — this is what builds the hierarchy in the org chart. The only unit without a parent should be the top-level node (e.g., HQ or the company root).
23.1.3 Salary Scales
Salary Scales allow companies to define minimum, midpoint, and maximum salary ranges for specific employee grades and levels. While not widely used by all organizations, it is a powerful tool for controlling salary equity — ensuring that employees with the same grade and level do not have major salary discrepancies from one another.
When a salary scale is configured and assigned, the system will prevent the payroll administrator from assigning a salary to an employee that falls below the minimum or above the maximum allowed for their grade and level. This enforces consistent and fair compensation practices across the organization.
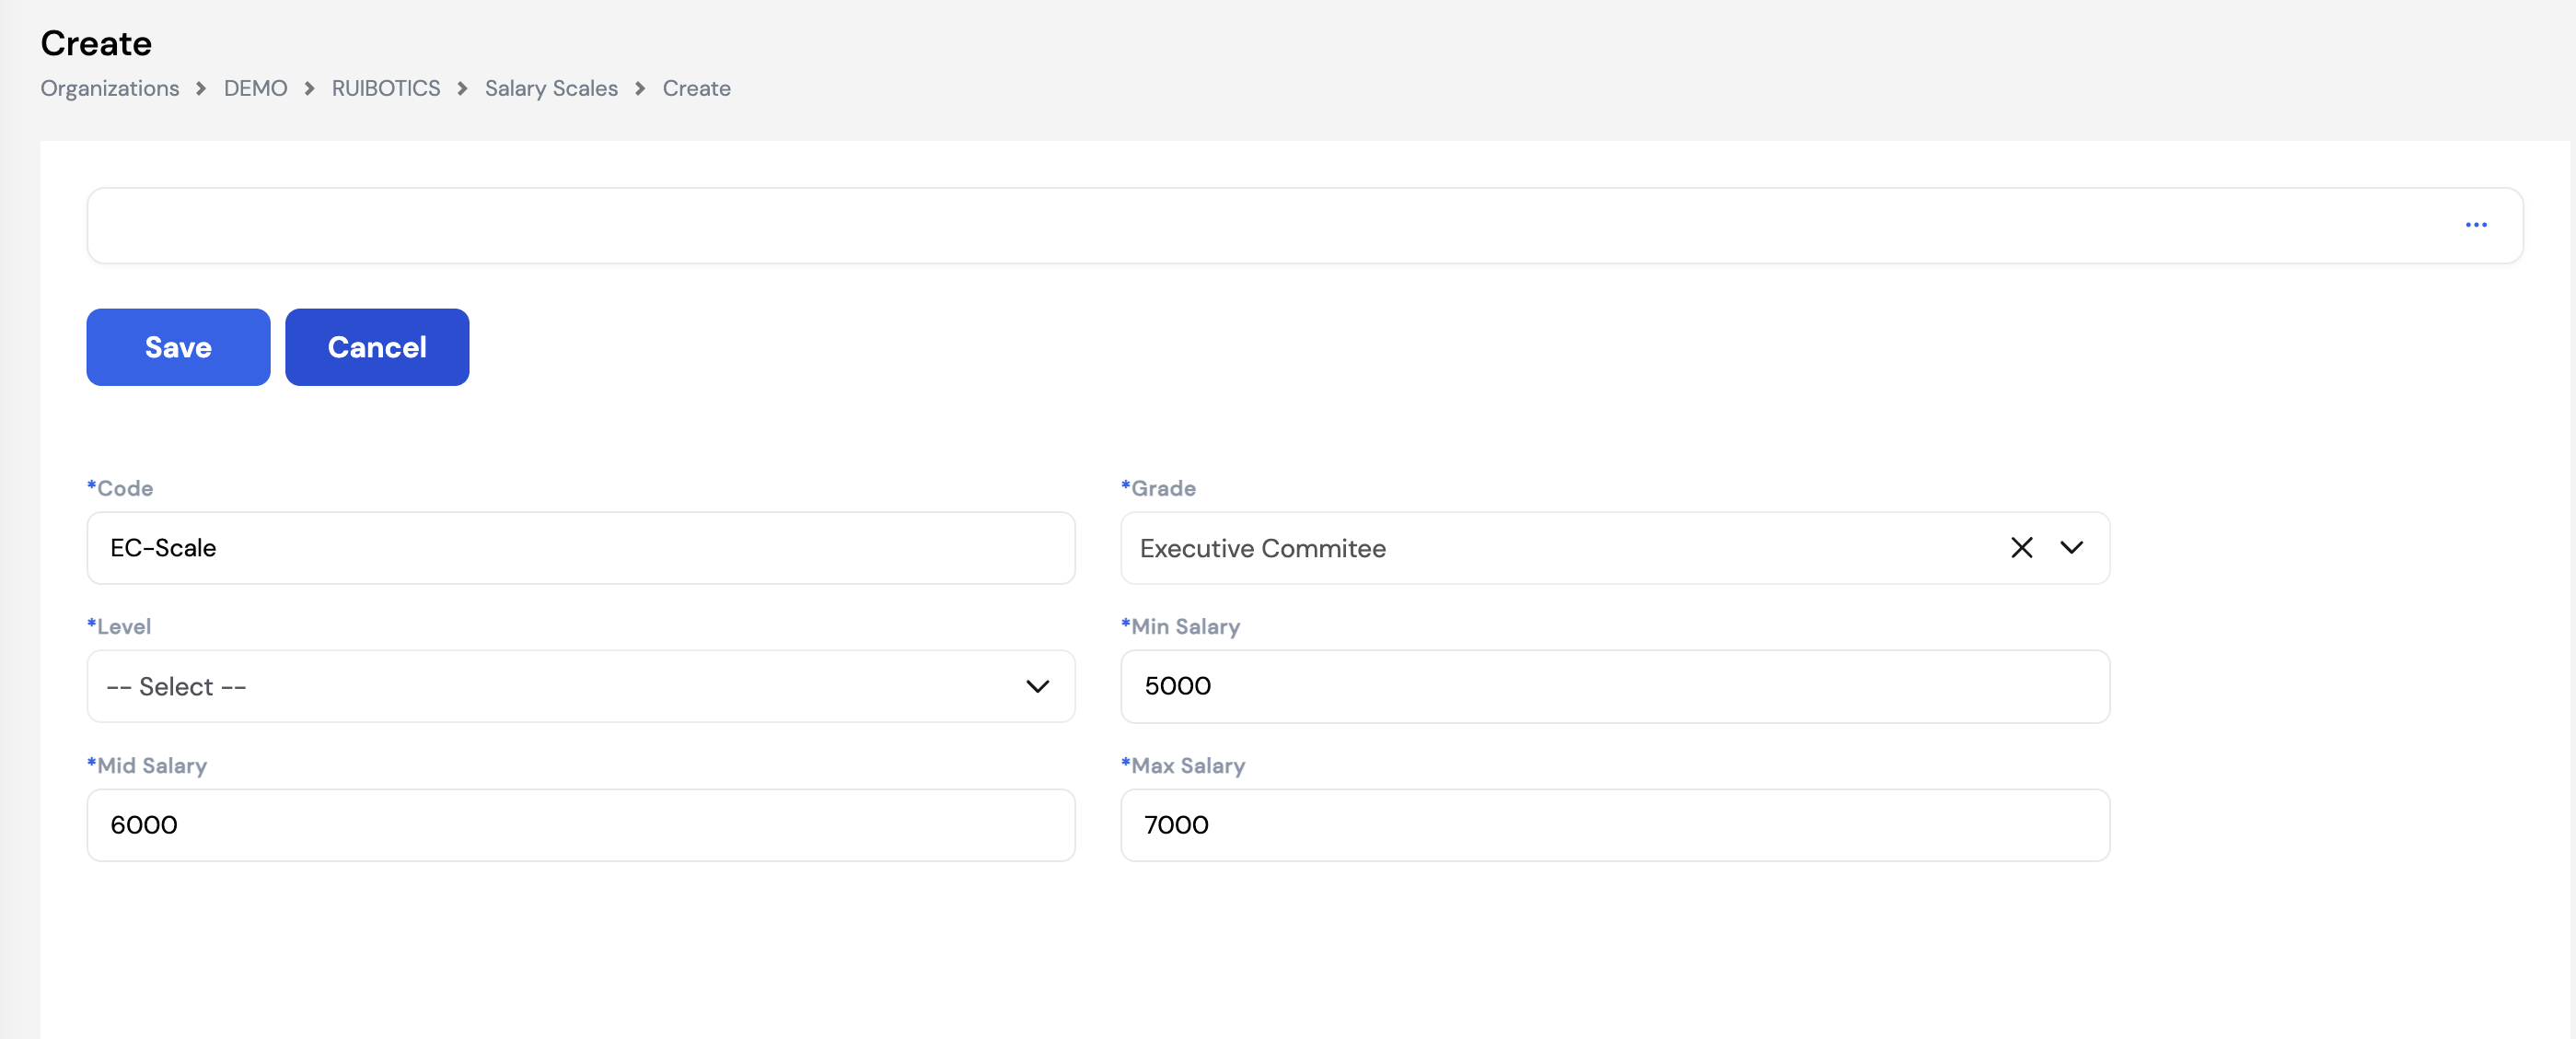
| Field | Description | Required |
|---|---|---|
| Code | A unique identifier for this salary scale (e.g., EC-Scale) | Required |
| Grade | The employee grade this scale applies to (e.g., Executive Committee) — from the Employee Grade lookup (Section 14.1) | Required |
| Level | The level within the grade for further segmentation (e.g., Senior, Junior) | Required |
| Min Salary | The minimum allowable salary for employees in this grade/level. The system will reject any salary set below this value. | Required |
| Mid Salary | The midpoint or benchmark salary for this grade/level — used as a reference for compensation planning | Required |
| Max Salary | The maximum allowable salary for employees in this grade/level. The system will reject any salary set above this value. | Required |
Optional feature. Salary Scales are not required for all organizations. They are most useful in companies with formal compensation frameworks or government-mandated salary bands. If your organization does not use salary scales, this section can be left empty.
23.1.4 Positions
Positions define the specific roles that exist within the company's organizational structure. Each position represents a single seat in the company's headcount plan — separate from the employee who occupies it. This distinction is important: a position exists independently of any person, and when an employee leaves, the position remains and shows as vacant, ready to be filled through recruitment.
Positions serve several purposes in Magnar HCM:
- Headcount planning — Define how many seats exist per role using the Number of Seats field
- Organizational hierarchy — Link positions to each other via the Reporting To field to build the management chain
- Employee assignment — Assign employees to positions in their profile
- Recruitment — Vacant positions are used as the basis for job openings in the recruitment module
- Approval workflows — Approval chains can be configured based on position hierarchy
List View
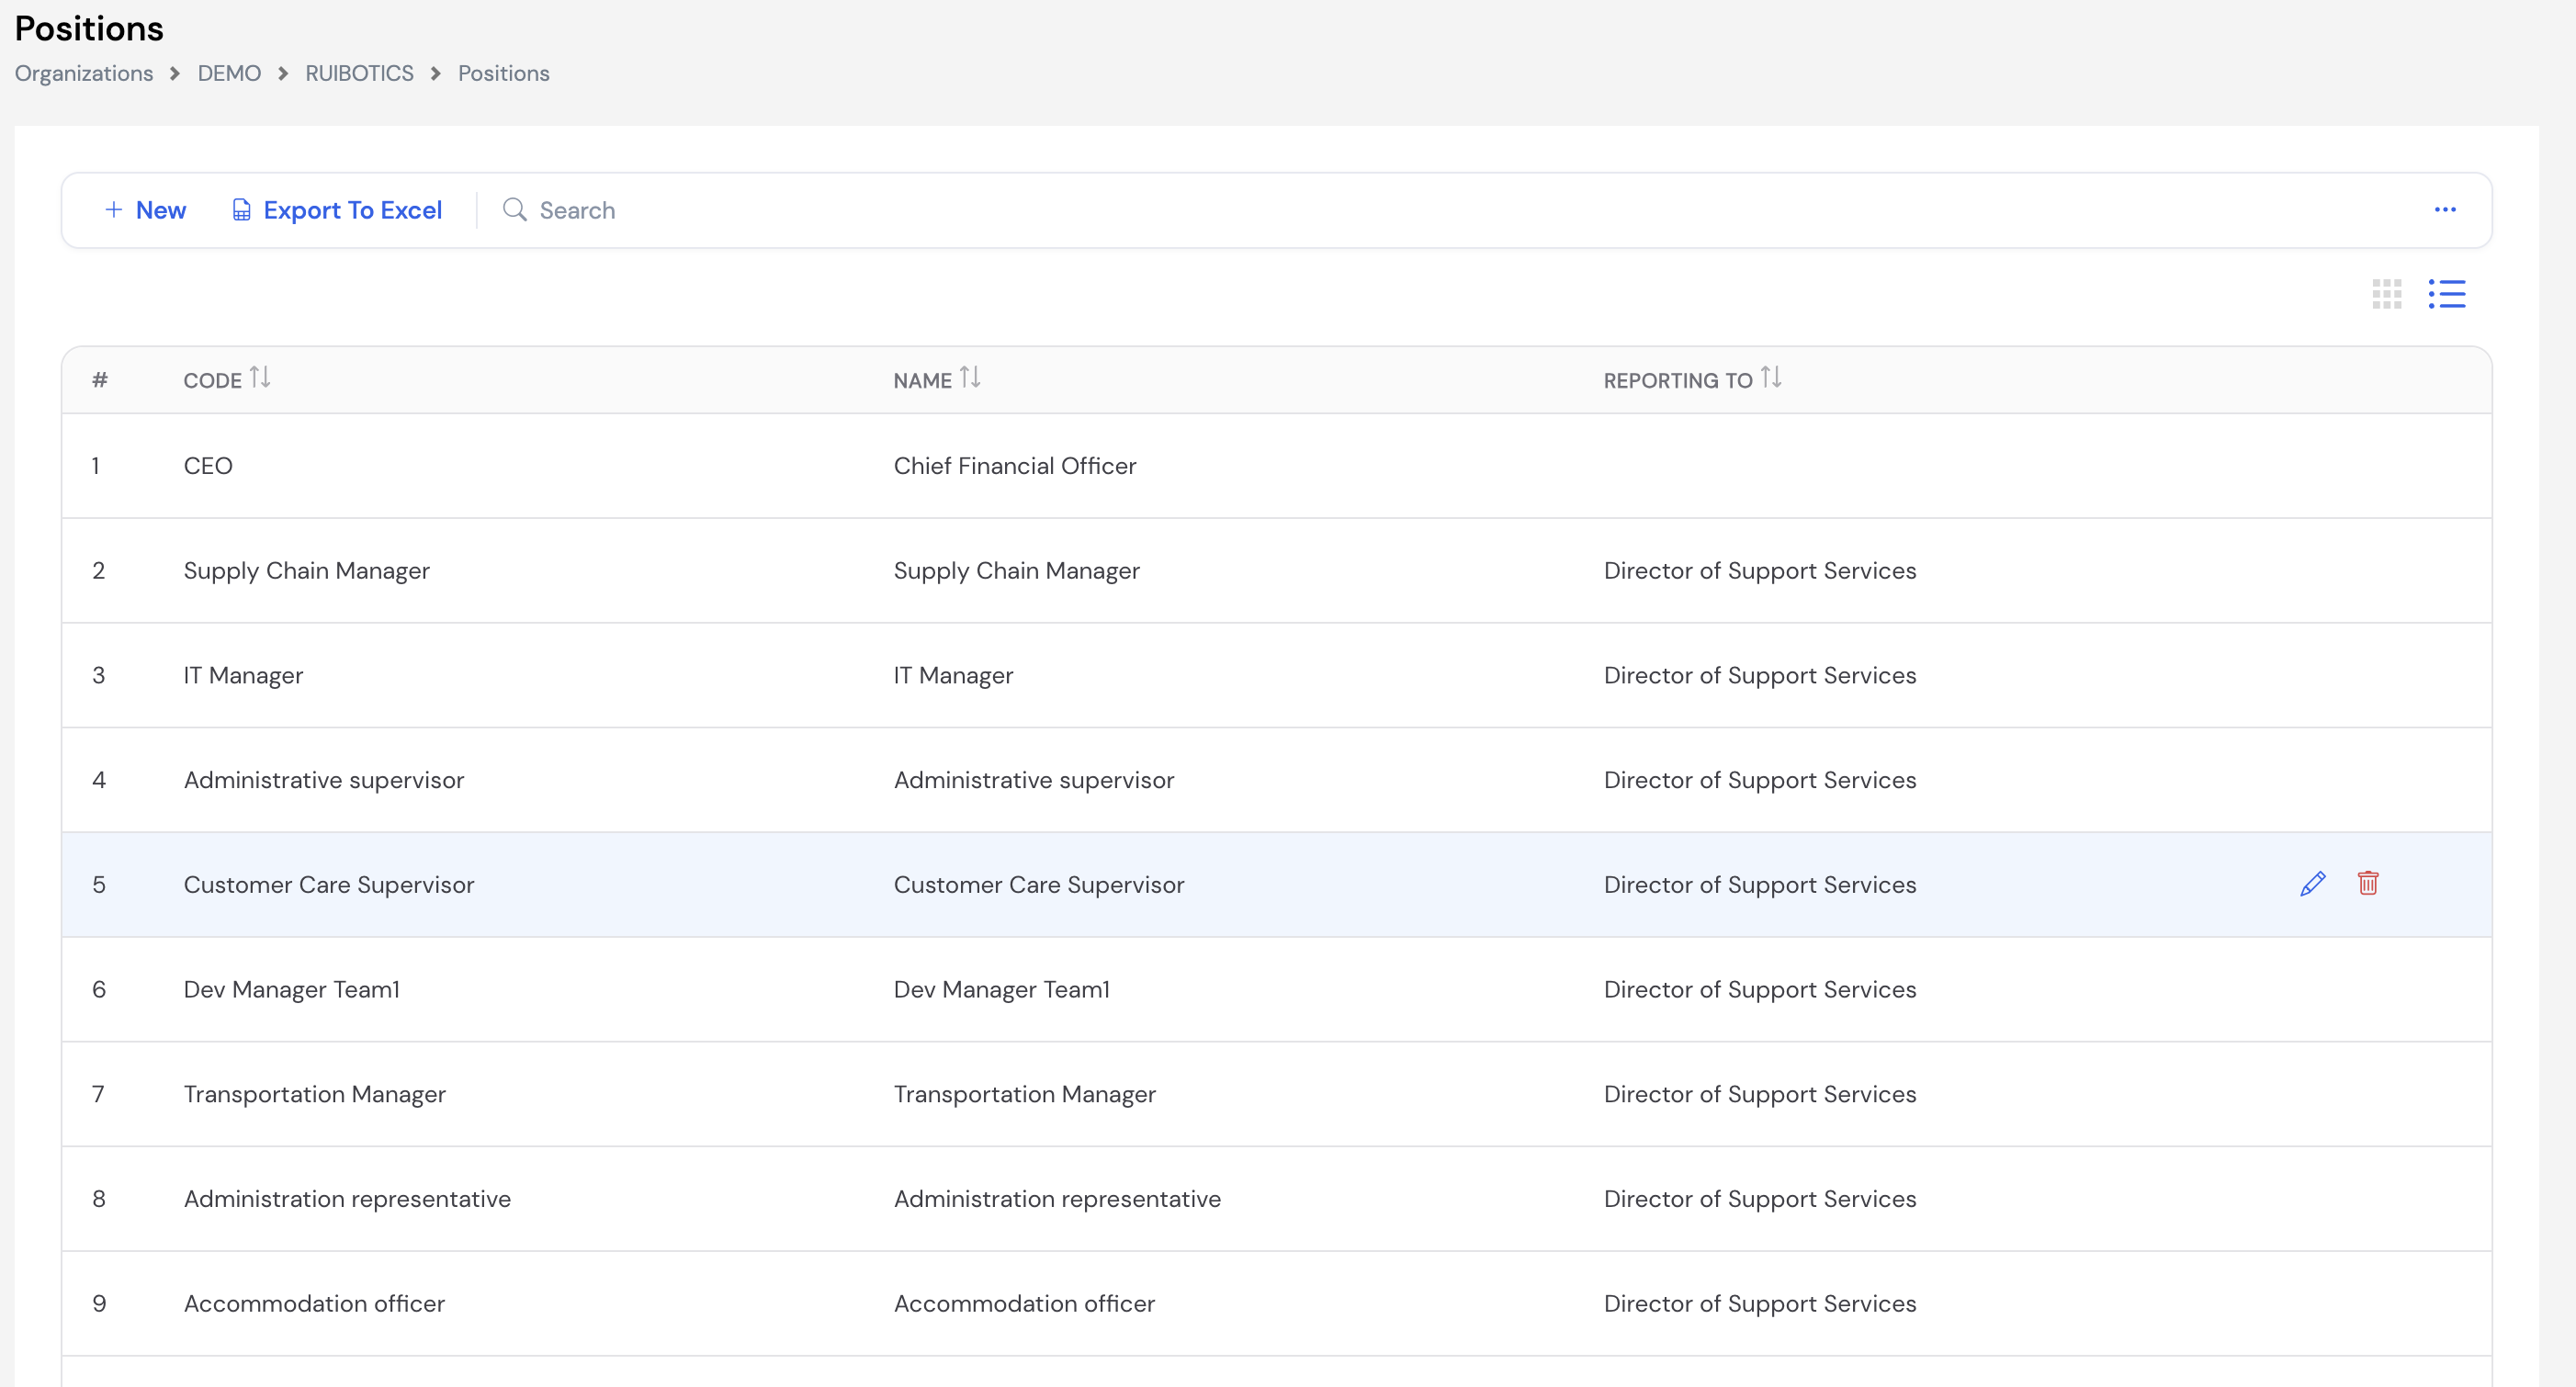
Graphical View
Positions can also be viewed as an org chart (card view) by clicking the grid icon — displaying the full position hierarchy across the company in a visual tree.
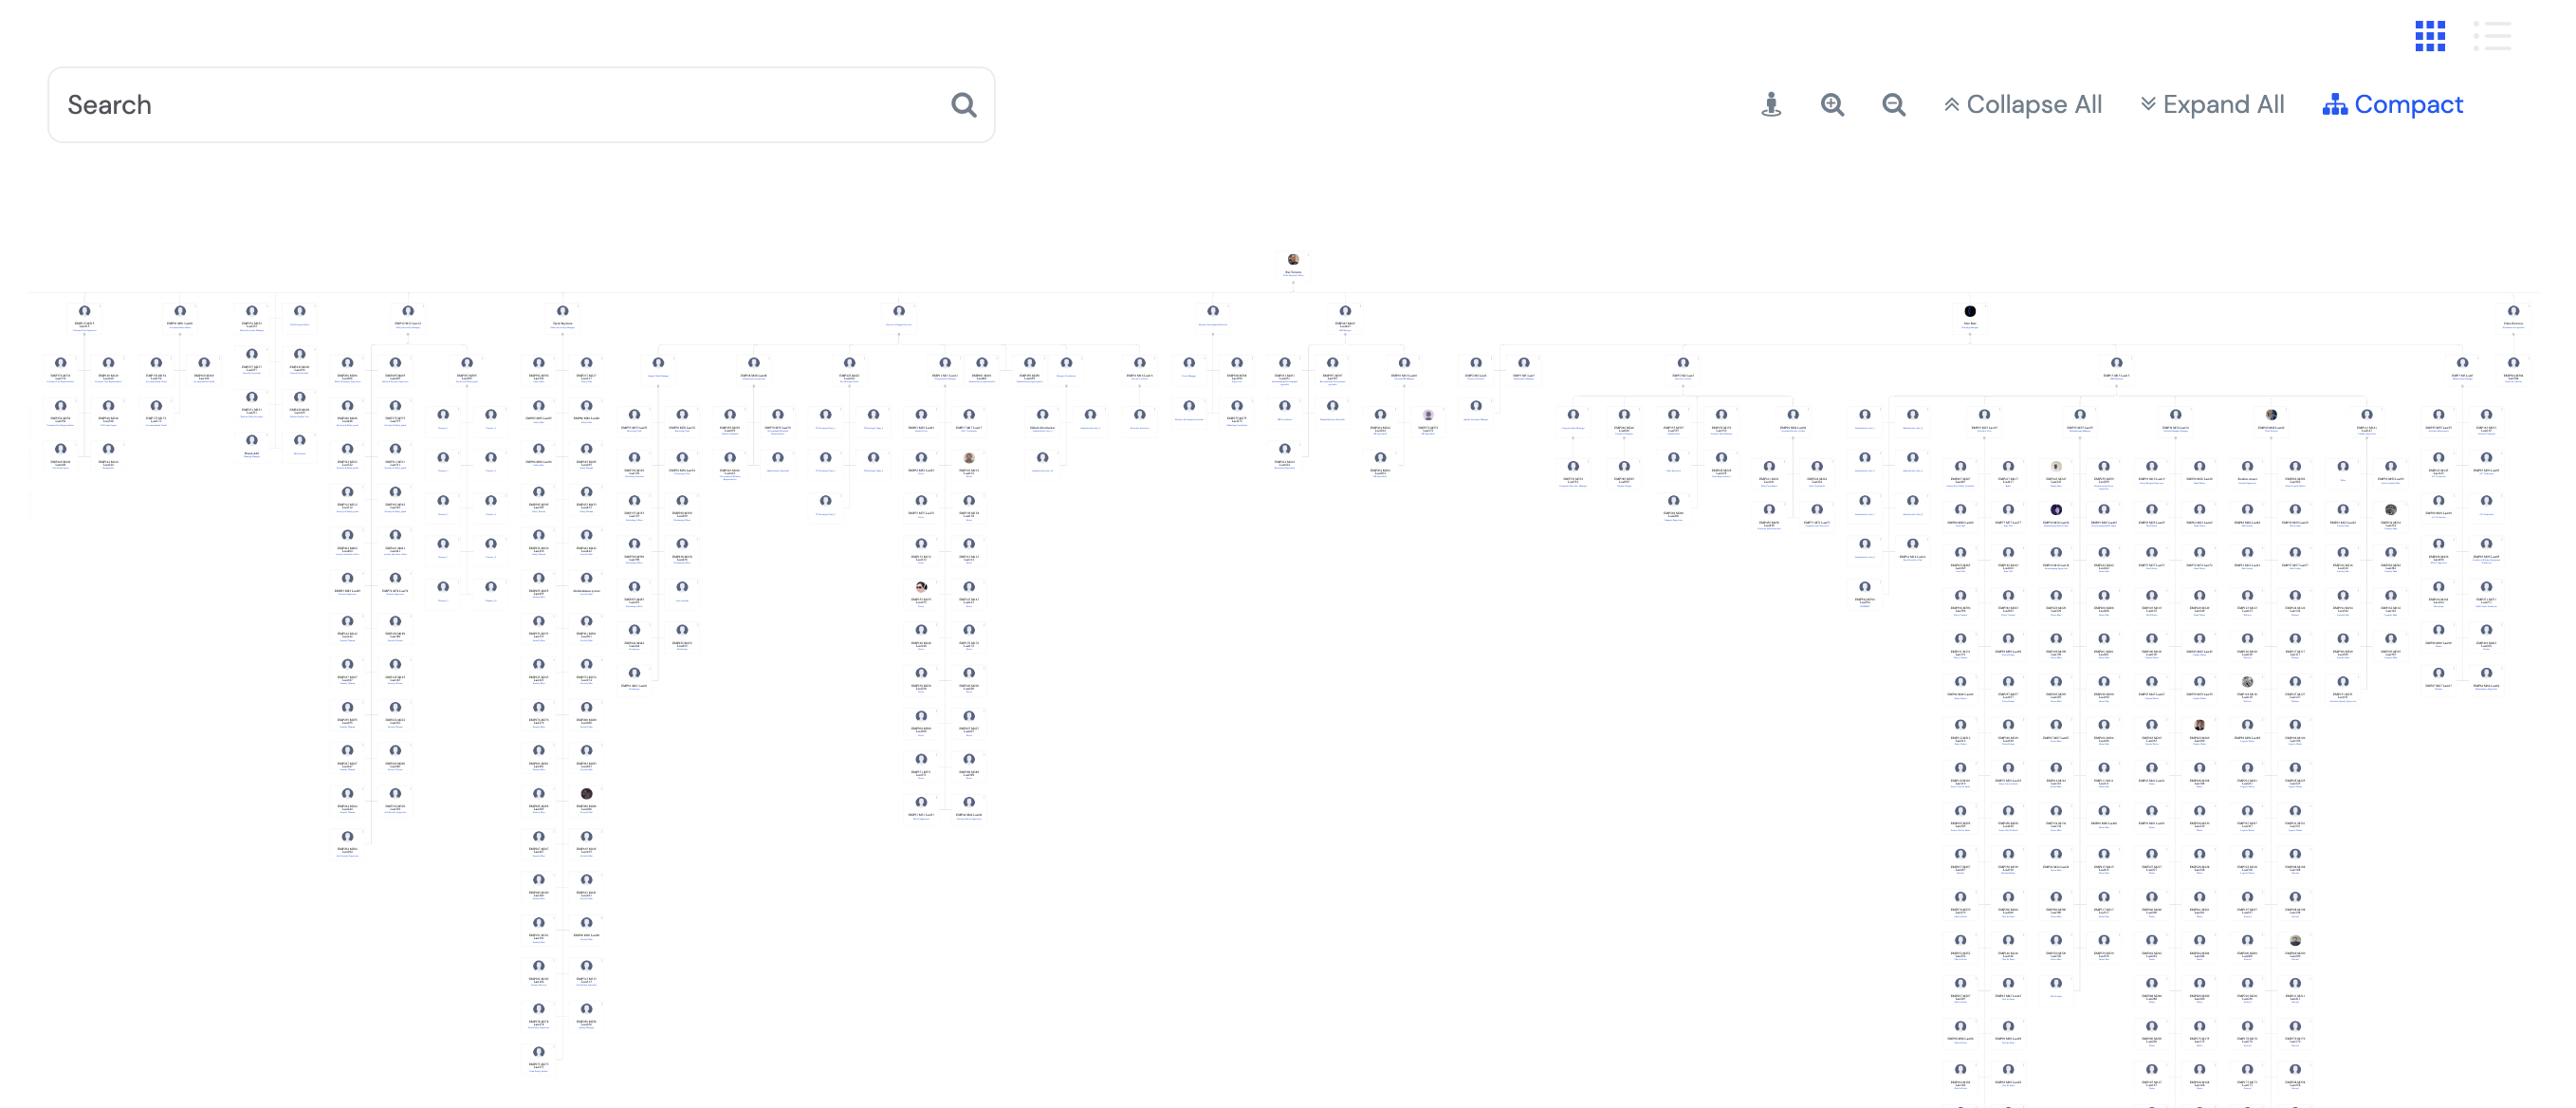
Creating a New Position
Click + New to create a new position in the company.
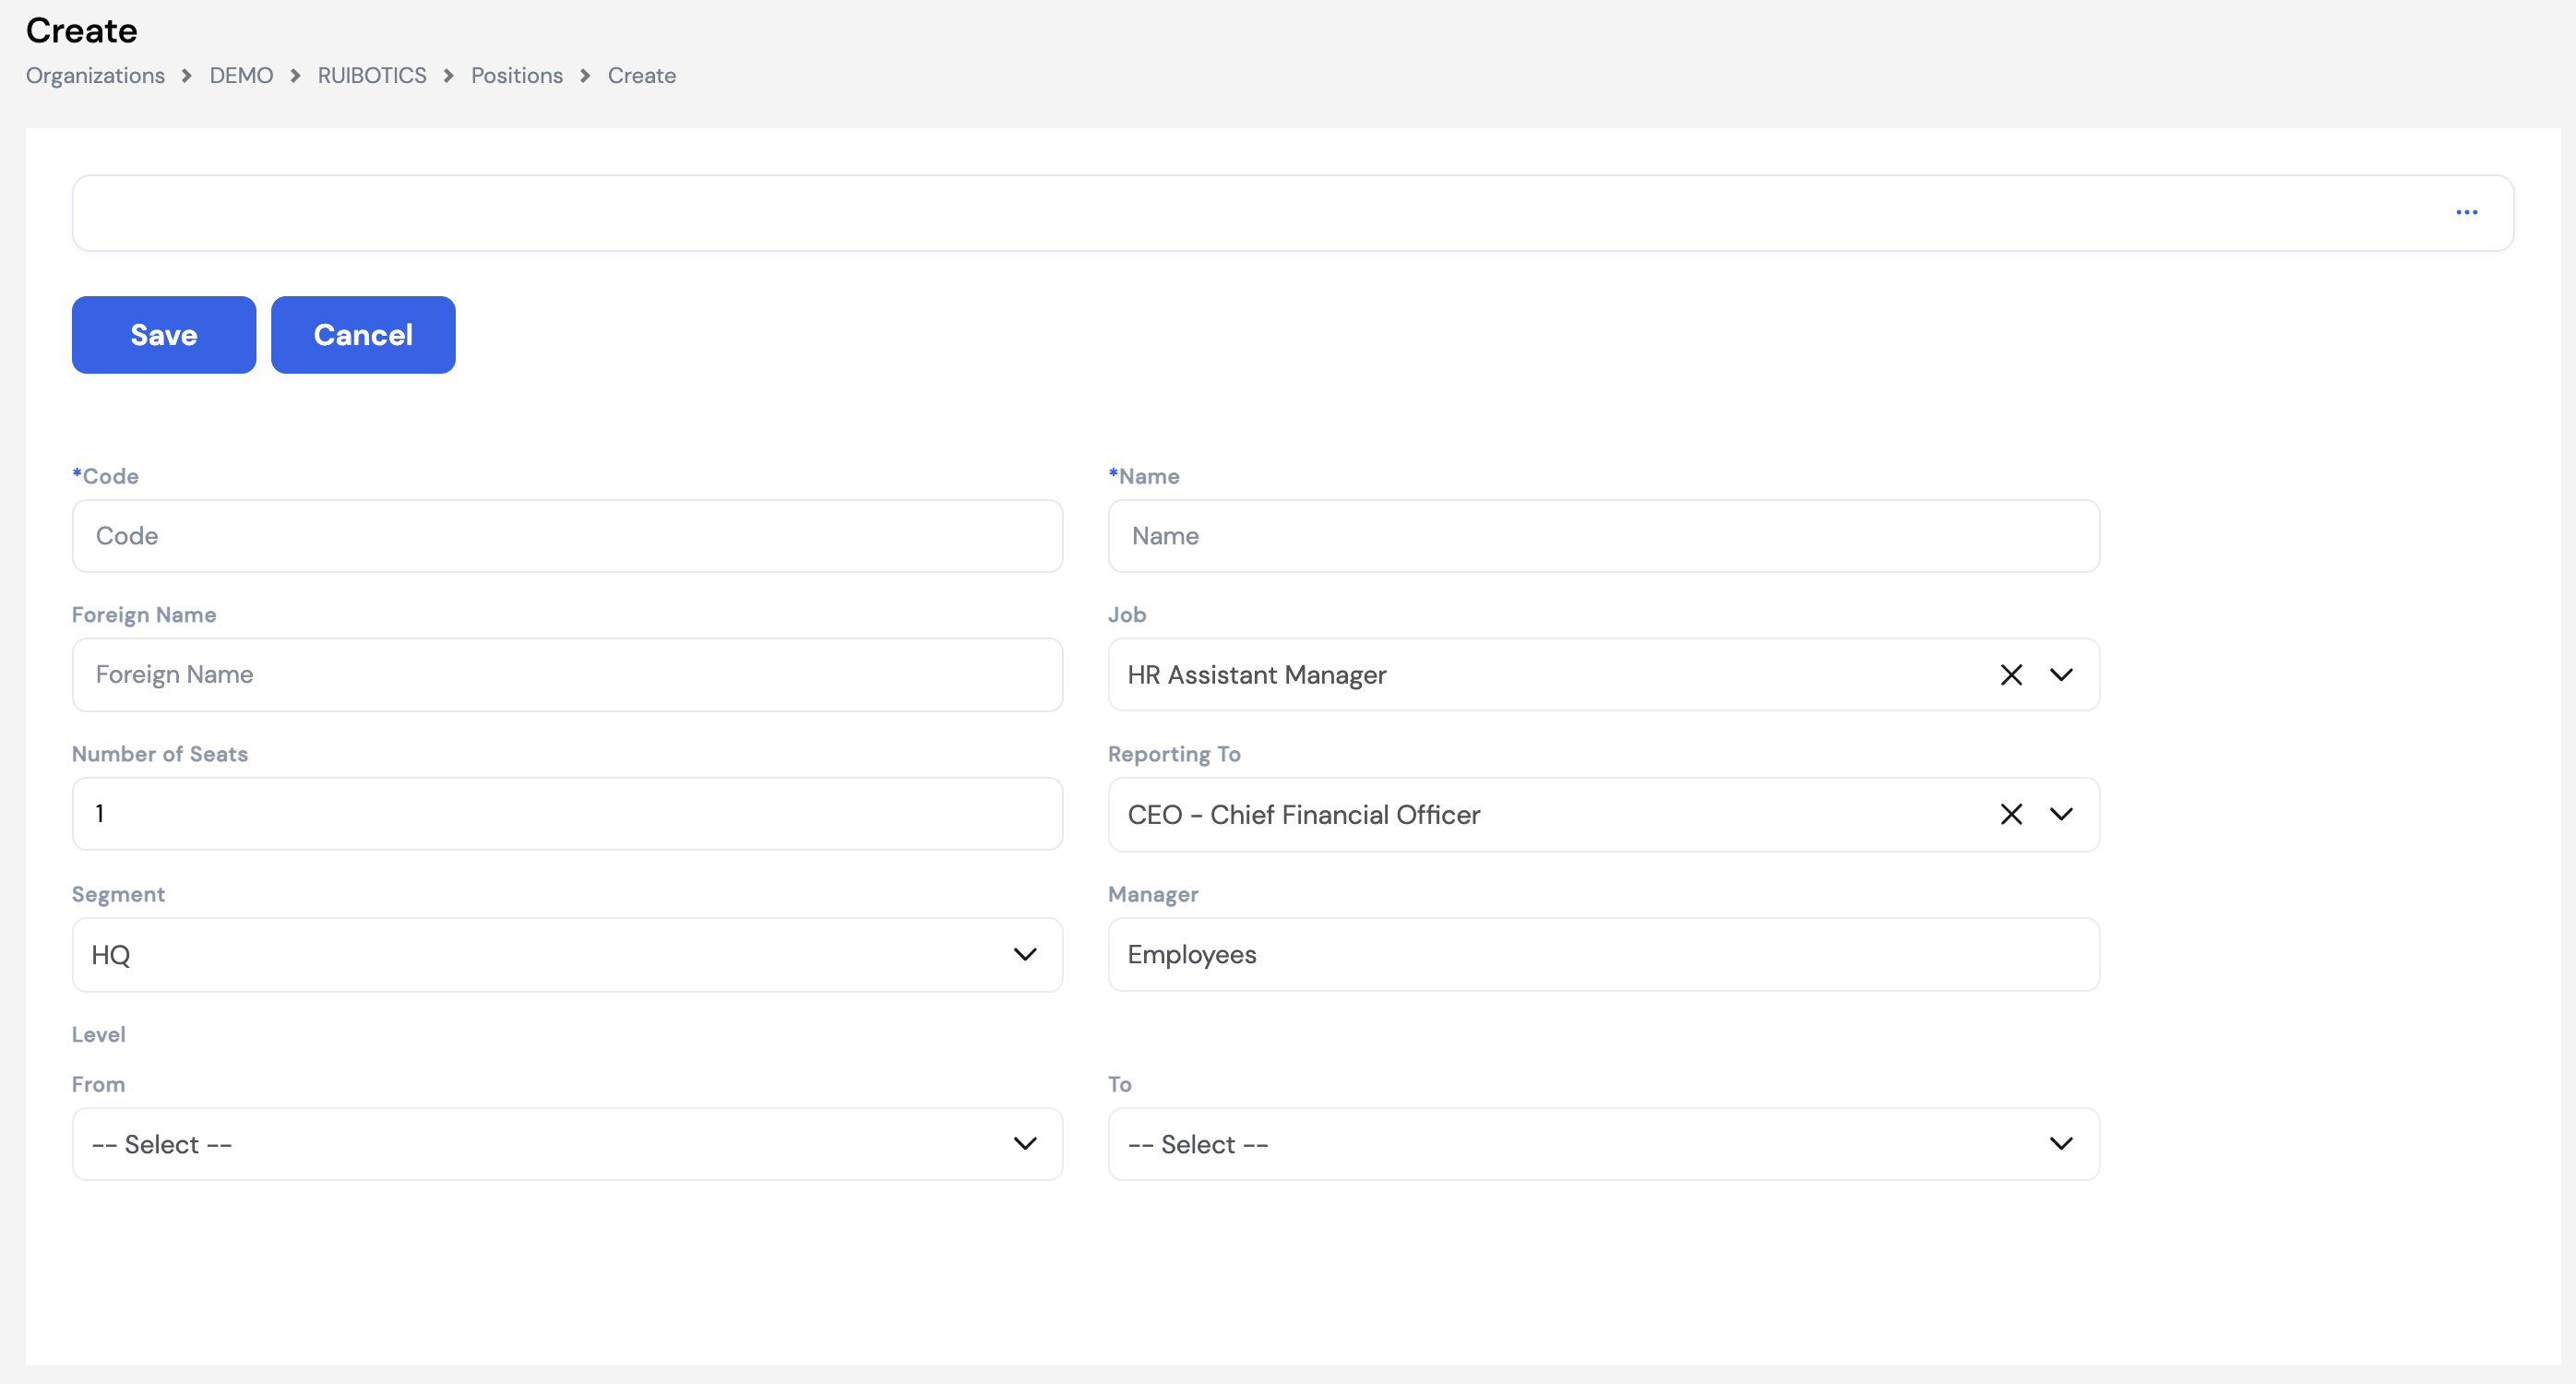
| Field | Description | Required |
|---|---|---|
| Code | A unique short code for the position (e.g., CEO, HR-MGR) | Required |
| Name | The position title (e.g., Chief Financial Officer, HR Assistant Manager) | Required |
| Foreign Name | The position title in a second language (e.g., Arabic) for bilingual organizations | Optional |
| Job | Link this position to a Job (Section 23.1.5) — the job defines the role profile and grade. Multiple positions can share the same job. | Optional |
| Number of Seats | How many employees can occupy this position simultaneously. Used for headcount planning. | Optional |
| Reporting To | The position this role reports to in the org chart hierarchy — builds the structural chain. This field should always be filled in to maintain the integrity of the position hierarchy. Only the top-level position (e.g., CEO) can have this field empty. | Required |
| Segment | The company structure unit (department/branch) this position belongs to | Optional |
| Manager | The actual reporting manager for this position — which may differ from the org chart hierarchy. For example, a Finance Strategist may report to the CFO in the org chart structure (Reporting To), but if the company decides this person should functionally report to the CEO, the CEO is set here as the Manager. This field overrides the structural line for day-to-day reporting purposes. | Optional |
| Level From / To | The grade level range applicable to this position — used with salary scales | Optional |
When an employee is assigned to a position in their profile and later exits the company, the position automatically becomes vacant — making it visible in the recruitment module as an open role to be filled.
23.1.5 Jobs
Jobs define the role profiles within the organization. A job represents a standardized role type — such as CEO, HR Manager, or Finance Analyst — that can be linked to one or more Positions. The job also determines the employee's grade, connecting the role to the company's grading and salary scale structure.
Each job contains a detailed description of the role's responsibilities, as well as a list of required competencies with their expected proficiency levels and weights. These competencies are later used in the Performance Appraisal module to evaluate employees against the expectations of their role.
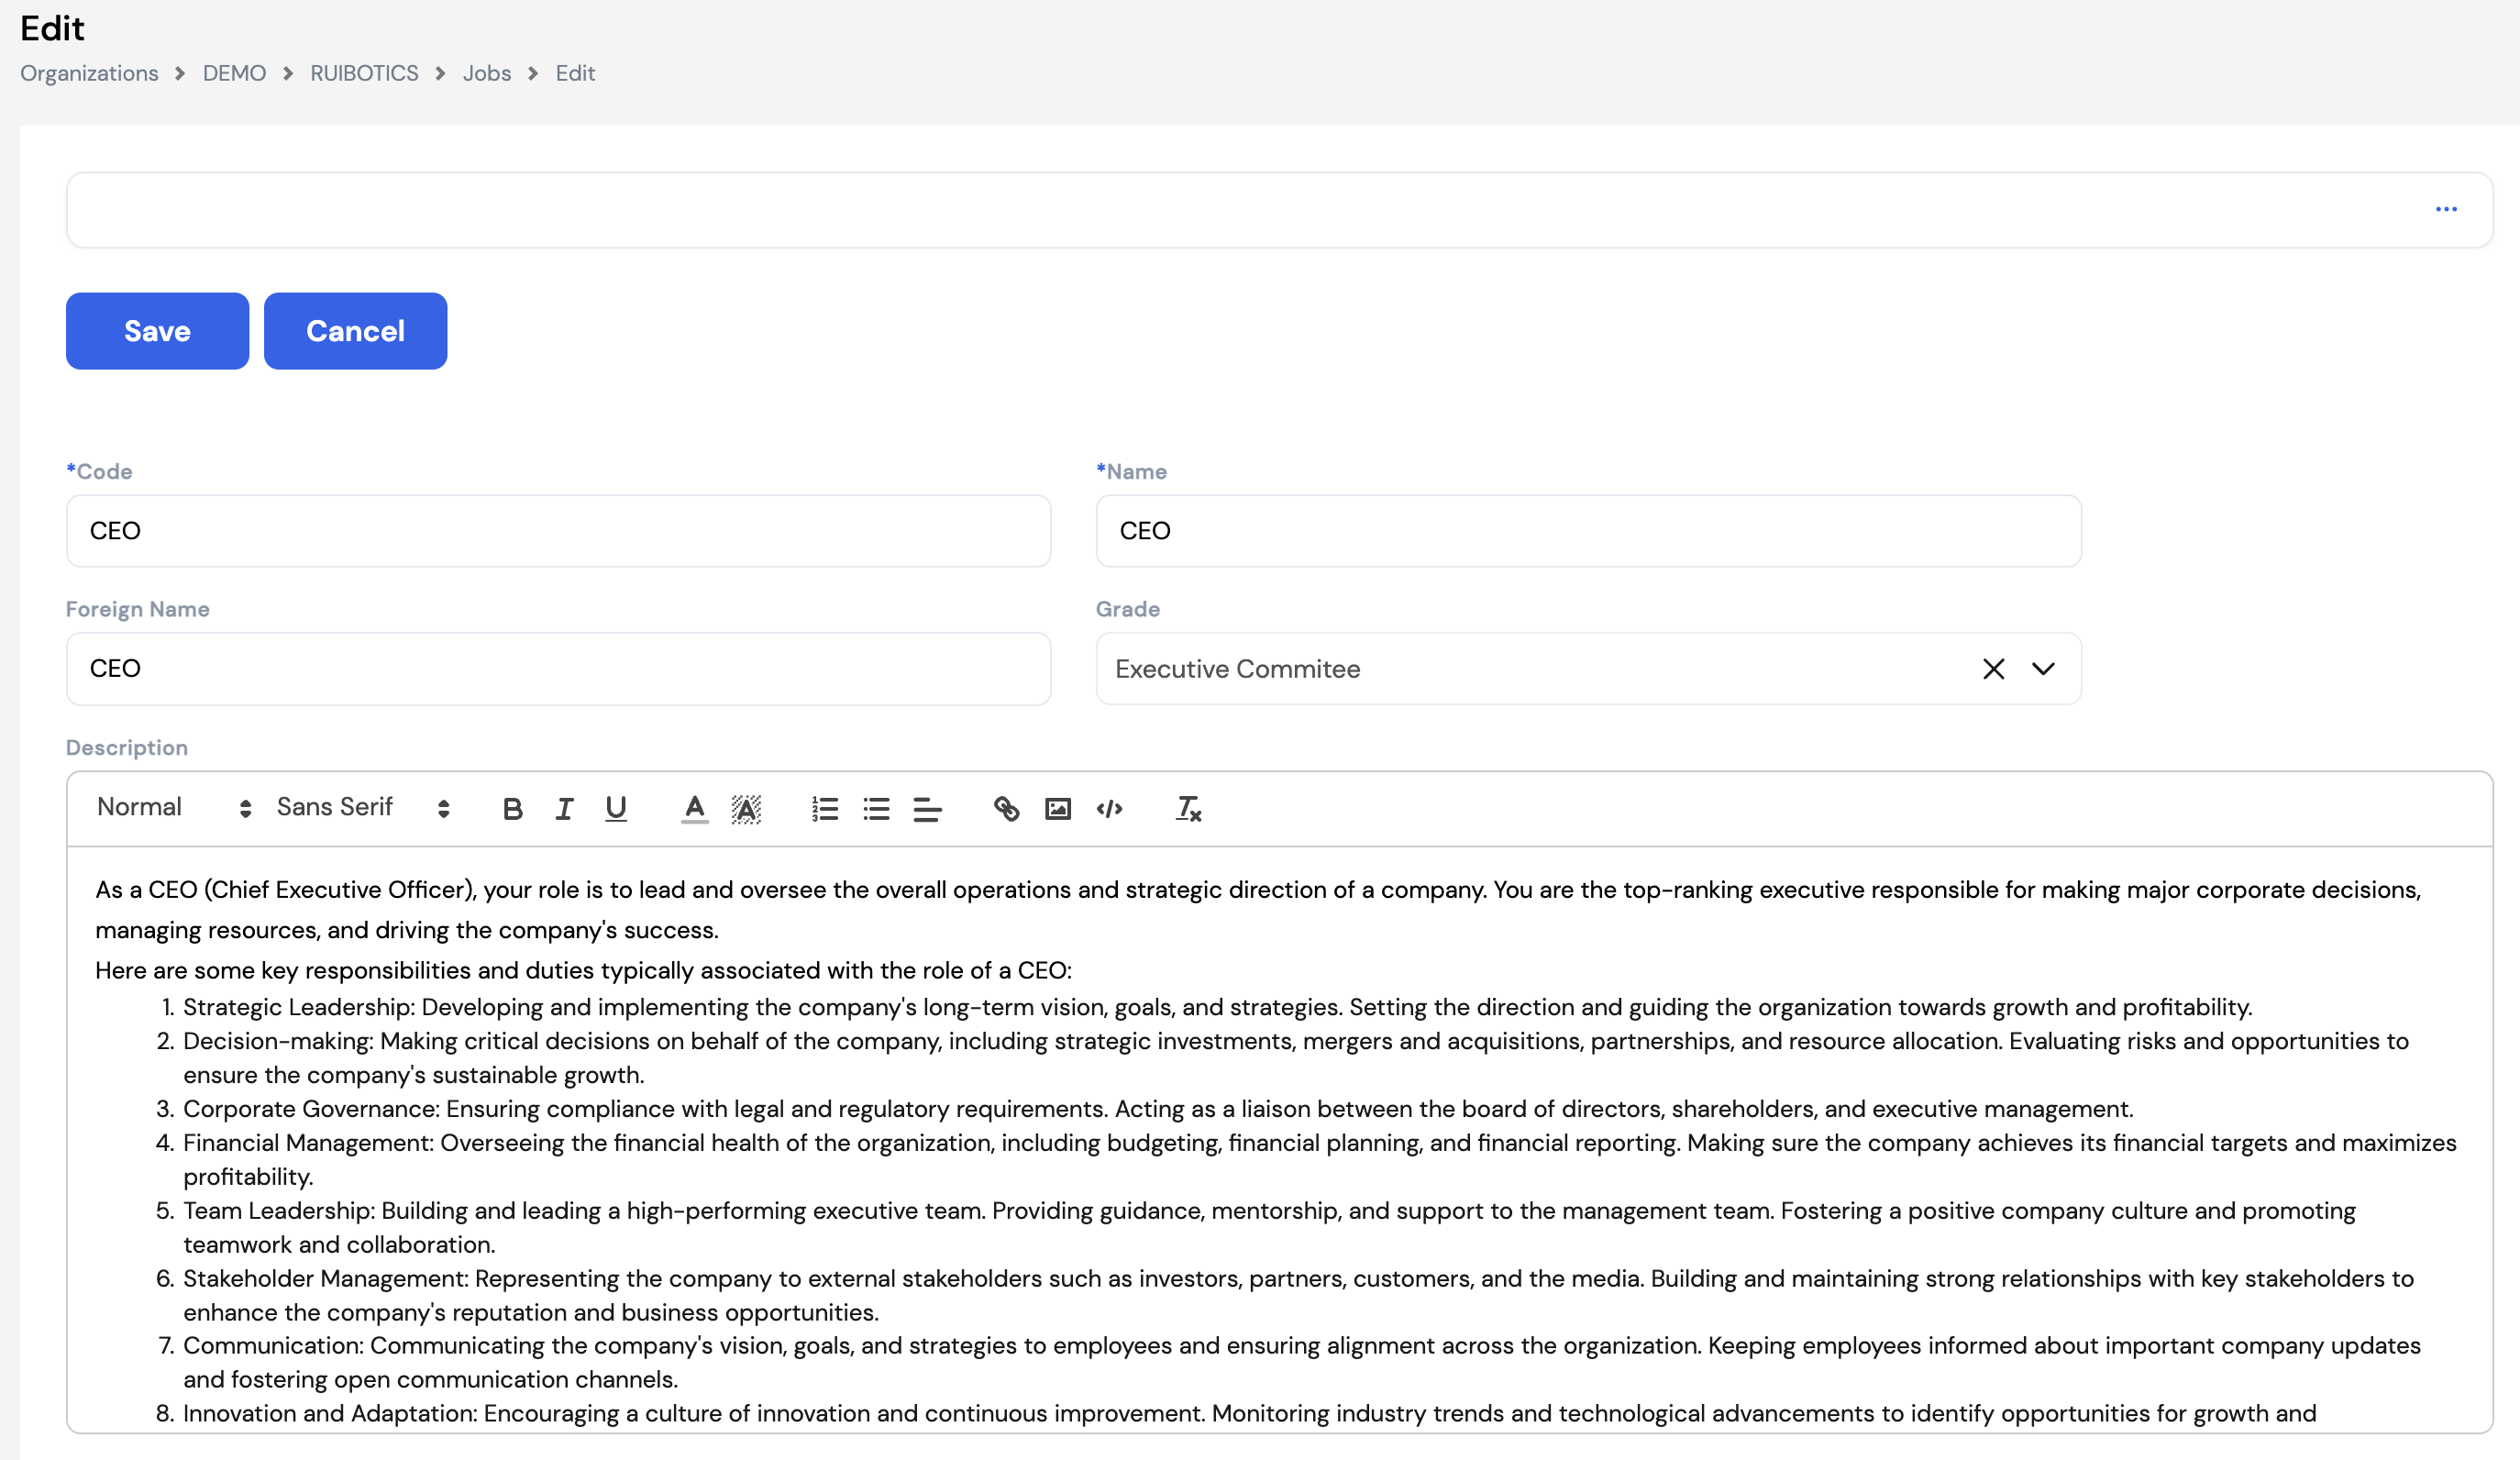
| Field | Description | Required |
|---|---|---|
| Code | A unique short code for the job (e.g., CEO, HR-MGR) | Required |
| Name | The job title (e.g., Chief Executive Officer, HR Assistant Manager) | Required |
| Foreign Name | The job title in a second language for bilingual organizations | Optional |
| Grade | The employee grade associated with this job (e.g., Executive Committee). Determines the salary scale and level expectations for anyone in this role. | Optional |
| Description | A rich-text field for a full description of the job's responsibilities, duties, and scope — used in recruitment and as the official job description | Optional |
Competencies, Duties & Requirements
Each job has three additional tabs below the main form:
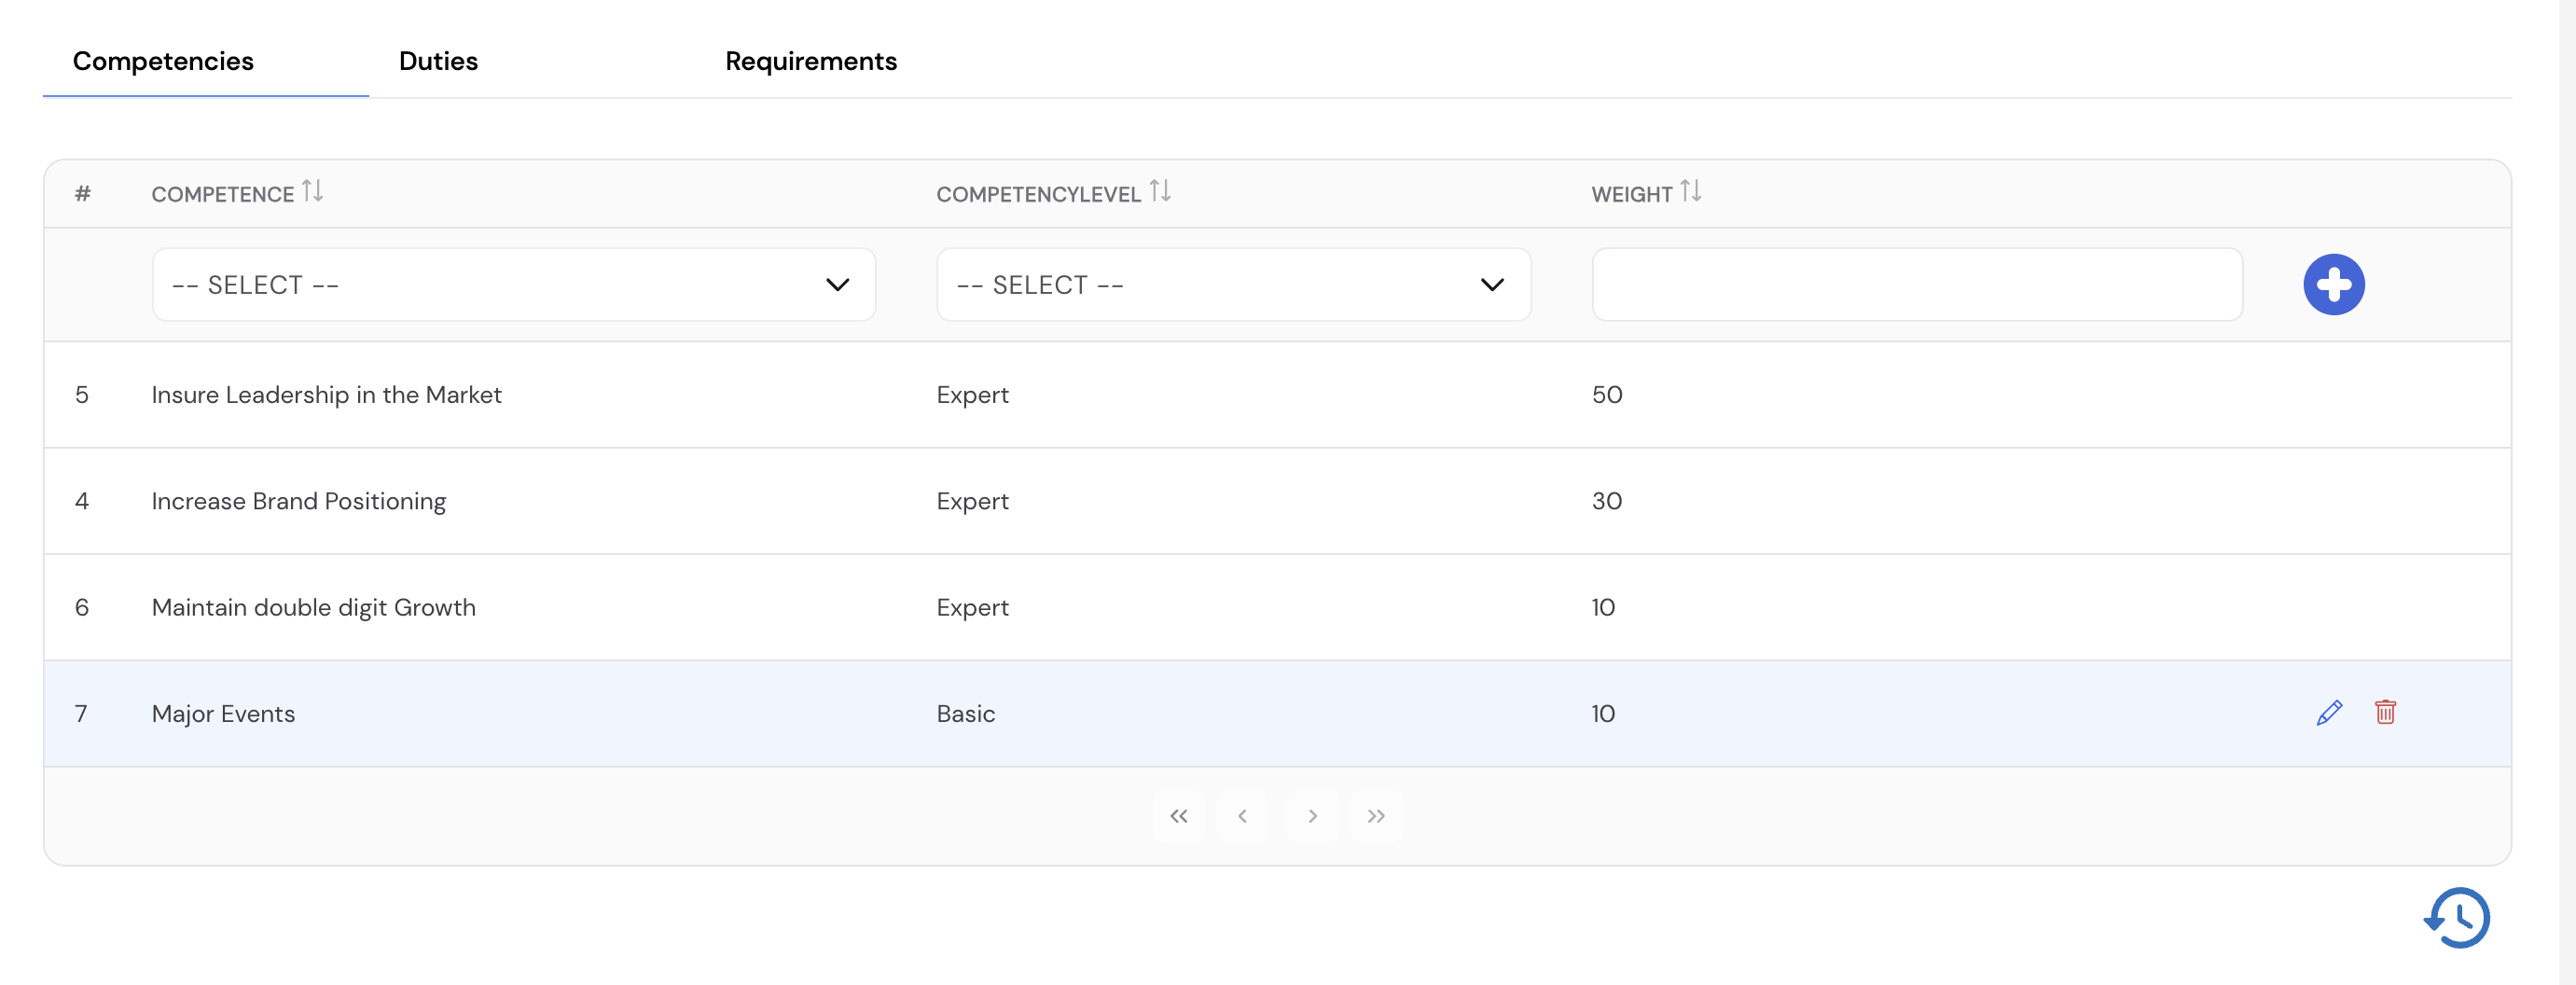
| Tab | Description |
|---|---|
| Competencies | Define the competencies required for this job, the expected proficiency level (e.g., Basic, Expert), and a weight (importance %) for each. These are used in the Performance Appraisal module to evaluate how well an employee in this role meets the role's competency requirements. The weights should total 100%. |
| Duties | List the key duties and responsibilities associated with this job — used for reference in job descriptions, onboarding, and performance reviews |
| Requirements | Define the minimum qualifications, experience, and certifications required for this job — used in recruitment to filter candidates |
Jobs are created first, then linked to Positions (Section 23.1.4). Multiple positions can reference the same job — for example, multiple "HR Officer" positions in different departments can all be linked to the same HR Officer job definition.
23.1.6 Company Lookup
Company Lookup is a centralized reference data store for company-level parameters used across various forms and modules in Magnar HCM. Similar to the organization-level Lookups (Section 14), each lookup type holds a list of configurable values that appear as selectable options throughout the system.
Select a Lookup Type from the dropdown and enter the corresponding ID to view, add, or edit values for that category.
The available lookup types include:
| Lookup Type | Used In |
|---|---|
| Competency Level | Defines the proficiency levels available when assigning competencies to jobs (e.g., Basic, Intermediate, Advanced, Expert) |
| Personal Objective Category | Categories used when creating personal objectives for employees in the appraisal module (e.g., Performance, Development) |
| Business Objective | Company-level business objectives that personal objectives can be linked to in appraisals |
| Appraisal Period Type | Defines the types of appraisal periods used (e.g., Annual, Semi-Annual, Probation) |
| Clearance Items | Items that must be cleared by the employee or relevant departments before final exit (e.g., IT Equipment, Access Cards, Finance Clearance) |
| Travel Type | The types of travel applicable for travel requests (e.g., Business Travel, Training, Conference) |
| Insurance Class | Medical or life insurance classes available for employee insurance enrollment |
| Hiring Priority | Priority levels for recruitment requests (e.g., Urgent, High, Normal, Low) |
| Competency Category | Categories used to group competencies (e.g., Technical, Leadership, Behavioral) |
Configure Company Lookup values before setting up Jobs (competency levels), the Appraisal module (objective categories, appraisal period types), and Travel Transactions (travel types). These values must exist before they can be selected in those modules.
23.1.7 Outgoing Email Configuration
Outgoing Email Configuration sets up the SMTP mail server used by Magnar HCM to send system-generated emails — such as workflow notifications, approval alerts, payslip delivery, and ESS registration emails. This configuration is required for any email-based communication from the system to work correctly.
| Field | Description |
|---|---|
| The sender email address used for all outgoing system emails (e.g., info@magnarhcm.com) | |
| Password | The password or app password for the sender email account |
| Mail Server Name | The SMTP server hostname (e.g., smtp.office365.com for Microsoft 365, smtp.gmail.com for Google) |
| Mail Server Port | The SMTP port number (e.g., 587 for TLS, 465 for SSL) |
| Mail SSL Enabled | Check this box to enable SSL/TLS encryption for the outgoing mail connection — recommended for security |
This configuration should be set up during initial system implementation. Without a valid outgoing email configuration, the system will not be able to send workflow notifications, approval emails, payslips, or ESS registration invitations.
If using Microsoft 365, use smtp.office365.com on port 587 with SSL enabled. For Gmail, use smtp.gmail.com on port 587 and ensure an app password is generated from the Google account security settings.
23.1.8 Policies & Procedures
The Policies & Procedures section allows administrators to upload company policy documents and procedure files that will be made available to all employees through the ESS (Employee Self-Service) portal. Any employee with ESS access can view and download the published documents directly from their portal.
To add a new policy document, click + New, enter a Name for the document, and upload the file using the file chooser. Each entry shows the document name, last modification date, and the uploaded filename.
Use this section to publish HR policies, employee handbooks, codes of conduct, health & safety procedures, or any other official company documents that all employees should have access to. Documents are visible to all ESS users as soon as they are saved.
23.1.9 Corporate Offers
Corporate Offers allows administrators to publish company benefit offers, promotions, and perks that will be displayed to all employees through the ESS portal. Any employee with ESS access can view the published offers directly from their portal — for example, partner discounts, internal promotions, or company benefit packages.
To add a new offer, click + New, enter a Name for the offer, and upload the associated file (image or document). Each entry shows the offer name, last modification date, and the uploaded filename.
Corporate Offers work similarly to Policies & Procedures — both publish content to the ESS portal. Use Policies & Procedures for official documents and Corporate Offers for promotional content, partner discounts, and employee perks.
23.2 Attendance Setup
Attendance Setup contains the configurations that govern how employee attendance, overtime, absences, and shifts are managed in Magnar HCM. It is accessed via Setup → Attendance Setup and includes the following sub-sections:
23.2.1 OverTime Type
OverTime Type defines the different categories of overtime applicable in the company, each with its own rate multiplier and hour limits. The Overtime Plugin (Section 12.6) uses these types during payroll to calculate the weighted overtime hours for each employee.
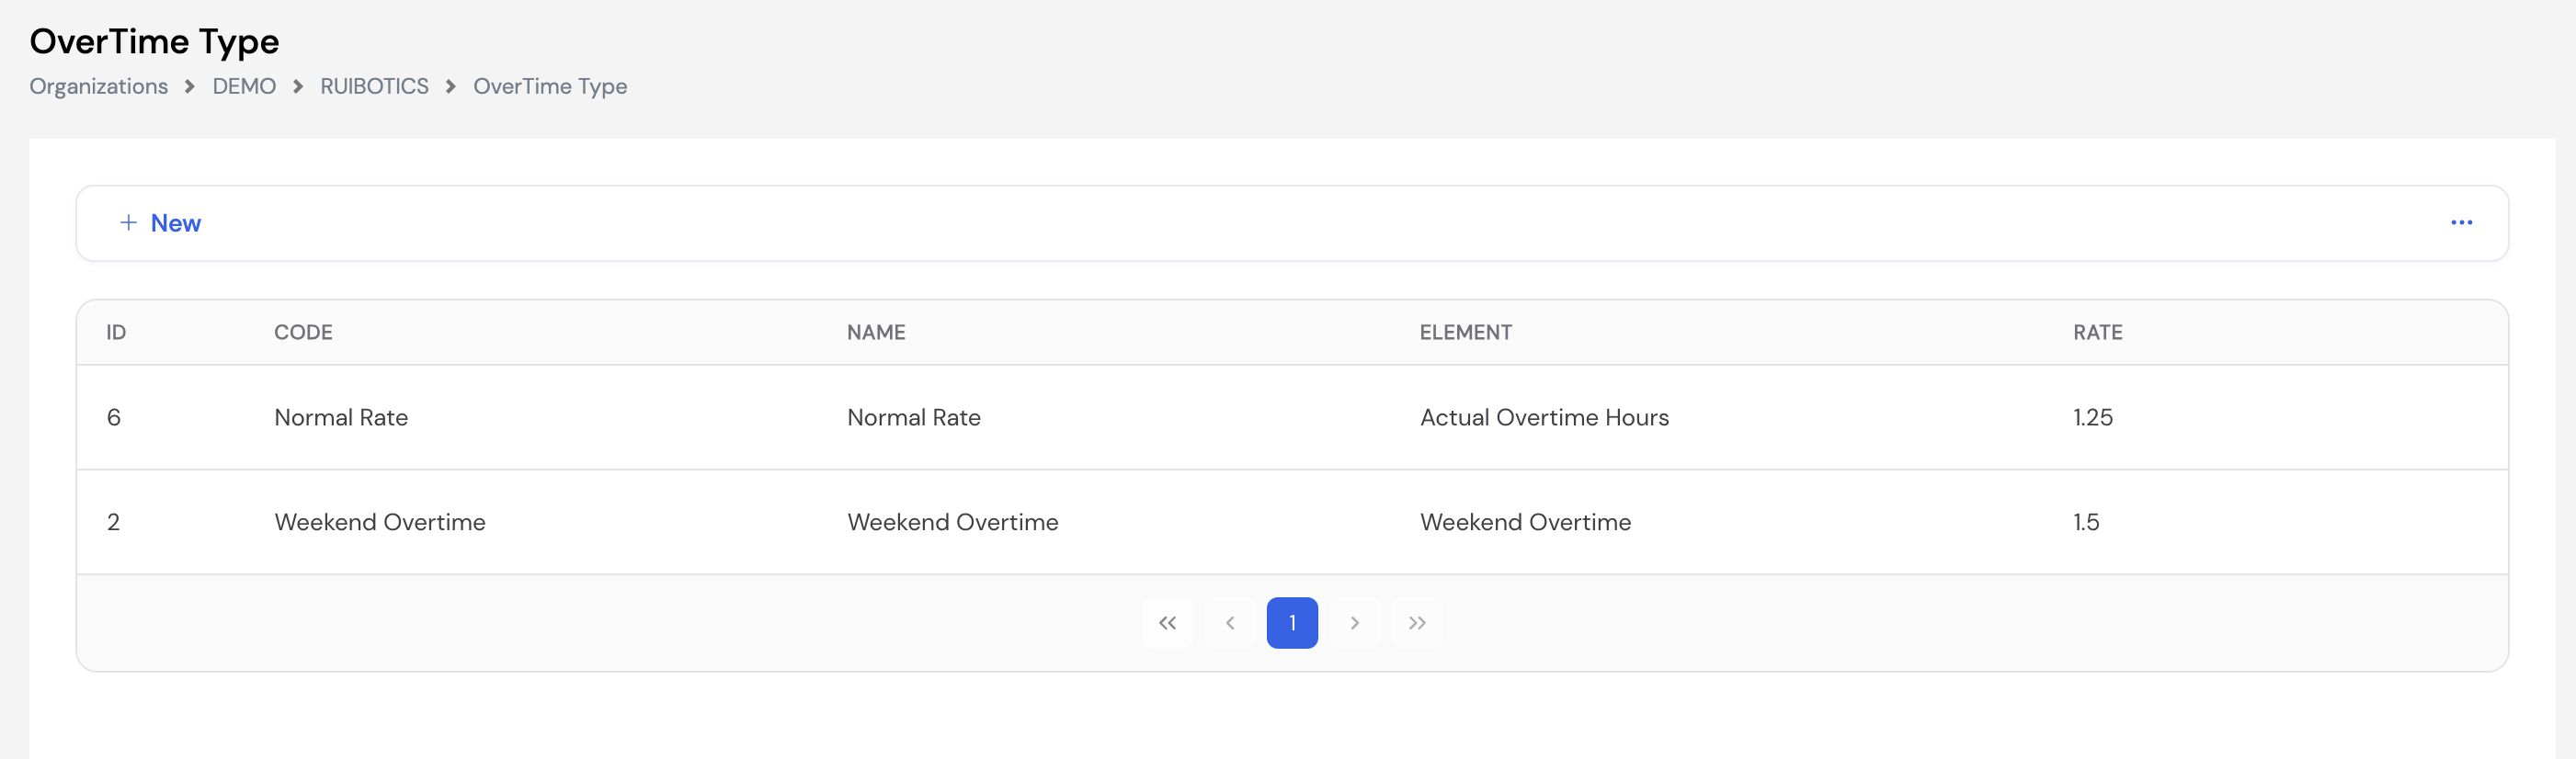
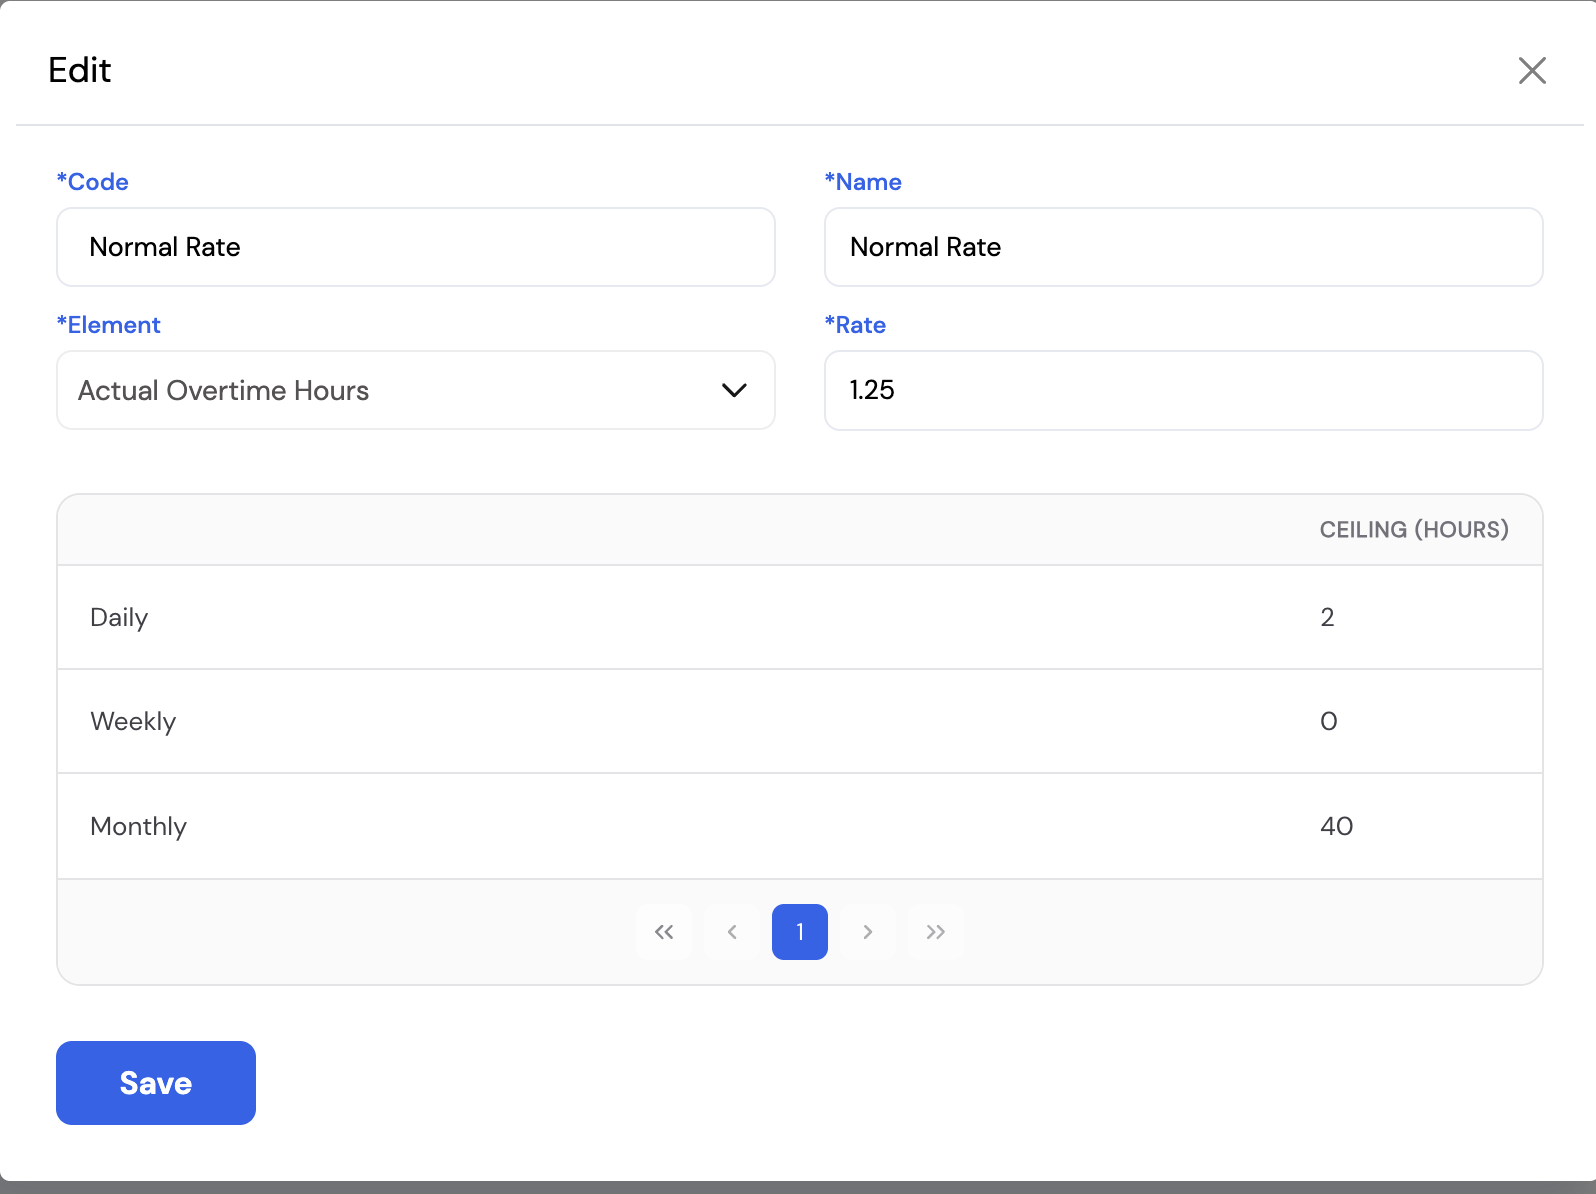
| Field | Description | Required |
|---|---|---|
| Code | A unique short code for this overtime type (e.g., Normal Rate, Weekend Overtime) | Required |
| Name | The display name for this overtime type as it appears in transactions and reports | Required |
| Element | The Pay Element linked to this overtime type — the Overtime Plugin will return its result to this element during payroll. Each overtime type must be linked to a dedicated overtime pay element. | Required |
| Rate | The overtime rate multiplier. The Overtime Plugin multiplies the recorded hours by this rate — for example, a rate of 1.25 means 1 hour of overtime = 1.25 paid hours; a rate of 1.5 means 1 hour = 1.5 paid hours. | Required |
Overtime Ceiling Limits
Each overtime type also has configurable ceiling (maximum) limits for how many overtime hours are allowed per time period. Hours recorded beyond the ceiling will not be compensated.
| Ceiling Period | Description |
|---|---|
| Daily | Maximum overtime hours allowed per day (e.g., 2 hours/day) |
| Weekly | Maximum overtime hours allowed per week (set to 0 for no weekly limit) |
| Monthly | Maximum overtime hours allowed per month (e.g., 40 hours/month) |
Set the ceiling to 0 for any period where no limit should apply. The system will only enforce limits for periods with a value greater than 0.
23.2.2 Absence Type
Absence Type defines the categories of unplanned absences that can be recorded against employees in the attendance system. Similar to Overtime Types, each absence type is linked to a Pay Element and a Rate, allowing the system to calculate the corresponding salary deduction during the payroll run via the Deduction Plugin.
| Field | Description | Required |
|---|---|---|
| Code | A unique short code for this absence type (e.g., Absence, Late, No Show) | Required |
| Name | The display name for this absence type as it appears in attendance records and reports | Required |
| Element | The Pay Element linked to this absence type — the Deduction Plugin will apply the deduction to this element during payroll. Each absence type should be linked to a dedicated deduction pay element. | Required |
| Rate | The deduction rate multiplier. A rate of 1 means the full value of the absent hours/days is deducted. A rate less than 1 applies a partial deduction (e.g., 0.5 = 50% deduction). | Required |
Absence Types work as the opposite of Overtime Types — overtime adds pay, absences deduct pay. Ensure each absence type is linked to a correctly configured Deduction pay element before processing attendance-based payroll deductions.
23.2.3 Attendance Rules
Attendance Rules define how the system handles employee attendance exceptions — such as arriving early, arriving late, leaving early, or leaving late. Rules are configured per Grade and specify which exception types are active, how they are distributed into payroll-impacting values, and which overtime and absence types to apply.
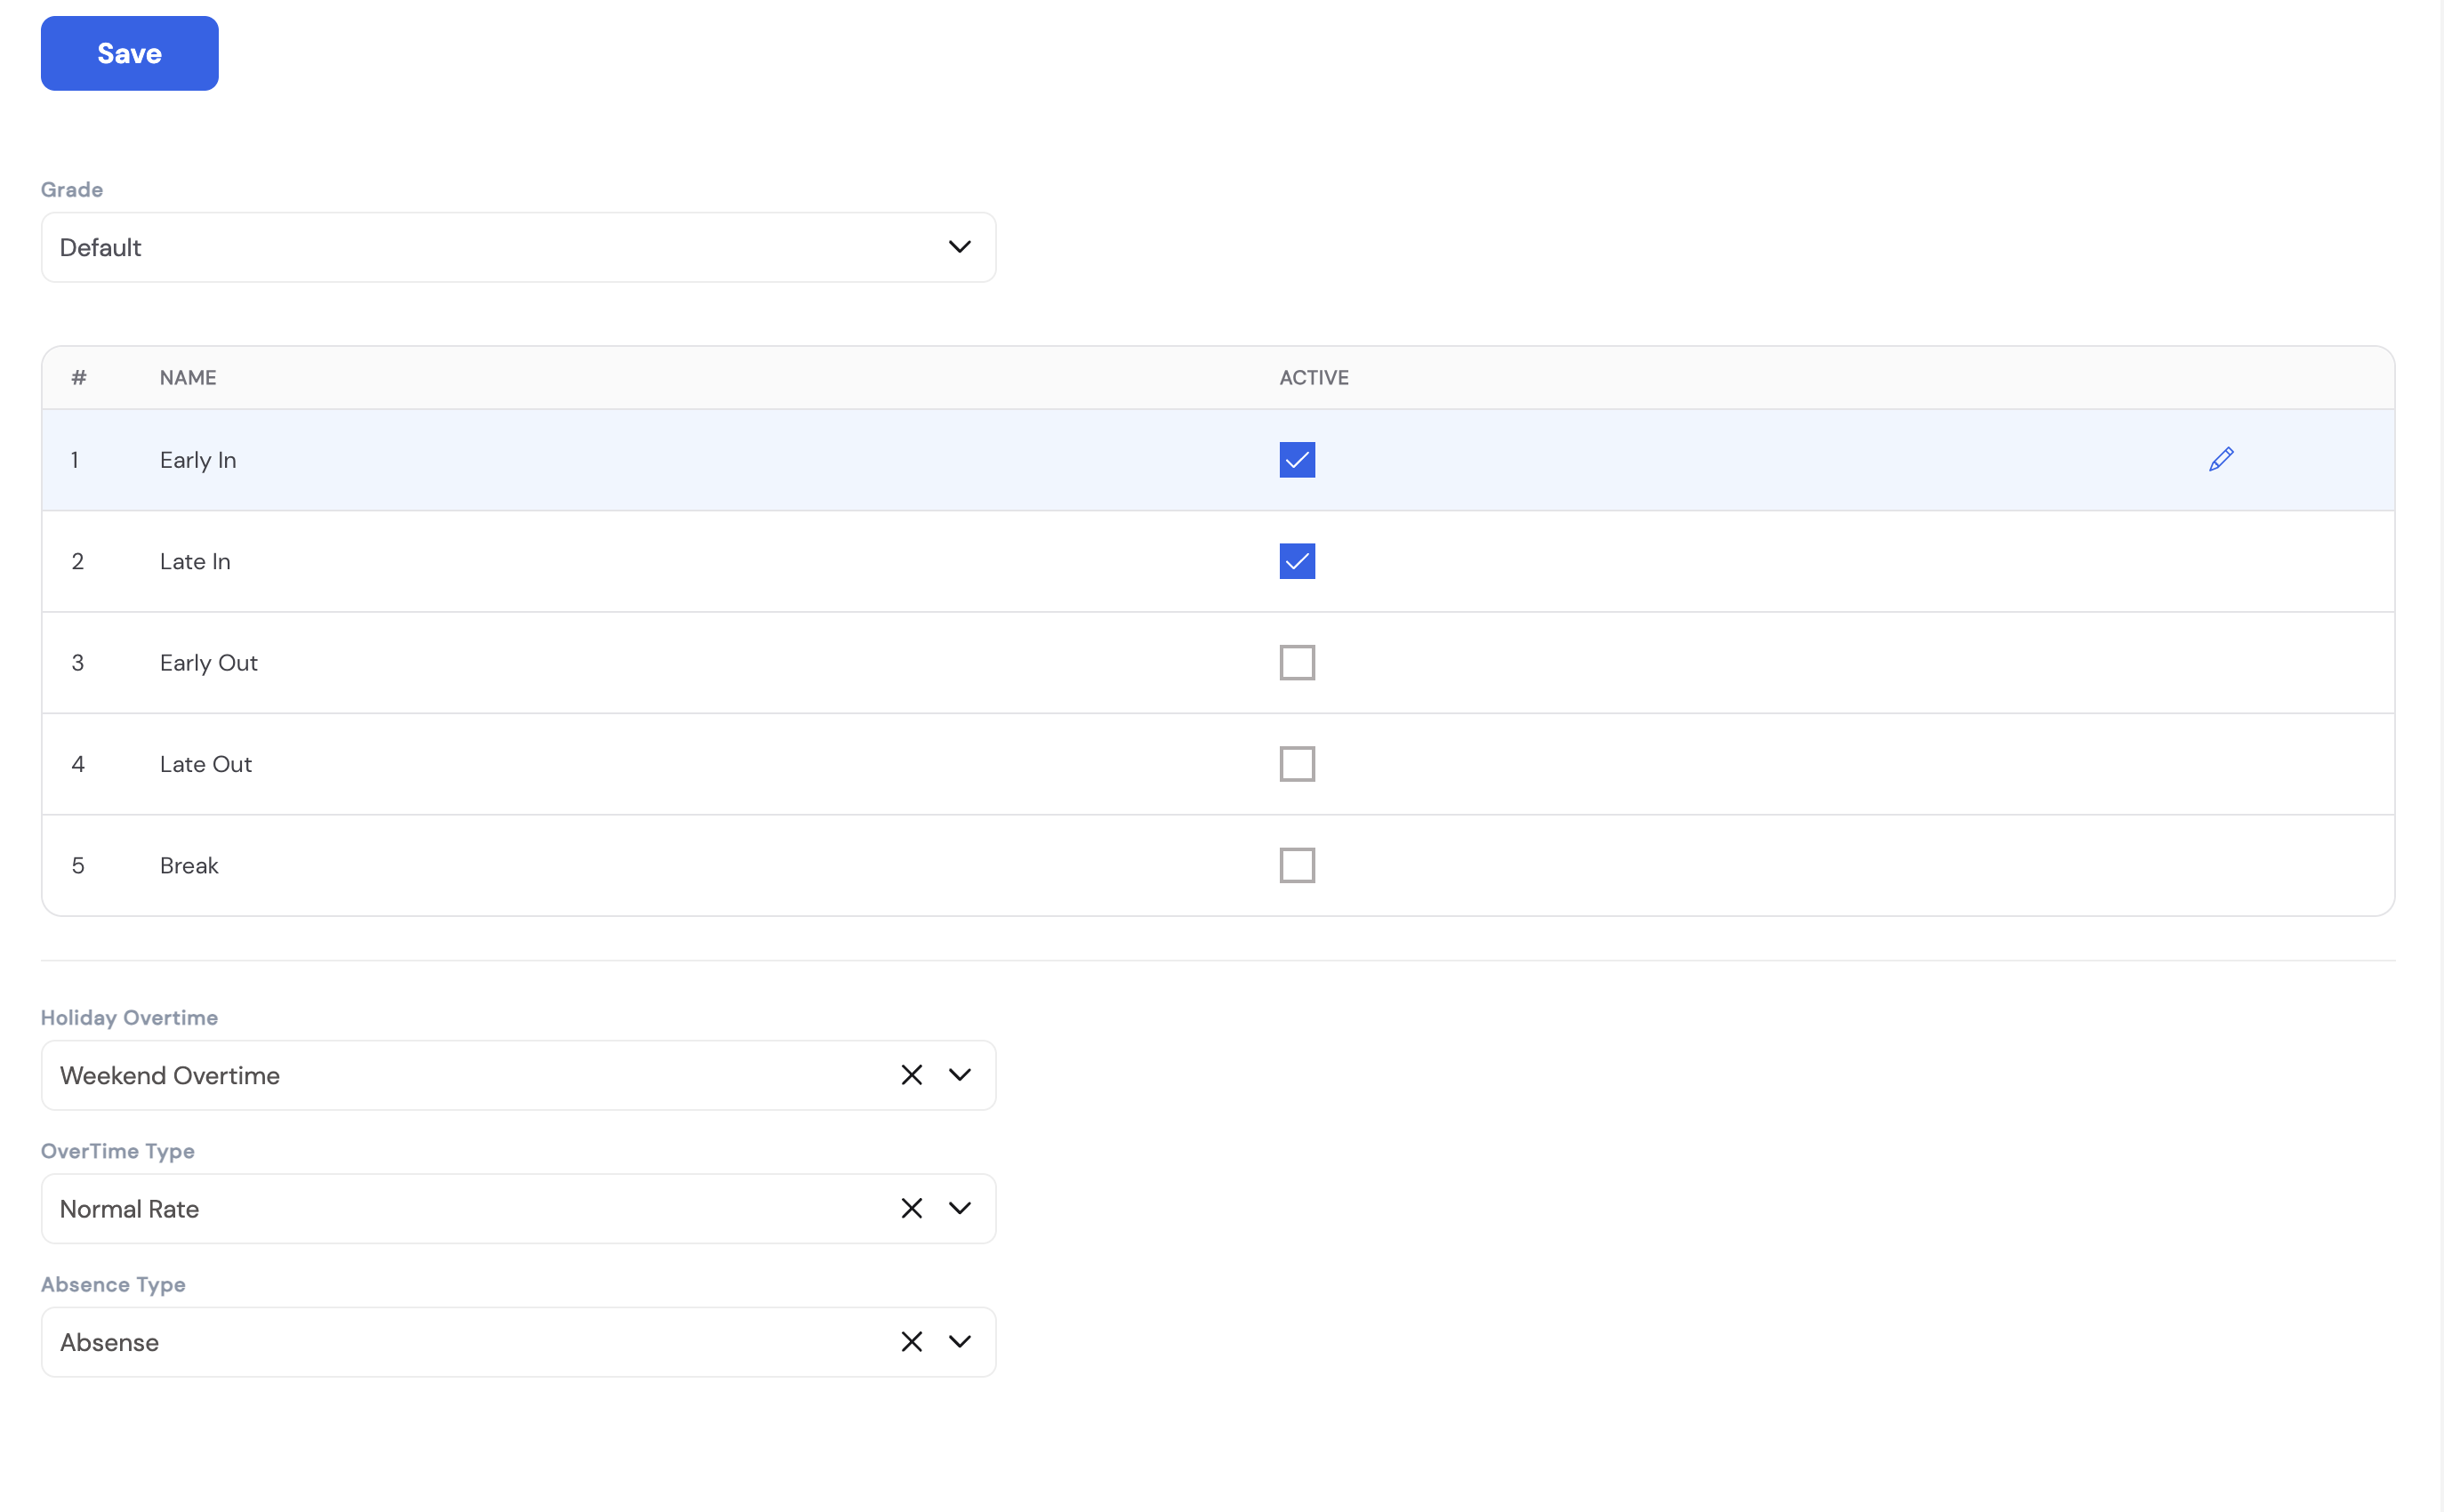
| Field / Column | Description |
|---|---|
| Grade | The employee grade this attendance rule applies to. Different grades can have different attendance tolerance and deduction rules. |
| Early In | Rule for employees who clock in earlier than their shift start time. When active, defines how early arrival minutes are handled (e.g., counted as overtime). |
| Late In | Rule for employees who clock in later than their shift start time. When active, defines how late arrival minutes are penalized or deducted. |
| Early Out | Rule for employees who clock out before their shift end time. |
| Late Out | Rule for employees who clock out after their shift end time (i.e., stay beyond scheduled hours). |
| Break | Rule governing break time exceptions. |
| Holiday Overtime | The overtime type to apply when an employee works on a public holiday (e.g., Weekend Overtime) |
| OverTime Type | The default overtime type applied to regular overtime hours captured through attendance (e.g., Normal Rate) |
| Absence Type | The absence type applied when the system detects an unexcused absence or attendance violation (e.g., Absence) |
Distribution Rules
Each active attendance exception (Early In, Late In, etc.) has a configurable Distribution — a set of time bands that determine how many minutes of absence or overtime to apply depending on how late/early the employee was. Click the edit (✏️) icon on any active rule to configure its distribution bands.
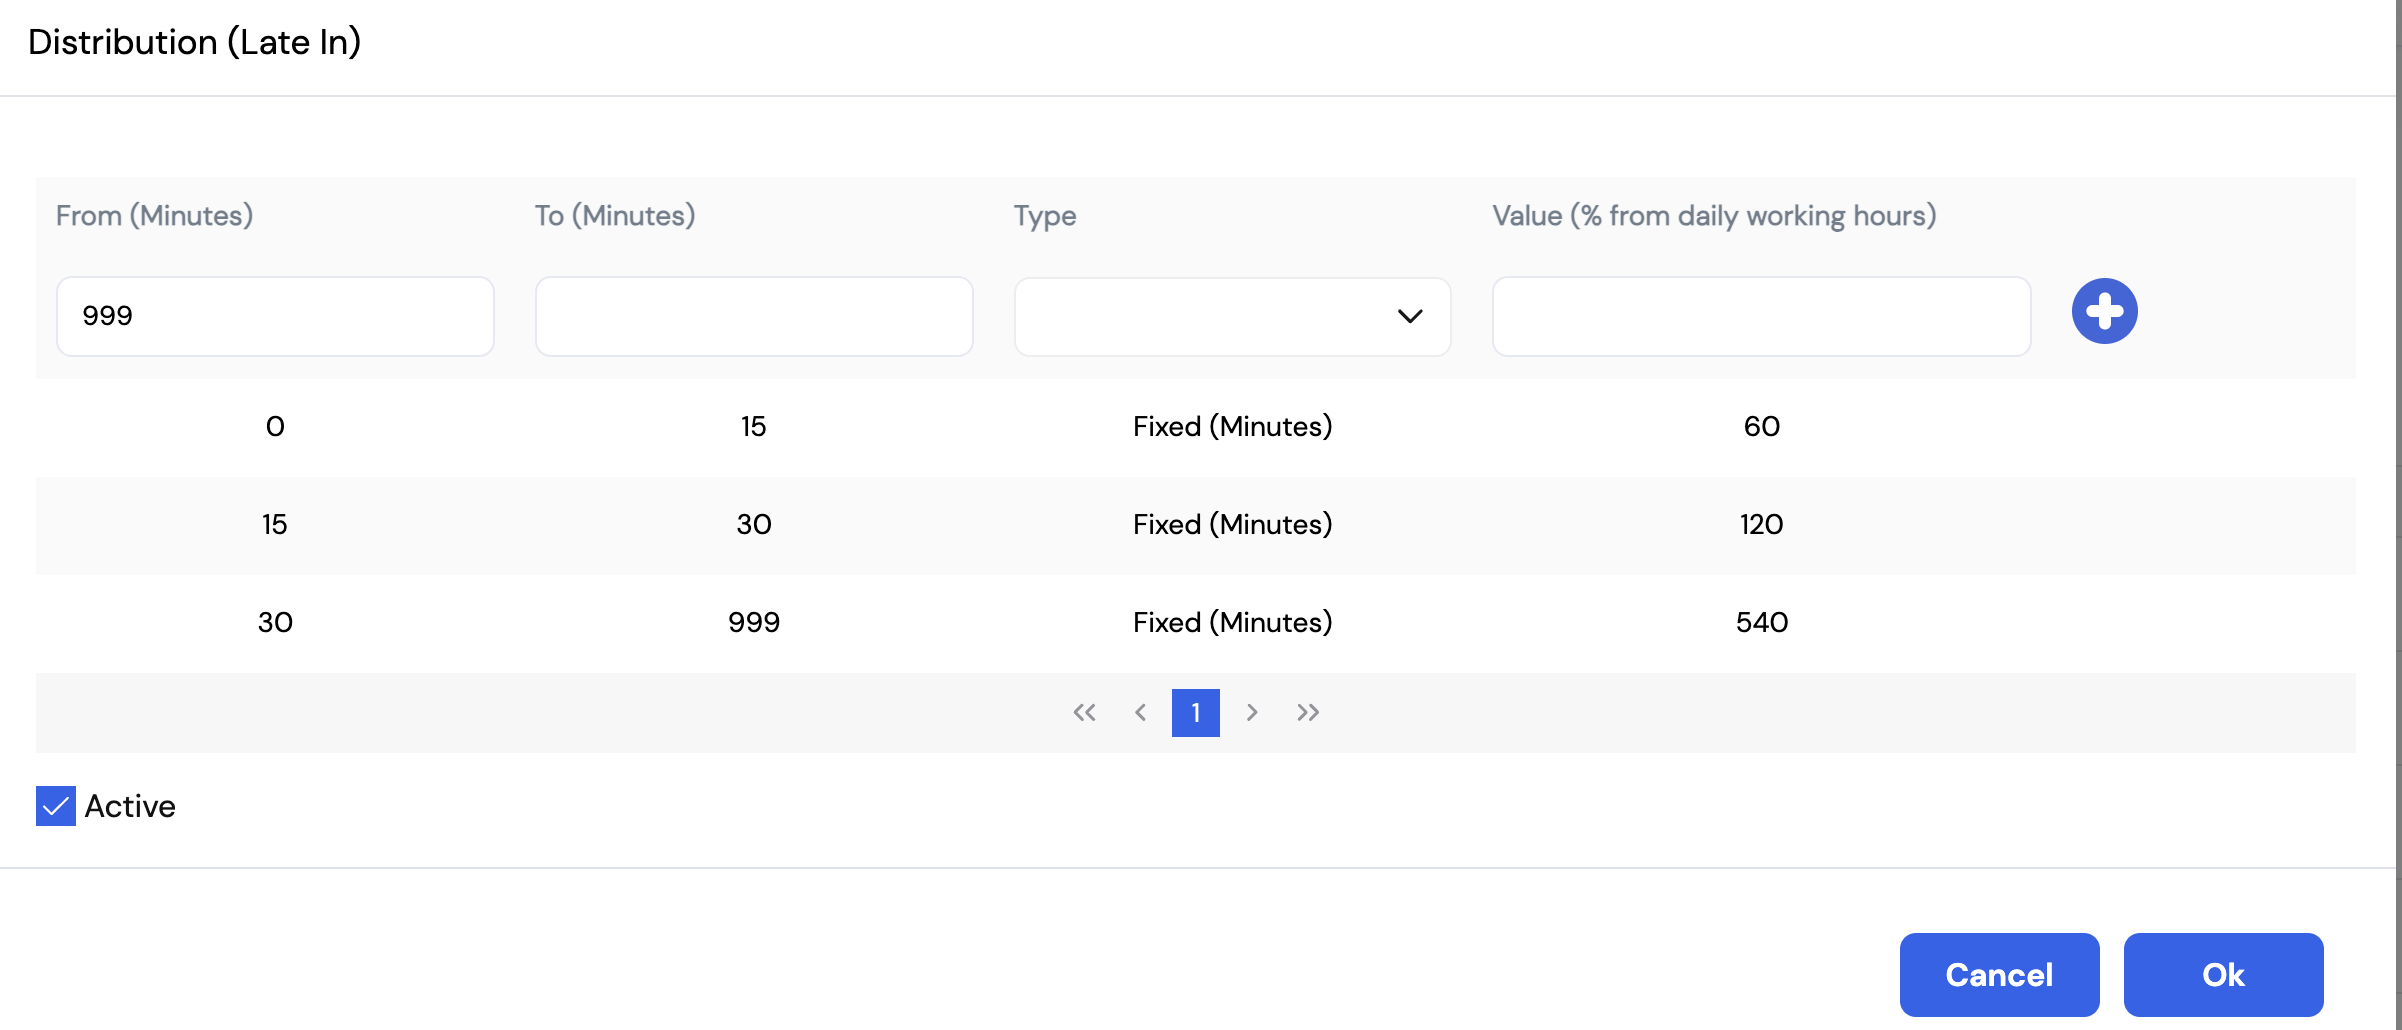
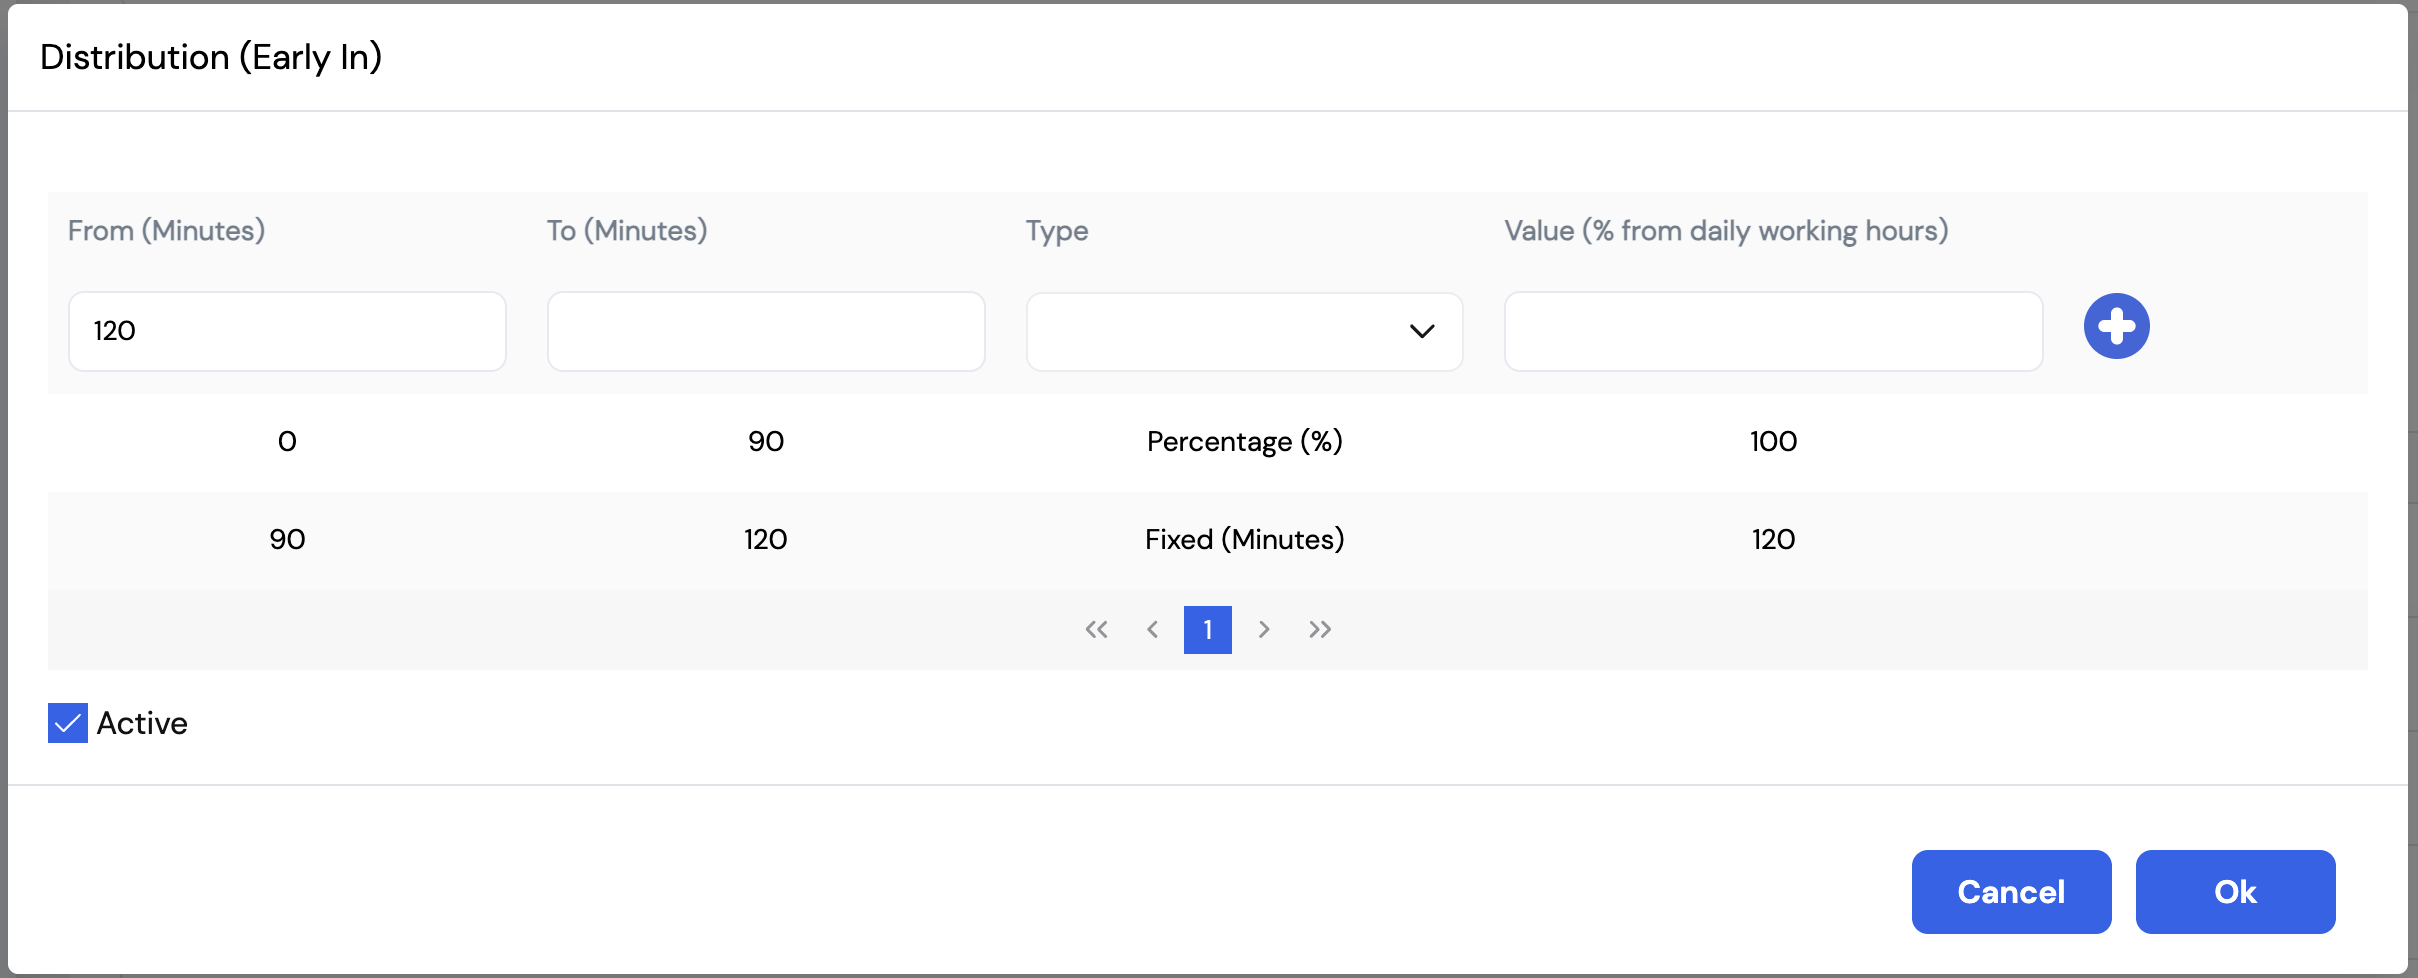
| Distribution Column | Description |
|---|---|
| From (Minutes) | The start of the time band (e.g., 0 = from the first minute) |
| To (Minutes) | The end of the time band (e.g., 15 = up to 15 minutes late; 999 = effectively no upper limit) |
| Type | Fixed (Minutes) — applies a fixed number of minutes as the deduction or overtime value. Percentage (%) — applies a multiplier to the actual out-of-shift minutes. For example, a value of 150% means each minute early or late counts as 1.5 minutes — amplifying the impact of the attendance exception. |
| Value | The deduction or overtime value to apply for this band. For Fixed type: number of minutes. For Percentage type: % of daily working hours. |
| Active | Check to enable this distribution rule. Uncheck to disable without deleting it. |
Example — Late In rule: If an employee is 10 minutes late (within the 0–15 band), the system applies a 60-minute fixed deduction. If they are 20 minutes late (15–30 band), the deduction becomes 120 minutes. If they are 45 minutes late (30–999 band), 540 minutes (a full shift) is deducted. This allows companies to apply a progressive penalty structure for late arrivals.
23.2.4 Shift Template
Shift Templates define the standard work shifts used in the company — such as Morning, Night, or any other shift pattern. Each template specifies the shift's start and end times and is later assigned to employees through the Employee Schedule (Section 23.2.5). Shift templates are the foundation of the attendance system — the system uses them to determine when an employee is expected to be at work and to evaluate early/late in and out exceptions against the Attendance Rules (Section 23.2.3).

| Column | Description |
|---|---|
| ID | System-generated unique identifier for the shift template |
| Code | The name of the shift (e.g., Morning, Night, Split Shift) |
| From | The shift start time |
| To | The shift end time |
To add a new shift, click + New, enter the Code, From time, and To time, then click Save.
For night shifts that span midnight (e.g., 10:00 PM to 6:00 AM), ensure the system is configured to handle cross-midnight shifts correctly. Contact your system administrator if night shift hours are not being calculated as expected.
23.2.5 Employee Schedule
Employee Schedule provides a calendar view of a specific employee's work schedule, allowing HR administrators to view, update, or override their assigned shifts on a day-by-day basis. Select an employee from the dropdown to load their schedule, then navigate by Month, Week, Day, or List view.
Each day on the calendar displays the employee's assigned shift (e.g., 7a – 3p) or a special status such as Day off. Administrators can click on any day to change the shift assignment or mark a day as a day off — overriding the employee's baseline calendar schedule for that specific date.
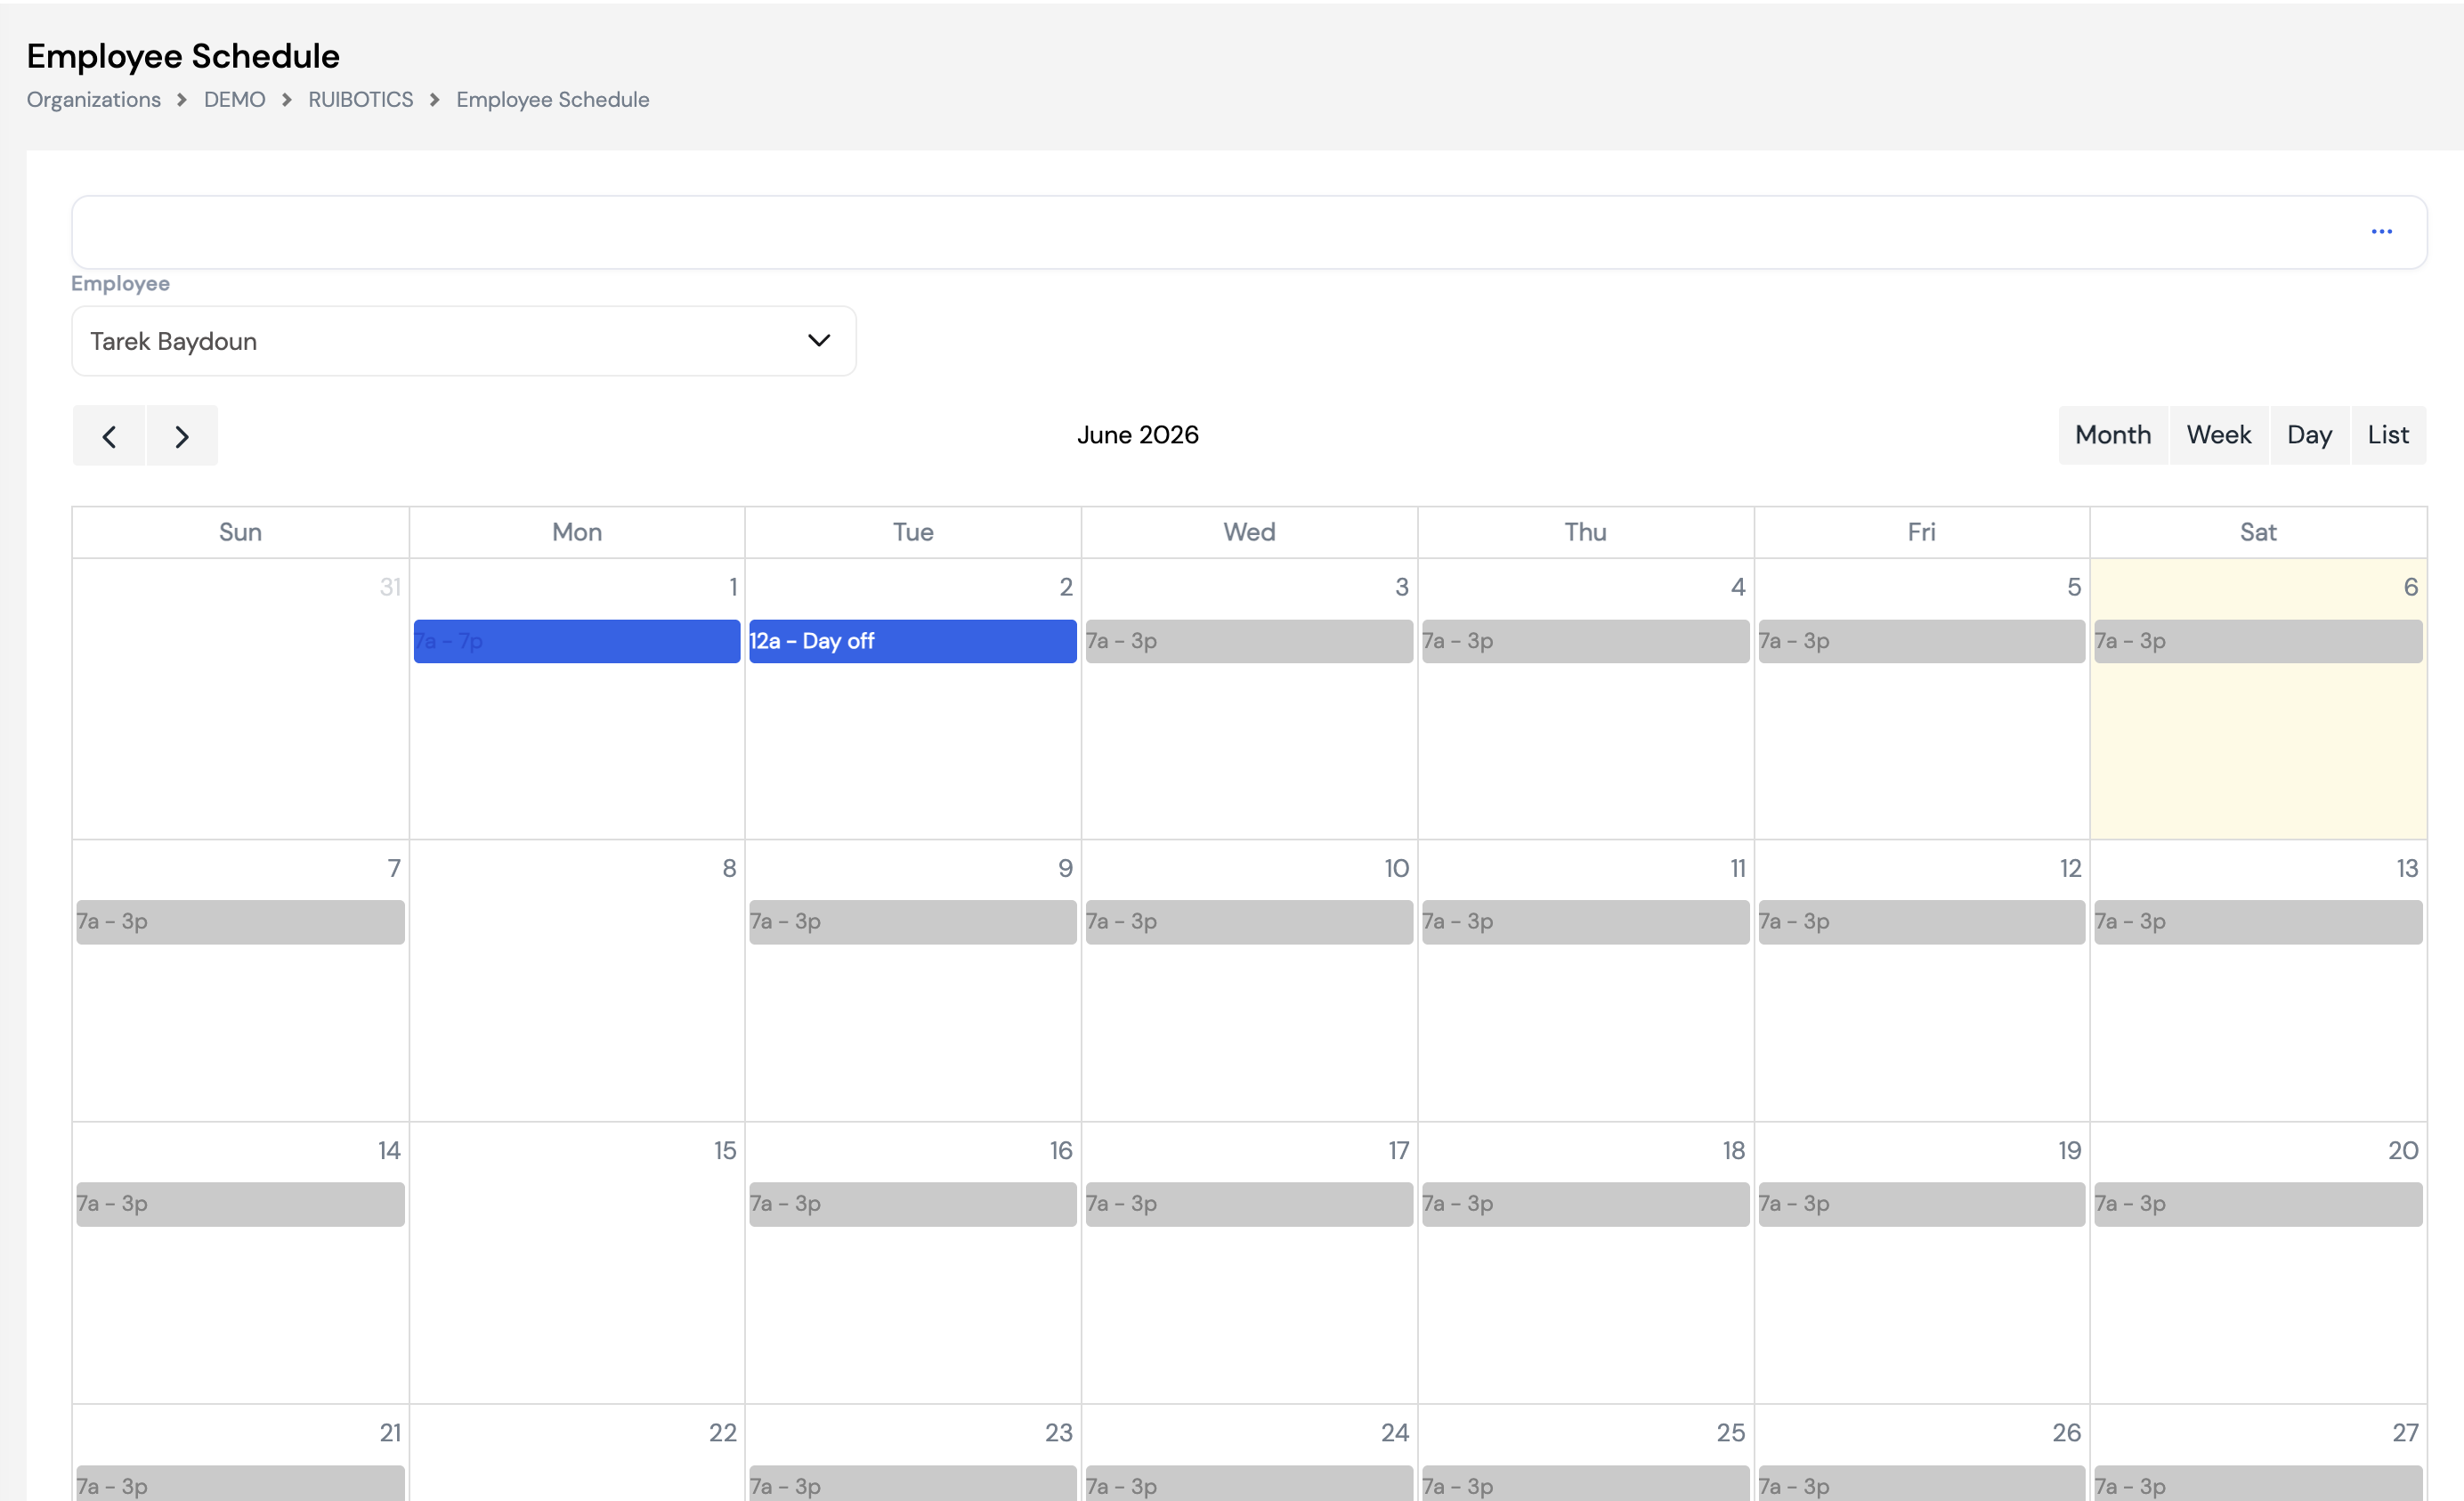
Baseline vs. override. An employee's default schedule comes from the Calendar assigned to them in their employee profile. The Employee Schedule screen here is used to override specific days — for example, assigning a different shift for a week, marking a specific date as a day off, or adjusting for a temporary schedule change. The baseline calendar remains unchanged for all other days.
To create a full work schedule and assign it to employees or employee groups as the baseline, see the Calendar setup covered later in this manual (Section 23 — Setup → Calendar).
23.3 Training Setup
Training Setup contains the configurations for managing classroom-based (physical attendance) training within Magnar HCM — including course definitions, trainers, agendas, and feedback. It is accessed via Setup → Training Setup.
This section covers instructor-led and in-person training only. Online and e-learning based training is managed separately through the LMS (Learning Management System) module, which will be covered in a dedicated section of this manual.
23.3.1 Course Categories
Course Categories are used to classify and group training courses. Each course created in the system (Section 23.3.2) is assigned to a category, making it easier to filter, report on, and manage the training catalog by area of learning.
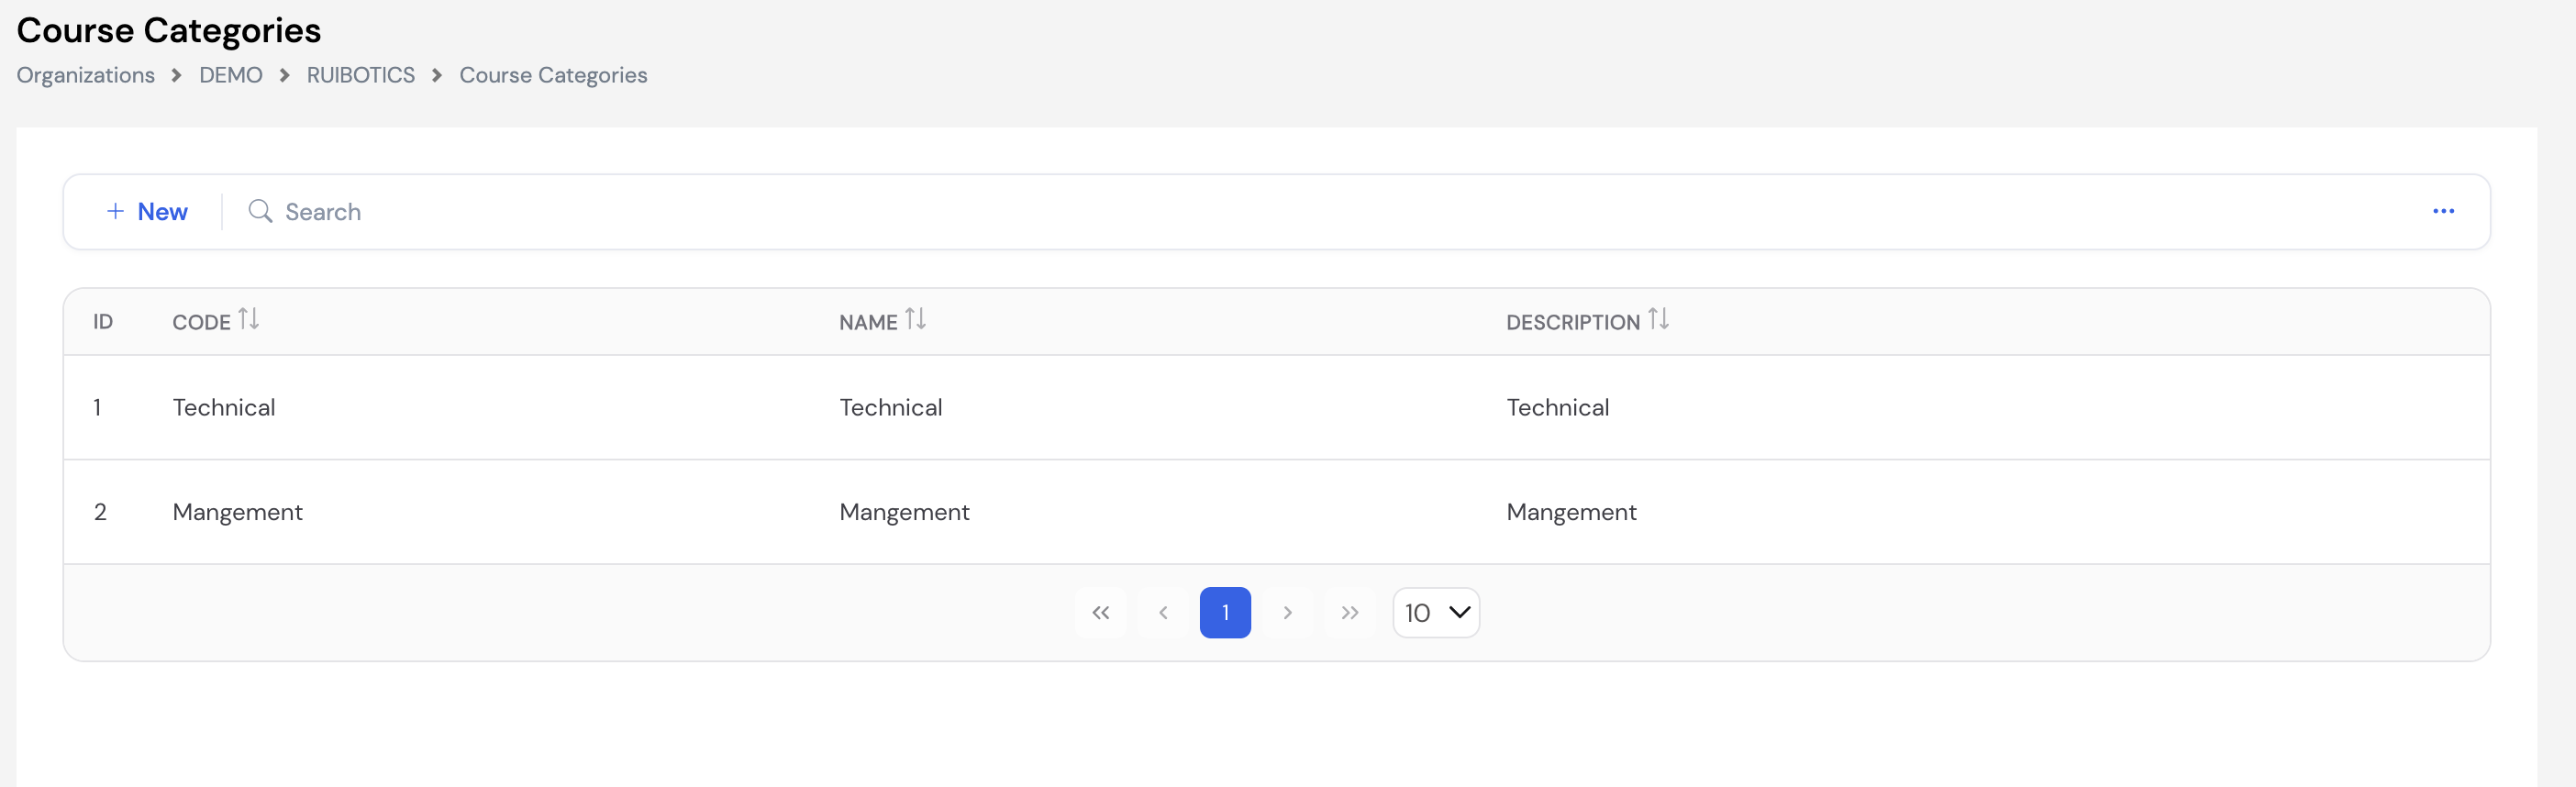
To add a new category, click + New, enter the Code, Name, and Description, then click Save.
23.3.2 Courses
Courses are the individual training programs available in the company's training catalog. Each course is assigned to a Course Category and can be filtered by category on the list screen. Courses defined here are used when scheduling training sessions through the Training Agenda (Section 23.3.7).
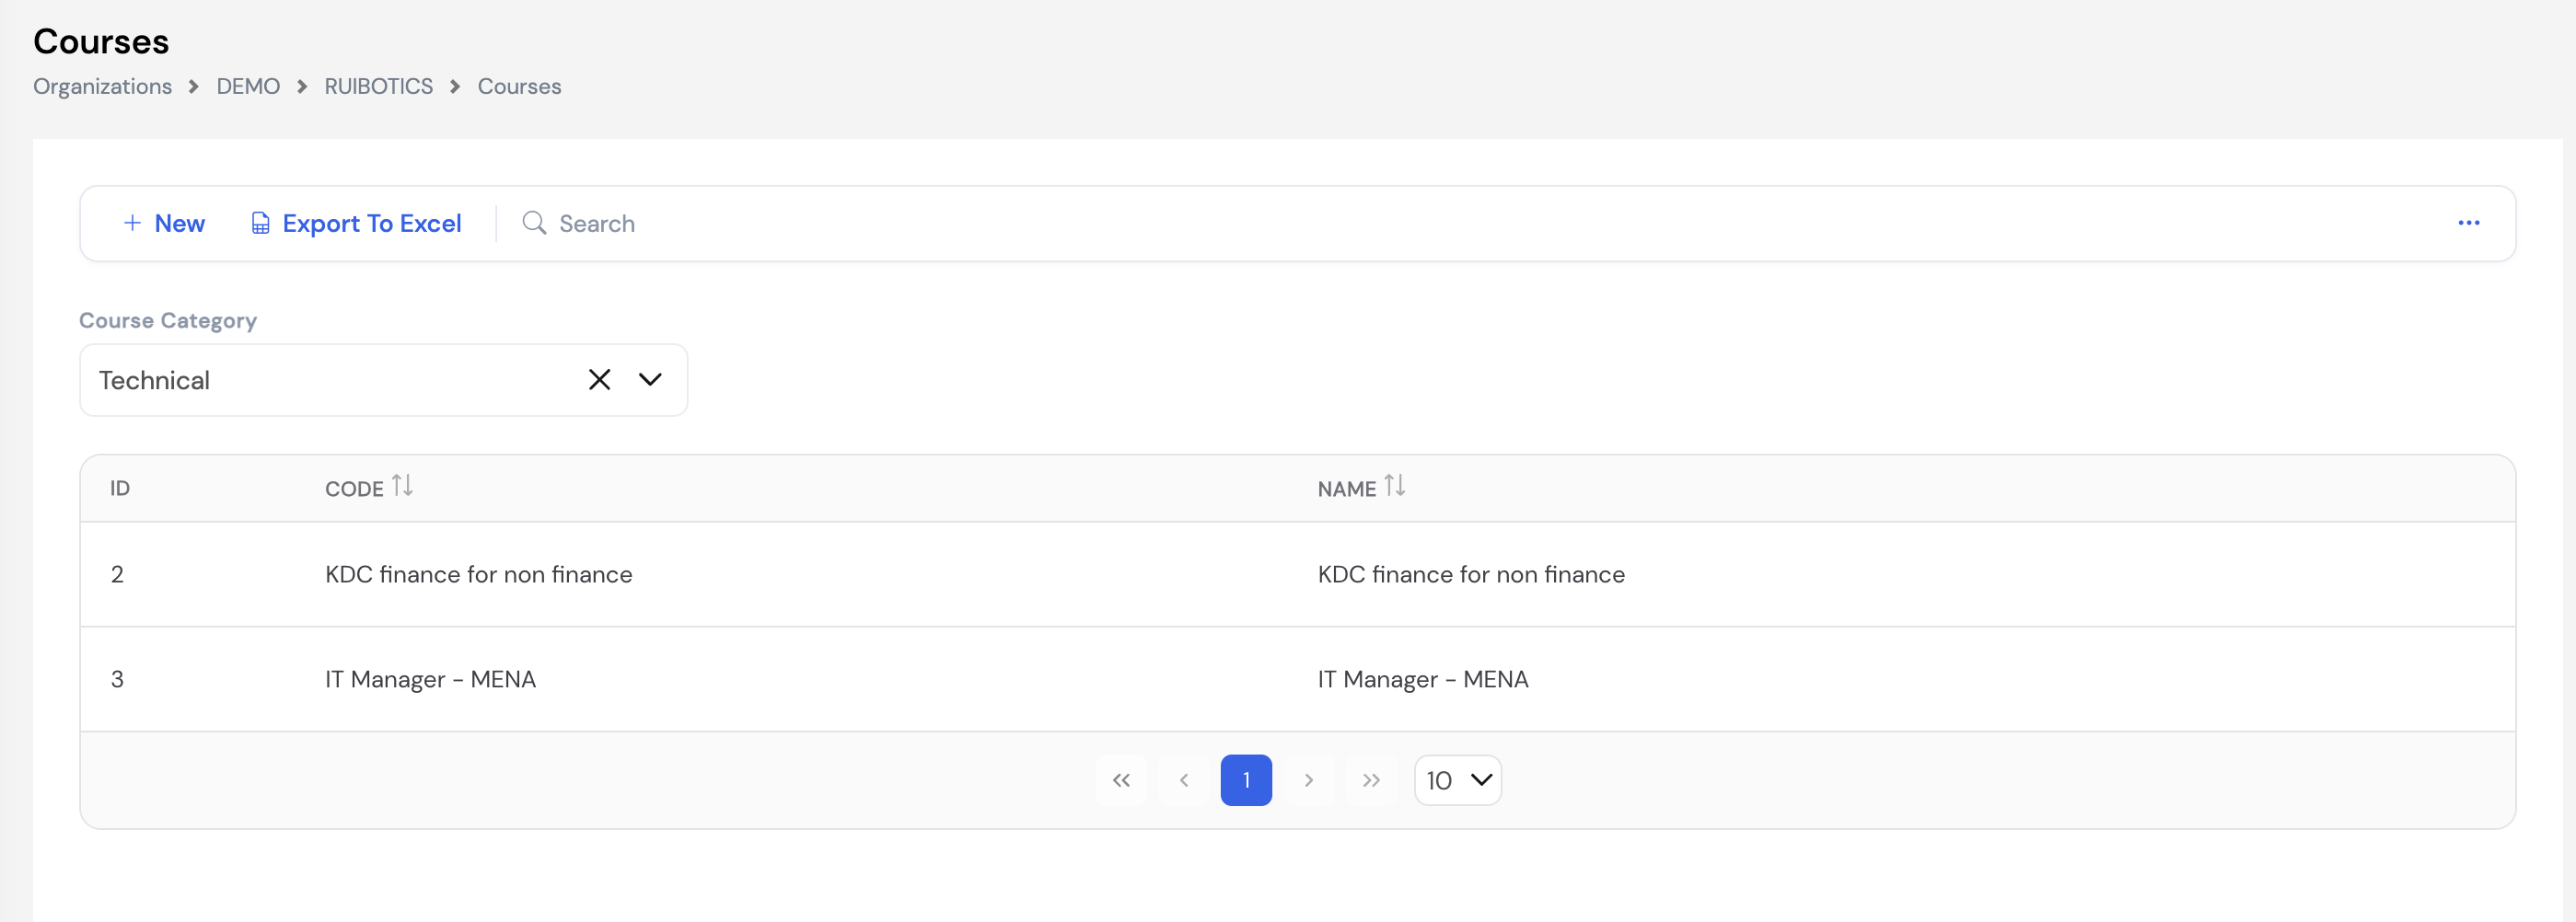
Use the Course Category dropdown to filter the list by category. The full course list can be exported using the Export to Excel button. To create a new course, click + New to open the course creation form.
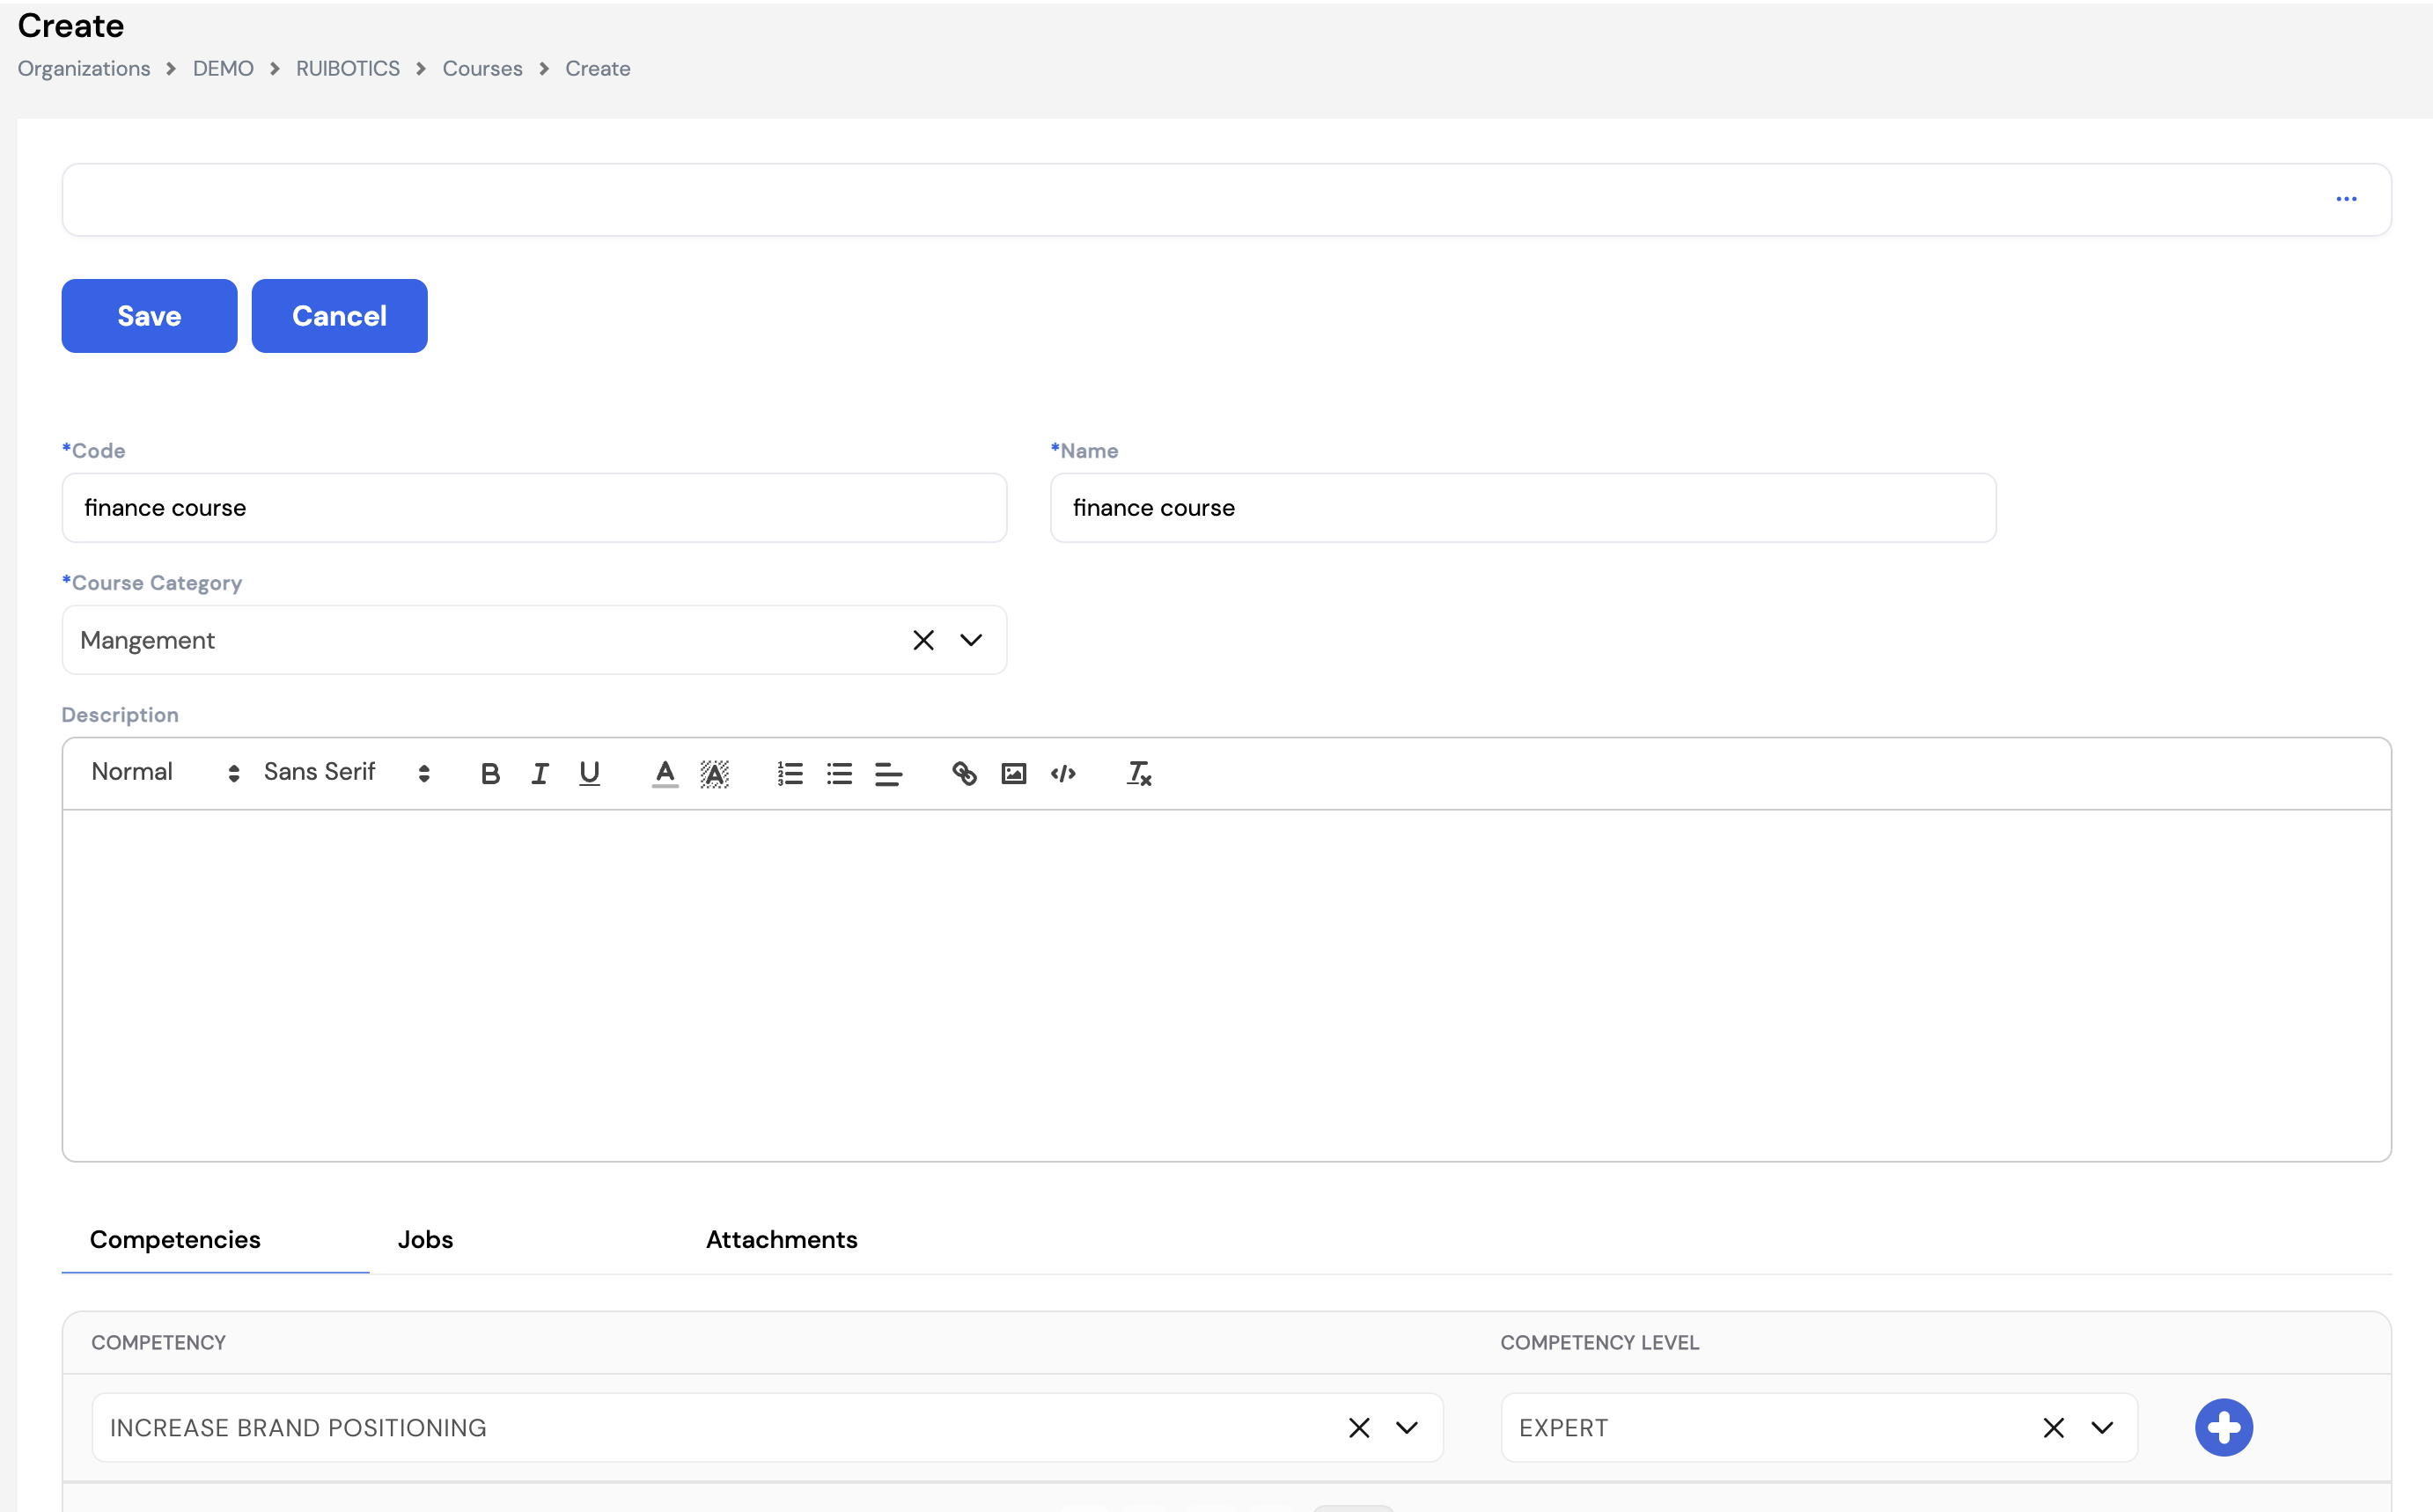
| Field | Description | Required |
|---|---|---|
| Code | A unique short code for the course (e.g., FIN-101) | Required |
| Name | The full name of the course as it will appear in training records and reports | Required |
| Course Category | The category this course belongs to (e.g., Technical, Management) — from Section 23.3.1 | Required |
| Description | A rich-text description of the course content, learning objectives, and any relevant details | Optional |
Course Tabs
| Tab | Description |
|---|---|
| Competencies | Define the competencies and their expected proficiency levels that will be added to an employee's skill set upon completing this course. Select the Competency and the Competency Level (e.g., Expert) for each skill the course develops. This links training completion directly to employee competency records. |
| Jobs | Assign this course to specific job roles that it is relevant to. When jobs are linked, only employees in those roles will see this course in ESS. If left blank, the course will be visible to all employees in the company regardless of their job. |
| Attachments | Upload training materials related to this course — such as the course syllabus, agenda, reference documents, or pre-reading materials. Employees can access these from the ESS portal when viewing training details. |
Always populate the Competencies tab — this ensures that completing the course automatically updates the employee's skill profile and links training activity to performance and appraisal data.
23.3.3 Feedback Category
Feedback Categories group the feedback questions asked to employees after a training session. For example, categories might separate feedback about the course content from feedback about the trainer. Each category contains one or more Feedback Items (Section 23.3.4).
To add a new category, click + New, enter the Code and Name, then click Save.
23.3.4 Feedback Item
Feedback Items are the individual questions or statements within a feedback category that employees are asked to rate or respond to after completing a training session. They form the post-training evaluation questionnaire.

To add a new feedback item, click + New, enter the Code and Name for the question or statement, then click Save.
Organize feedback items under the correct Feedback Category — for example, items about trainer delivery under Feedback on Trainer, and items about material quality under Content Feedback. This makes post-training reports more meaningful.
23.3.5 Trainers
Trainers defines the individuals who deliver training sessions. Trainers can be classified as either Internal (company employees acting as trainers) or External (third-party trainers or training providers from outside the organization). Use the Trainer Type dropdown to filter the list by type.
| Trainer Type | Description |
|---|---|
| Internal | An employee within the company who conducts training sessions for colleagues |
| External | A trainer or training provider from outside the organization — such as a consultant, vendor, or training institution |
To add a new trainer, click + New, enter their name details and select their Trainer Type, then click Save. Trainers defined here are assigned to training sessions through the Training Agenda (Section 23.3.7).
23.3.6 Training Agenda Types
Training Agenda Types define the categories or formats of training sessions used when creating a Training Agenda (Section 23.3.7) — for example, Project Management Training, Classroom Session, Workshop, or On-the-Job Training. They support bilingual labeling through a Foreign Name field.
| Field | Description | Required |
|---|---|---|
| Code | A unique short code for this agenda type (e.g., PMT, WS, OJT) | Required |
| Name | The name of the agenda type in the primary language (e.g., Project Management Training) | Required |
| Foreign Name | The name of the agenda type in a second language (e.g., Arabic) for bilingual organizations | Optional |
To add a new type, click + New or click the edit icon on an existing row, fill in the fields, and click Save.
23.3.7 Training Agenda
The Training Agenda is where actual training sessions are created and scheduled. It brings together the course, trainer, dates, attendee limits, and day-by-day schedule into a single training event that employees can apply for through ESS.
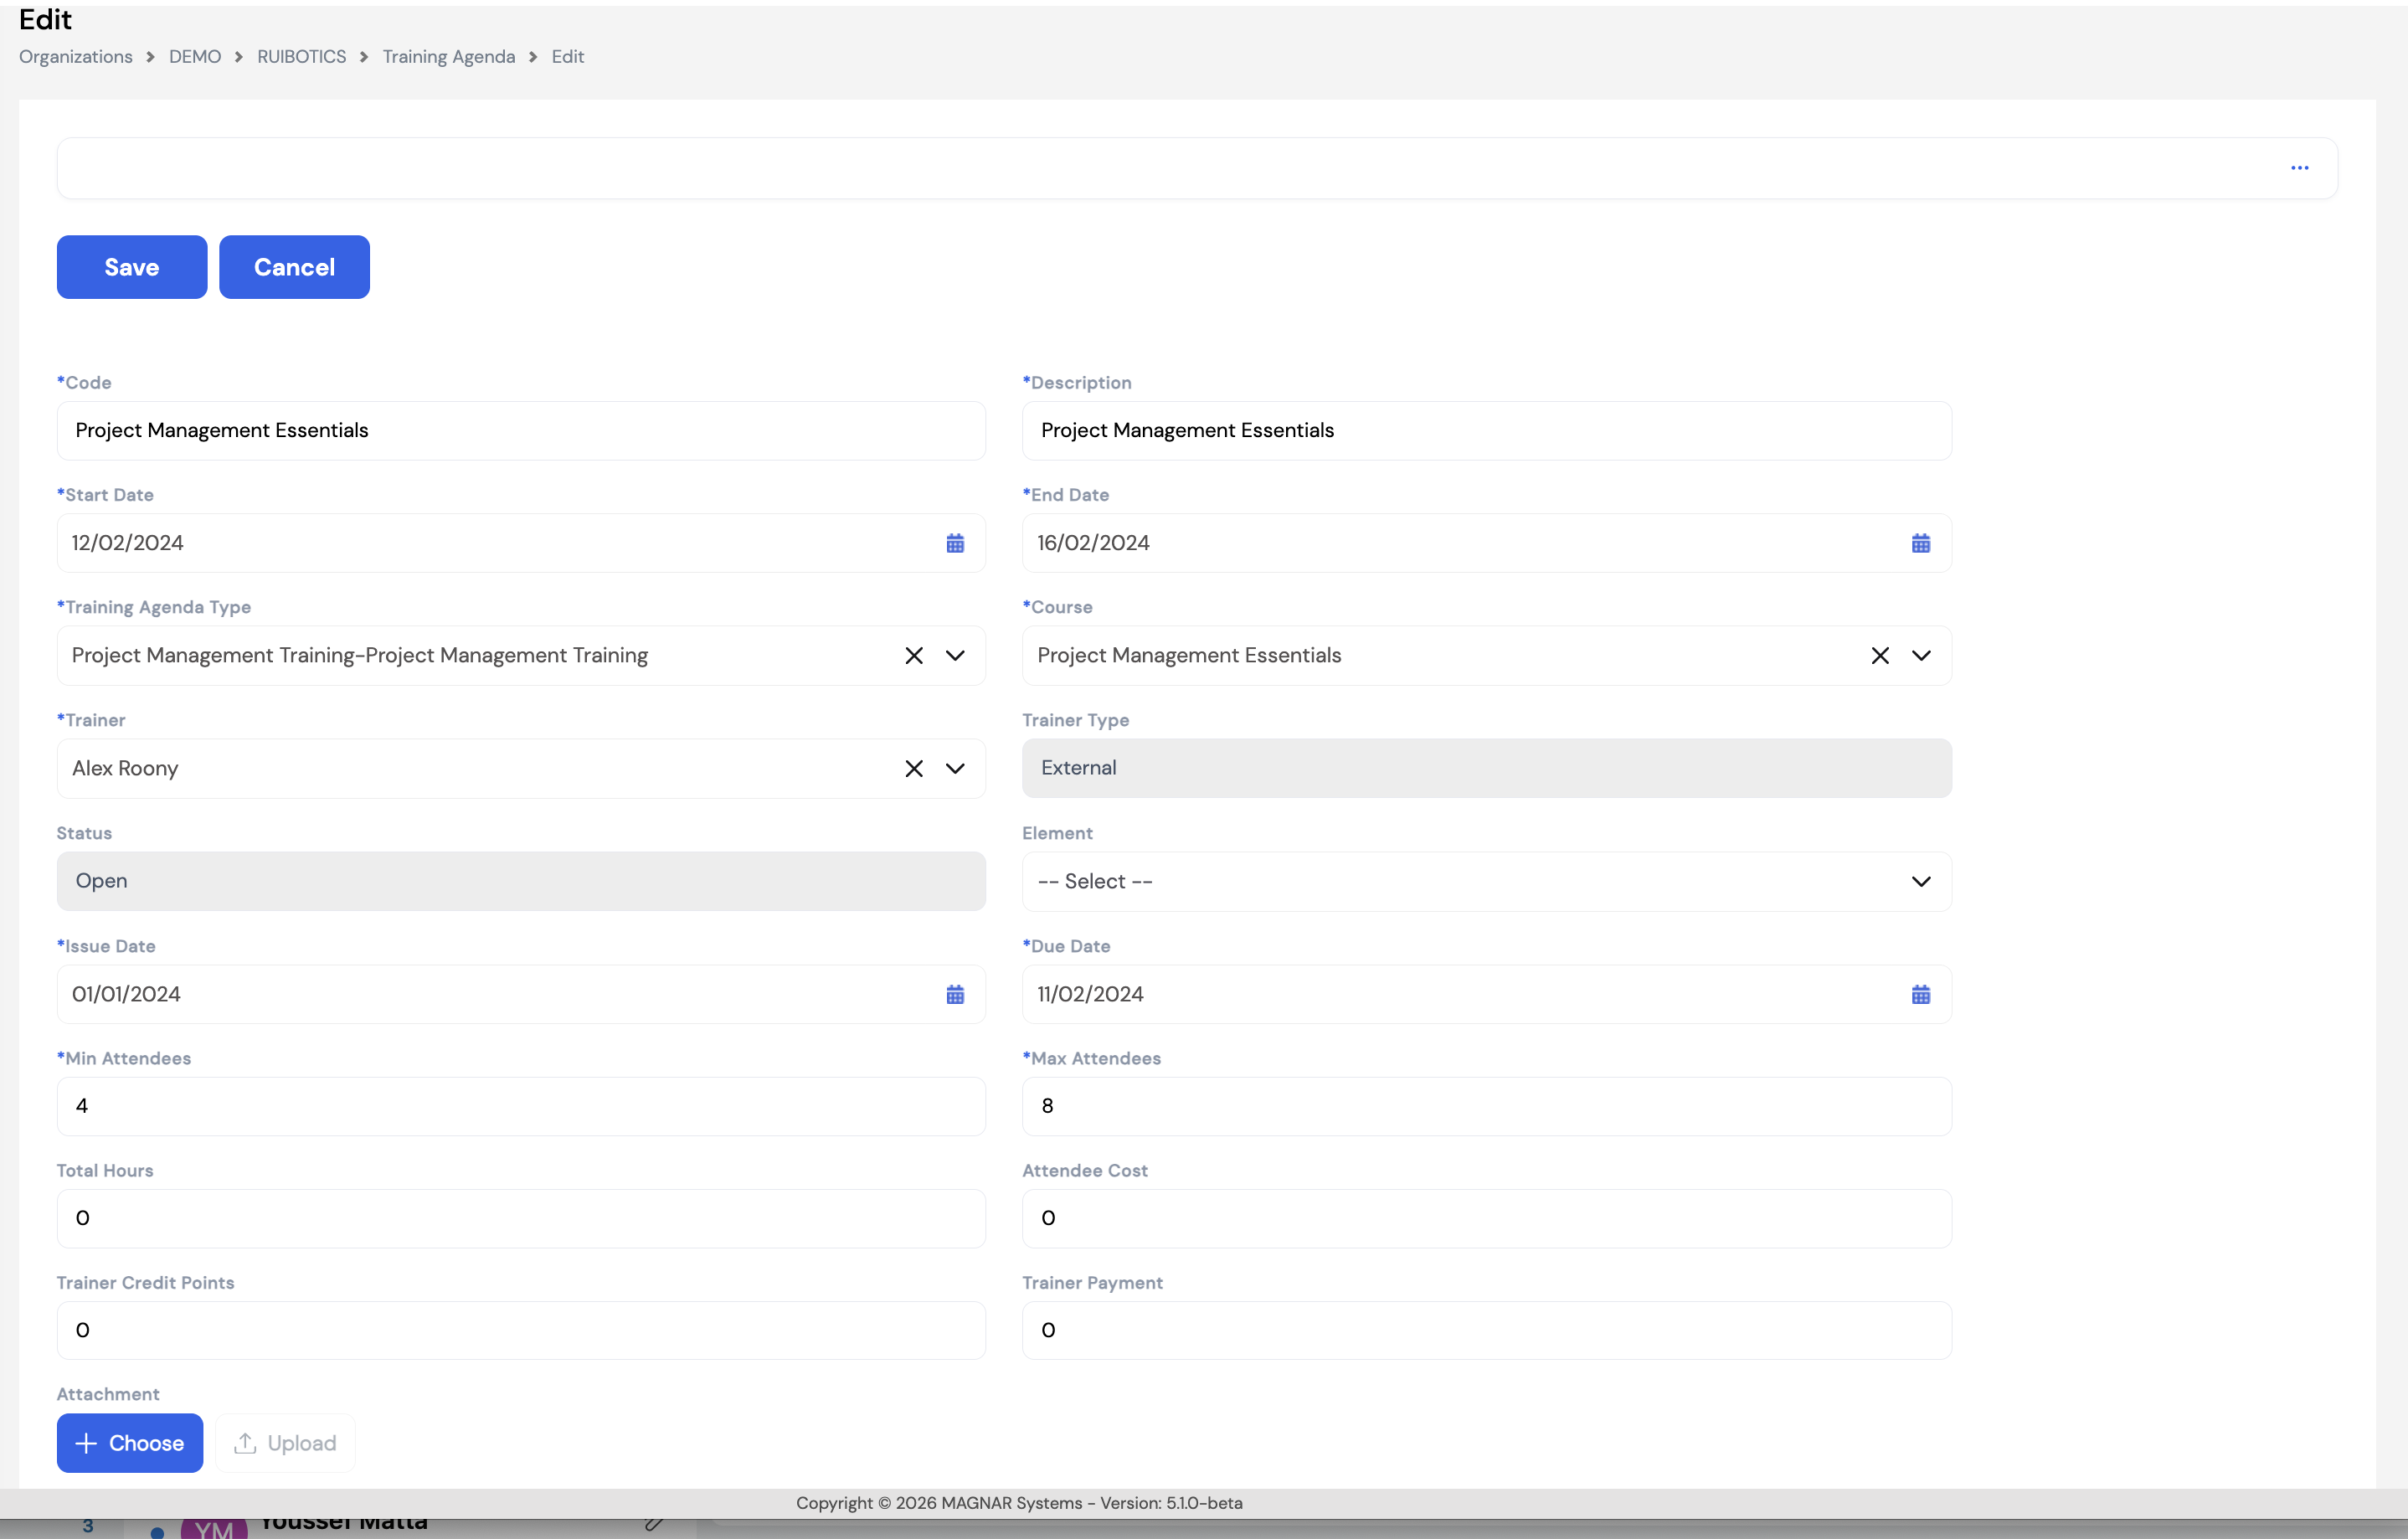
| Field | Description | Required |
|---|---|---|
| Code | A unique identifier for this training session (e.g., Project Management Essentials) | Required |
| Description | A brief description of this specific training session | Required |
| Start Date | The first day of the training session | Required |
| End Date | The last day of the training session | Required |
| Training Agenda Type | The type of training session (e.g., Project Management Training) — from Section 23.3.6 | Required |
| Course | The course being delivered in this session — from Section 23.3.2 | Required |
| Trainer | The trainer delivering this session — from Section 23.3.5 | Required |
| Trainer Type | Auto-populated (Internal or External) based on the selected trainer | Auto |
| Status | The current status of the agenda (e.g., Open, Closed). Auto-updated by the system. | Auto |
| Element | A pay element to link if the training has a cost component that needs to be processed through payroll | Optional |
| Issue Date | The date the training request was issued or opened for enrollment | Required |
| Due Date | The deadline for employee applications to enroll in this training session | Required |
| Min Attendees | The minimum number of attendees required for the session to proceed | Required |
| Max Attendees | The maximum number of employees that can attend this session | Required |
| Total Hours | Total training hours for the session | Optional |
| Attendee Cost | The cost per attendee for this training session (for budgeting and reporting) | Optional |
| Trainer Credit Points | Credit points awarded to the trainer for delivering this session | Optional |
| Trainer Payment | The payment amount to the trainer for delivering this session (relevant for external trainers) | Optional |
| Attachment | Upload supporting documents such as the session agenda or materials for attendees | Optional |
Details Tab — Session Schedule
The Details tab below the main form allows you to define the day-by-day schedule of the training session — specifying which days of the week are active training days and the start and end times for each active day.

For each day, check the Active checkbox to include that day in the schedule, then enter the Start Time and End Time. The session also has two additional tabs:
- Applicants Received — view the list of employees who have applied to attend this training session through ESS
- Close — close the training agenda once the session is complete and enrollment is finalized
Once the Training Agenda is saved and has an Open status, it becomes visible to employees in the ESS portal who can apply to attend (subject to the Max Attendees limit and Due Date).
23.3.8 Training Rating
Training Rating defines the rating scale used when employees evaluate a training session through the post-training feedback form. Each rating has a Name, a numeric Value, and a Description. The values are used to calculate aggregate scores for training effectiveness reporting.
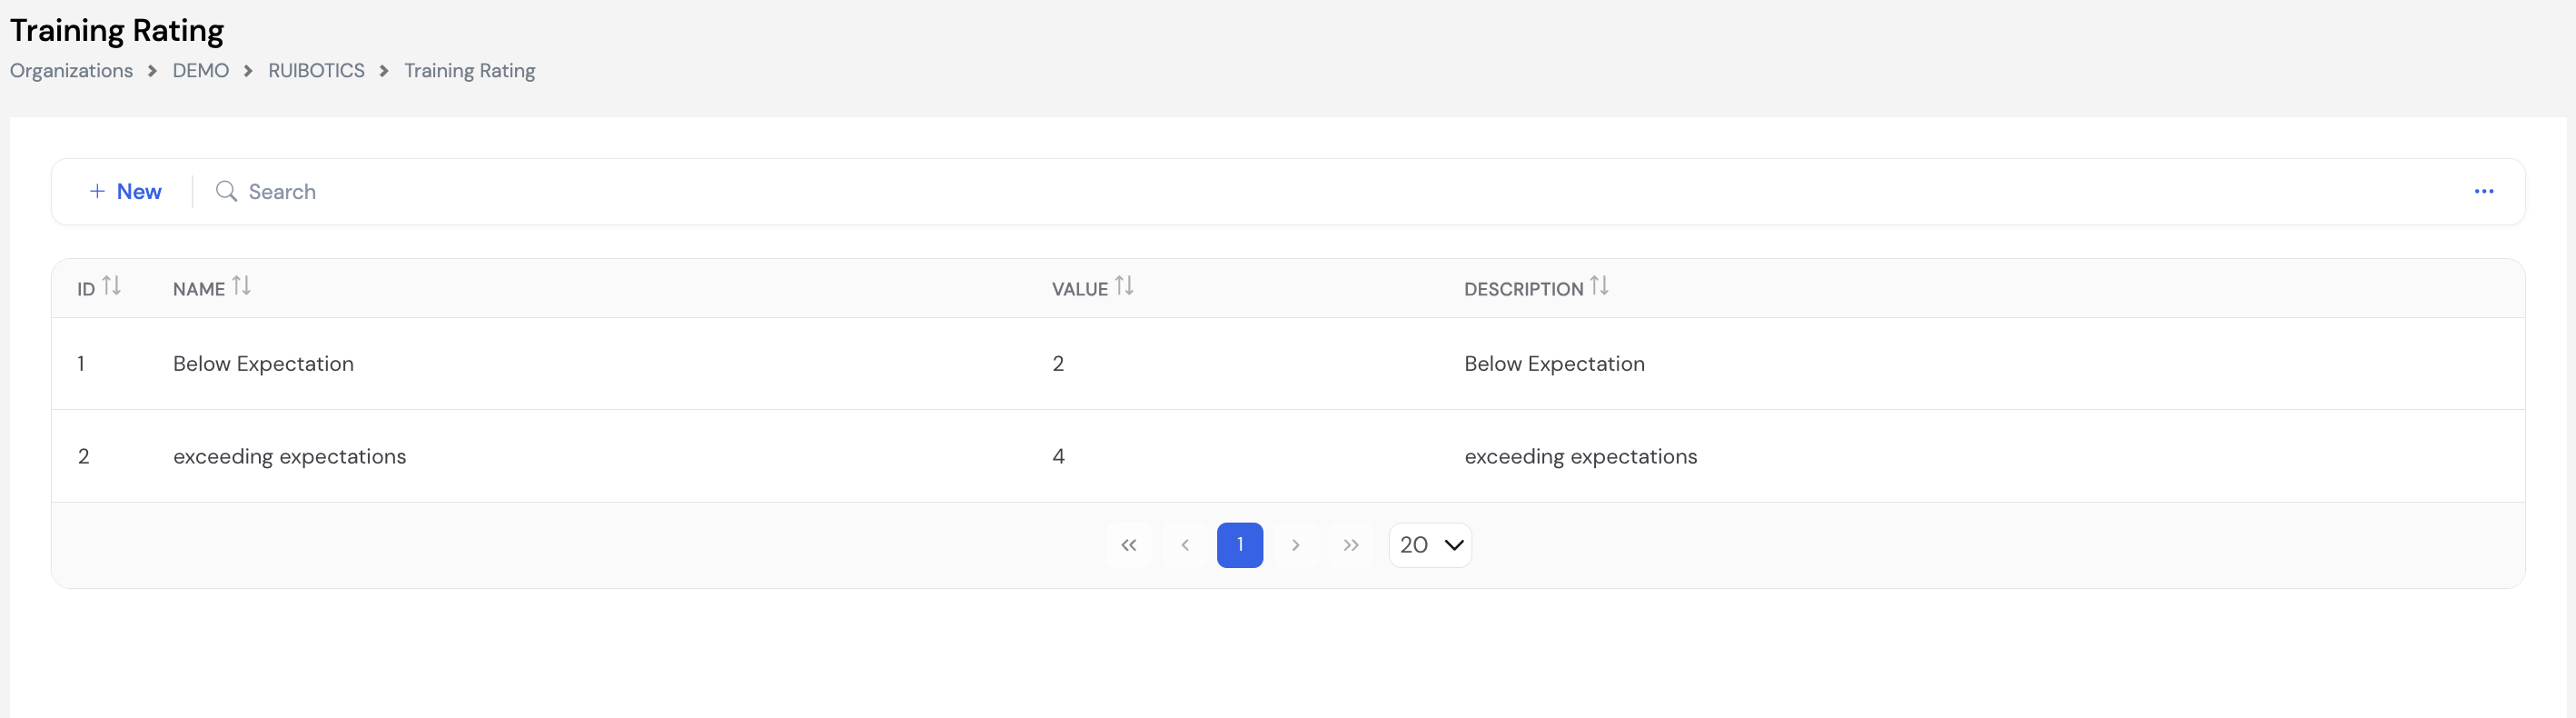
To add a new rating level, click + New, enter the Name, the numeric Value, and a Description, then click Save.
Design your rating scale consistently — for example, 1 = Poor, 2 = Below Expectation, 3 = Meets Expectation, 4 = Exceeding Expectation, 5 = Outstanding. A clear numeric scale makes it easier to compare training effectiveness across sessions and trainers.
23.4 Questionnaire Setup — Resignation Questionnaire
The Resignation Questionnaire allows HR administrators to define exit questionnaires that employees must complete when submitting a resignation through the ESS portal or mobile app. This is the exit interview in digital form — capturing the employee's reasons for leaving, feedback, and any other information the company needs to collect at the point of resignation.
Multiple questionnaire templates can be created and assigned to different Grades — allowing companies to use a different exit questionnaire for executives versus standard employees, for example. The questionnaire assigned to the employee's grade will automatically appear when they submit their resignation.
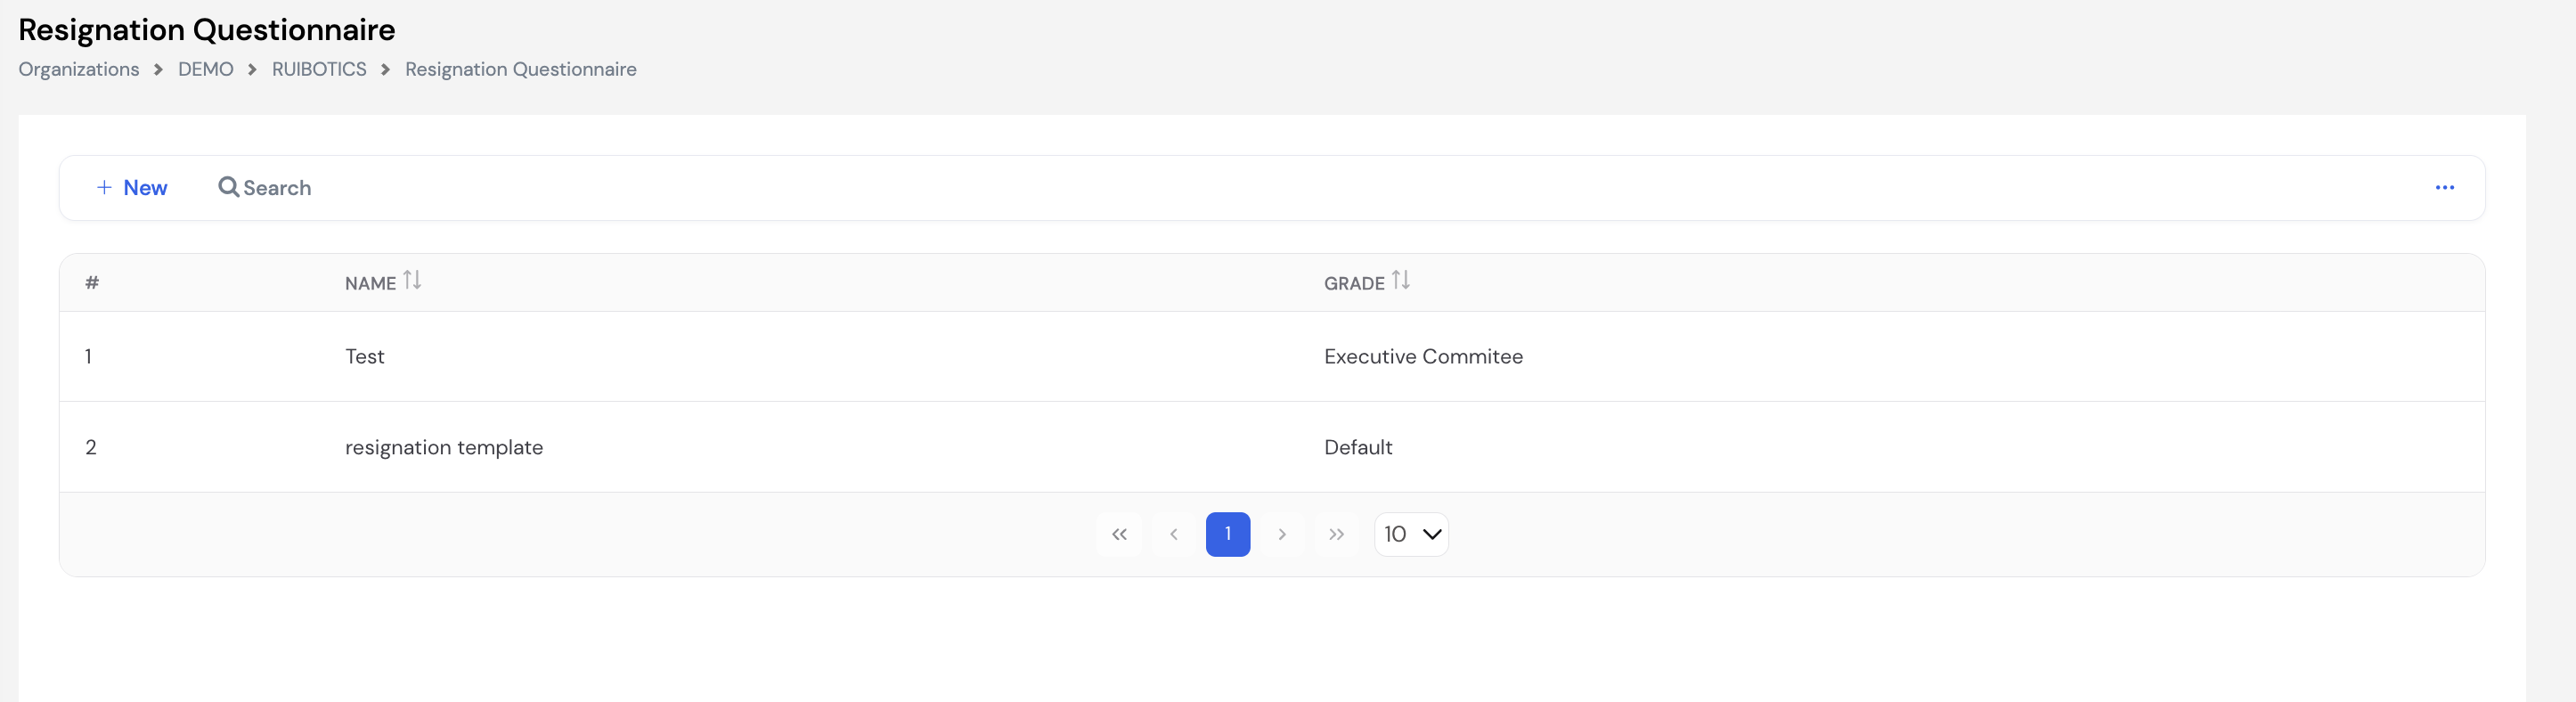
| Column | Description |
|---|---|
| Name | The name of the questionnaire template (e.g., Standard Exit Survey, Executive Exit Interview) |
| Grade | The employee grade this questionnaire is assigned to. Use Default to apply the template to all grades without a specific questionnaire assigned. |
To create a new questionnaire, click + New, enter a name, assign it to a grade, and then add the questions that employees will be asked to answer when resigning.
Create at least one questionnaire with the Default grade to ensure all employees — regardless of grade — are presented with an exit questionnaire when submitting their resignation.
The completed questionnaire responses are stored in the system and can be reviewed by HR administrators to identify trends in employee turnover and improve retention strategies.
23.5 Reports
The Reports section under Setup allows administrators to configure and manage the report templates used throughout Magnar HCM — for payslips, payroll summaries, HR letters, and more. It contains two sub-modules accessed via Setup → Reports:
- Reports Setup — Register and configure report templates by uploading pre-designed .repx report files
- Reports Designer — Build or modify reports directly within the system using the built-in visual report designer
23.5.1 Reports Setup
Reports Setup is where report templates are registered in the system. Reports are typically pre-designed externally using DevExpress (producing .repx files) and then uploaded here along with any required sub-report files. Once registered, a report becomes available for selection in the relevant module — for example, the payslip report template appears in the Send Payslip module.
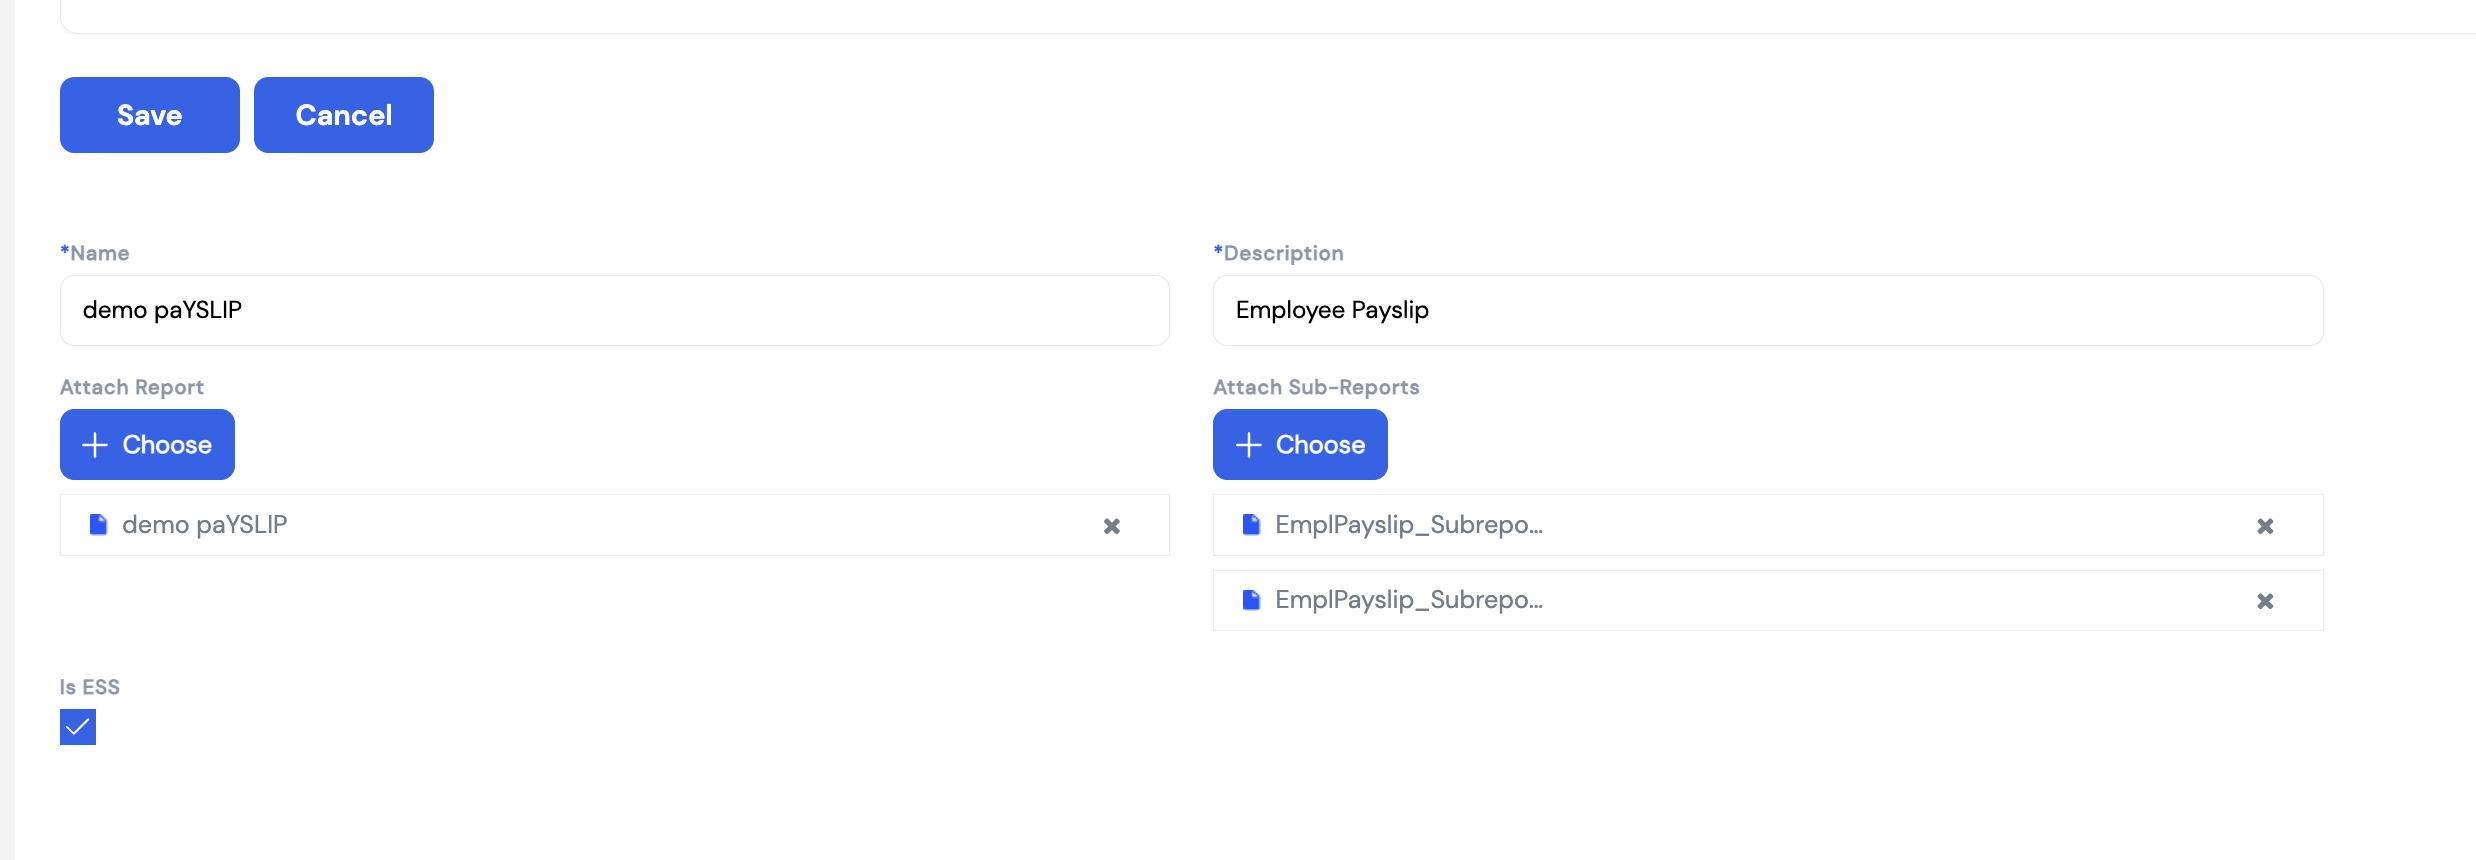
| Field | Description | Required |
|---|---|---|
| Name | The internal name for this report template (e.g., demo paYSLIP) | Required |
| Description | A descriptive label for the report (e.g., Employee Payslip) — used to identify the report when selecting it in other modules | Required |
| Attach Report | Upload the main .repx report file — the primary report template designed in DevExpress or the built-in Report Designer | Required |
| Attach Sub-Reports | Upload any sub-report files referenced by the main report (e.g., payslip detail sections, page headers). Multiple sub-reports can be attached. | Optional |
| Is ESS | Check this box if this report should be available to employees through the ESS portal (e.g., an employee-facing payslip). Uncheck for admin-only reports. | Optional |
23.5.2 Reports Designer
The Reports Designer is a built-in visual report builder that allows administrators and implementers to create new reports or edit existing ones directly within Magnar HCM — without needing external design tools. It is based on the DevExpress reporting engine and provides a full drag-and-drop design surface with a rich component toolbox.
The Reports Designer provides:
- A design canvas with report bands (Top Margin, Detail, Bottom Margin, headers, footers) for laying out report content
- A component toolbox on the left with labels, text fields, images, tables, barcodes, charts, cross-tabs, shapes, and more
- A Properties panel on the right for configuring data sources, filters, appearance, page settings, and printing options
- Standard editing controls: cut, copy, paste, undo, redo, zoom
The Reports Designer is primarily used by system implementers and technical administrators. Standard HR and Payroll users typically use pre-built report templates registered in Reports Setup and do not need to work in the designer directly.
Reports can also be designed externally using DevExpress Report Designer (desktop application) and then uploaded to the system as .repx files via Reports Setup — which may be preferable for complex reports requiring advanced data binding.
23.6 Dashboard Designer
The Dashboard Designer is a built-in visual tool for creating and editing the dashboards displayed in the Corporate Dashboard (Section 19). Using a drag-and-drop interface, administrators can build custom analytics panels — adding charts, grids, gauges, maps, filters, and layout components — and connect them to live company data.
Dashboards created here are installed and activated by the system administrator and then displayed to authorized users on the Company Dashboard screen.
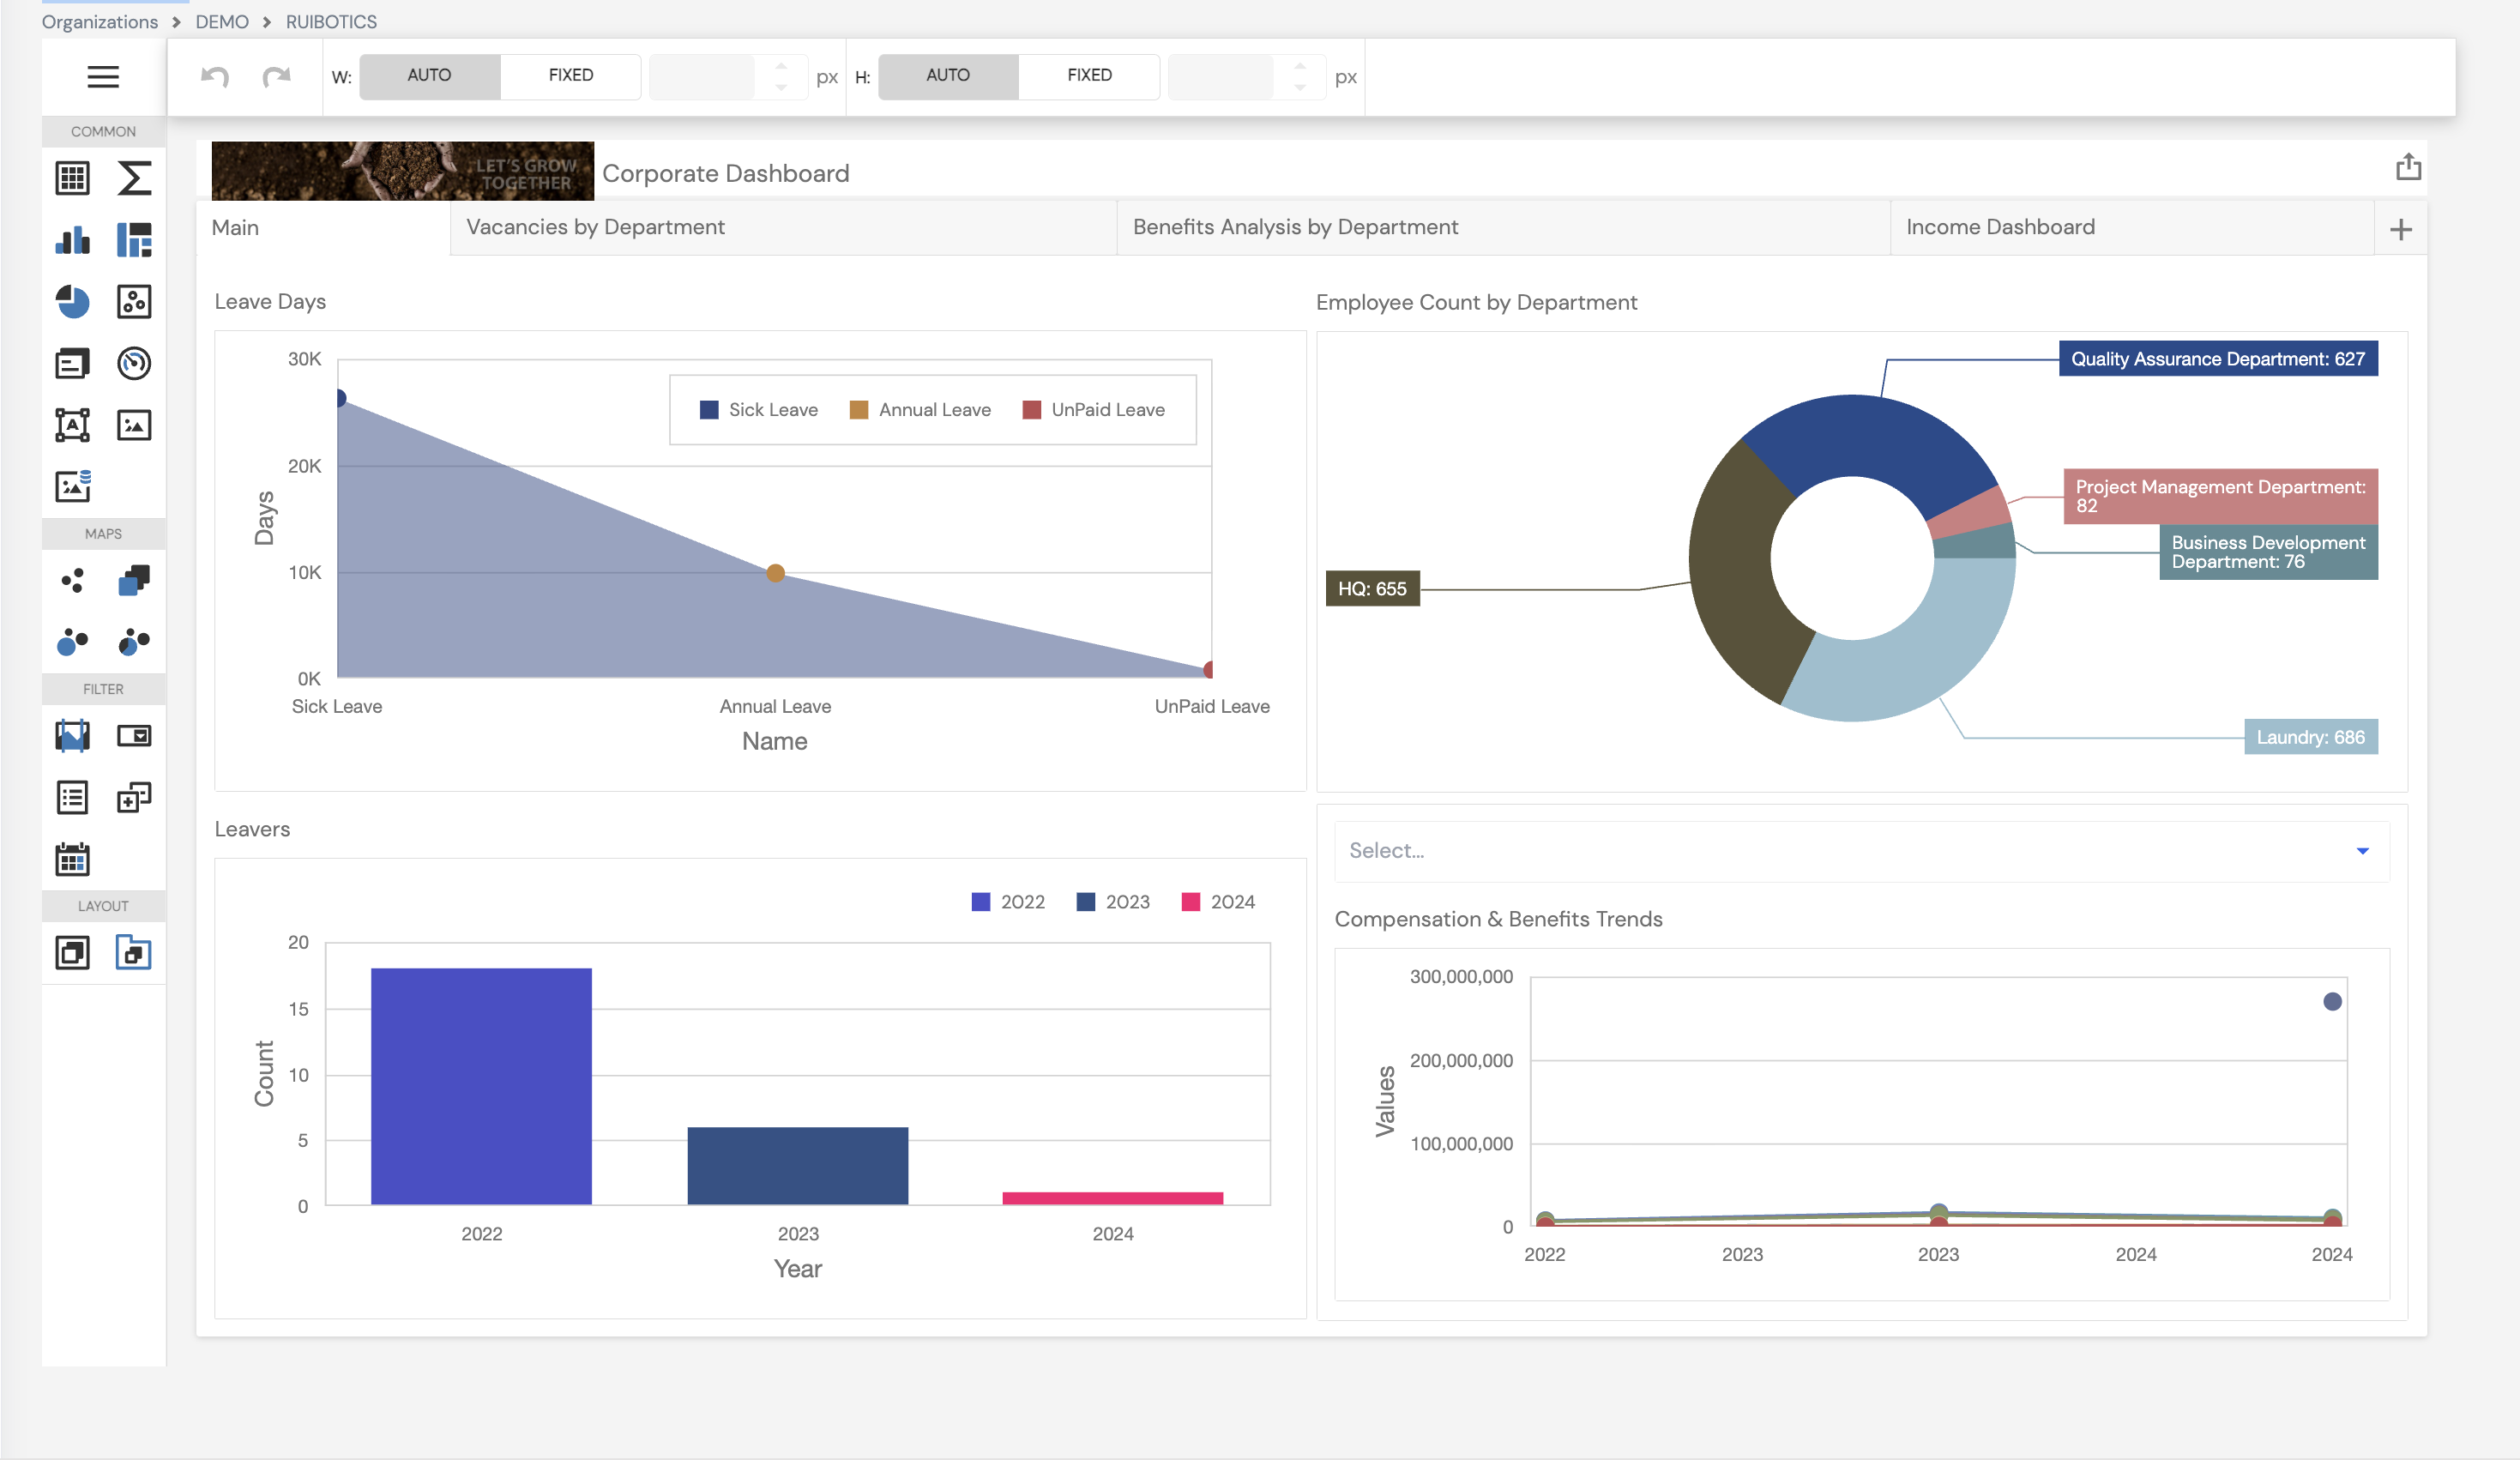
The Dashboard Designer provides:
- A live preview canvas showing the dashboard exactly as it will appear to users, with real data
- A left-side component toolbox organized into four categories:
- Common — charts, pivot tables, grids, gauges, range filters, image and text widgets
- Maps — geographic map components for location-based analytics
- Filter — date range pickers, combo boxes, list boxes, and other filter components
- Layout — tab and group panel containers for organizing dashboard sections
- A top toolbar with undo/redo and size controls (W and H — set to Auto or Fixed width/height) for precise layout control
- The ability to add multiple tabs (e.g., Main, Vacancies by Department, Benefits Analysis, Income Dashboard) using the + button on the tab bar
The Dashboard Designer is primarily used by system implementers and technical administrators. Standard HR and Payroll users view dashboards but do not typically design them. Contact your system administrator to create or modify dashboards.
Dashboards are displayed in the Corporate Dashboard after being installed and activated. See Section 19 — Company Dashboard for how dashboards appear to users, including export options.
23.7 Calendar
The Calendar module defines the working schedules used across the company — specifying working days, weekends, public holidays, daily working hours, and optional shift-based schedules. Calendars are assigned to employees in their profile and drive attendance tracking, leave calculation, payroll proration, and overtime/absence rule enforcement.
Calendars must be created before adding employees. A calendar is a required field on the employee profile. Ensure all required calendars are configured before onboarding any employee into the system.
23.7.1 Calendar List
The Calendar list shows all work calendars configured for the company, with their Working Days count and Default Working Hours per day.
23.7.2 Calendar Configuration
Click + New to create a calendar. The calendar form has two tabs: Calendar (schedule configuration) and Employees (employee assignment).
| Field | Description | Required |
|---|---|---|
| Code | A unique identifier for this calendar (e.g., Administration Calendar) | Required |
| Name | The display name of the calendar | Required |
| Working Days | The number of working days used as the base for payroll calculations (e.g., 30 for a monthly calendar) | Required |
| First Day of the Week | The day the work week starts (e.g., Monday, Sunday) — used in leave and attendance calculations | Required |
| Default Working Hours | The standard number of working hours per day (e.g., 8) | Optional |
| Schedule | Toggle — set to On to enable a shift-based calendar (see Section 23.7.3). Set to Off for a standard calendar using the Weekdays grid below. | Optional |
Holidays
Add public holidays that apply to this calendar. Each holiday has a Name, From Date, and To Date. Holidays are excluded from working day counts in leave and attendance calculations.
Weekdays
For standard calendars (Schedule = Off), define which days of the week are working days and how many hours each day. Check Is Working Day for each active day and enter the Working Hours. Days left unchecked (e.g., Sunday, Saturday) are treated as rest days.
23.7.3 Shift-Based Calendar (Schedule = On)
When the Schedule toggle is set to On, the calendar becomes shift-based — displaying a full monthly calendar view where specific shift assignments are shown day by day. This is used for employees working rotating shifts or non-standard weekly patterns.
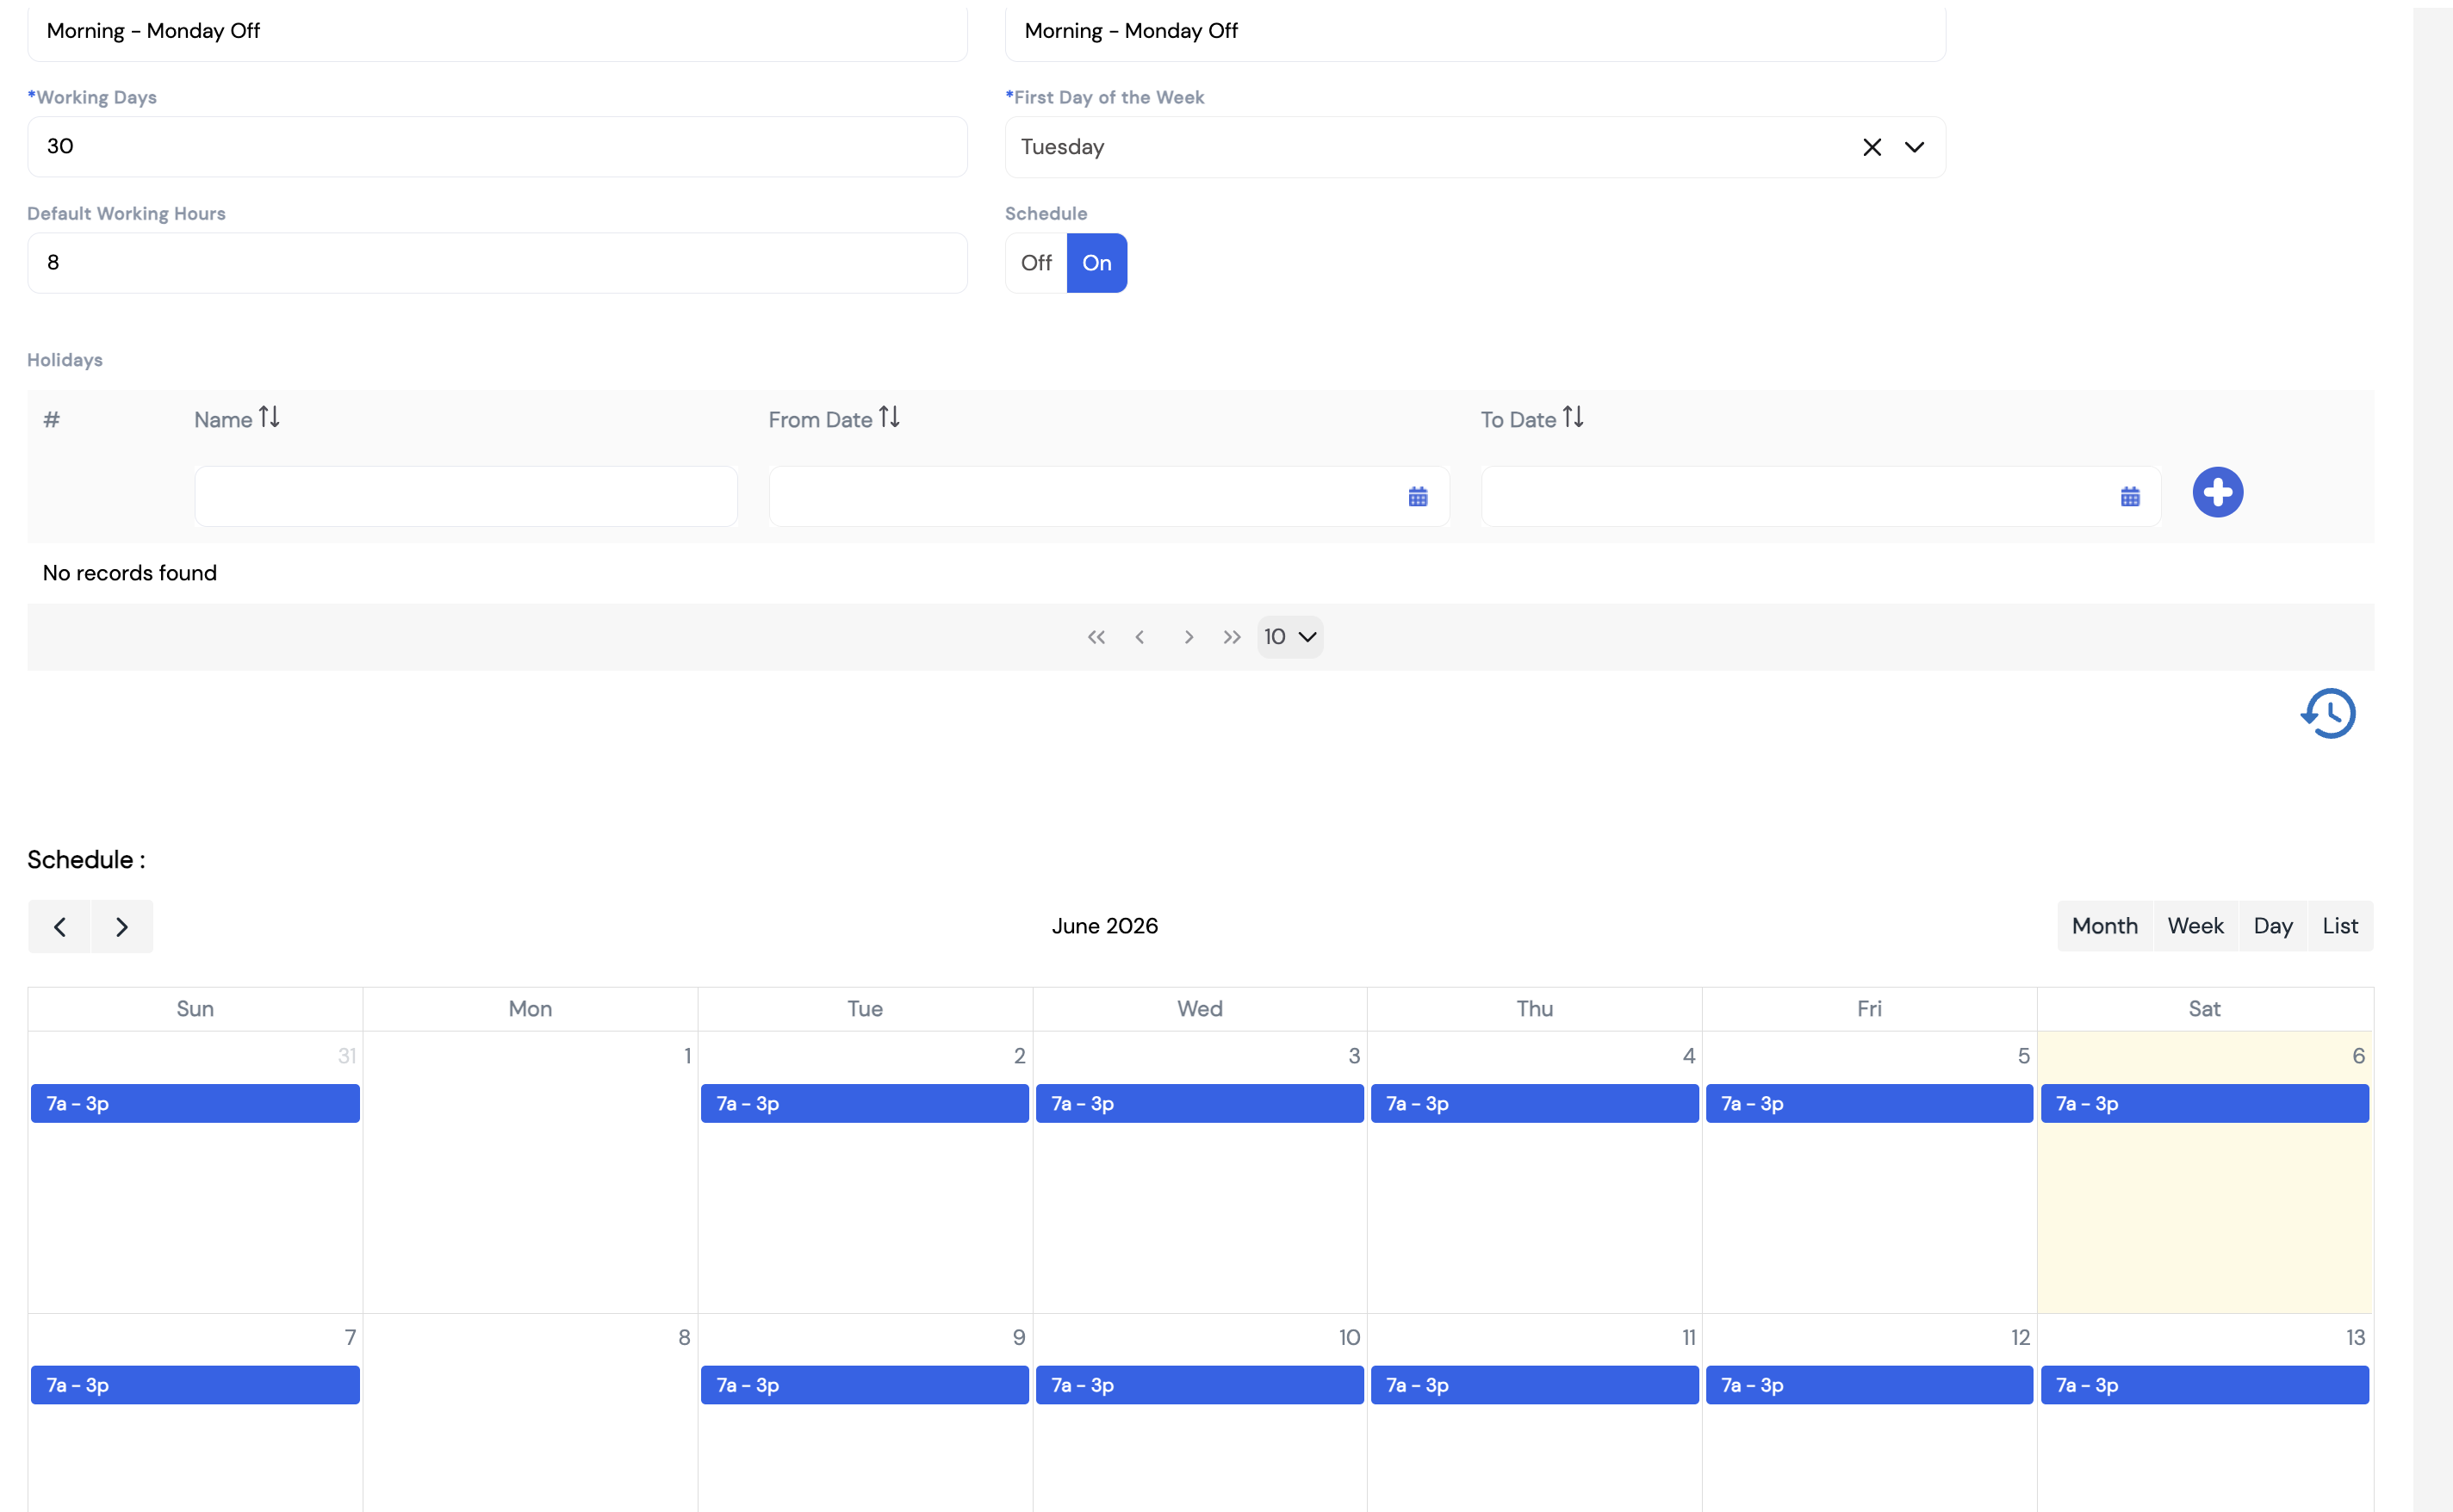
In the shift-based view, each day on the calendar shows the assigned shift (e.g., 7a – 3p) or is blank for rest days. The schedule can be navigated by Month, Week, Day, or List view.
23.7.4 Assigning Employees to a Calendar
The Employees tab on the calendar allows administrators to assign the calendar to one or more employees in bulk — as an alternative to assigning the calendar individually on each employee's profile. Employees can be filtered by Employee Type, Employee Code, Employee Name, Position, Department, or Branch.
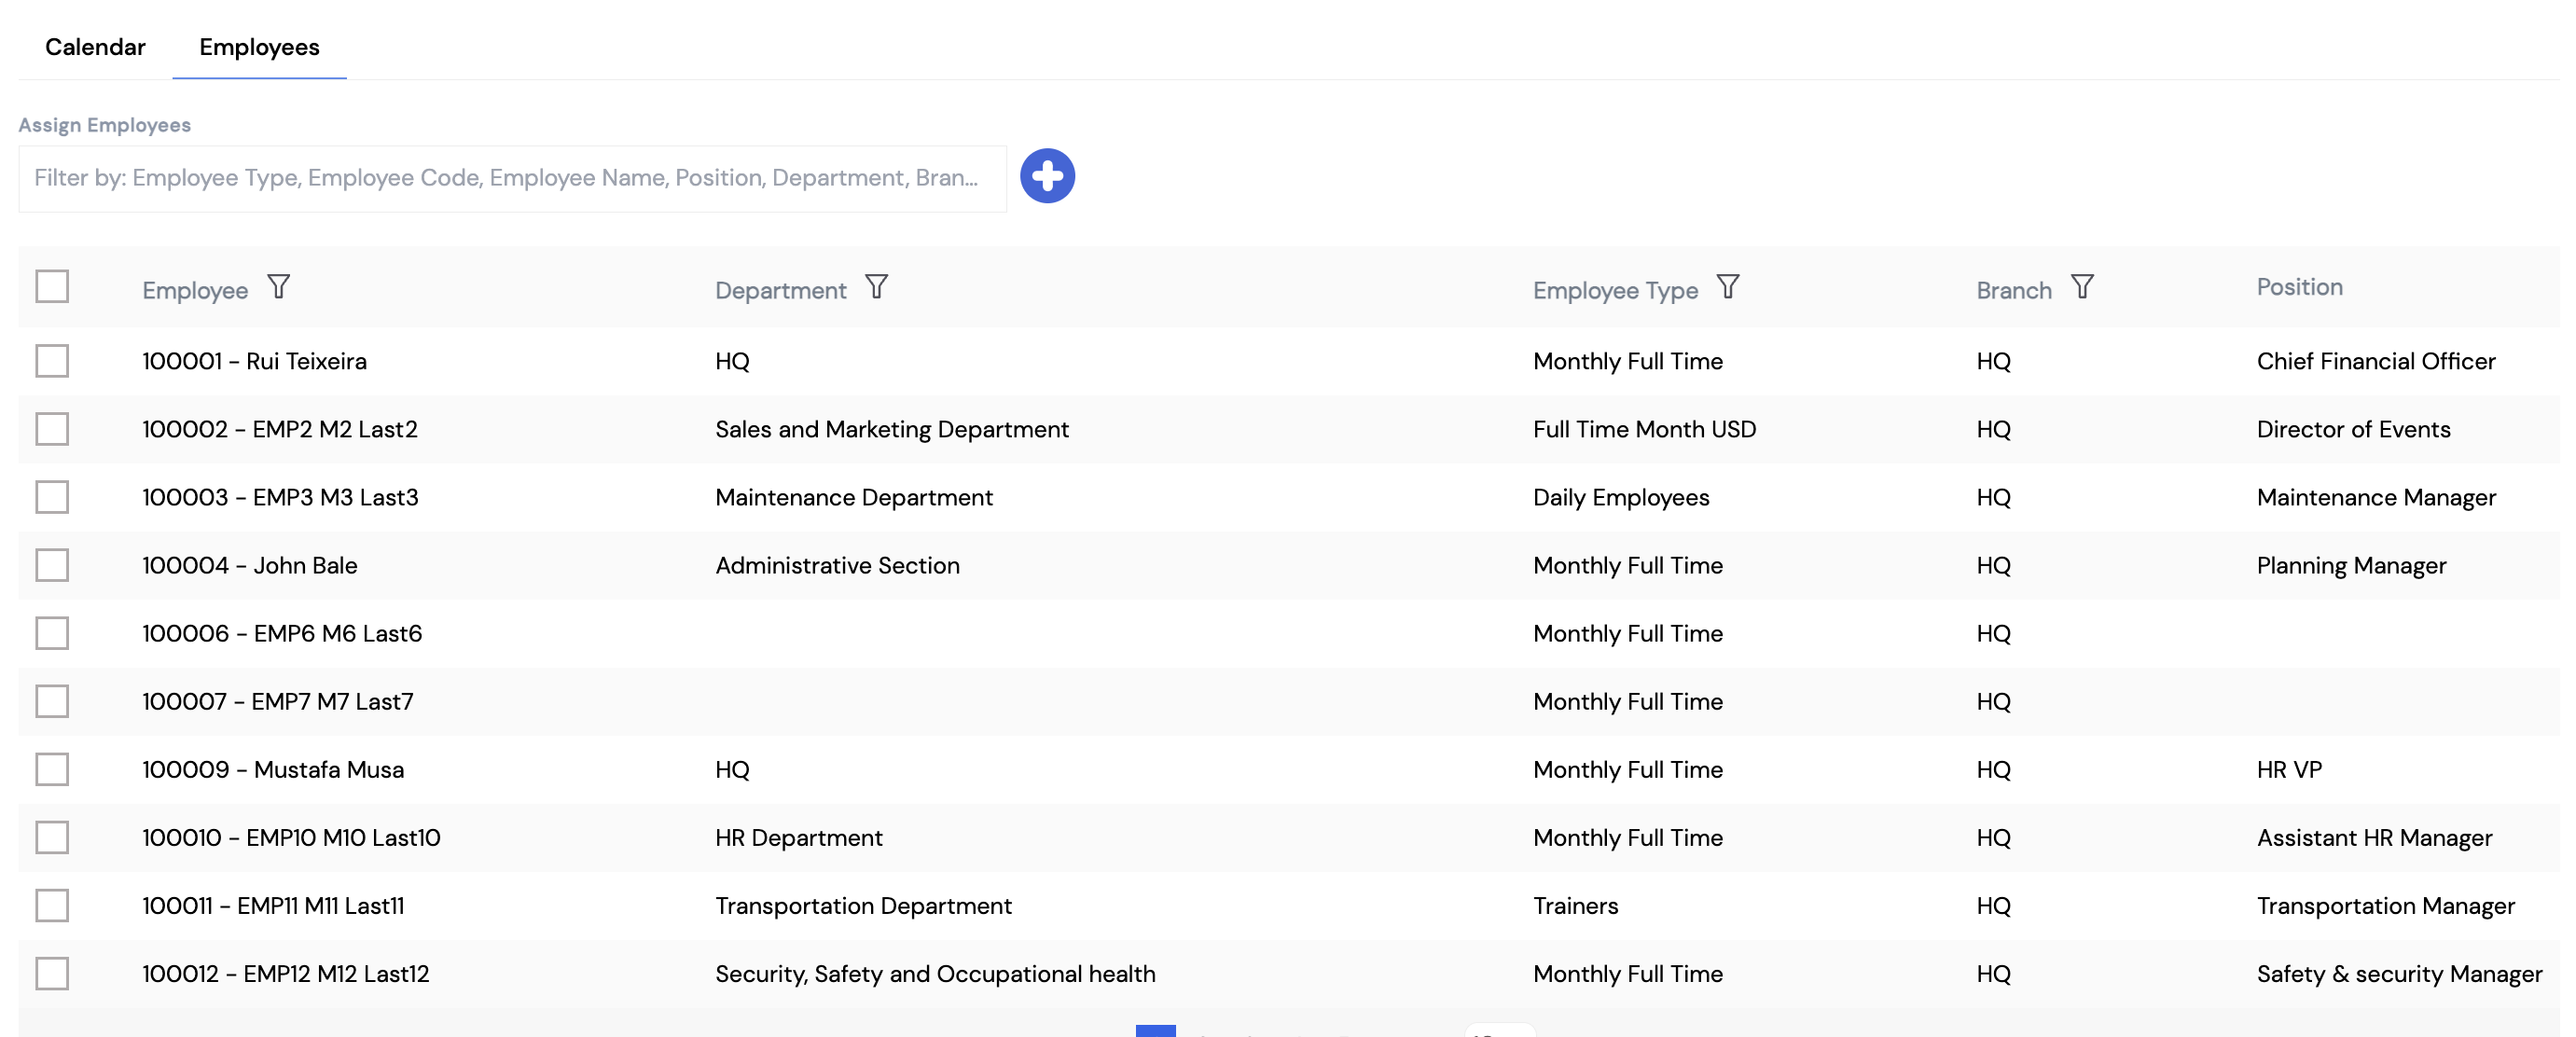
Use the Employees tab to assign a new calendar to a large group of employees at once — for example, when changing all employees in a department from one shift pattern to another. This is faster than updating each employee profile individually.
23.8 Loan
The Loan setup defines the loan types available to employees — such as Personal Loans, Car Loans, Salary Advances, or Traffic Fines. Each loan type specifies its maximum amount, installment limits, the pay elements used for monthly deductions and disbursement, and the approval workflow to apply. Loan types configured here appear as options when creating employee loan records in Section 21.2 — Employee Loan.
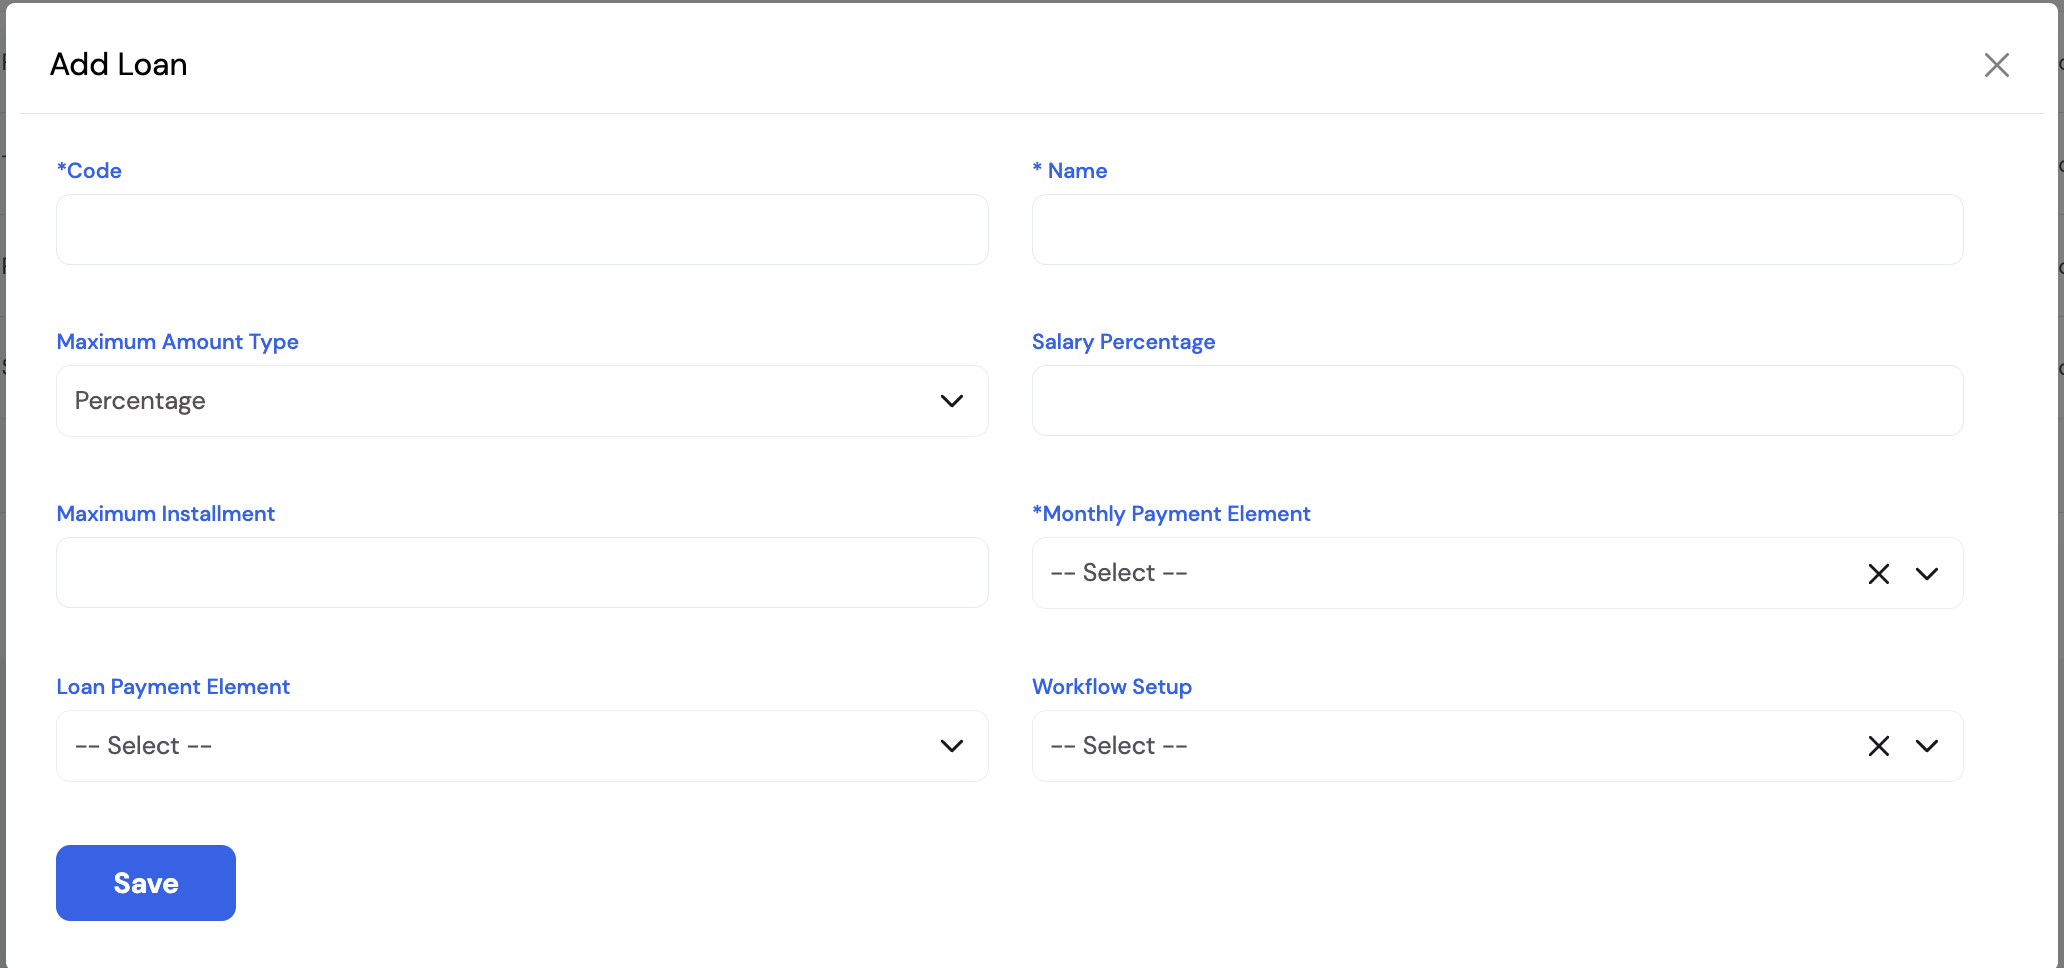
| Field | Description | Required |
|---|---|---|
| Code | A unique short code for this loan type (e.g., Personal Loan, CAR) | Required |
| Name | The display name of the loan type as it appears when creating employee loans | Required |
| Maximum Amount Type | Determines how the loan ceiling is defined — either a Fixed Amount (a specific monetary cap) or a Percentage of the employee's basic salary (e.g., 300% of salary). The system will enforce this limit when a loan is created. | Optional |
| Salary Percentage | If Maximum Amount Type is set to Percentage, enter the percentage of basic salary that defines the maximum loan amount (e.g., 300 = the employee can borrow up to 3x their basic salary) | Optional |
| Maximum Installment | The maximum number of monthly installments over which this loan can be repaid (e.g., 100 months for personal loans, 1 for petty cash) | Optional |
| Monthly Payment Element | The Pay Element used to deduct the monthly loan installment from the employee's payslip (e.g., Personal Loan – Installment). This element must be configured with the Loan Plugin. | Required |
| Loan Payment Element | The Pay Element used to record the loan disbursement amount — i.e., the one-off payment made to the employee when the loan is granted (e.g., Personal Loan – Payment) | Optional |
| Workflow Setup | The approval workflow applied to loan requests submitted through ESS. Defines who must approve the loan before it is processed. | Optional |
Additional loan conditions and rules beyond what is shown here may be configured based on client requirements. Contact your system administrator or Magnar implementation team for customizations such as eligibility rules, probation period restrictions, or concurrent loan limits.
Loan types defined here are used when creating employee loan records. See Section 21.2 — Employee Loan for how to create and schedule loan repayments for individual employees.
23.9 General Request Types
General Request Types define the categories of miscellaneous HR requests that employees can submit through the ESS portal or mobile app — beyond the standard request types (leave, loan, travel, overtime). Examples include contract renewals, hotel booking requests, passport submissions, iqama renewals, bank account applications, and any other company-specific request type.
Each request type has its own approval workflow and can optionally include a PDF form attachment for cases where employees need to fill out or submit a specific document alongside the request.
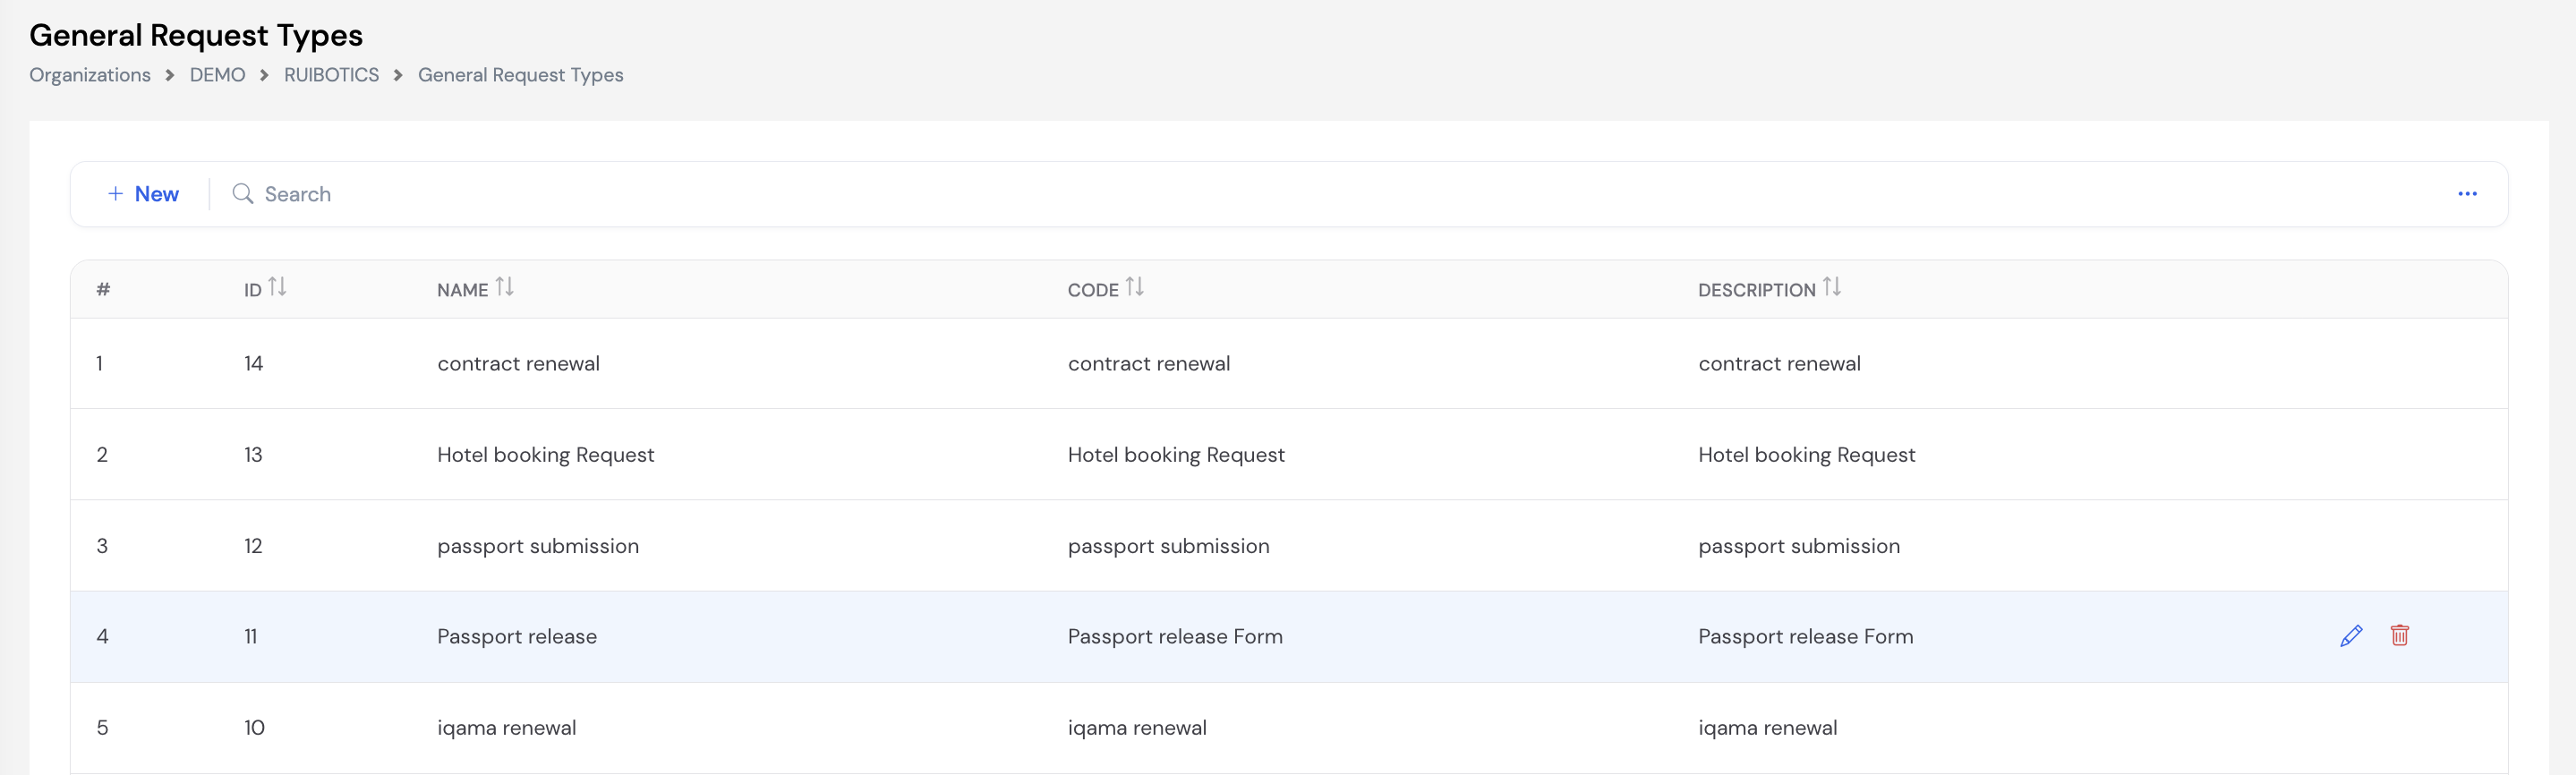
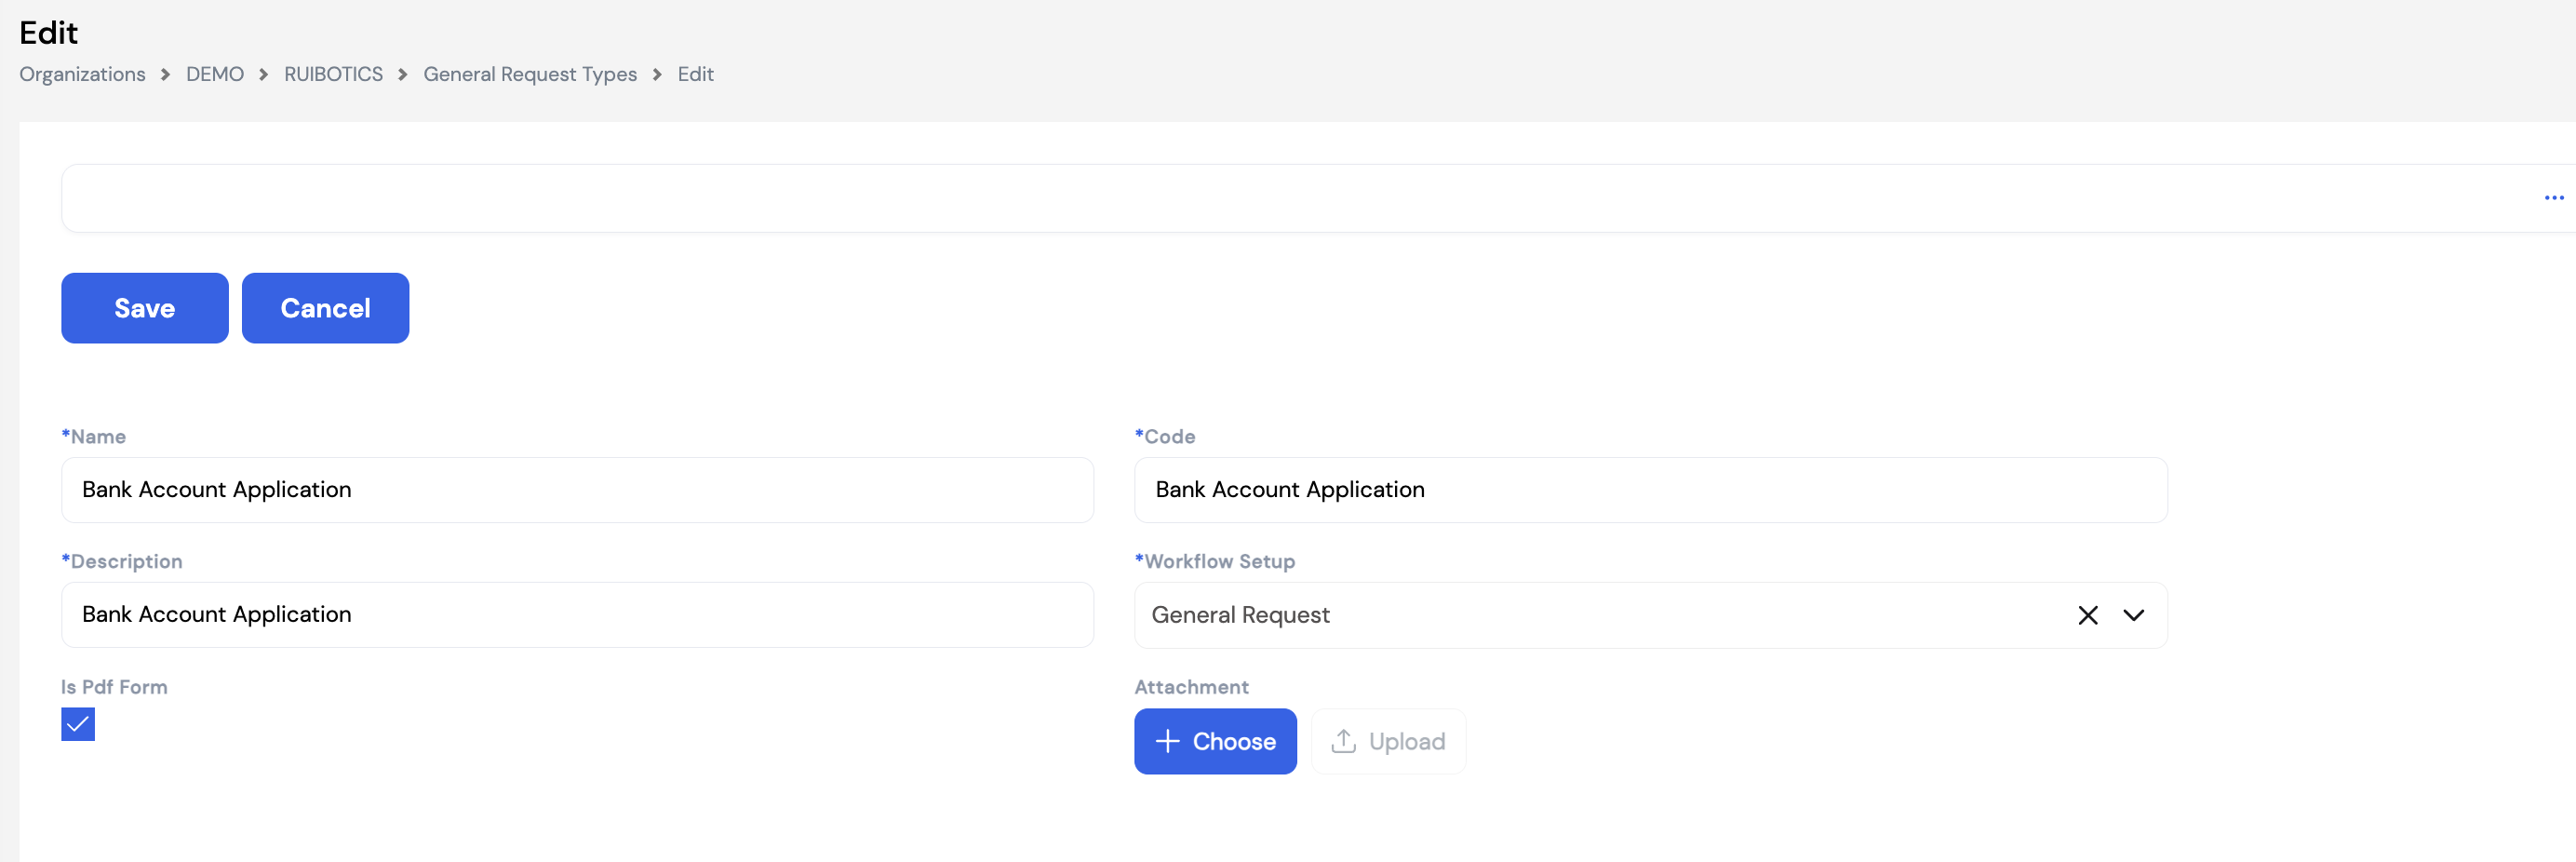
| Field | Description | Required |
|---|---|---|
| Name | The name of the request type as it will appear to employees in ESS (e.g., Bank Account Application, Passport Release) | Required |
| Code | A unique short code for this request type | Required |
| Description | A brief description of the request type — may be displayed to employees when selecting the request in ESS | Required |
| Workflow Setup | The approval workflow applied to requests of this type. Defines the approvers and steps required before the request is actioned. | Required |
| Is Pdf Form | Check this box if the employee is required to fill out and submit a specific PDF form with this request. When enabled, the form can be uploaded in the Attachment field. | Optional |
| Attachment | Upload the PDF form template that employees must complete when submitting this request type (active when Is Pdf Form is checked) | Optional |
General Request Types give companies the flexibility to handle any HR or administrative request that does not fit the standard request modules. Add as many types as needed to cover all employee service requests — each with its own dedicated approval workflow.
23.10 Templates
Templates define how payroll results are grouped and displayed when viewing or reviewing payroll data. A template is essentially a custom column layout for the payroll results grid — each Pay Element included in the template becomes a column in the display, and the Order number determines the column position from left to right.
Templates are required in the following key screens:
- Payroll Generation (Section 22.2) — a template must be selected to view payroll results after execution
- Periodic Movement (Section 22.1) — used to review and display payroll element values per employee
- Off-Cycle and Employee Exit payroll runs — templates are selected to control the view of results
You can create as many templates as needed — for example, one template for monthly salary review, another for overtime analysis, and another for management reporting. Templates can also be duplicated using the Duplicate button to quickly create a variant of an existing template.
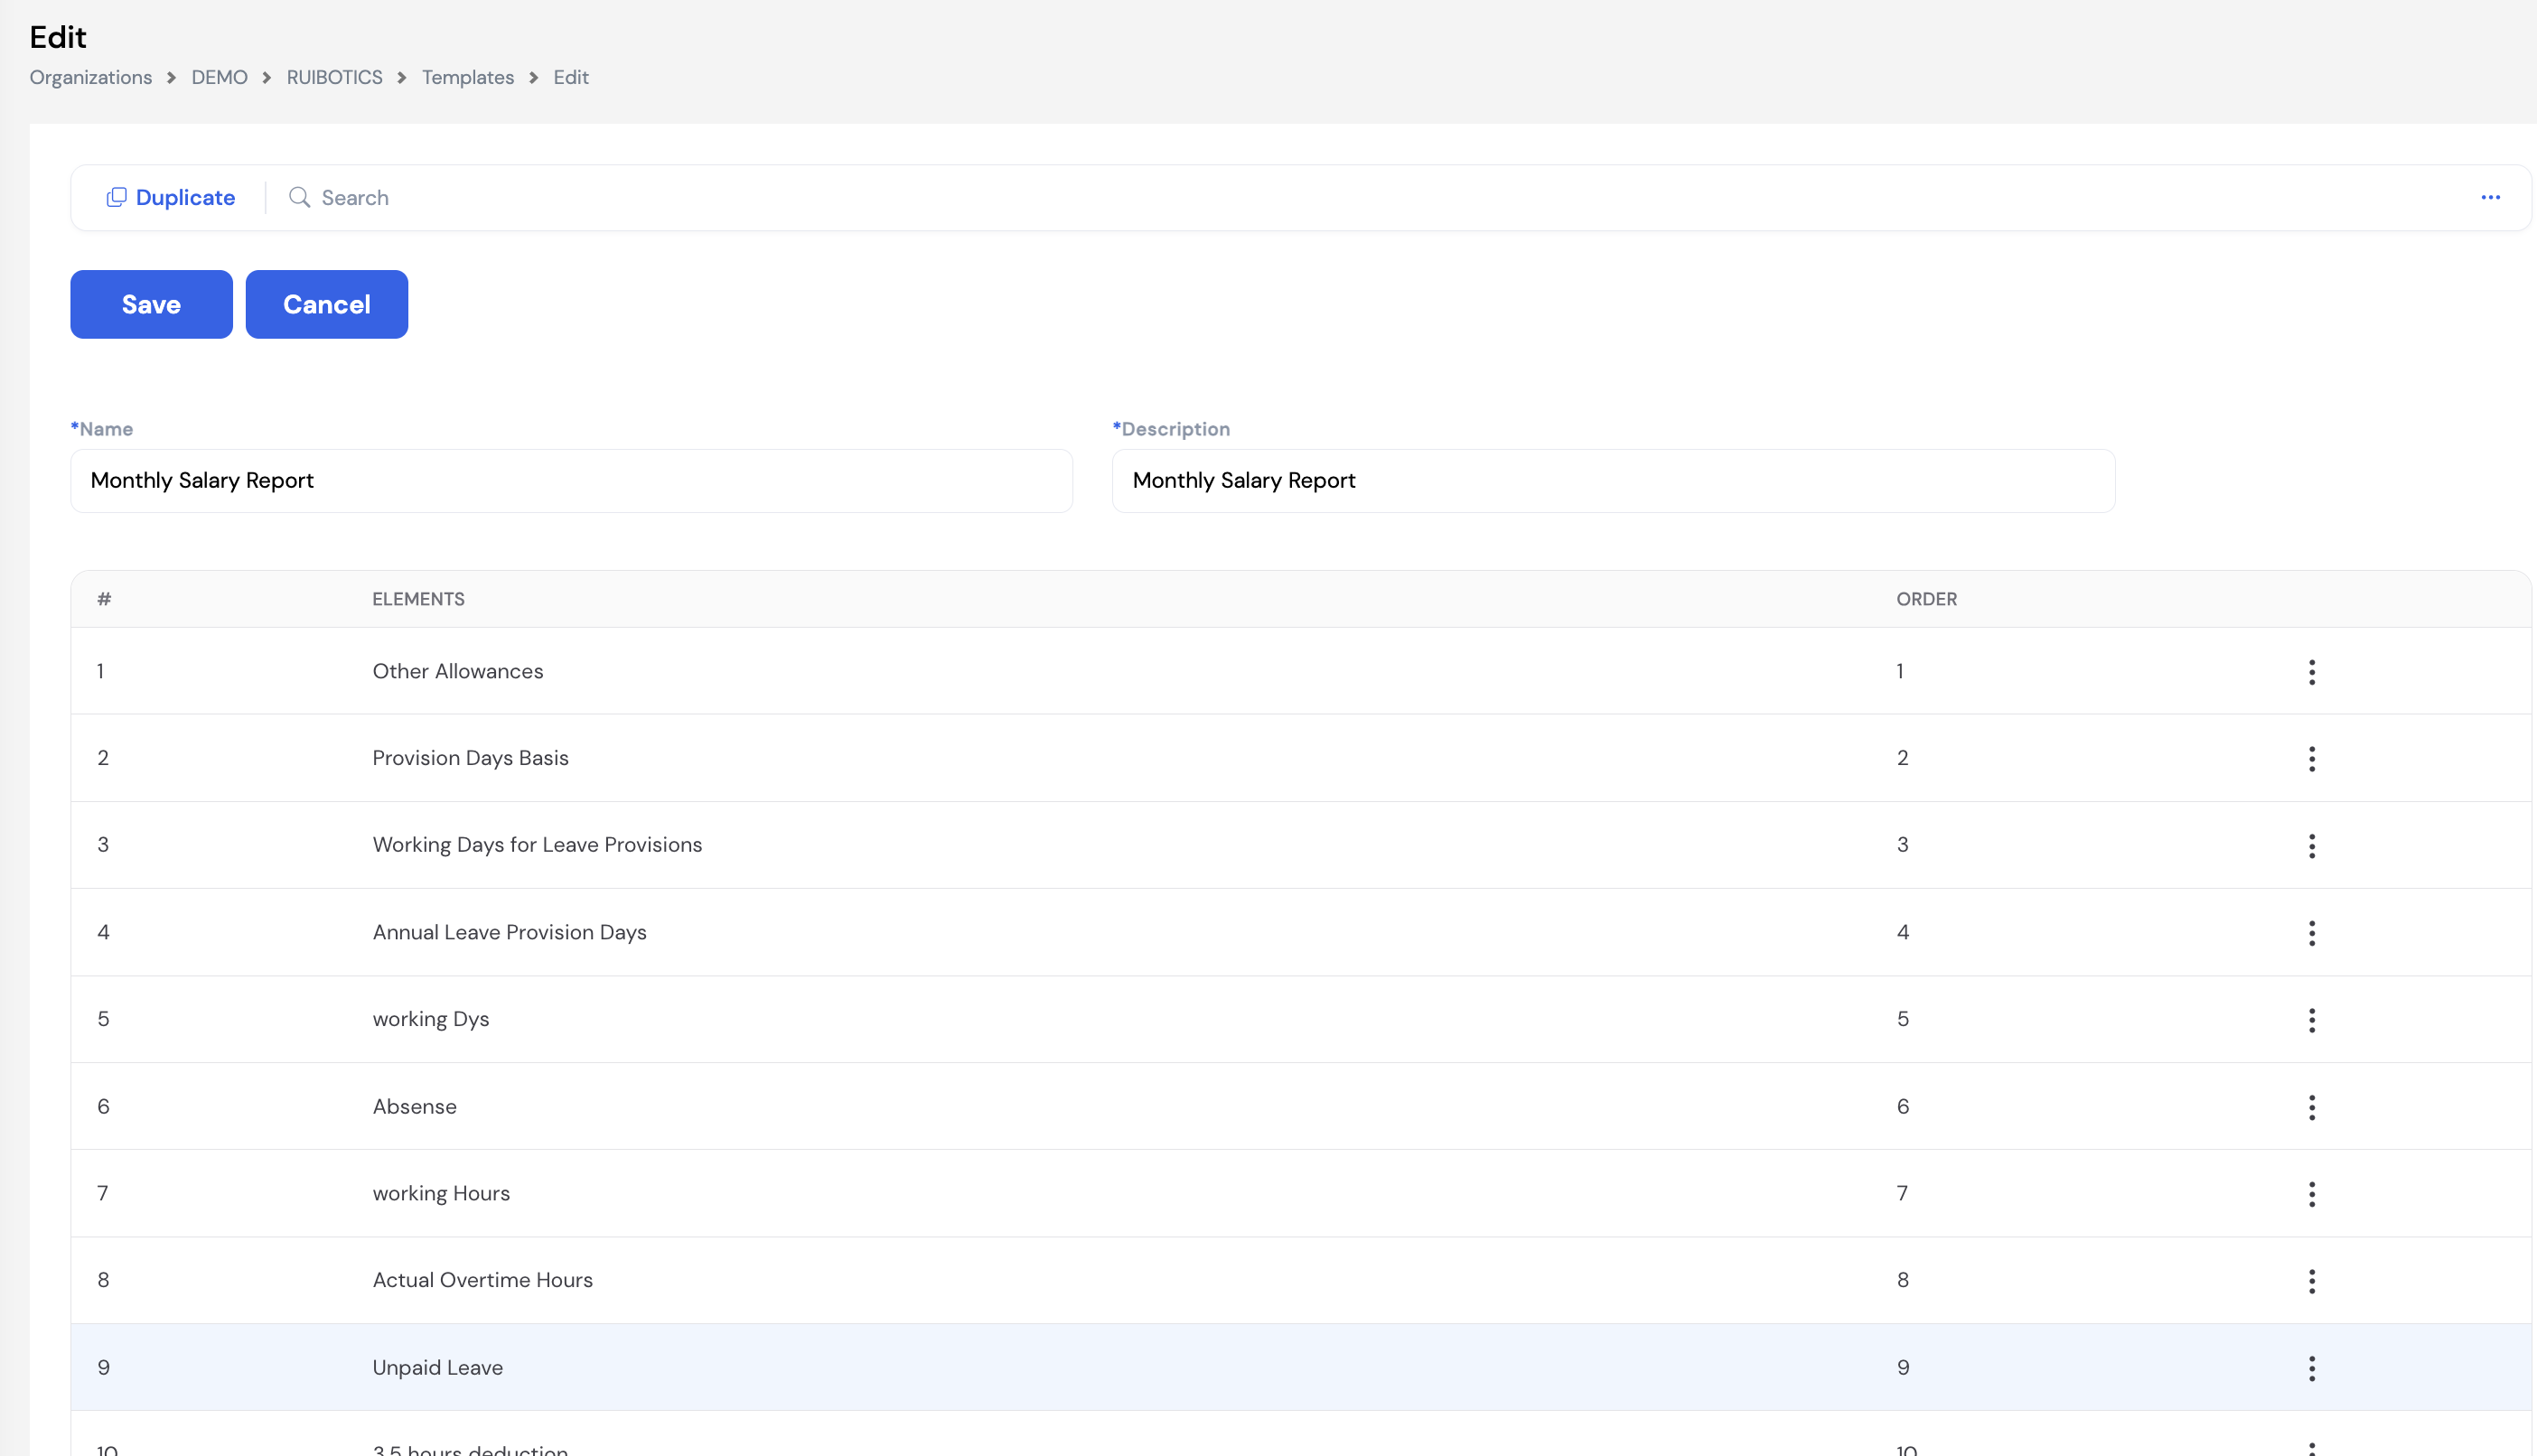
| Field / Column | Description | Required |
|---|---|---|
| Name | The name of the template (e.g., Monthly Salary Report, Overtime Review) | Required |
| Description | A brief description of what this template is used for | Required |
| Elements | The Pay Elements to include as columns in this template. Add elements using the input row at the top of the grid and click + to include them. | Required |
| Order | The column position for each element — lower numbers appear further to the left. The order determines how the data is laid out in the payroll results grid and any exported Excel view. | Required |
Templates must be selected before viewing payroll data. When generating or reviewing payroll (Sections 22.1 and 22.2), the system requires you to select a template to load the results. Without a template, the payroll data grid will be empty. Ensure at least one template is configured before running your first payroll.
Use the Duplicate button on the template form to quickly create a new template based on an existing one — then adjust the elements and order as needed. This saves time when creating multiple templates with similar element sets.
23.11 Period
The Period module defines and manages the payroll periods for each employee type and year. Each period represents one payroll cycle — monthly, bi-weekly, or otherwise — with a specific From Date, To Date, and number of calendar days. Periods must be created and kept up to date for payroll processing to function correctly.
Select an Employee Type and Year then click Filter to view the periods for that combination. Use Auto Fill to automatically generate all periods for the selected year based on the employee type's payroll frequency.

| Column | Description |
|---|---|
| Period Number | The sequential number of the payroll period within the year (1 = January for monthly, etc.) |
| Period Days | The number of calendar days in this period (e.g., 31 for January, 28 for February) |
| From Date | The first day of the payroll period |
| To Date | The last day of the payroll period |
| Is Current | Indicates the active payroll period — the one that will be processed on the next payroll run. Only one period can be current at a time. |
| Is Processed | Automatically checked by the system once payroll has been executed for this period |
| Is Posted | Automatically checked once the payroll for this period has been posted and closed |
| Is Extra Month | Flag for special additional payroll periods (e.g., a 13th month payment) outside the standard annual cycle |
| Prorate Coefficient | An optional multiplier applied to prorate elements for this period — used in non-standard period lengths |
23.11.1 How Periods Work
Understanding the period lifecycle is essential for smooth payroll processing:
- When payroll is executed for a period, the Is Processed checkbox is automatically checked.
- When payroll is posted, the Is Posted checkbox is checked, and the system automatically advances the Is Current flag to the next period.
- If the next period does not exist yet, the system will not allow payroll to be run. Always ensure the next period is created before posting the current one.
Only open (unprocessed) periods can be deleted. Once a period has been processed or posted, it cannot be deleted. If you need to change the current period — for example to re-open a previous month — you must delete the current open period, which frees up the current flag so you can set a different period as current. If the deleted period is needed again later, it must be re-created manually.
Always ensure the next period exists before posting payroll. Posting the current period advances the current flag to the next period. If that period has not been created yet, payroll for the next cycle cannot be run. Use Auto Fill at the start of each year to generate all periods for the year at once.
Use Auto Fill at the beginning of each year to generate all payroll periods for the year in one step. This avoids the risk of a missing period blocking a payroll run mid-year.
23.12 Profiles
A Profile is one of the most critical prerequisites for payroll generation. It defines the complete list of Pay Elements to be calculated during a payroll run and — crucially — their execution order. The profile tells the payroll engine exactly which elements to process, in what sequence, and how each element value is sourced (manually, via formula, or via plugin).
Profiles are organized into two types, accessible via the Regular and Off-Cycle tabs:
- Regular — The standard monthly payroll profile. Only one regular profile is allowed per Employee Type.
- Off-Cycle — Profiles for off-cycle, exit, or leave settlement payroll runs. Multiple off-cycle profiles can be created per Employee Type (e.g., one for commissions, one for annual leave settlement, one for final settlement).
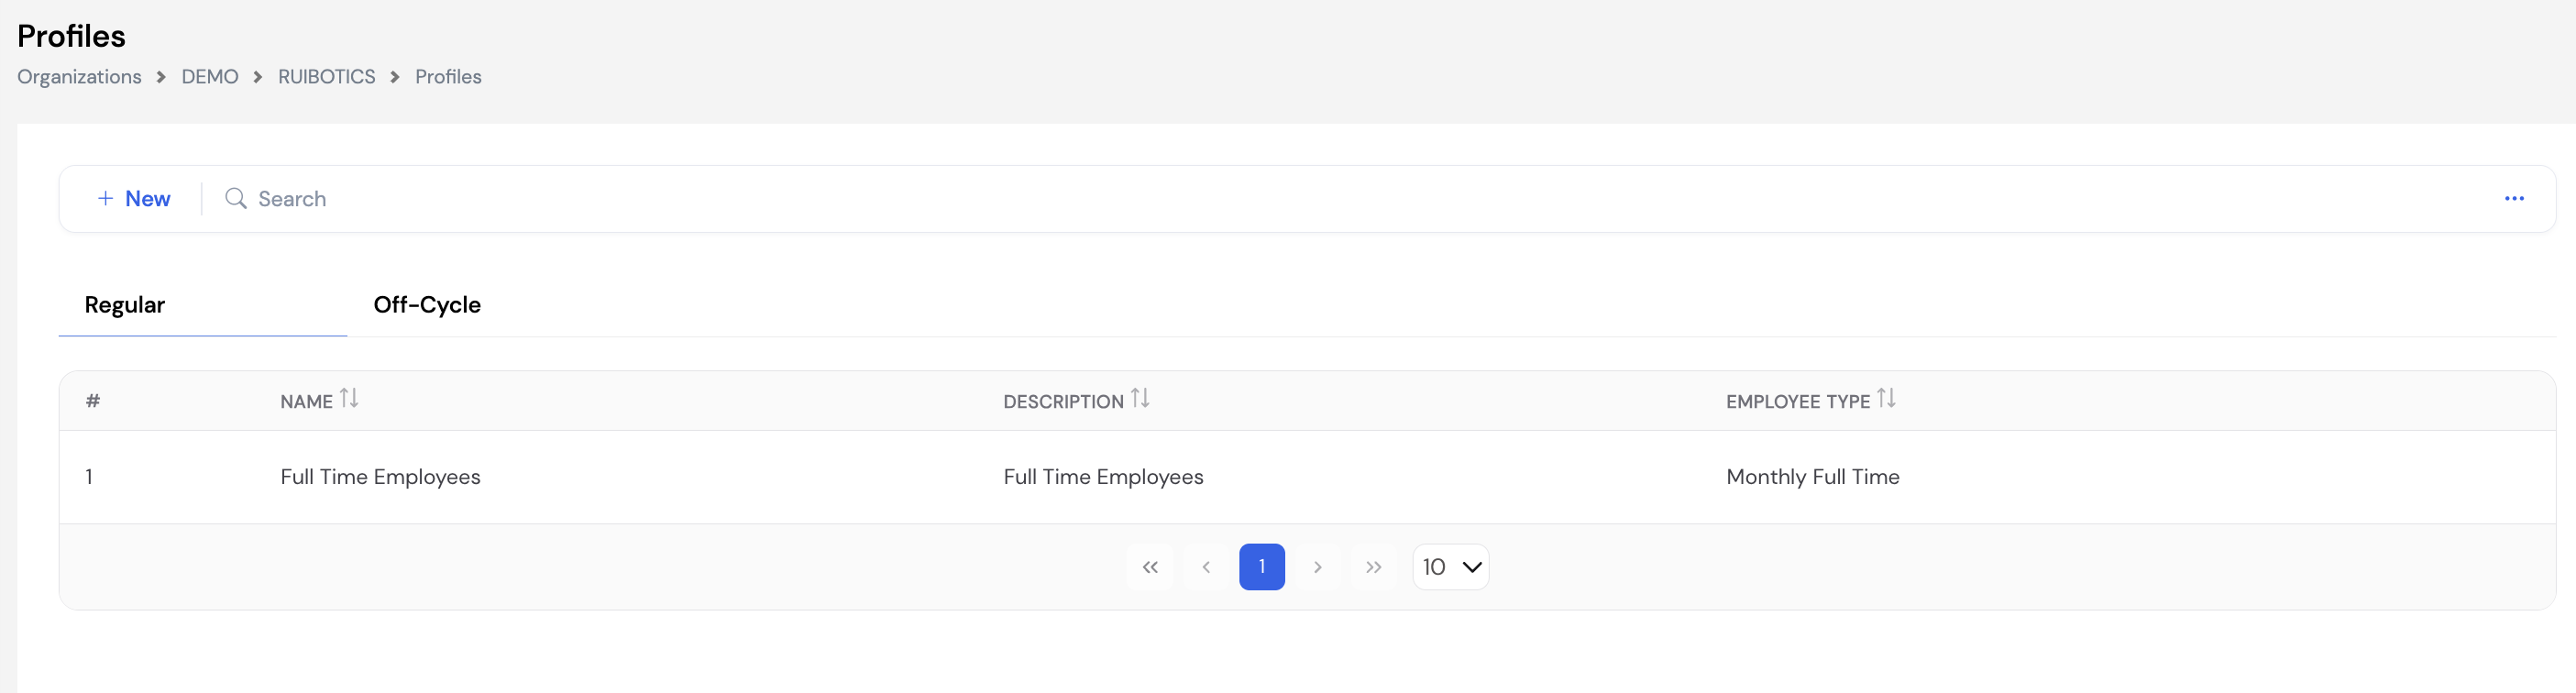

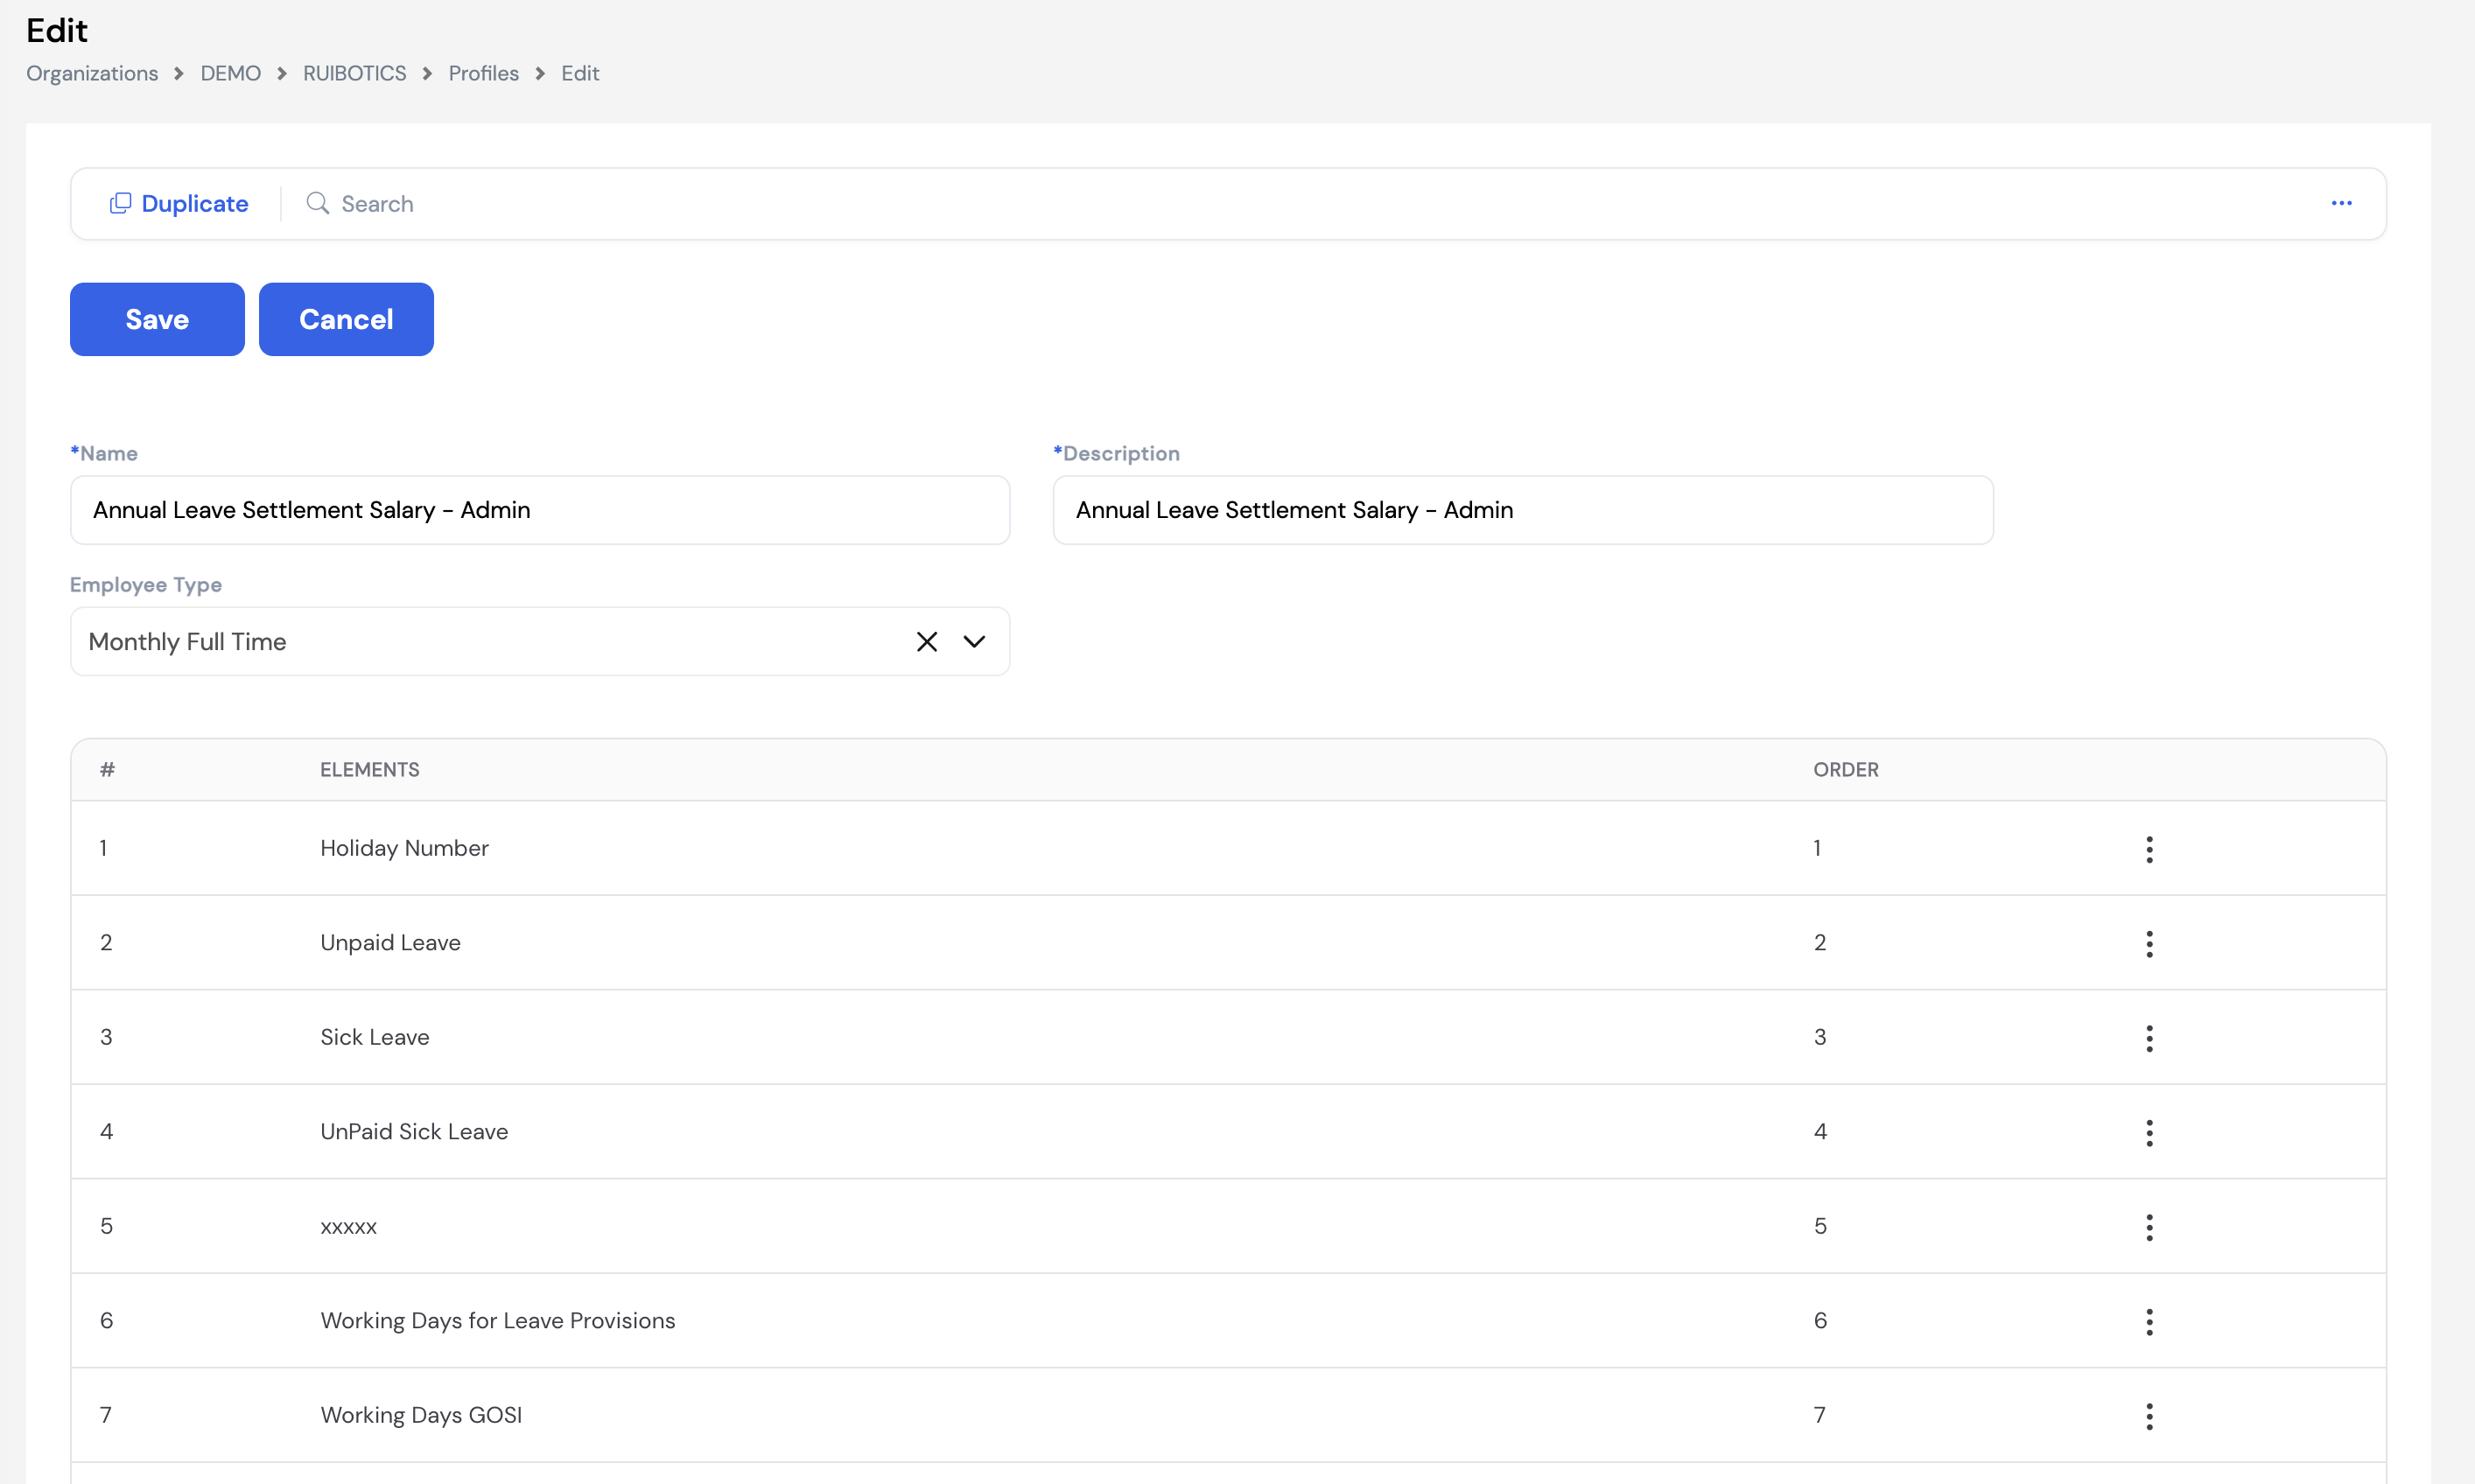
| Field | Description | Required |
|---|---|---|
| Name | The name of the profile (e.g., Full Time Employees, Annual Leave Settlement Salary – Admin) | Required |
| Description | A brief description of the profile's purpose | Required |
| Employee Type | The employee type this profile applies to. For Regular profiles, only one profile can exist per employee type. | Required |
| Elements | The Pay Elements included in this payroll run, added from the available elements list | Required |
| Order | The execution sequence — the payroll engine processes elements strictly in this order, from lowest to highest | Required |
23.12.1 Element Order — Critical Rules
The element order in a profile is critical and must be planned carefully. The payroll engine calculates elements strictly from top to bottom. If an element depends on the value of another element — either in a formula or as an input to a plugin — the dependent element must appear lower in the order than the elements it references. Placing elements out of order will result in zero values or calculation errors.
The rules apply differently depending on the element type:
| Element Type | Ordering Rule | Example |
|---|---|---|
| Manual Elements | No calculation dependency — can appear in any order since their values are entered manually before the payroll run | Bonus, Commission, Ad Hoc Deduction |
| Formula Elements | All elements referenced in the formula must appear before this element in the profile. If the formula is Basic Salary + Transportation Allowance, both Basic Salary and Transportation Allowance must have a lower order number than the formula element. | Housing Allowance formula referencing Basic Salary → Basic Salary must come first |
| Plugin Elements | All input elements required by the plugin must appear before this element in the profile. For example, the Income Tax plugin needs a Taxable Income element as its input — Taxable Income must be placed before Income Tax in the profile. | Income Tax Plugin → Taxable Income must come first; EOS Plugin → Daily Rate must come first |
Missing elements will cause errors. If a formula or plugin references an element that is not included in the profile at all, the payroll run will return a zero value or an error for that element. Every element referenced by a formula or plugin must be explicitly included in the profile.
Use the Duplicate button to quickly create a new profile based on an existing one — useful when creating off-cycle profiles that share most elements with the regular profile but have a few additions or removals.
Profiles are selected during Payroll Generation (Section 22.2), Off-Cycle runs (Section 22.4), and Employee Exit (Section 22.5). Ensure all required profiles are configured before running payroll.
23.13 Workflow Setup
Workflow Setup defines the approval chains used across Magnar HCM for all types of HR and payroll requests — from leave approvals and loan requests to resignation submissions and payroll posting. Each workflow is linked to a specific request Type and can have multiple approval levels, each with its own approvers, activity types, and conditional logic.
Multiple workflow setups can be created for the same request type — for example, different leave approval chains for different leave types. The specific workflow to apply is then selected when configuring that module (e.g., linking a workflow to a specific leave type in the Leave Setup, or to a loan type in the Loan Setup).
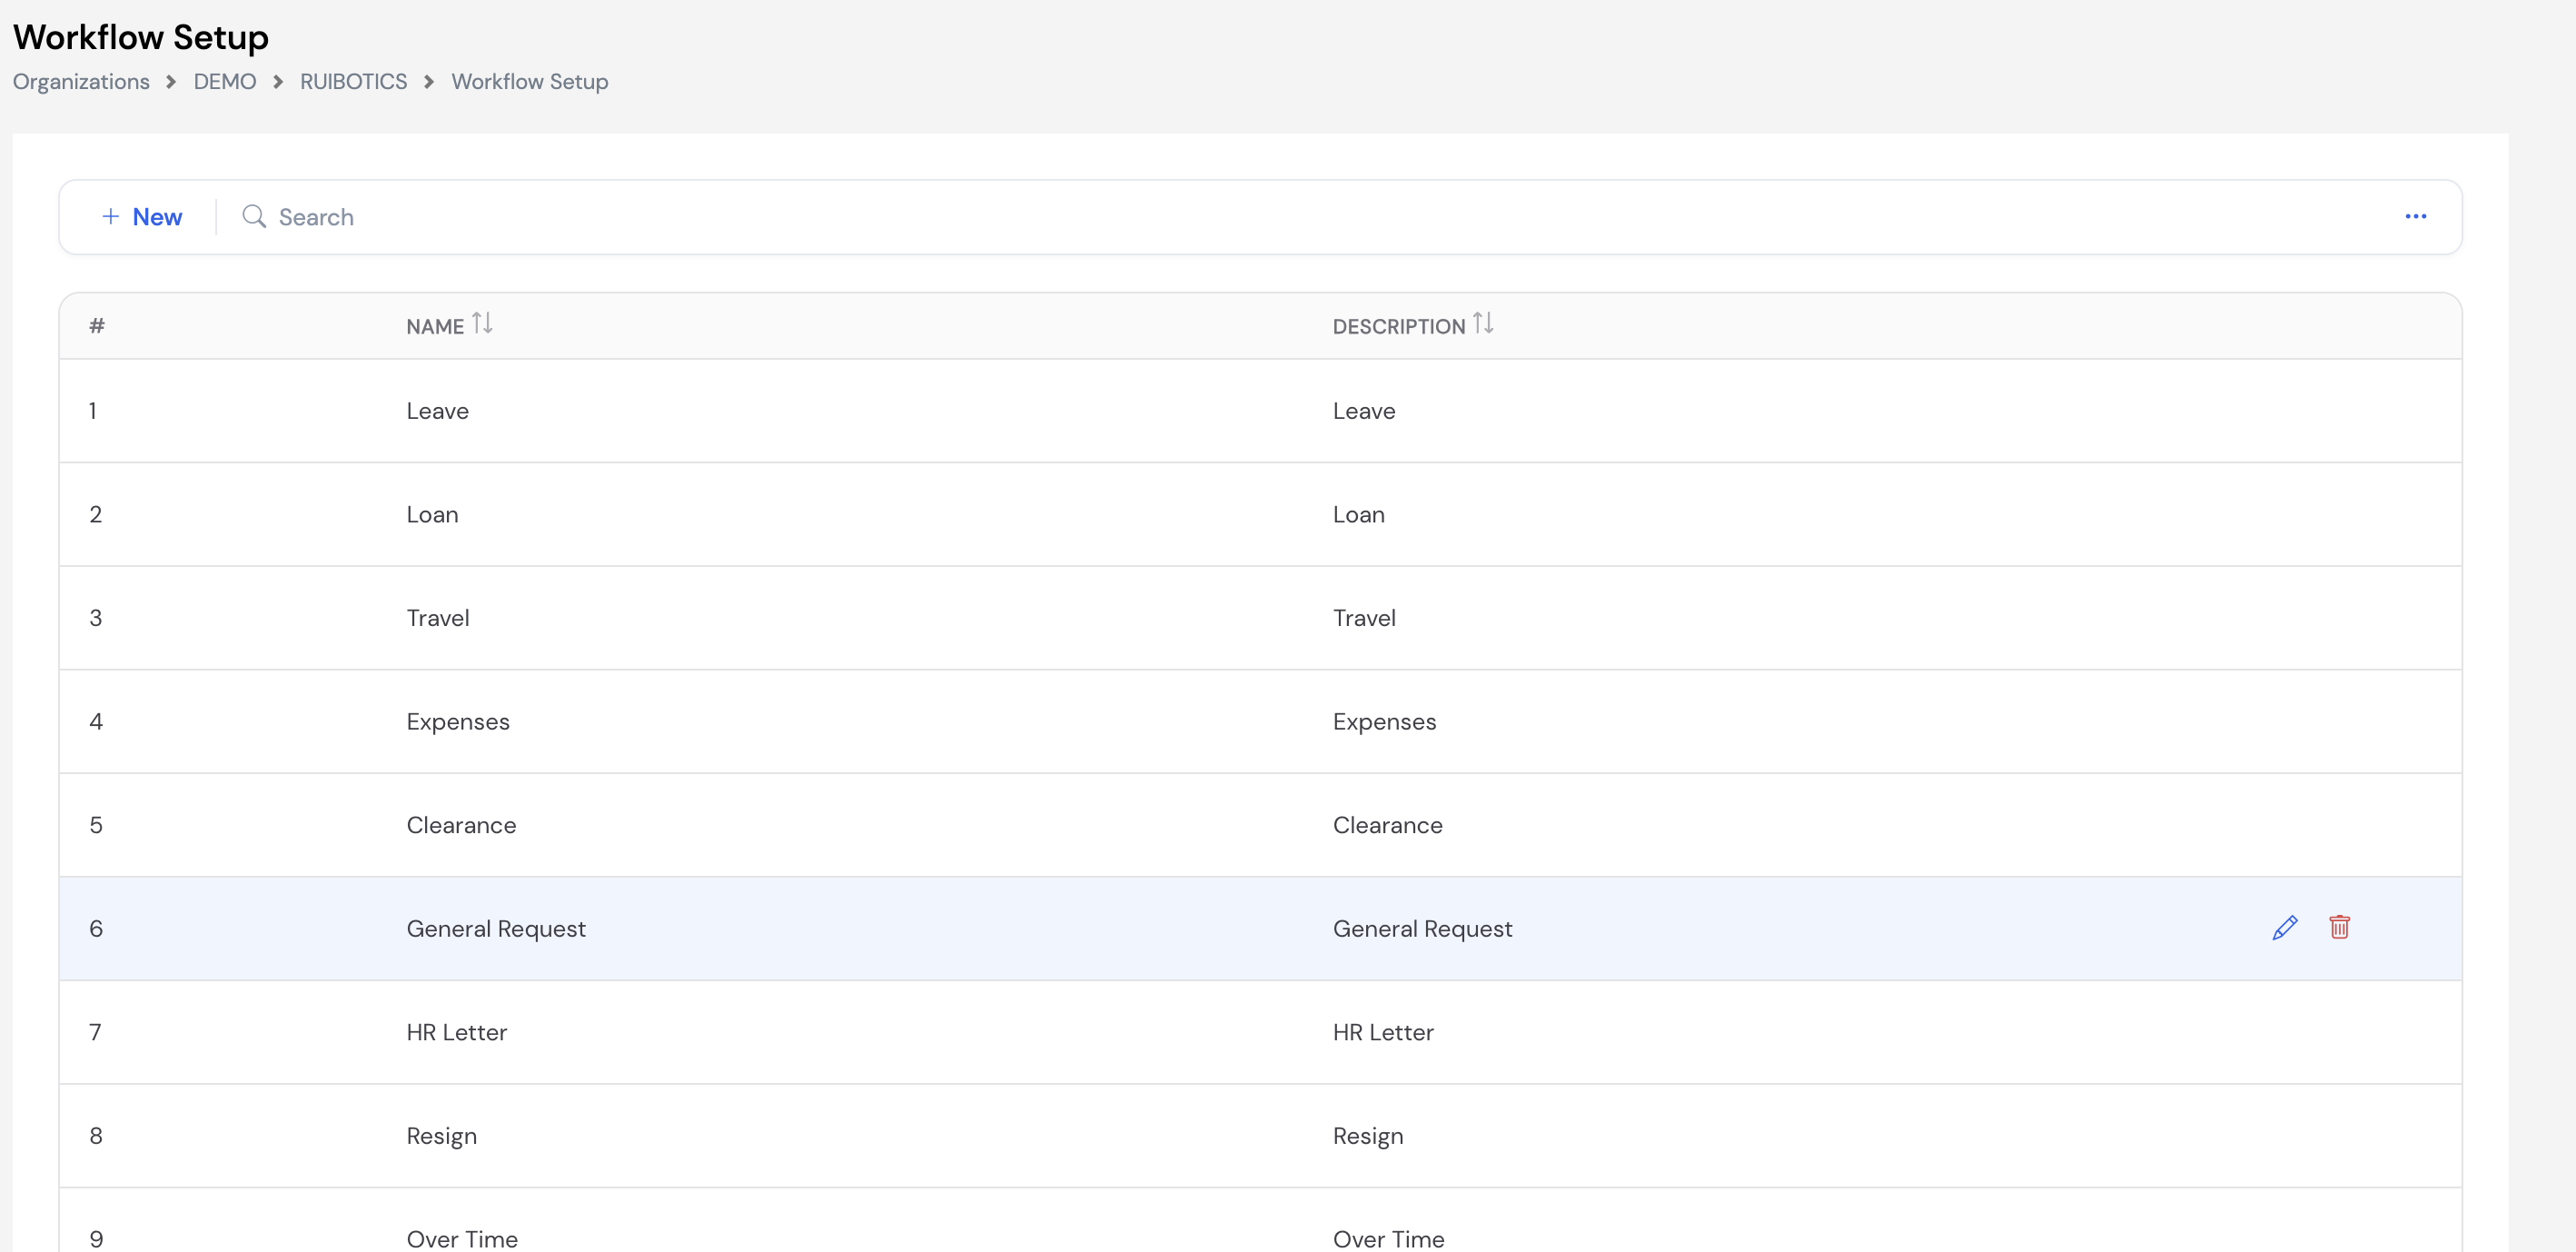
23.13.1 Creating a Workflow
Click + New to create a workflow. Each workflow has a Name, Description, a Type (the request category it applies to), and one or more Approval Levels.
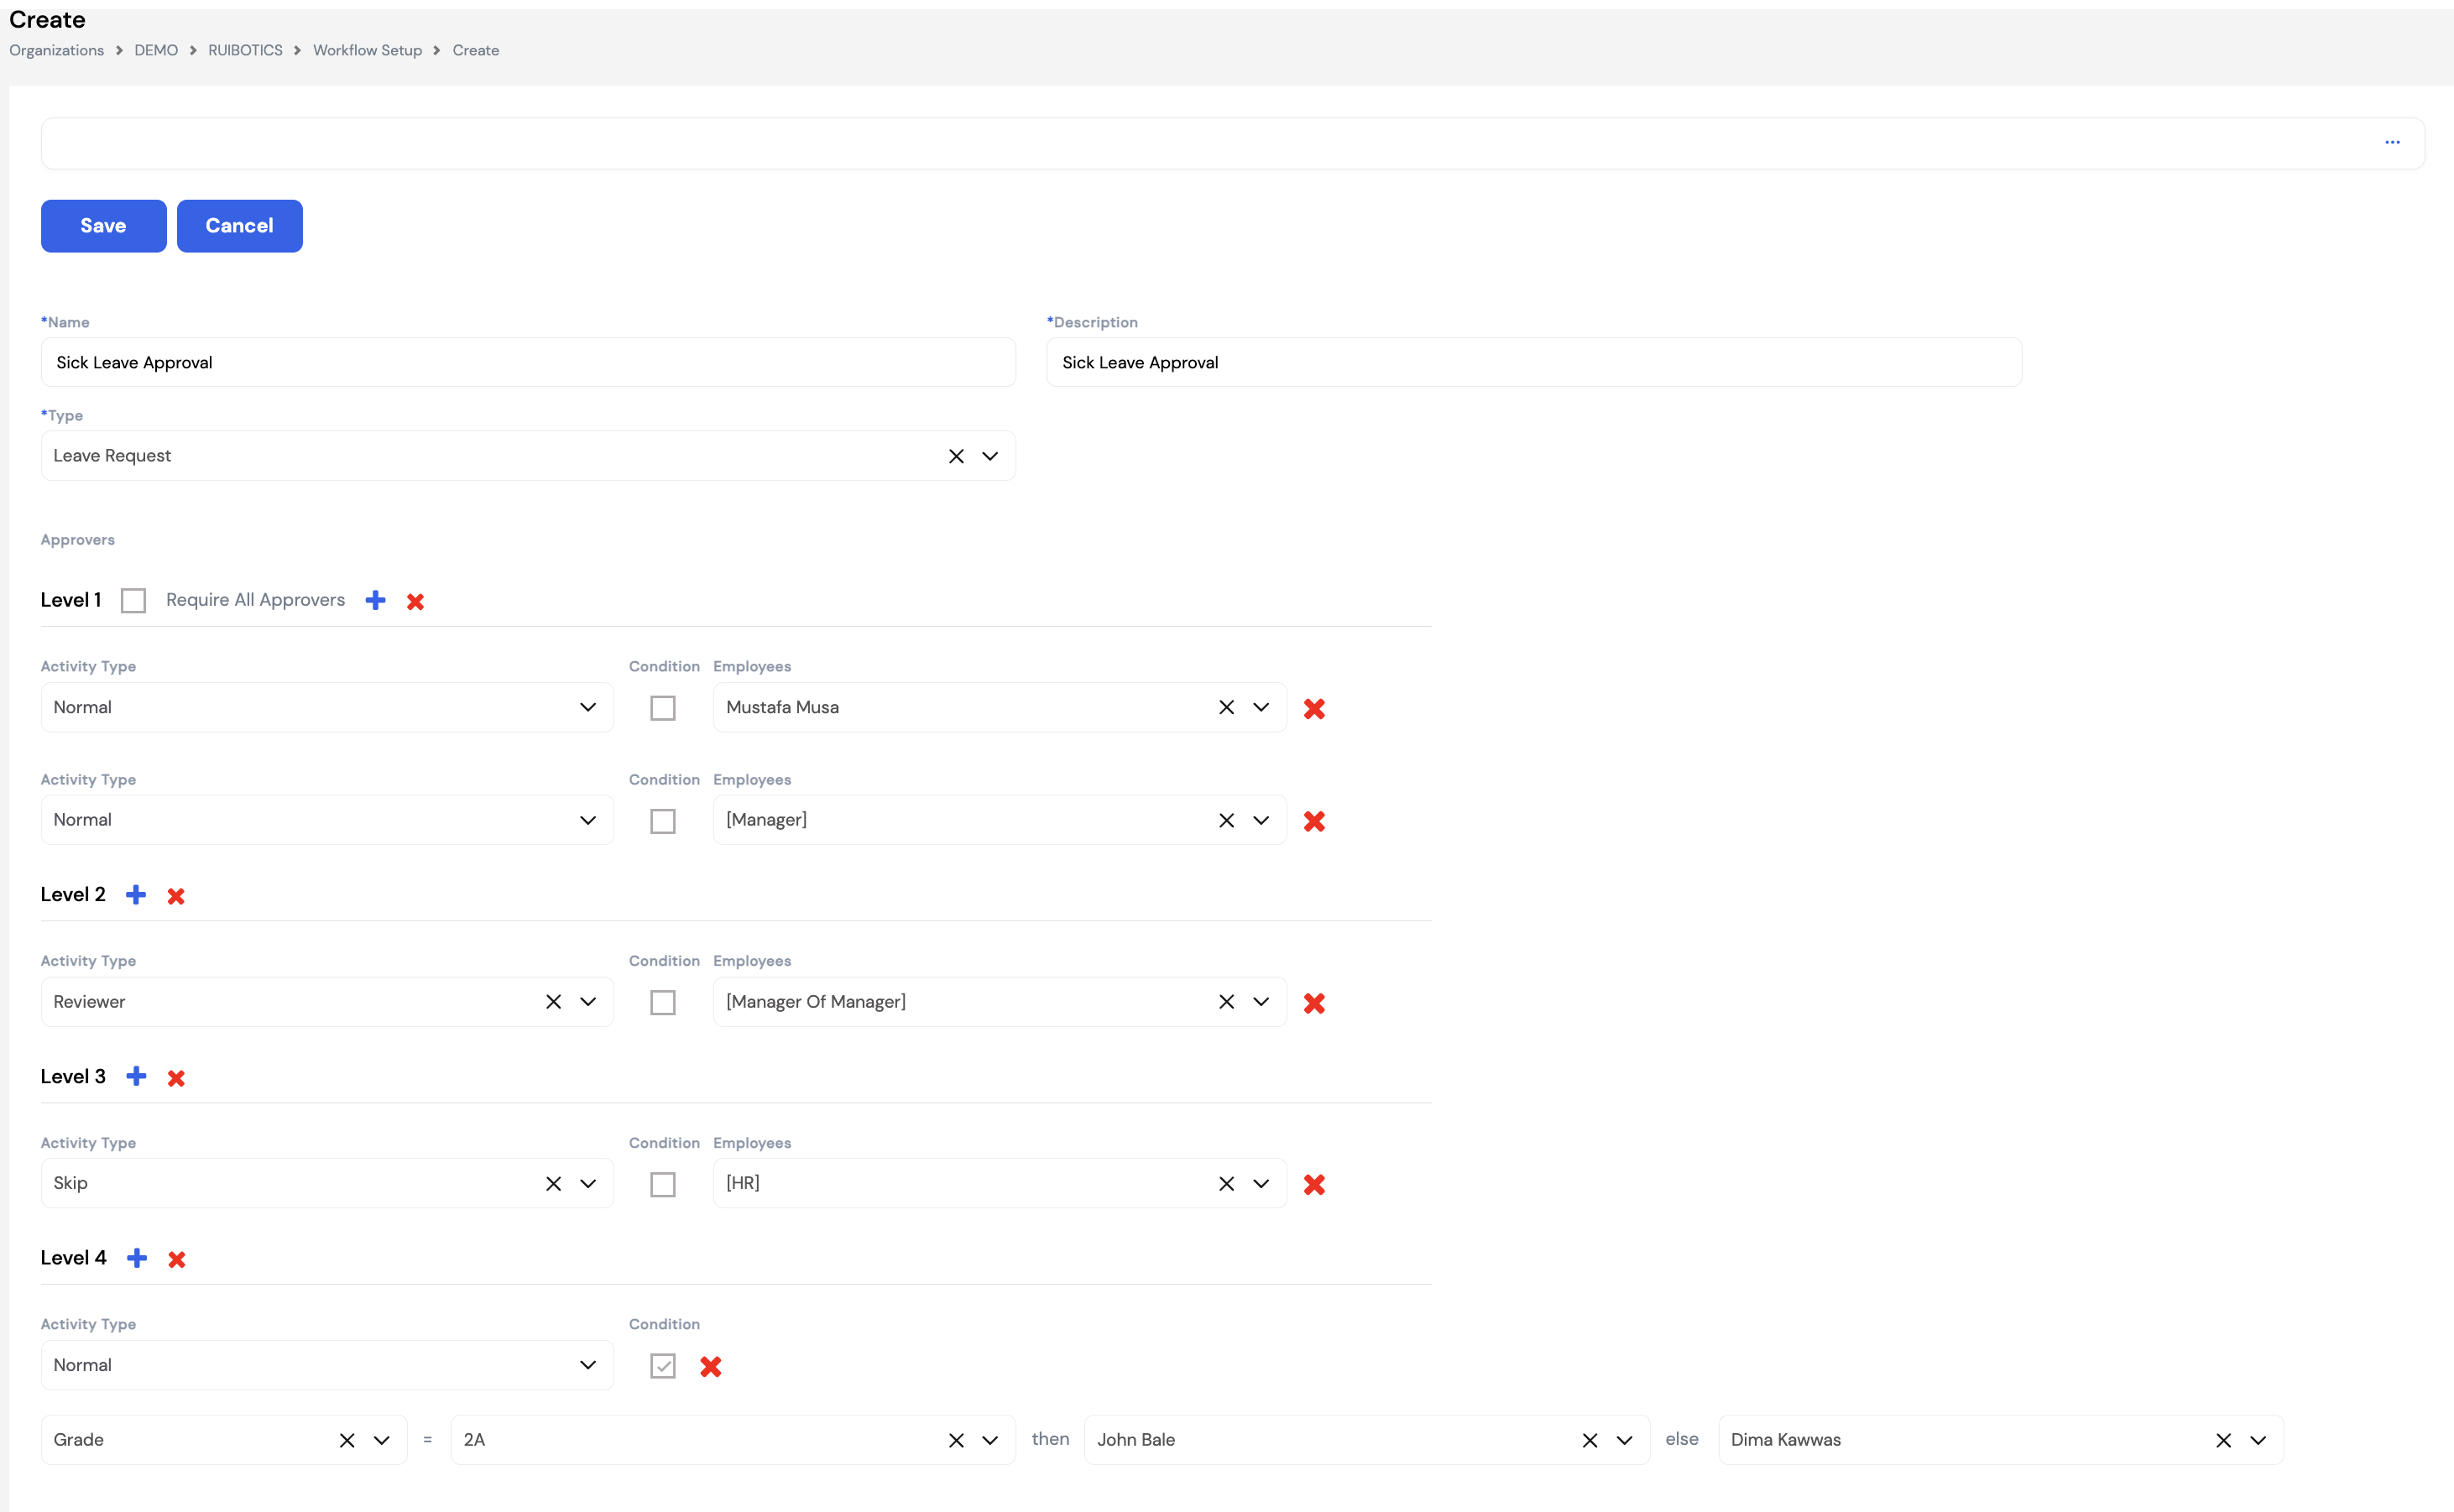
| Field | Description | Required |
|---|---|---|
| Name | A descriptive name for this workflow (e.g., Sick Leave Approval, Loan Approval – Senior Staff) | Required |
| Description | A brief description of what this workflow is used for | Required |
| Type | The request category this workflow applies to — see the full list below | Required |
Available Workflow Types
The following request types can have approval workflows configured:
23.13.2 Approval Levels
Each workflow can have one or more Levels — sequential stages in the approval chain. Click + next to a level to add an approver row, or the red × to delete the level.
| Field | Description |
|---|---|
| Level | The sequential approval stage (Level 1 = first approver, Level 2 = second, etc.). Requests must pass each level in order. |
| Require All Approvers | If checked, all approvers at this level must approve before the request advances to the next level. If unchecked, approval by any one approver at the level is sufficient. |
| Activity Type | How the approver interacts with the request:
|
| Condition | When checked, a conditional rule is applied at this level — routing the request to different approvers based on employee attributes (e.g., Grade, Employee Type, Department). Supports If [attribute] = [value] Then [approver A] Else [approver B] logic. |
| Employees | The approver(s) at this level. Can be a specific named employee or a dynamic role such as:
|
Use [Manager] and [Manager of Manager] as dynamic approvers wherever possible — these resolve automatically based on the reporting structure defined in Positions (Section 23.1.4), so workflows don't need to be updated when managers change.
For leave requests, multiple workflows can be created (e.g., one for Annual Leave, one for Sick Leave, one for Emergency Leave) and each is linked to the corresponding leave type in the Leave Setup module — allowing different approval chains per leave type.
23.14 Per Diem
The Per Diem module defines the daily travel allowance rates linked to each travel destination, broken down by employee grade. When an employee submits an expense claim related to a travel request, the system automatically calculates the applicable per diem amounts based on the destination and the employee's grade — without any manual calculation required. The expense claim section covers how this works in practice.
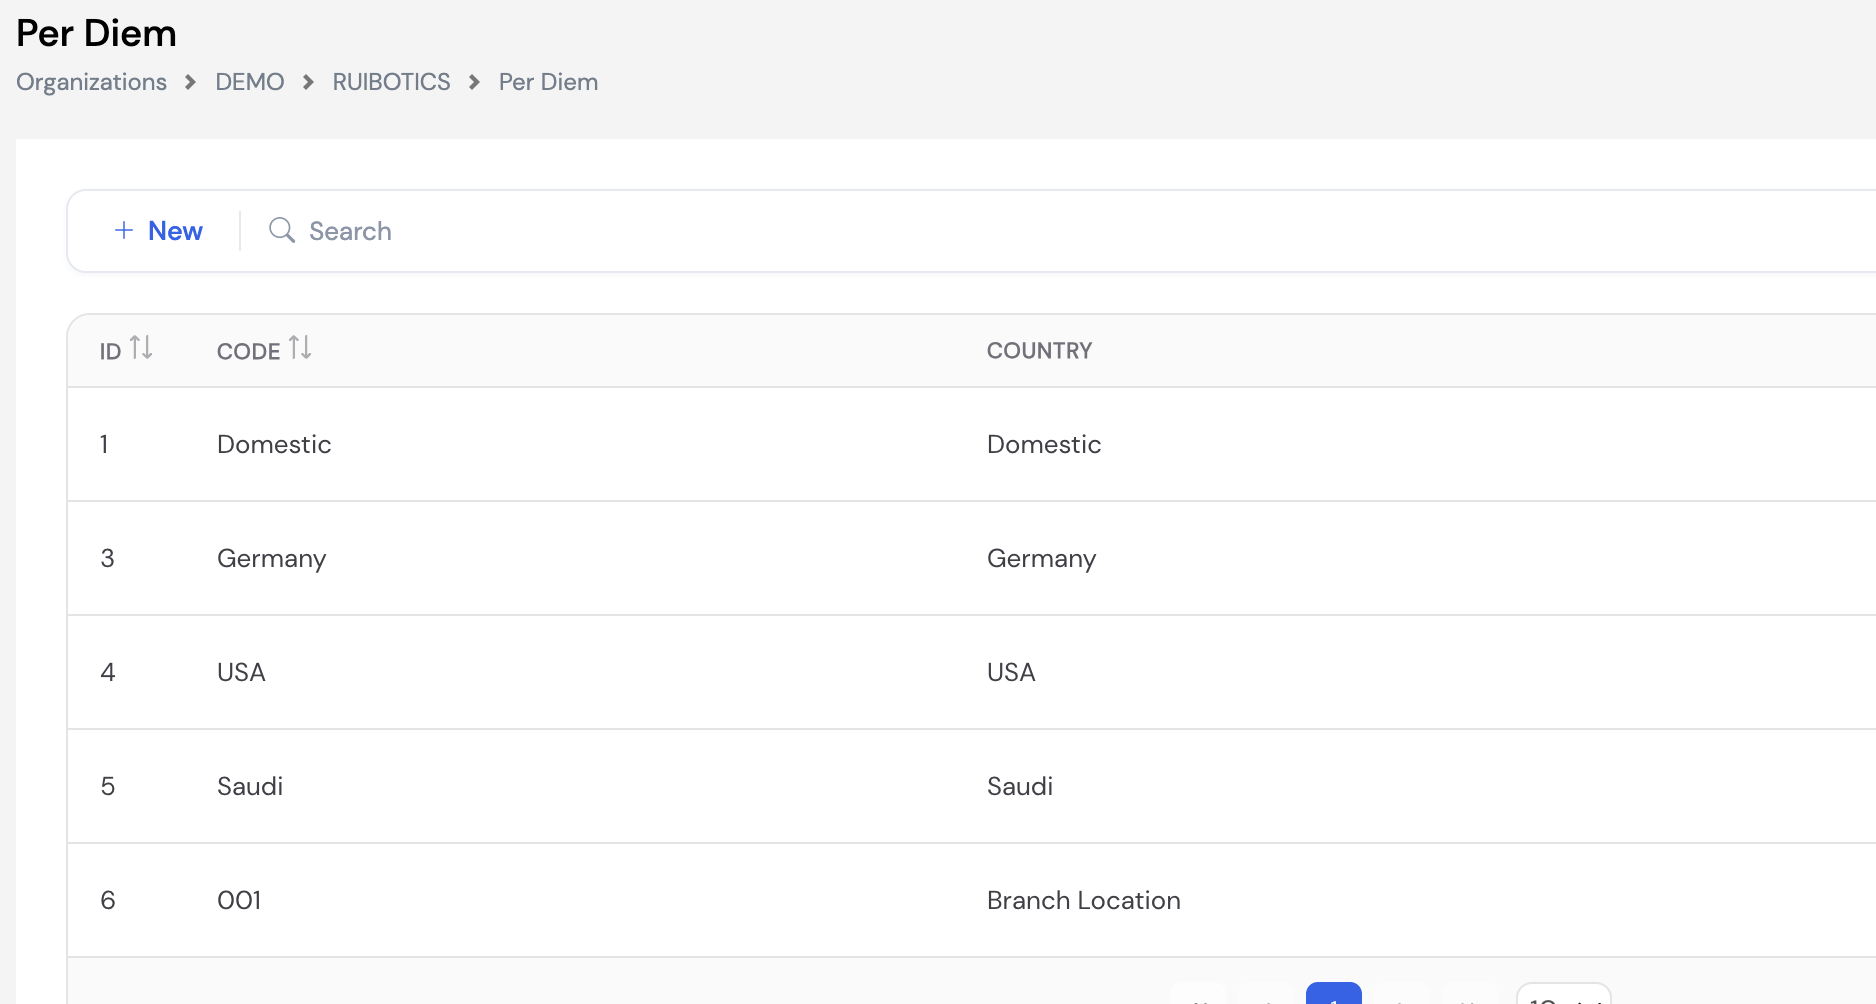
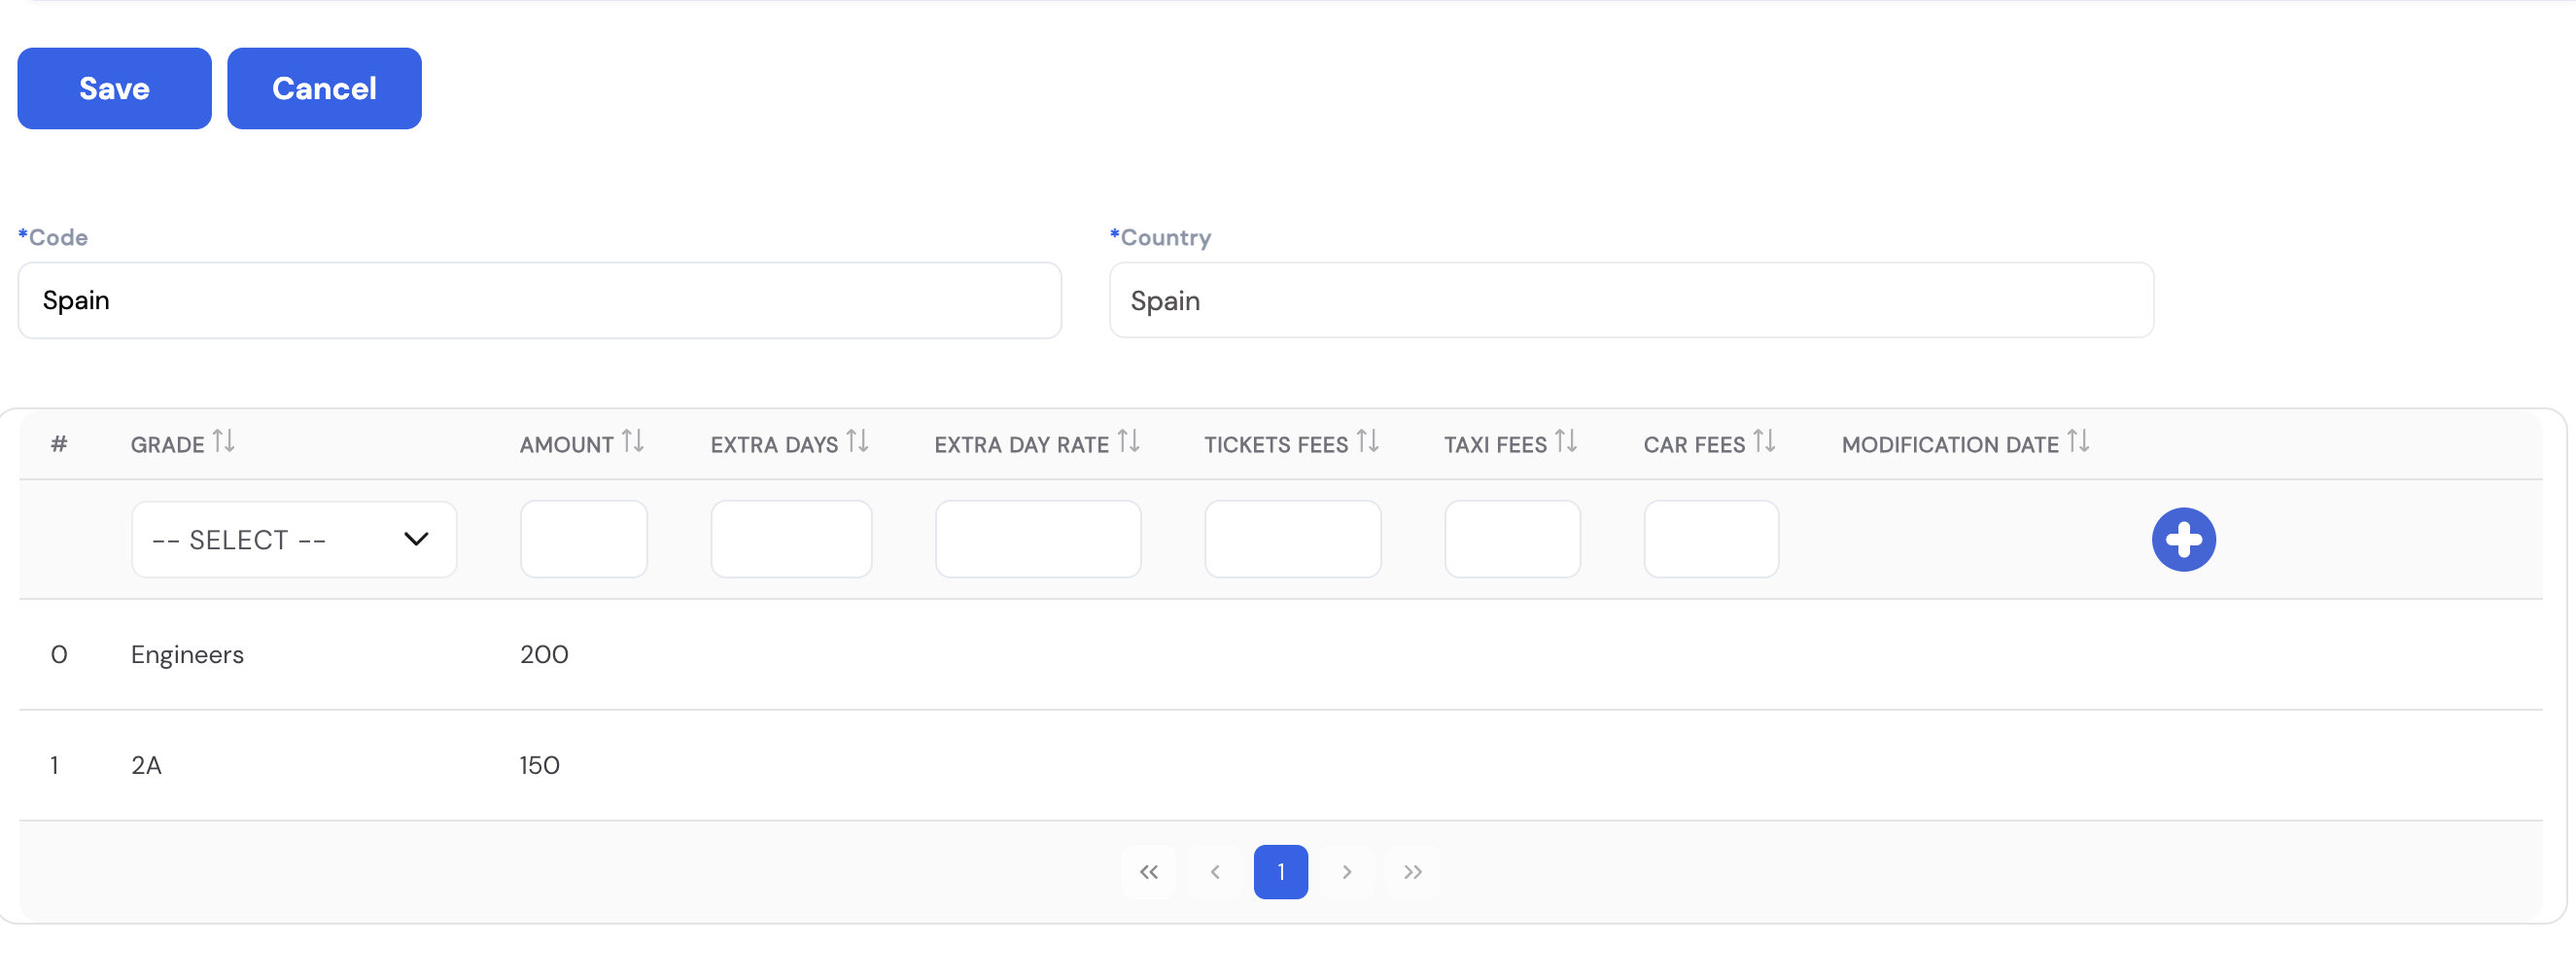
| Field / Column | Description | Required |
|---|---|---|
| Code | A unique identifier for this per diem destination (e.g., Spain, Domestic, USA) | Required |
| Country | The country or destination name as it will appear in travel requests and reports | Required |
| Grade | The employee grade the allowance rates apply to — different grades can receive different per diem amounts for the same destination | Required |
| Amount | The daily per diem allowance amount for this grade at this destination (e.g., 200 for Engineers, 150 for Grade 2A) | Required |
| Extra Days | The number of additional days (beyond the trip duration) for which an extra per diem rate applies | Optional |
| Extra Day Rate | The per diem rate applied for any extra days beyond the standard trip duration | Optional |
| Tickets Fees | A fixed allowance for flight or transportation ticket costs associated with this destination and grade | Optional |
| Taxi Fees | A fixed allowance for taxi or local transport costs at this destination | Optional |
| Car Fees | A fixed allowance for car rental costs at this destination | Optional |
Add a row per grade for each destination — this allows the system to automatically apply the correct allowance amounts based on the travelling employee's grade when the travel request is approved and processed. Destinations must match those configured in the Per Diem Destinations lookup (Section 14.4).
23.15 Employment Letter
The Employment Letter module allows administrators to define the types of HR letters that the system can generate — such as salary certificates, employment confirmations, experience letters, NOC letters, or any other official document issued to employees. Letter types configured here appear as options when employees submit a Letter Request through the ESS portal.
Each letter type is backed by a pre-designed .repx report template (uploaded via Reports Setup — Section 23.5.1). Letter templates are typically designed during the implementation phase according to each client's official letter formats and branding requirements.
| Field | Description | Required |
|---|---|---|
| Code | A unique code for this letter type (e.g., Salary Certificate, NOC) | Optional |
| Date | Auto-populated with the creation date of this letter type record | Auto |
| Name | The name of the letter type as it will appear when employees submit a letter request in ESS (e.g., Salary Certificate) | Optional |
| Foreign Name | The letter type name in a second language for bilingual organizations | Optional |
| Workflow Type | The approval workflow applied to letter requests of this type — defines who must approve the request before the letter is generated (e.g., HR Letter workflow) | Optional |
| Attachment | Upload the .repx report file that defines the letter's layout and content. This template must be designed and prepared before the letter type can be used. | Optional |
Templates are client-specific. Each organization has its own official letter formats, letterheads, and language requirements. Letter templates are designed as .repx files during the system implementation and uploaded here. Contact your Magnar implementation team to create or update letter templates.
The letter generation process supports digital signatures if required, and can be linked to a workflow approval chain — ensuring that a letter request must be approved by the relevant manager or HR before the letter is issued to the employee.
23.16 Banks
The Banks module allows administrators to define the banks used for salary disbursement — including WPS (Wage Protection System) transfers and direct bank payments. Banks configured here are available for selection when assigning bank account details to employee profiles (Section 20.4).
Each bank supports multiple country/SWIFT combinations — useful for organizations operating across multiple countries using the same banking institution.
| Field / Column | Description | Required |
|---|---|---|
| Code | A unique short code for the bank (e.g., ANB, HSBC, Cash) | Required |
| Name | The full name of the bank as it will appear in employee profiles and payroll reports | Required |
| Country | The country in which this bank operates. Multiple country rows can be added to the same bank for multi-country organizations. | Optional |
| SWIFT | The SWIFT/BIC code for this bank in the corresponding country. Used in WPS files and international salary transfer records. | Optional |
Include a Cash entry in your banks list for employees who receive their salary in cash — this allows them to have a bank record assigned without a formal bank account, while keeping payroll records consistent.
23.17 Projects
The Projects module allows organizations to define company projects and assign employees as resources to them. Projects are used for timesheet and worksheet tracking — employees log their working hours against specific projects — and can also be linked to cost centers for accurate labor cost allocation during ERP payroll posting.
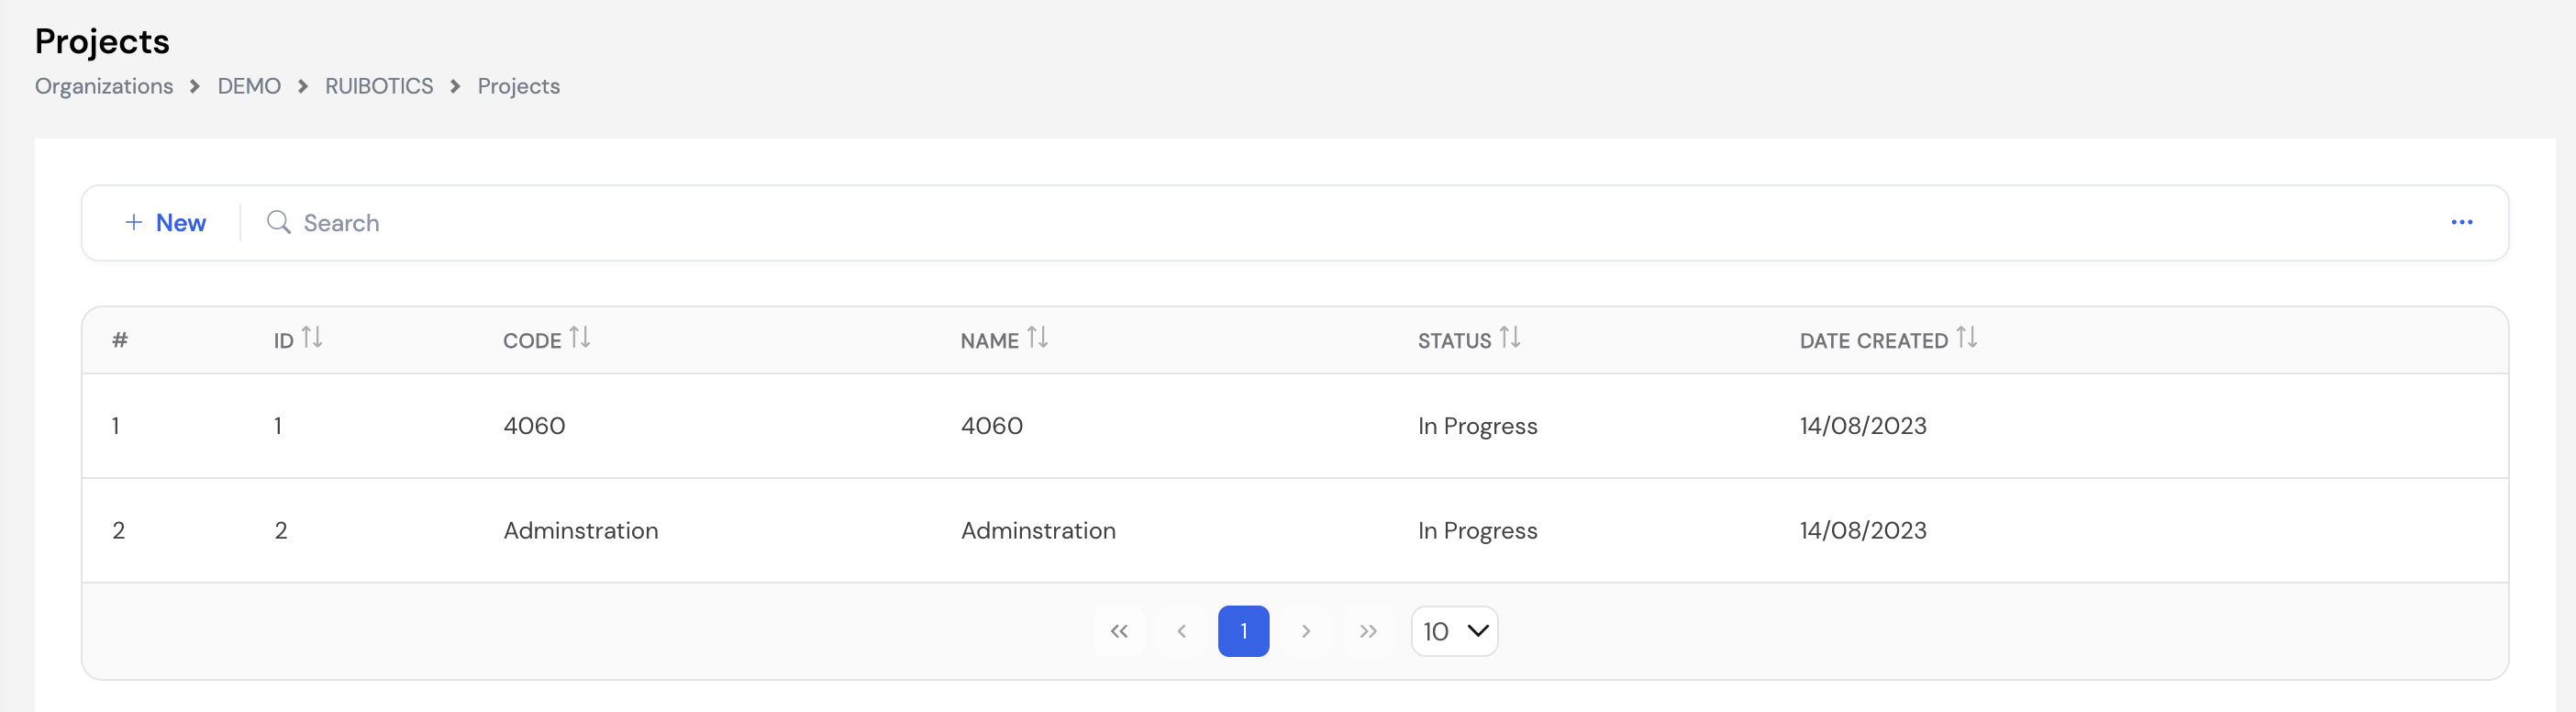
23.17.1 Creating a Project
Click + New to create a project. The project form includes the project's basic details, its assigned cost center, and a Resources grid for assigning employees to the project.
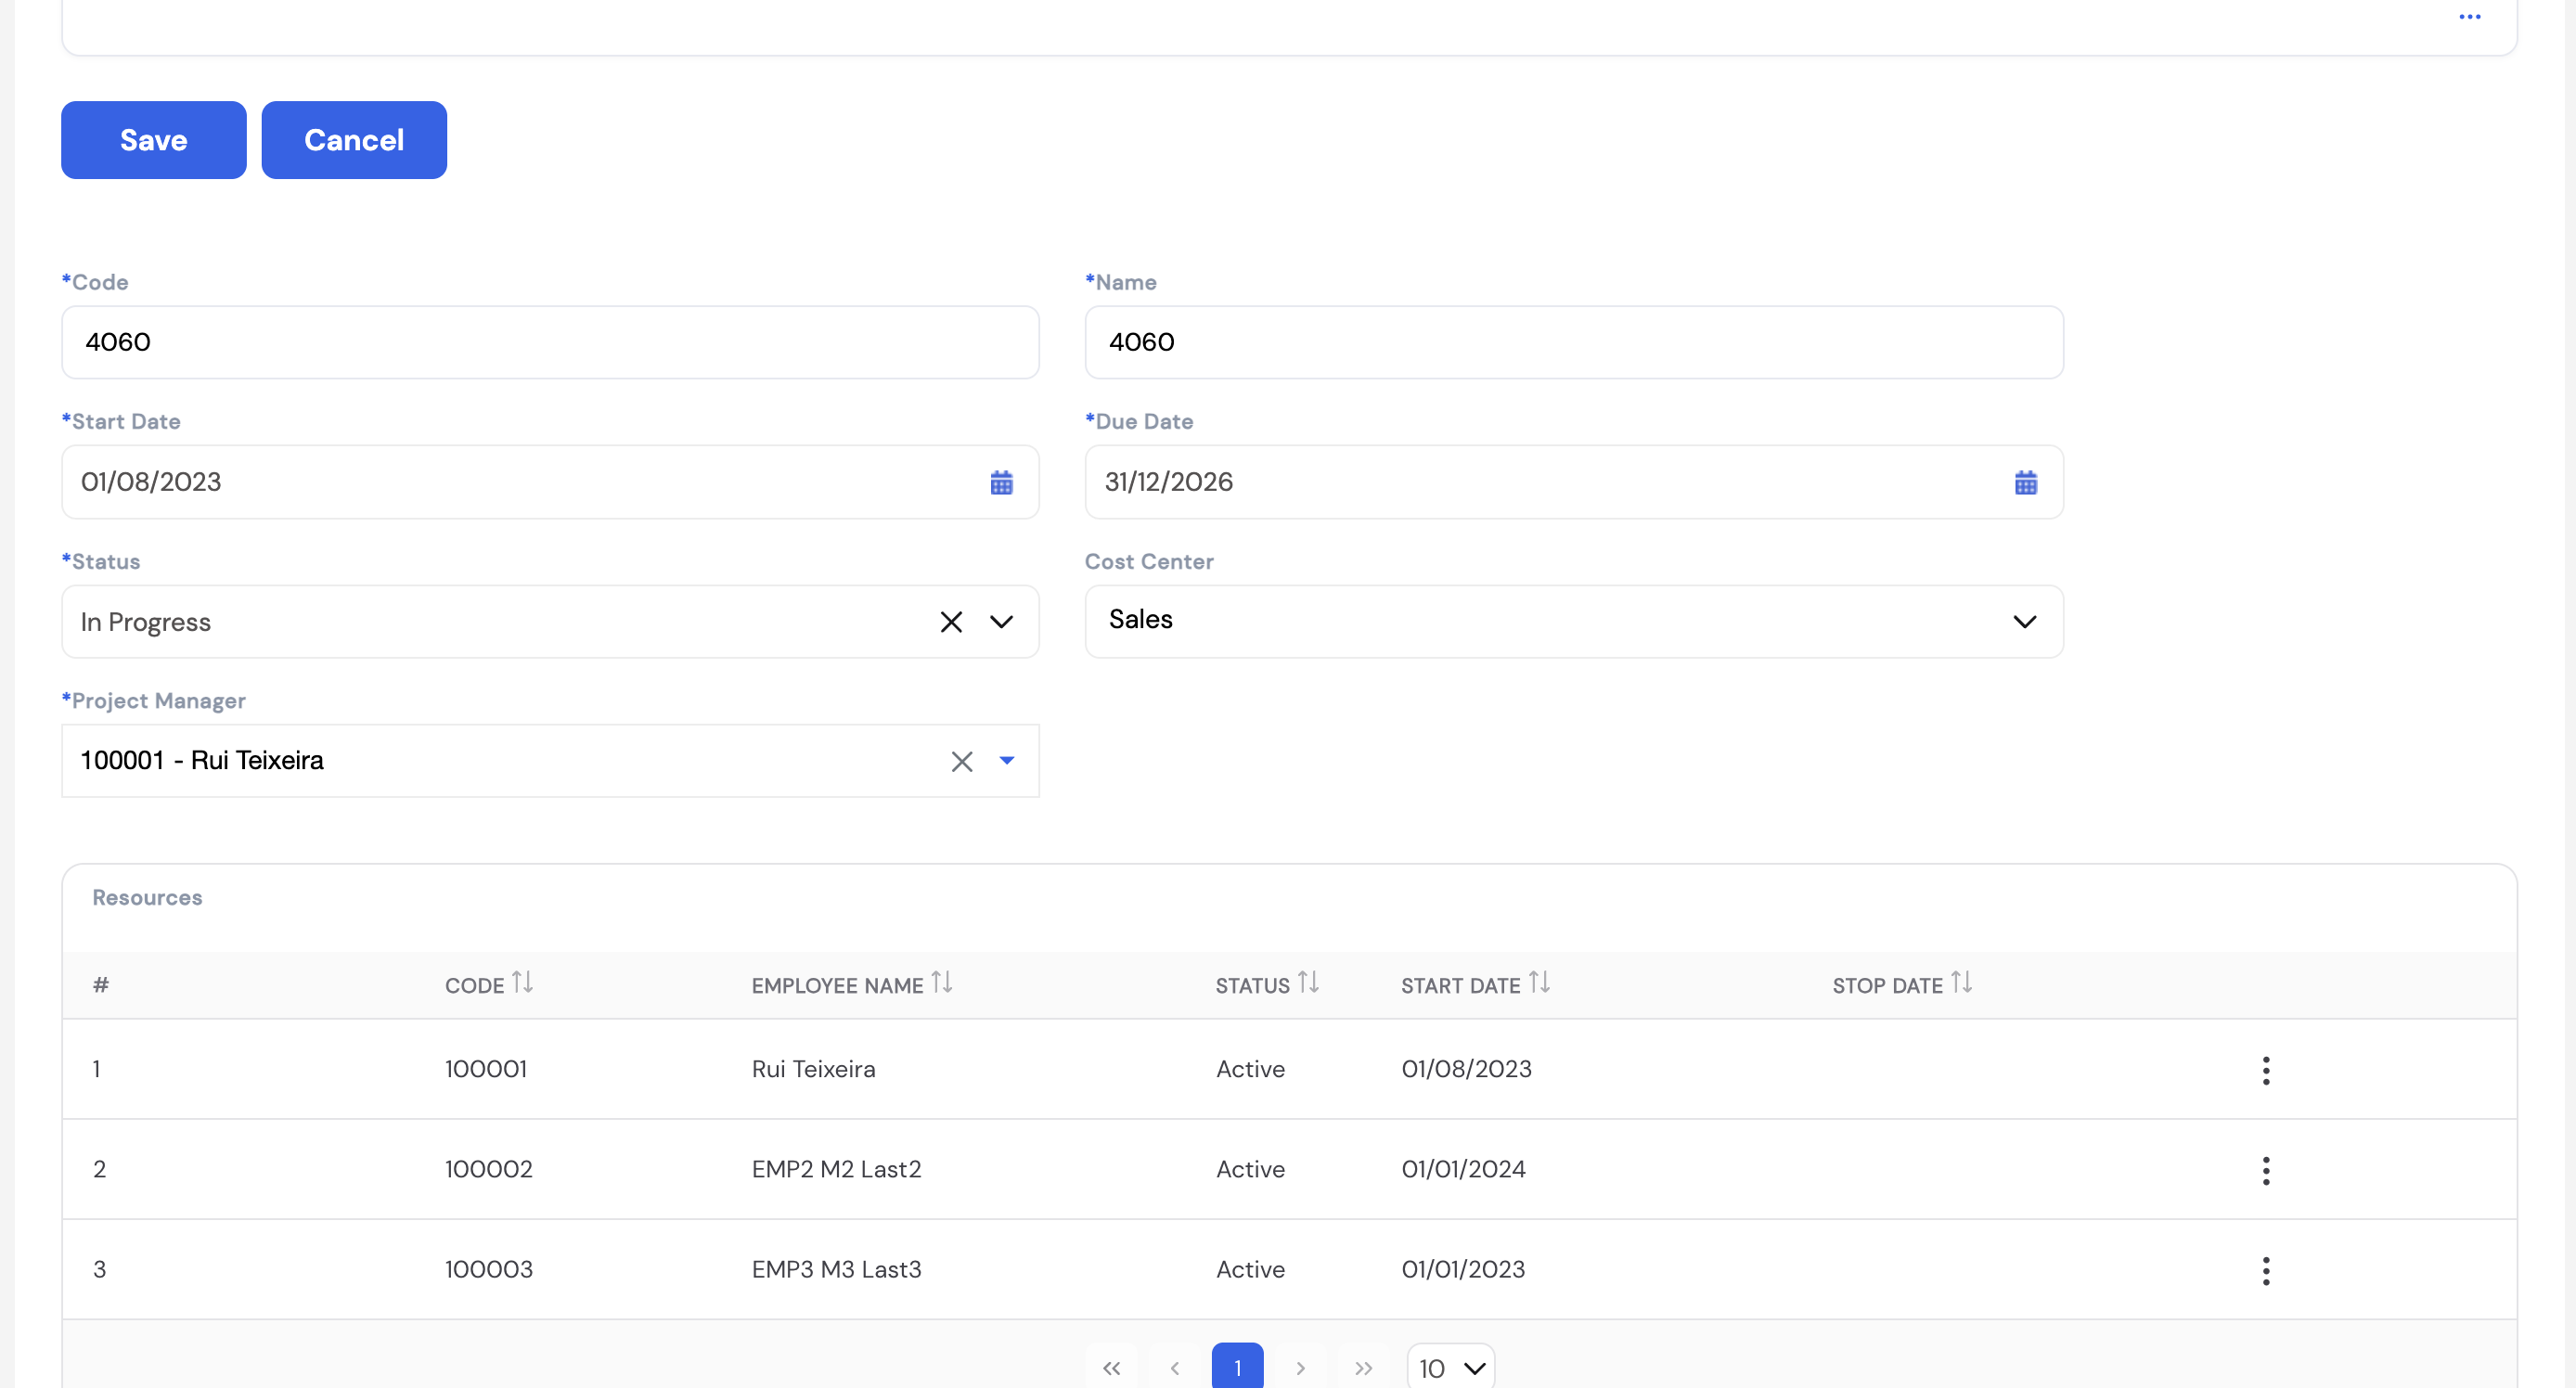
| Field | Description | Required |
|---|---|---|
| Code | A unique project code or number (e.g., 4060) | Required |
| Name | The project name | Required |
| Start Date | The project start date | Required |
| Due Date | The expected project completion date | Required |
| Status | The current project status (e.g., In Progress, Completed, On Hold) | Required |
| Cost Center | The cost center (Project dimension) this project's labor costs are allocated to during ERP payroll posting | Optional |
| Project Manager | The employee responsible for managing this project | Required |
23.17.2 Assigning Resources
The Resources grid at the bottom of the project form lists all employees assigned to work on this project. Click Add Resource or the edit icon on an existing resource row to open the Edit Resource dialog.
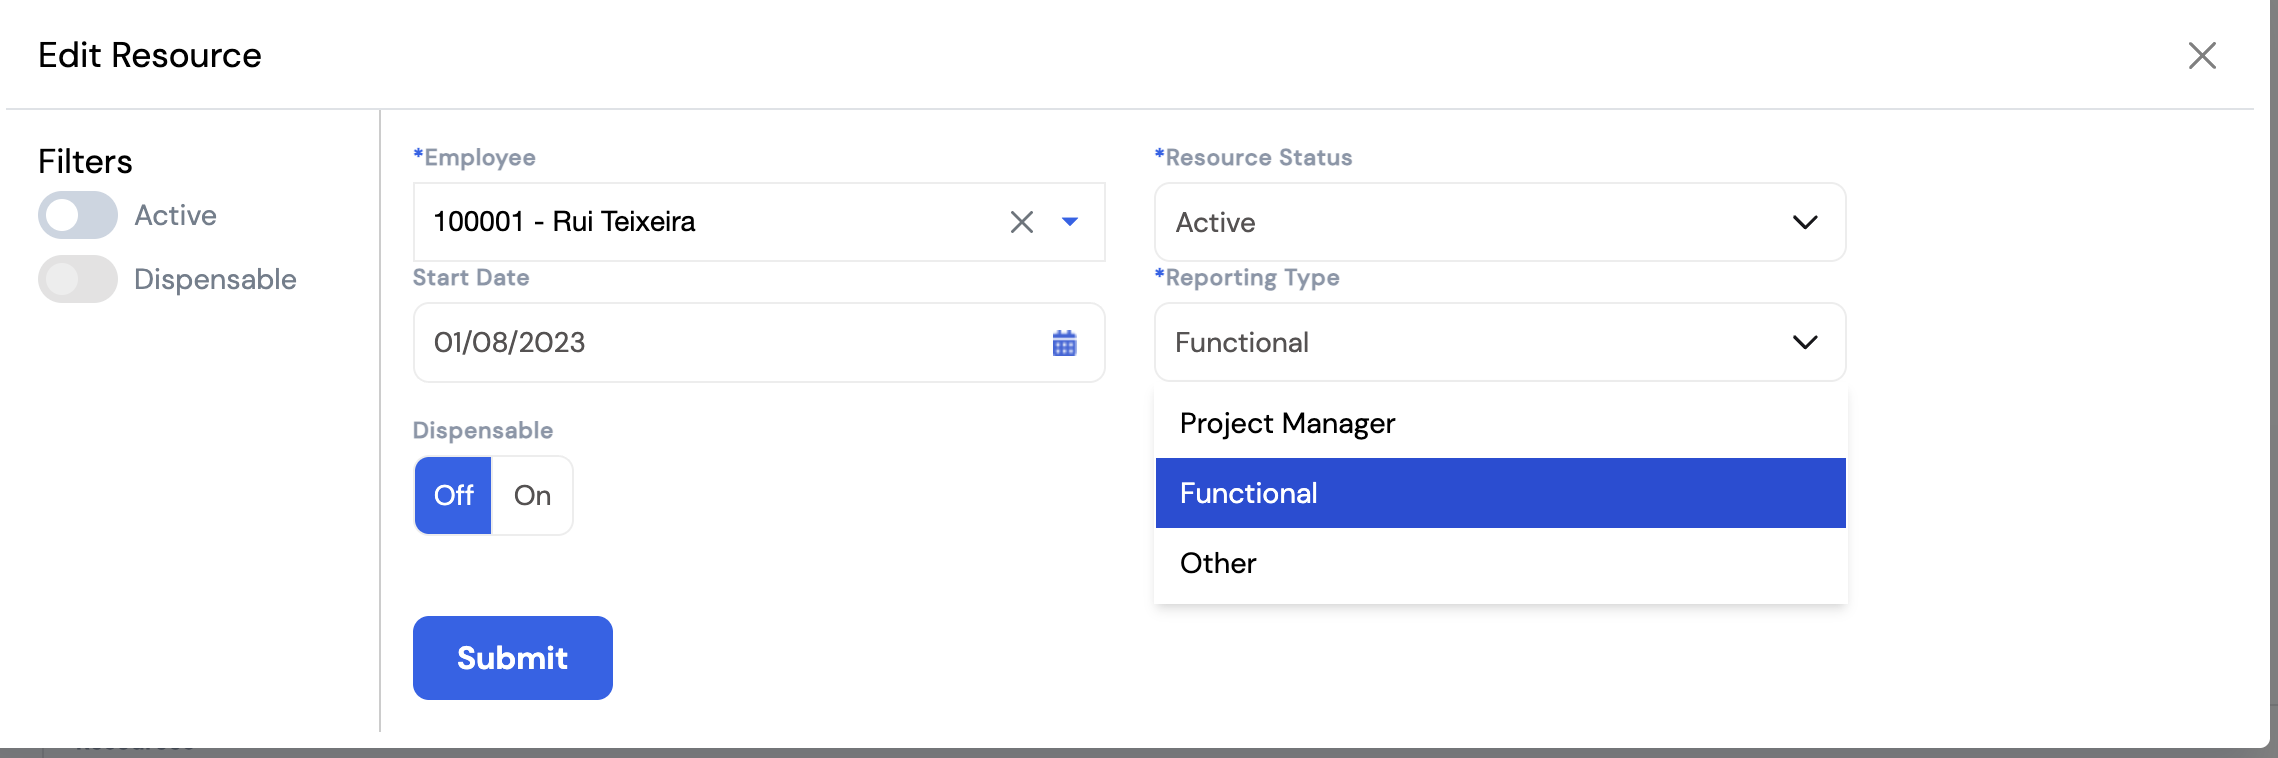
| Field | Description | Required |
|---|---|---|
| Employee | The employee to assign to this project | Required |
| Resource Status | The employee's current status on this project (Active or Inactive) | Required |
| Start Date | The date the employee started working on this project | Optional |
| Reporting Type | The employee's role type on the project: Project Manager, Functional (a team member in a functional role), or Other | Required |
| Dispensable | Toggle — set to On if this employee can be removed from the project without impacting its delivery. Used for resource planning. | Optional |
Use the Filters on the resource dialog (Active, Dispensable) to quickly view only the relevant resources when working on large projects with many team members.
23.18 Fixed Allowances
Fixed Allowances defines the types of recurring monthly allowances that can be assigned to employees. Each fixed allowance is linked to a Pay Element — the element that will carry this allowance's value during payroll calculation. The actual amounts are assigned to individual employees in the Salaries and Allowances section of the employee profile.
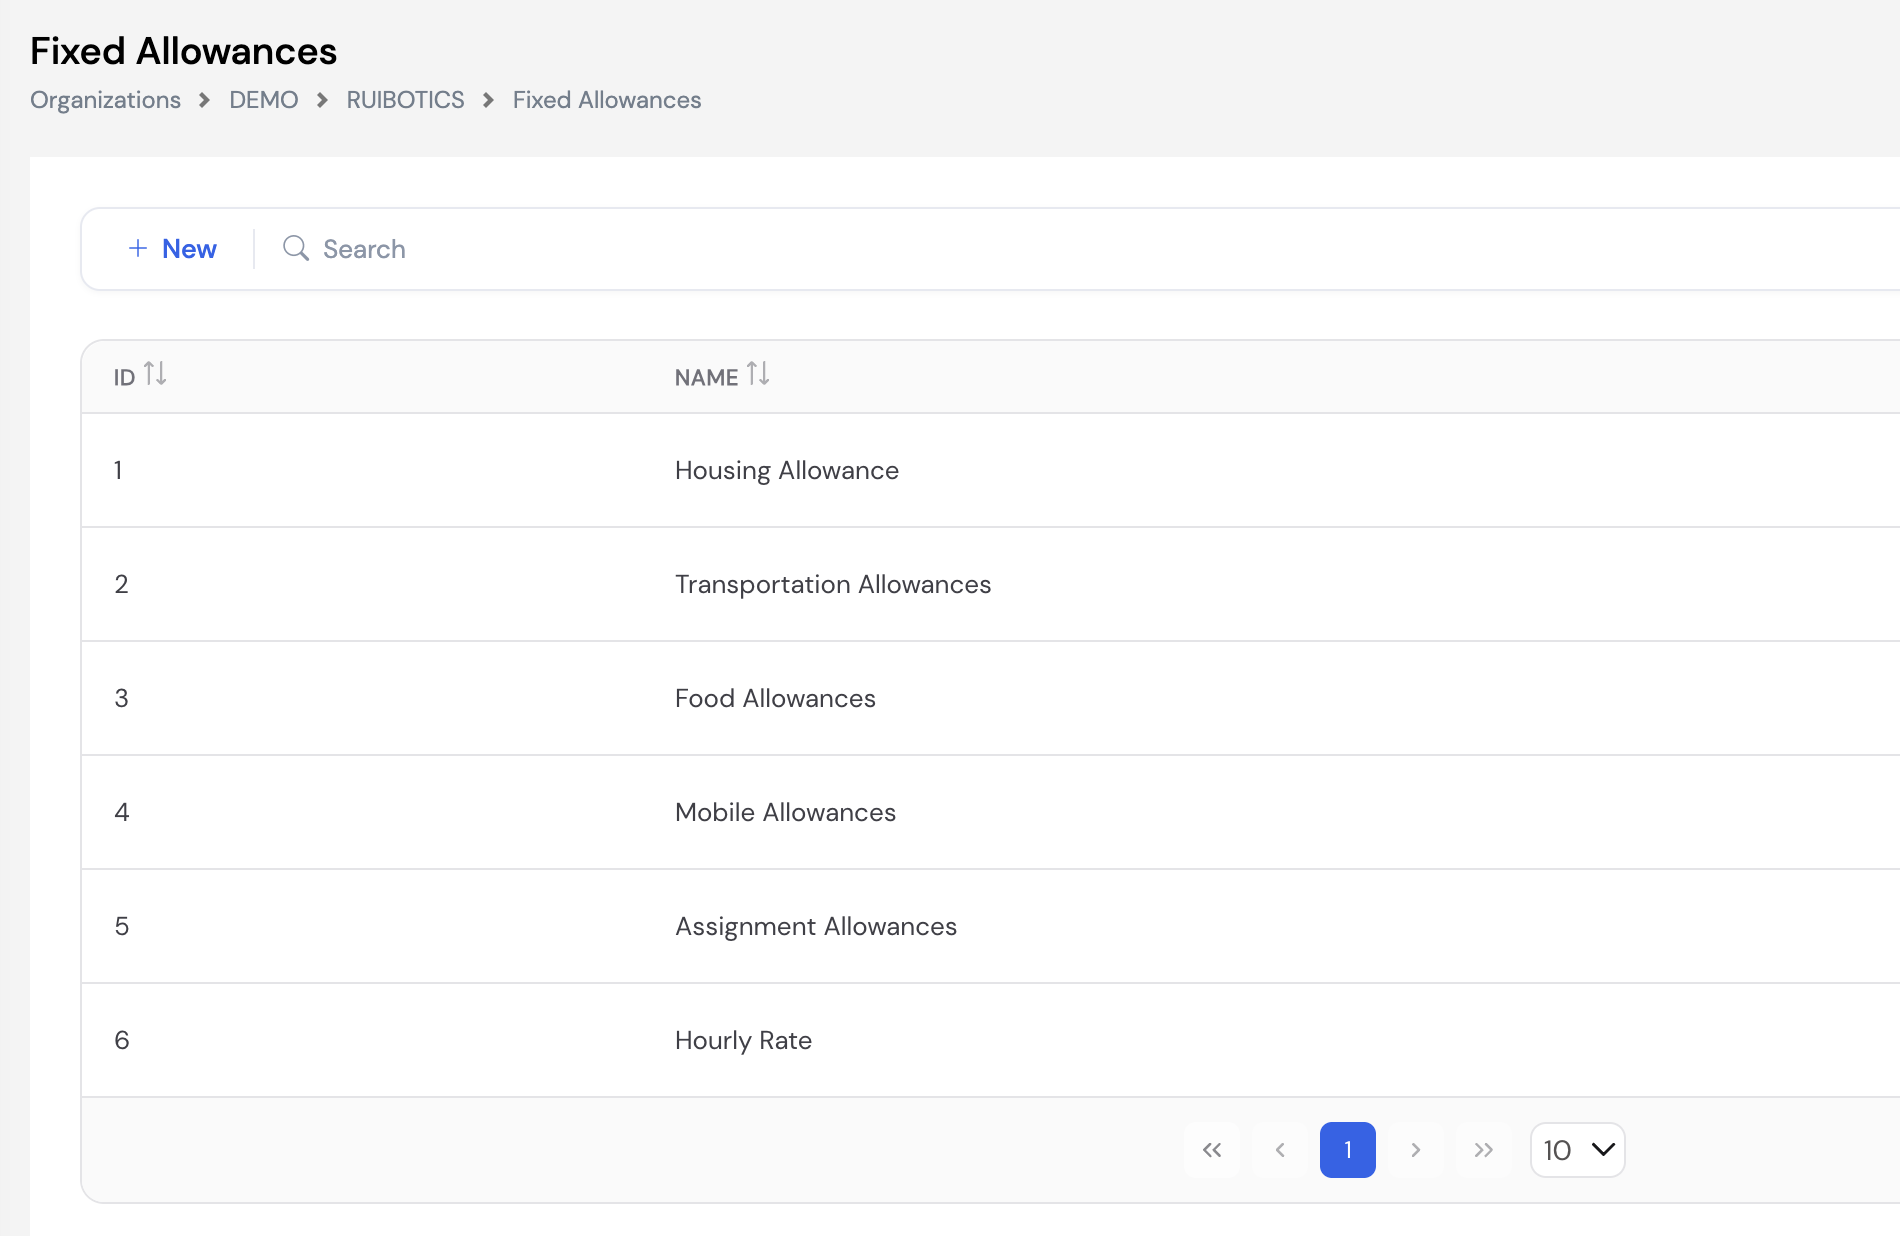
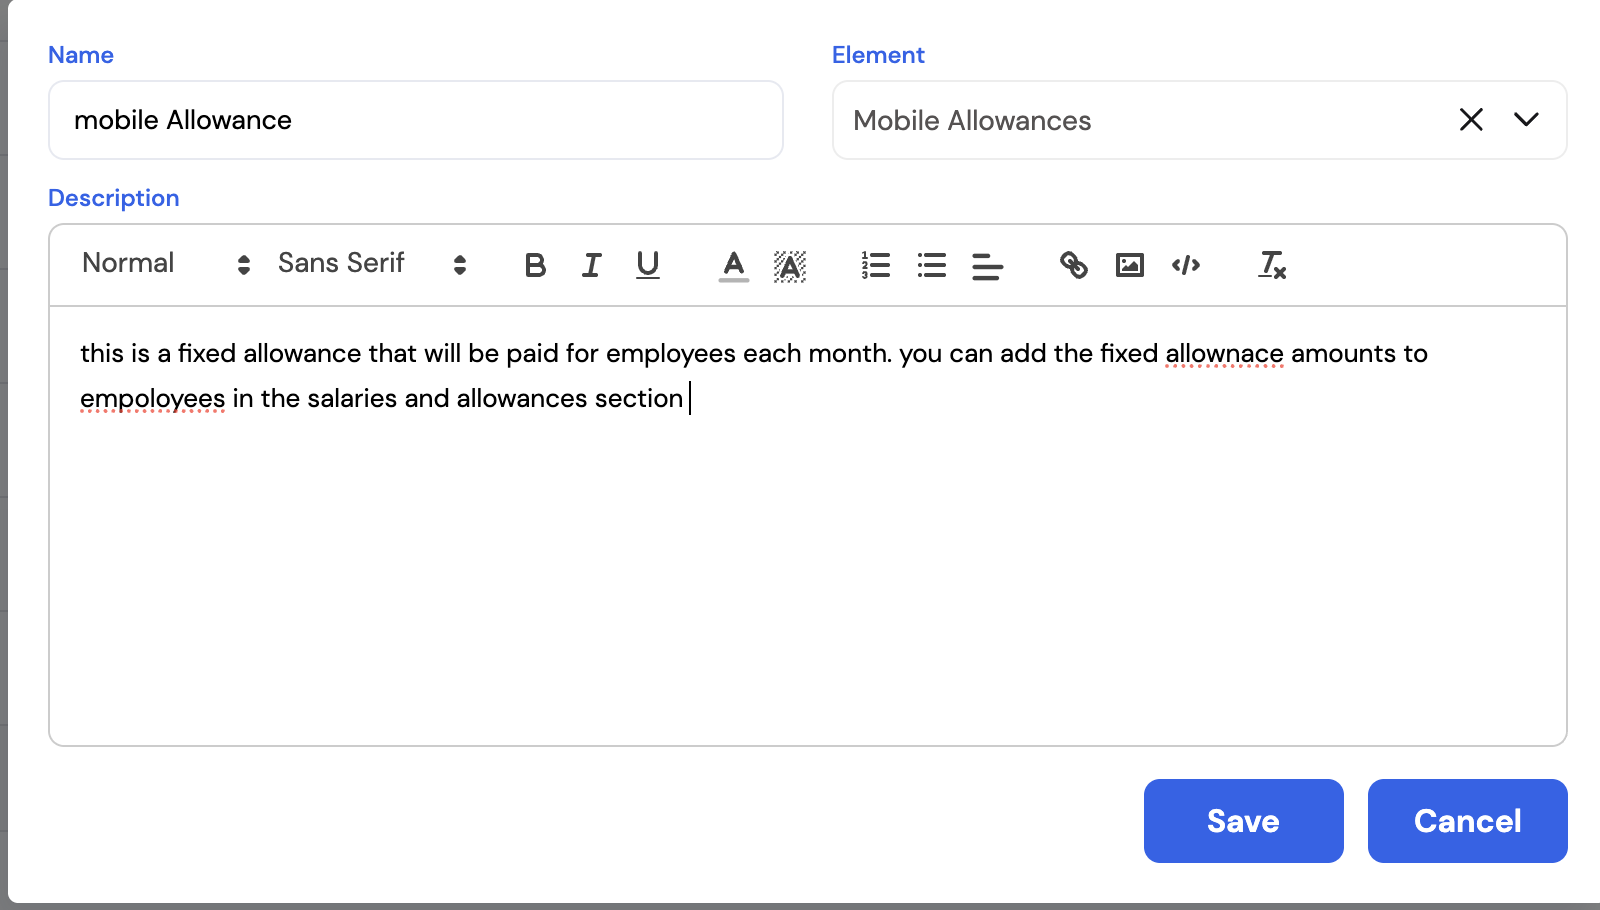
| Field | Description | Required |
|---|---|---|
| Name | The name of the fixed allowance as it will appear in employee salary records (e.g., Housing Allowance, Mobile Allowances, Hourly Rate) | Required |
| Element | The Pay Element linked to this allowance type. During payroll, the Fixed Allowance Plugin retrieves the employee's assigned amount for this allowance and passes it to the linked element. | Required |
| Description | A description of the allowance — what it covers and how it is used | Optional |
Fixed Allowances defined here act as allowance types. The actual monetary amounts are set per employee in the Salaries and Allowances section. This separation means the allowance type only needs to be defined once, while the specific amount can differ for each employee.
Fixed Allowances are calculated during payroll using the Fixed Allowance Plugin (Section 12.1). Ensure each allowance type is linked to a Pay Element that uses this plugin in its configuration.
23.19 Workplaces
Workplaces define the physical or virtual locations where employees are expected to clock in and out. They are used to enforce attendance through geo-location (GPS-based proximity check via mobile app) or IP address (network-based check via web browser). This ensures employees can only register their attendance when they are physically present at an authorized location or connected to an authorized network.
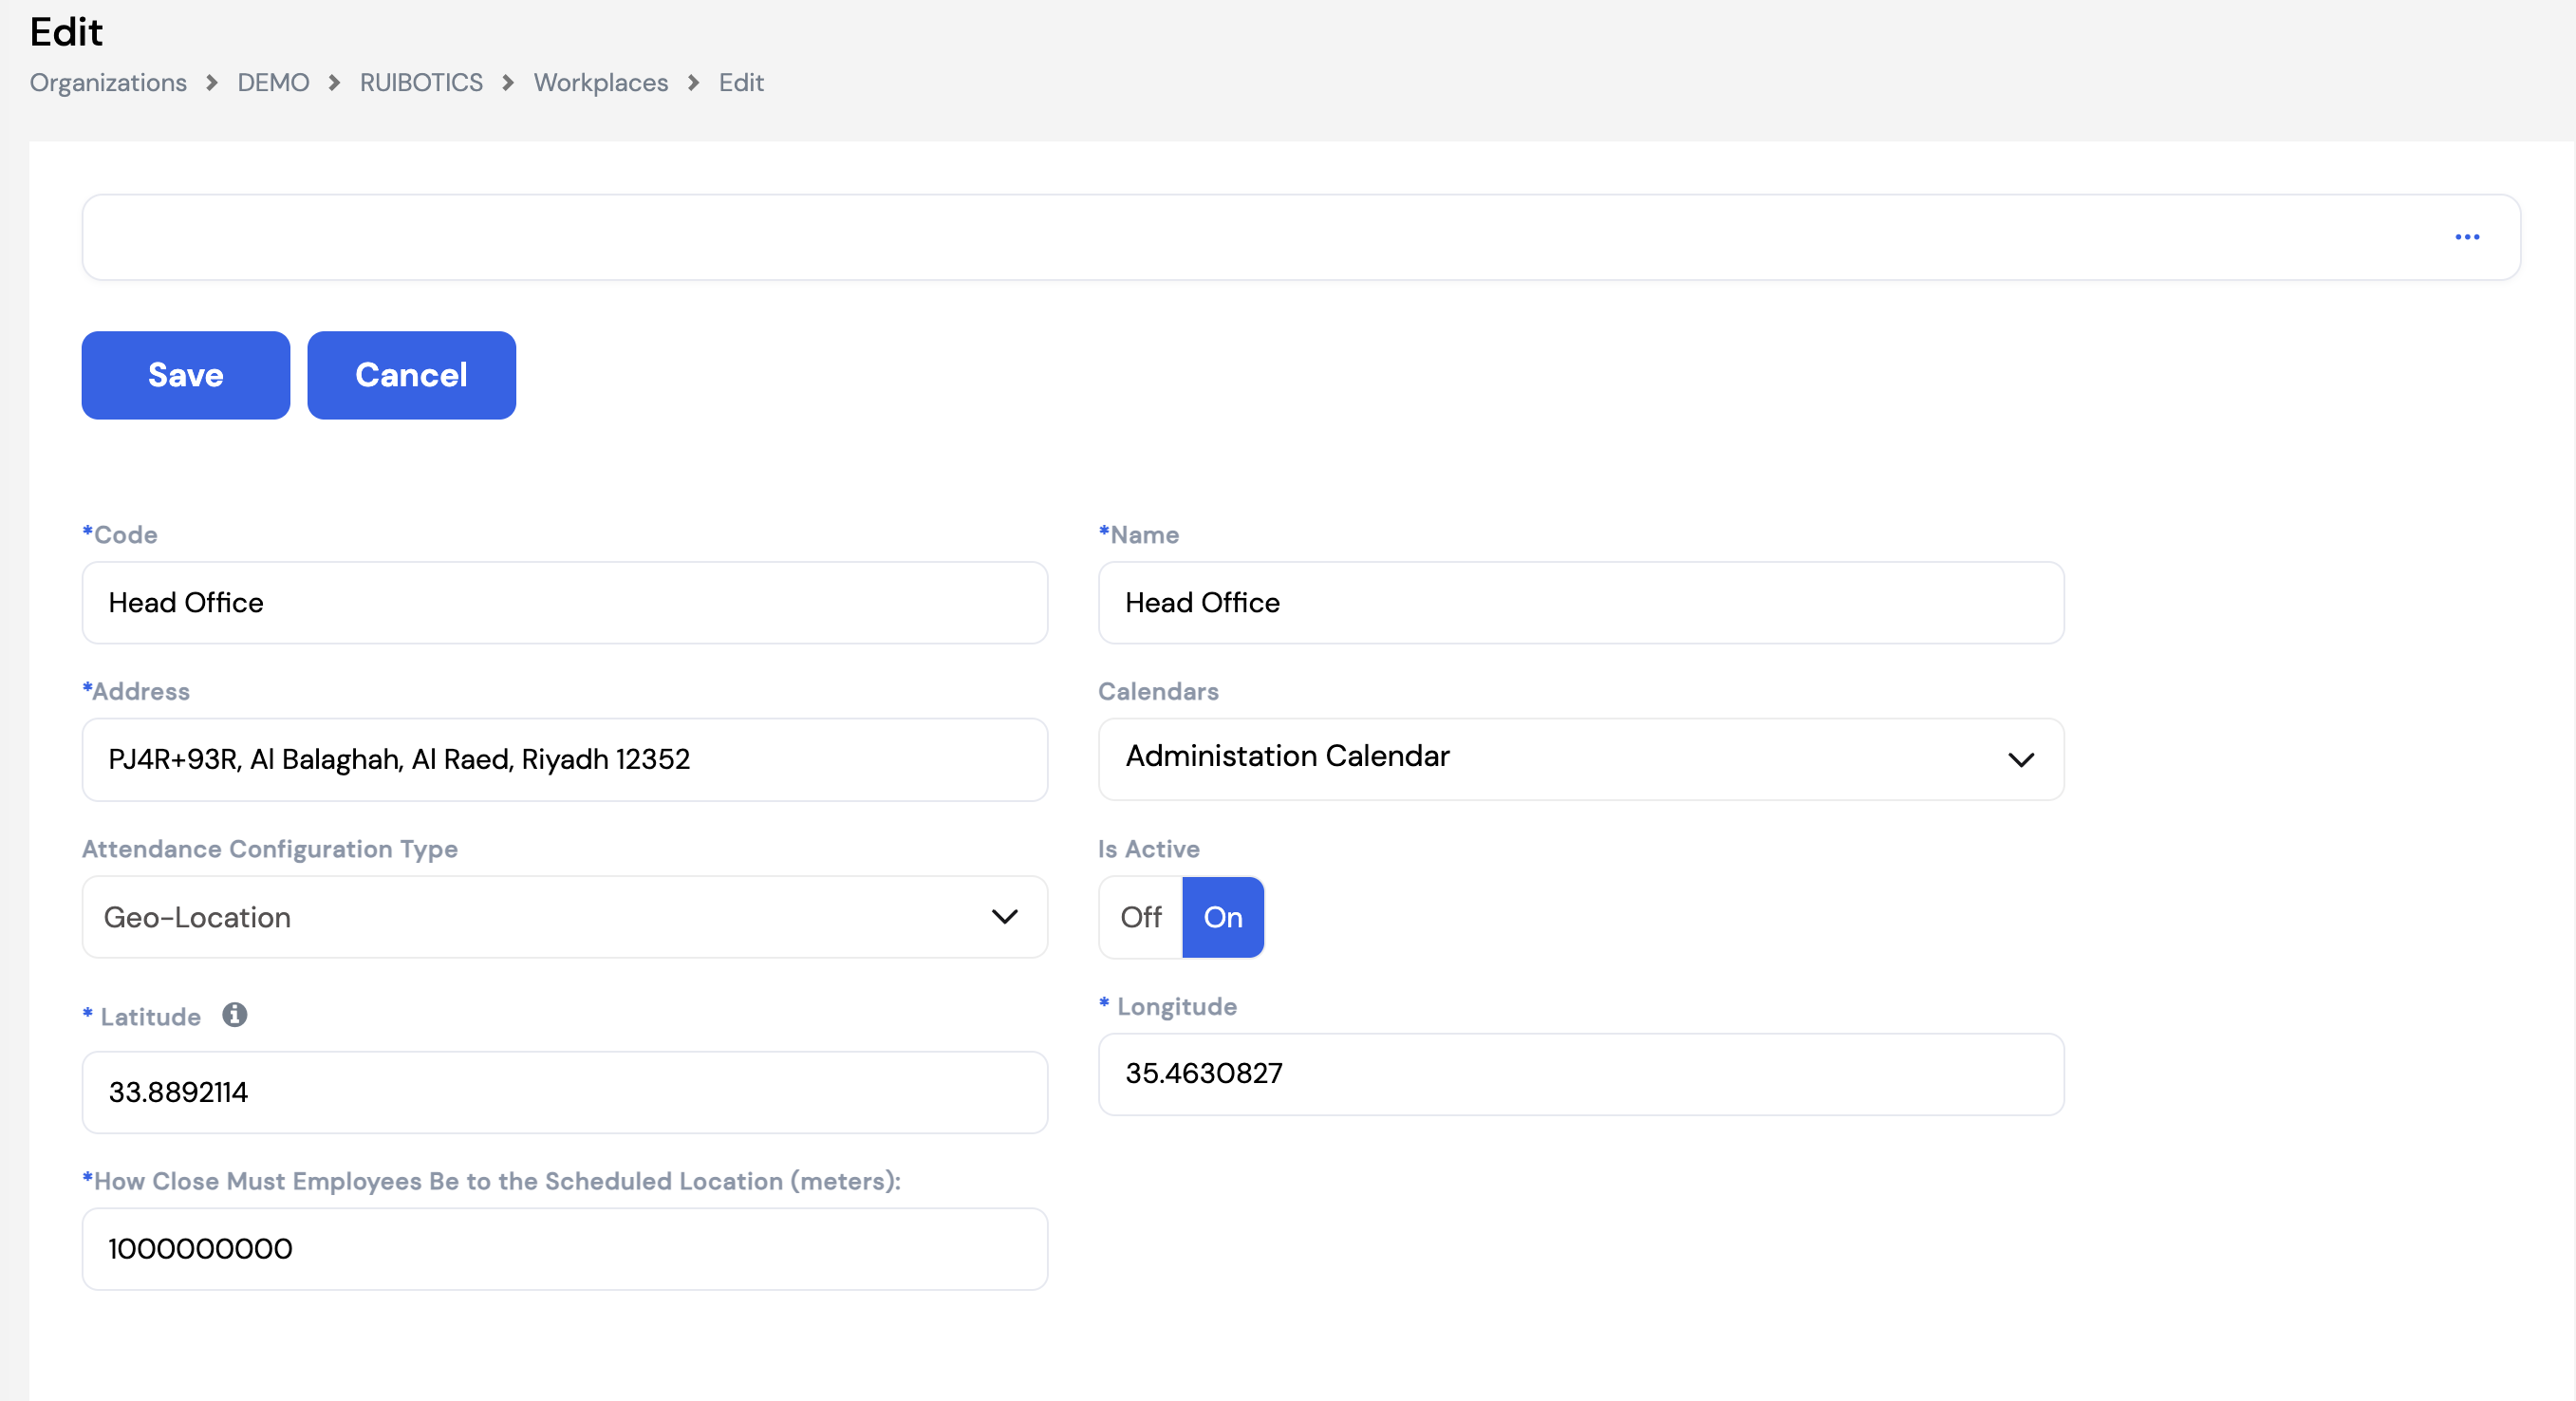
| Field | Description | Required |
|---|---|---|
| Code | A unique code for this workplace (e.g., Head Office, Branch01) | Required |
| Name | The full name of the workplace as it will appear in attendance records | Required |
| Address | The physical address of this workplace location | Required |
| Calendars | The working calendar assigned to this workplace — used to validate clock-in times against the expected shift schedule | Optional |
| Attendance Configuration Type | The method used to validate employee attendance at this location:
| Required |
| Is Active | Toggle — set to On to enable this workplace for attendance registration | Optional |
| Latitude | The GPS latitude coordinate of the workplace — required when Attendance Configuration Type is set to Geo-Location | Required |
| Longitude | The GPS longitude coordinate of the workplace — required when Attendance Configuration Type is set to Geo-Location | Required |
| How Close Must Employees Be (meters) | The maximum distance in meters an employee can be from the workplace coordinates and still successfully clock in. Set a tight radius (e.g., 100–500 meters) to enforce on-site attendance, or a large value to allow broader flexibility. | Required |
To get the exact GPS coordinates for a workplace, open Google Maps, right-click on the location, and copy the latitude and longitude values displayed. Enter these in the Latitude and Longitude fields.
Setting the proximity to a very large value (e.g., 1,000,000,000 meters) effectively disables the distance check — allowing employees to clock in from anywhere. Use a realistic radius appropriate to the workplace footprint to enforce meaningful geo-location attendance control.
23.20 Employee Fields
Employee Fields controls which employee profile fields employees are permitted to request changes to through the Employee Edit Request in the ESS portal. When an employee submits an edit request, only the fields selected here will be available for them to update — any change still goes through the configured approval workflow before being applied.
The screen shows two panels:
- Available — all employee profile fields that can potentially be made editable via ESS. Use the search box to find specific fields quickly.
- Selected — the fields currently enabled for employee edit requests. Only these fields will appear when an employee submits an Employee Edit Request through ESS.
Use the arrow buttons between the panels to move fields: › moves one selected field to the right, » moves all available fields, ‹ removes one selected field, « removes all selected fields. Click Save to apply the configuration.
Select carefully. Only include fields that employees genuinely need to update themselves — such as Marital Status, Contact Details, or Bank Account. Sensitive fields like Employee Type, EOS Opening Balance, or Salary-related fields should not be made available to avoid unauthorized change requests.
Employee edit requests submitted through ESS go through the Employee Edit Request approval workflow configured in Workflow Setup (Section 23.13). Changes are only applied to the employee profile after the request is approved.
23.21 Employee Assets
The Employee Assets (Fixed Assets) module is where you configure the asset types that can be assigned to employees. The asset types defined here appear as selectable options when adding assets to an employee's profile in the Assets tab of the Employee Profile (Section 20.9).
To add a new asset type, click + New, enter a Code and Name for the asset category (e.g., Laptop, CAR, Mobile, SIM Card), and click Save. The full asset type list can be exported using Export to Excel.
Define all company asset categories here before assigning assets to employees. Clear, standardized asset type names (e.g., Laptop, CAR, Mobile) make it easier to track and report on company assets assigned across the workforce.
24. Leaves
The Leaves module covers the full configuration and management of employee leave — from defining leave types and policies to managing balances, sick leave rules, encashment, and leave calendars. It is accessed from the left navigation menu under Leaves.
24.1 Leaves
The Leaves screen is where all leave types are defined — Annual Leave, Sick Leave, Unpaid Leave, Maternity Leave, and any other leave category applicable to the company. Each leave type controls how leave days are accrued, renewed, calculated, and approved.
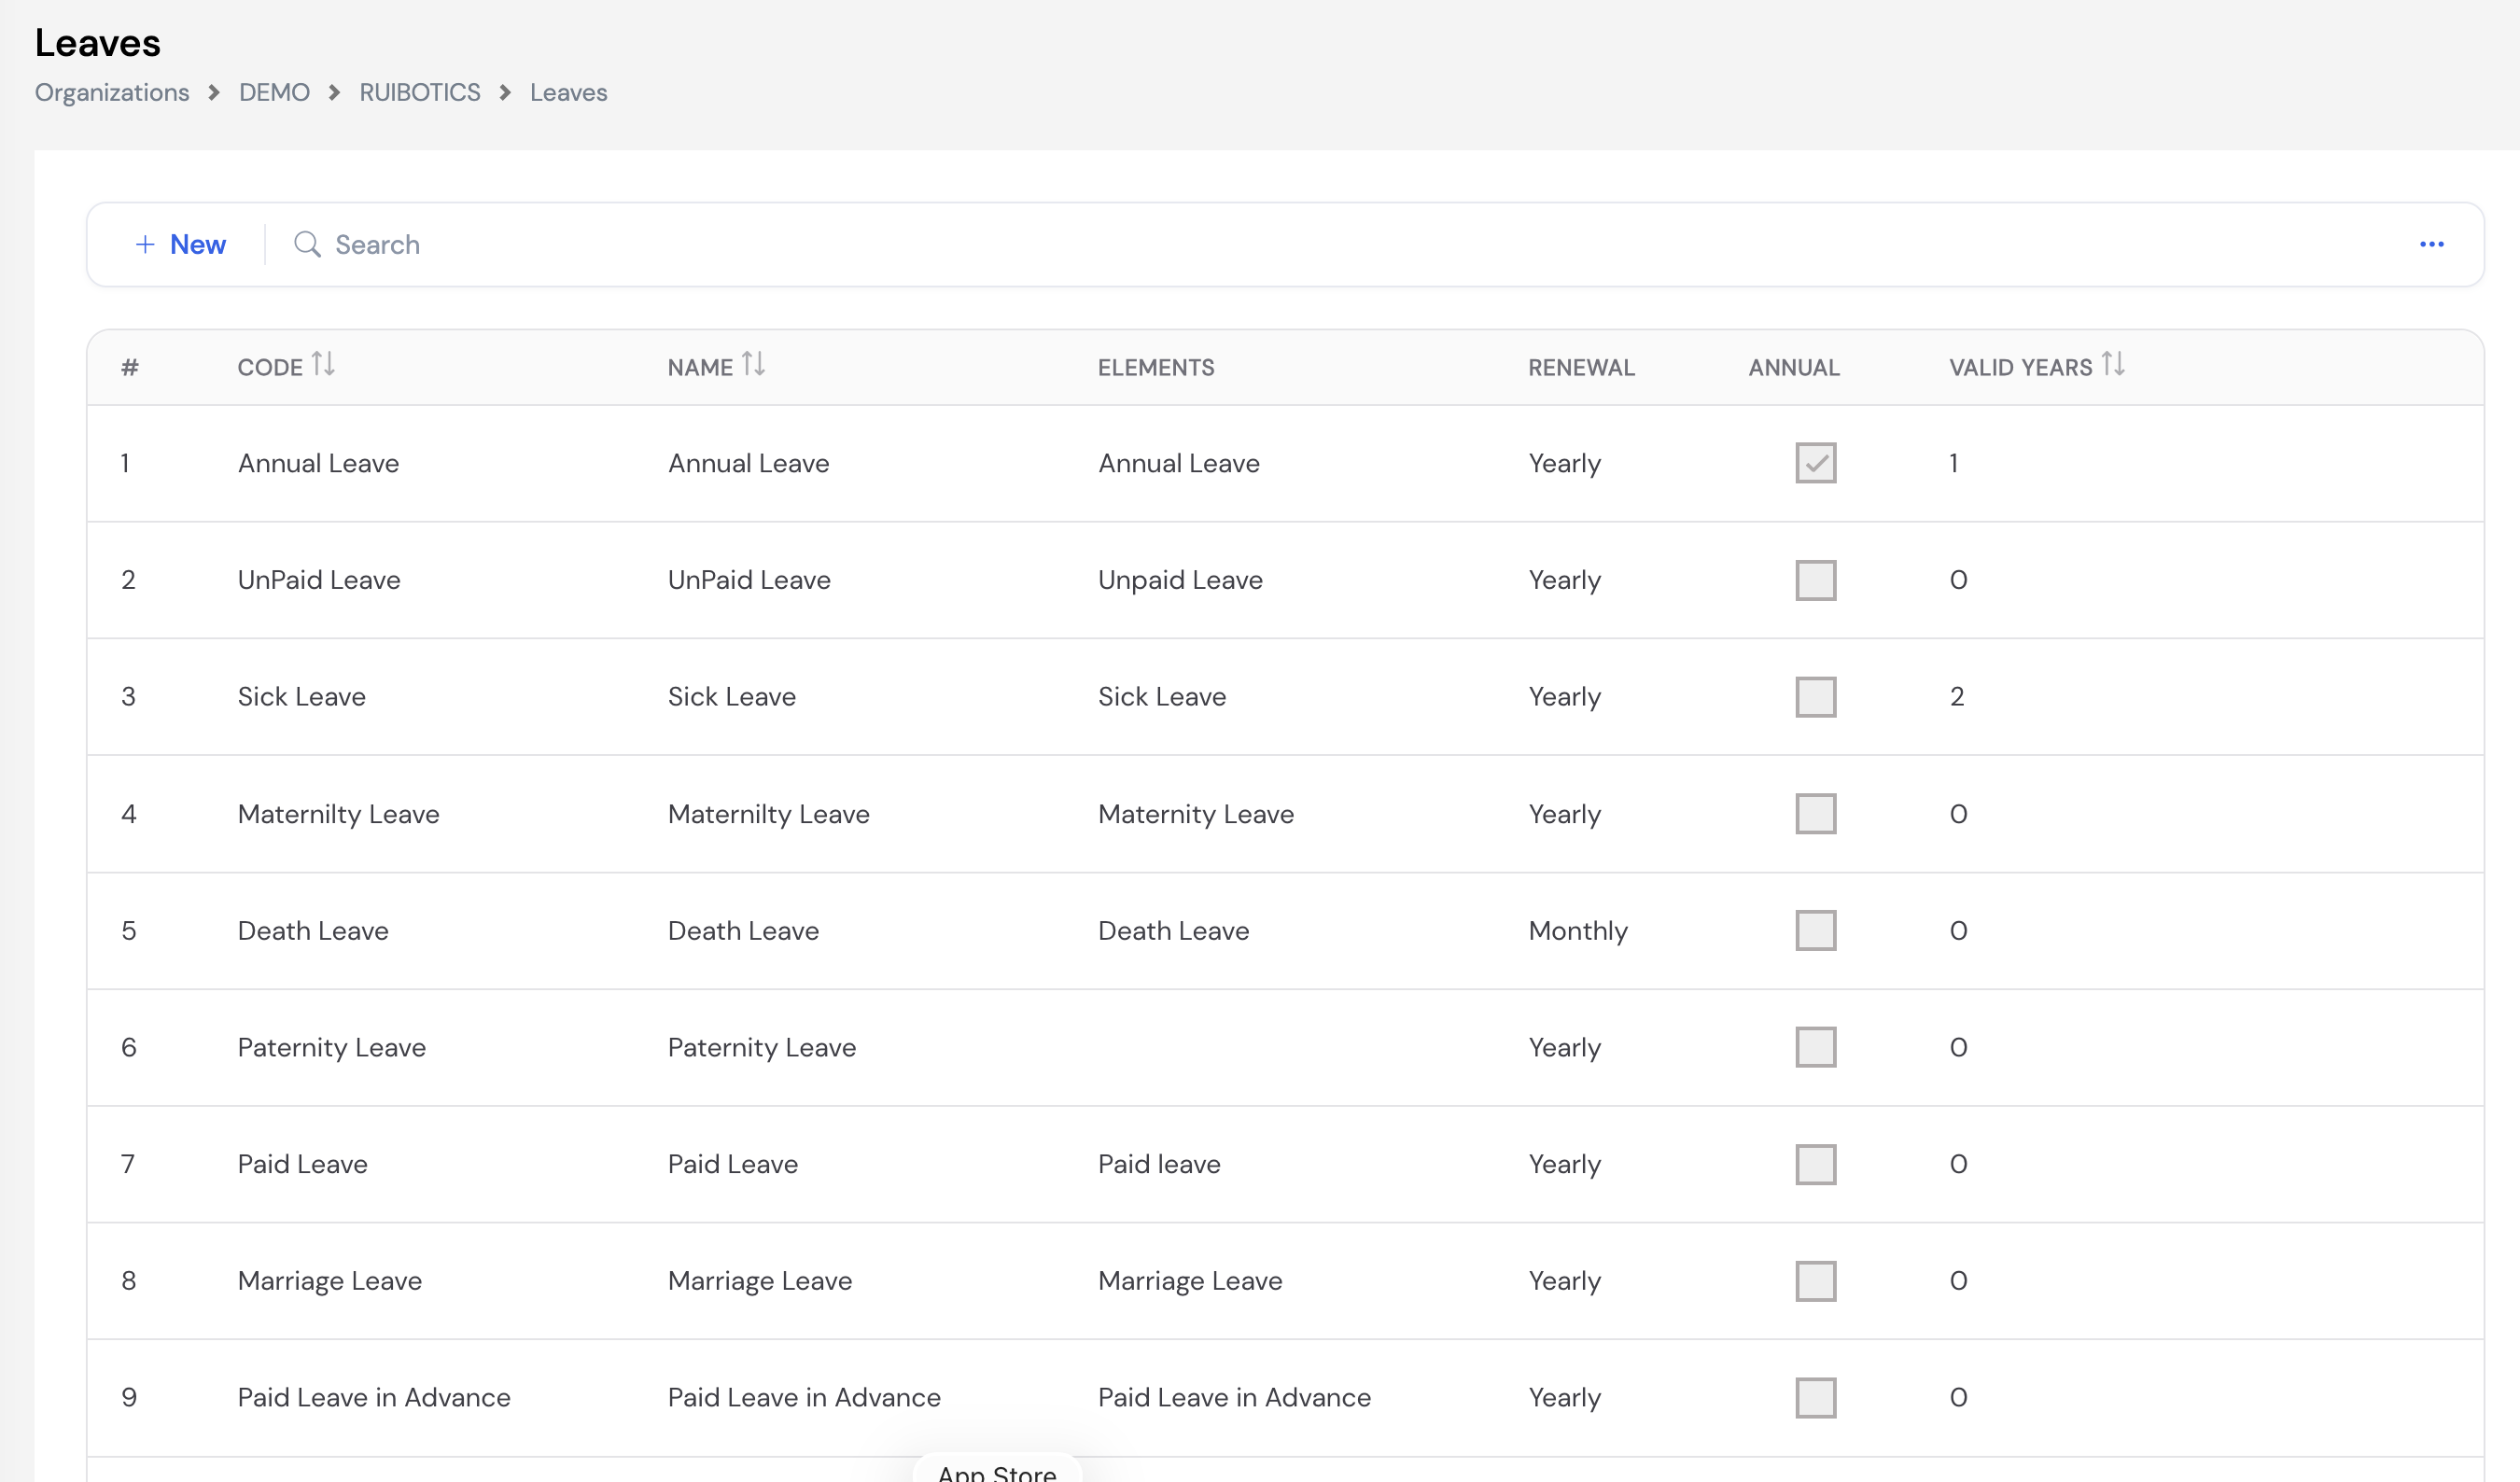
Leave Configuration Form
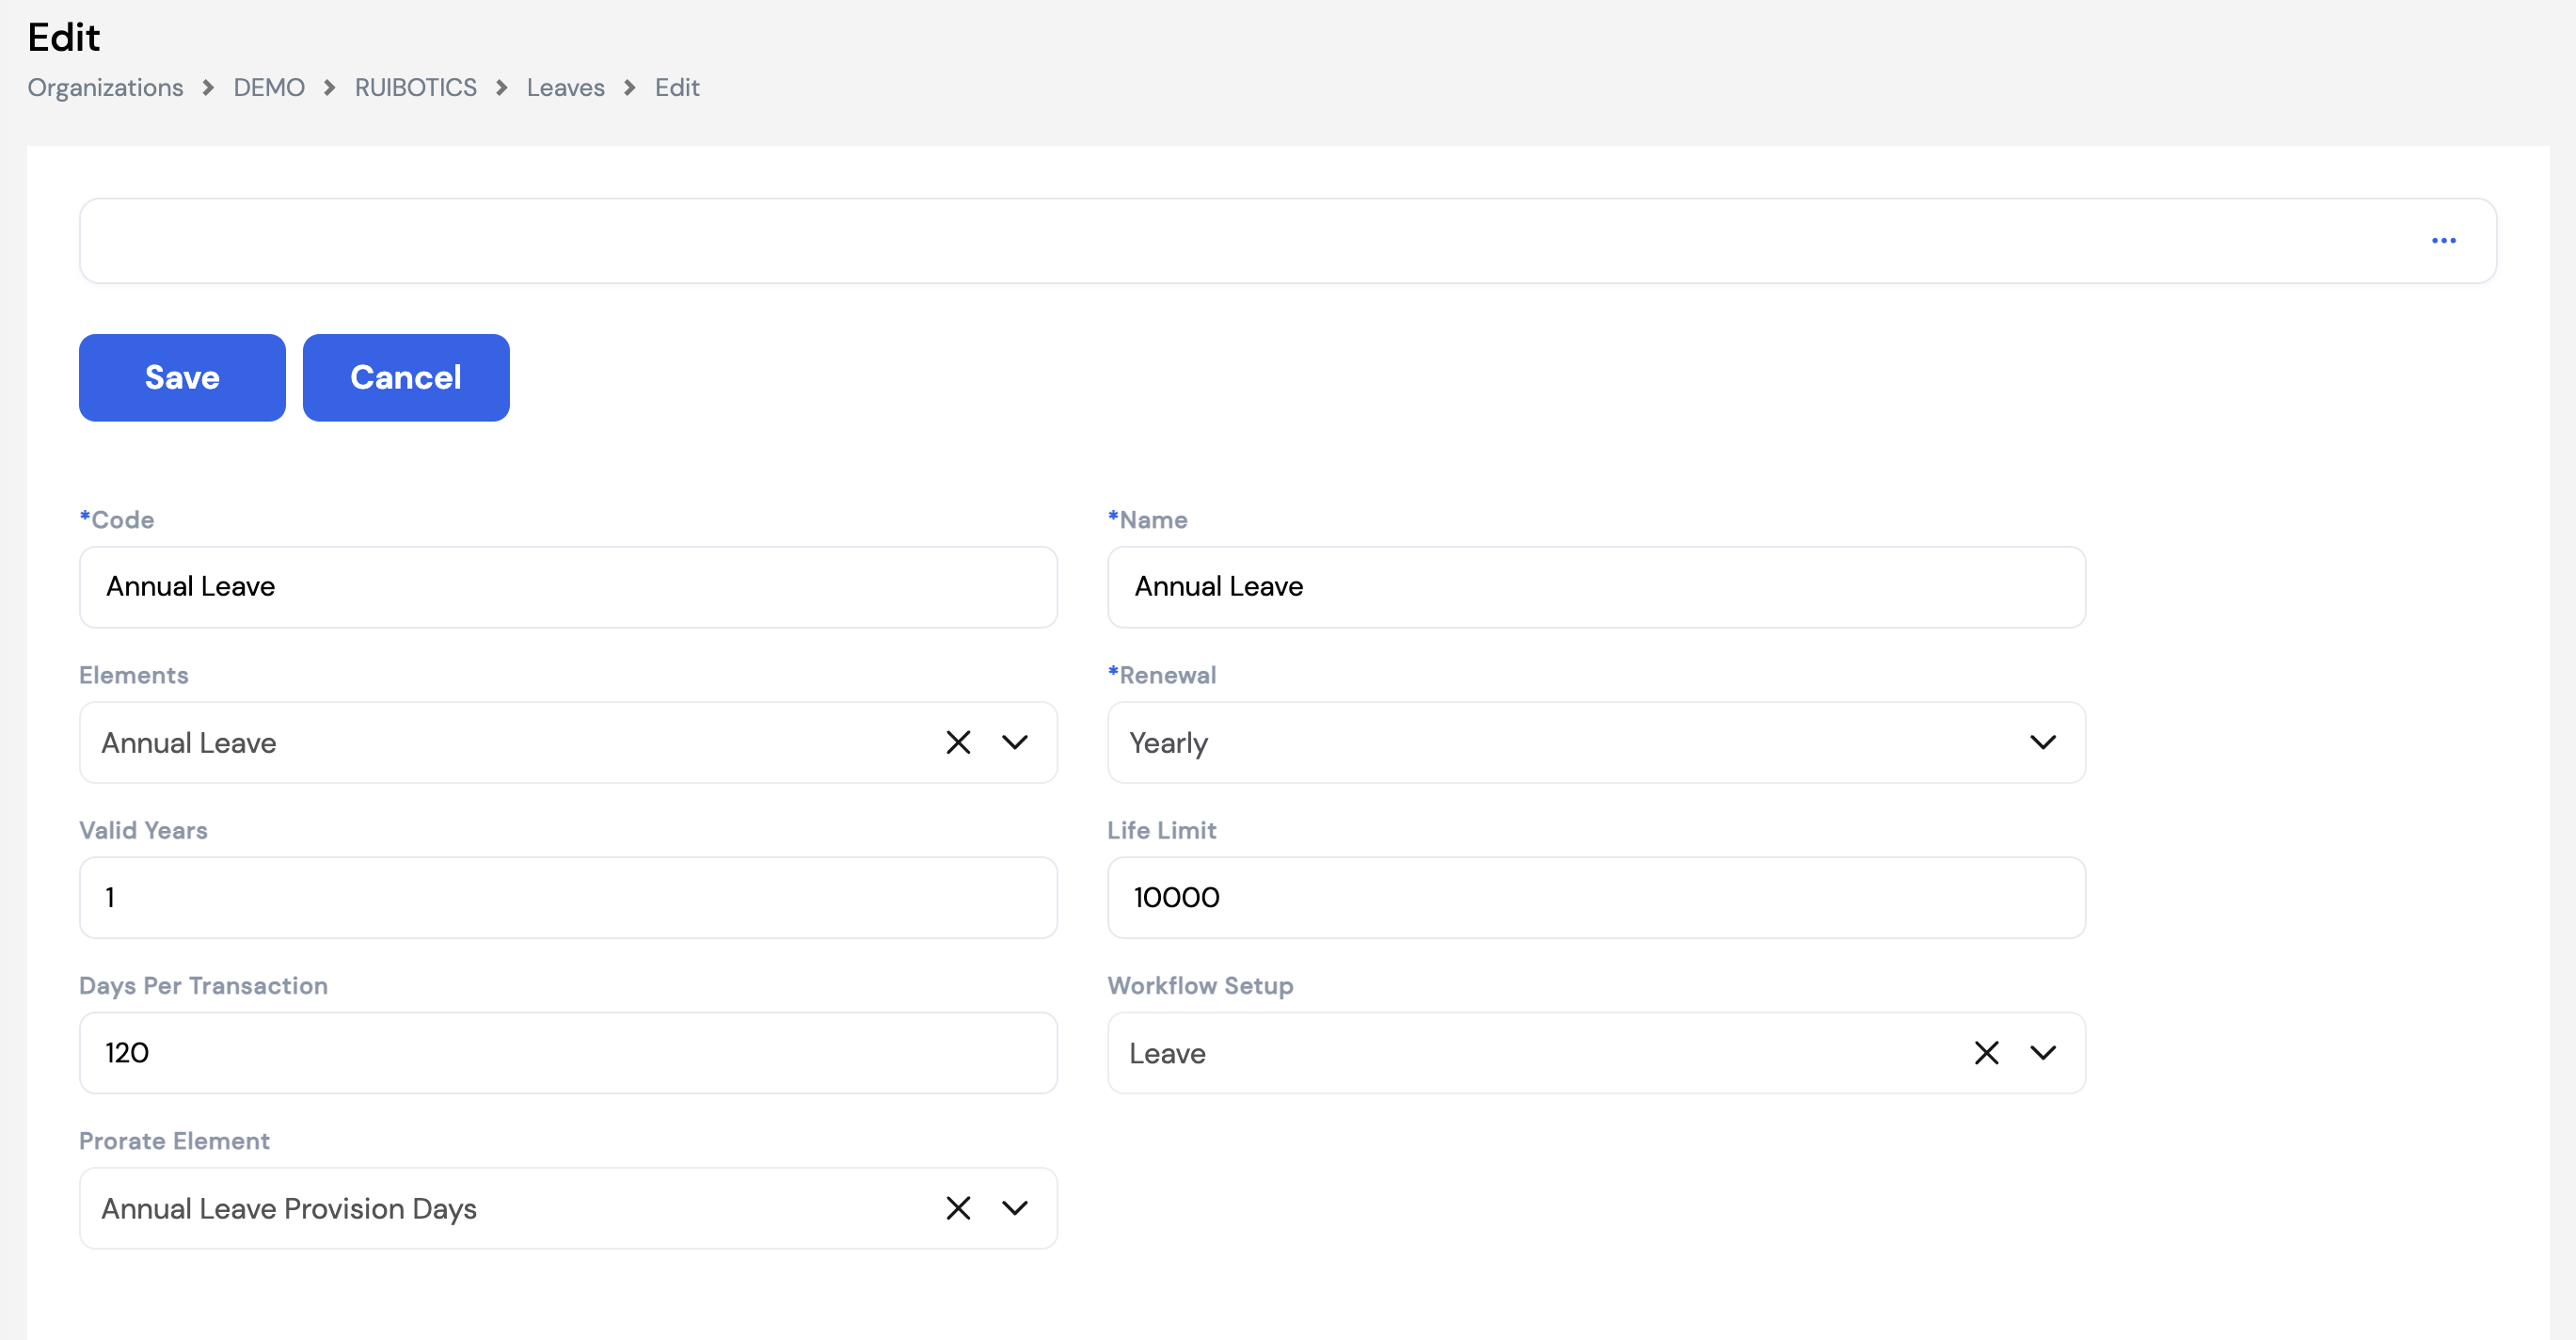
| Field | Description | Required |
|---|---|---|
| Code | A unique code for this leave type (e.g., Annual Leave, Sick Leave) | Required |
| Name | The leave type name as it appears to employees in ESS and on reports | Required |
| Elements | The Pay Element linked to this leave type — used by the Leave Plugin during payroll to identify which leave element to process | Optional |
| Renewal |
Defines how and when the leave balance resets. Available options:
| Required |
| Valid Years | The number of years a leave balance remains valid before expiring (e.g., 1 = balance expires after 1 year if unused; 0 = no expiry) | Optional |
| Life Limit | The maximum total number of days that can ever be accumulated for this leave type over the employee's lifetime (e.g., 10,000 as an effectively unlimited cap) | Optional |
| Days Per Transaction | The maximum number of days an employee can request in a single leave transaction (e.g., 120 = employee cannot request more than 120 days in one leave request) | Optional |
| Workflow Setup | The approval workflow applied to requests for this leave type — different leave types can have different approval chains | Optional |
| Default Expiration Period | Visible only when Renewal = Manual. Defines how long a manually granted leave balance remains valid before it expires if not used (e.g., 3 Months). After this period, any unused balance of this leave type is forfeited. | Required |
| Prorate Element | The Leave Prorate Pay Element used to accrue this leave type monthly. Only the Annual Leave type that has a provision should have this field populated. All other leave types should leave this blank. | Optional |
Only one leave type can hold an annual leave provision. The Prorate Element field should only be set on your main annual leave type (e.g., Annual Leave). This links the leave type to its monthly accrual element (Leave Prorate Plugin). All other leave types — Sick Leave, Unpaid Leave, Maternity Leave, etc. — do not require a Prorate Element and should leave this field empty.
Leave Settings
Each leave type has additional behavioral settings accessible by clicking the settings icon on the leave row. These control how the leave behaves during requests and payroll:
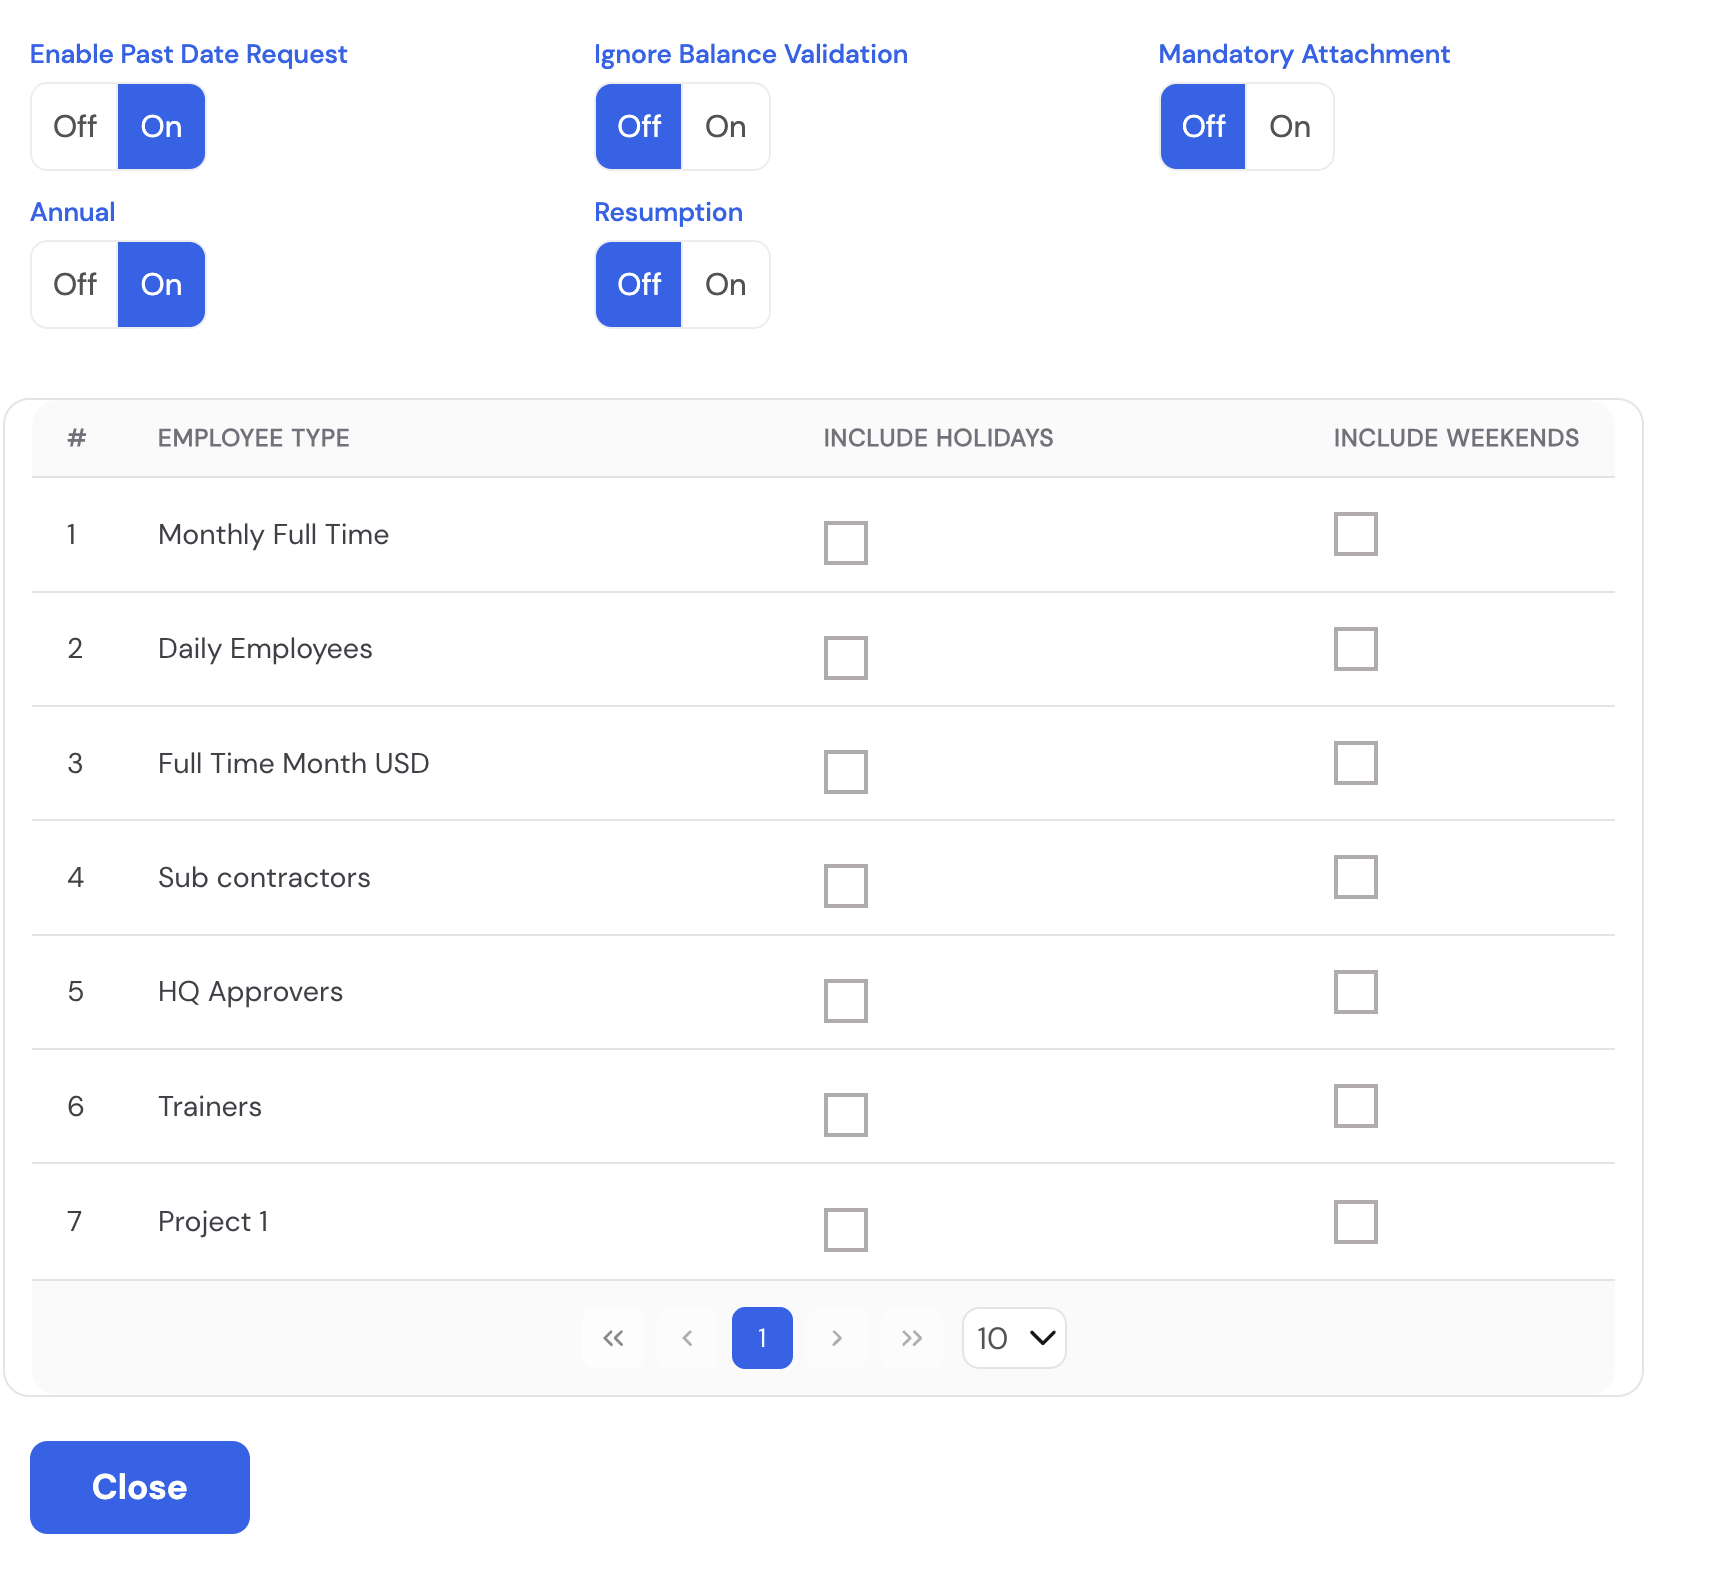
| Setting | Description |
|---|---|
| Enable Past Date Request | When On, employees can submit leave requests with a start date in the past |
| Ignore Balance Validation | When On, employees can request leave even if their balance is insufficient — useful for leave types with no fixed balance (e.g., Unpaid Leave) |
| Mandatory Attachment | When On, employees must attach a document (e.g., medical certificate for sick leave) before the request can be submitted |
| Annual | When On, this leave type is classified as annual leave — only one leave type should have this enabled (the main annual leave type) |
| Resumption | When On, the employee is required to submit a resumption record when returning from this leave type |
| Include Holidays / Include Weekends | Configured per Employee Type — determines whether public holidays and weekends are counted as leave days for each employee group. All combinations are supported — see Section 21.3.2 for details. |
24.2 Sick Leave Percentage
The Sick Leave Percentage screen defines the tiered salary coverage rules that apply to sick leave days. These tiers provide the input for the Sick Leave Percentage Plugin (Section 12.4), which calculates and returns the number of sick leave days that will not be paid — based on how many cumulative sick days the employee has taken.

| Column | Description |
|---|---|
| From Day | The start of the sick day range for this tier (e.g., 0 = from the first sick day) |
| To Day | The end of the sick day range for this tier (e.g., 15 = up to and including day 15) |
| Covered Percentage | The percentage of salary paid for sick days within this range. For example, 100% = full pay, 75% = three-quarter pay, 0% = unpaid. |
In the example above: the first 15 sick days are paid at 100%, and days 15–30 are paid at 75%. The plugin calculates how many of the employee's sick days fall into the unpaid or partially-paid tiers and returns that amount as a deduction element.
Element parameter configuration required. For the Sick Leave Percentage Plugin to work correctly, the Pay Element that holds this plugin must have the Element ID of the sick leave days element entered in its Parameter field. This tells the plugin which leave element to read the sick day count from when calculating the unpaid portion. See Section 11.2 — Element Configuration for how to set the Parameter field.
24.3 Leave Balance
The Leave Balance screen displays and manages the leave balances for all employees. It shows the full picture of each employee's leave position — yearly entitlement, days earned, consumed, pending, paid, opening balance, carried forward, and total balance — for any selected year. Balances can be filtered by employee and exported to Excel for review.
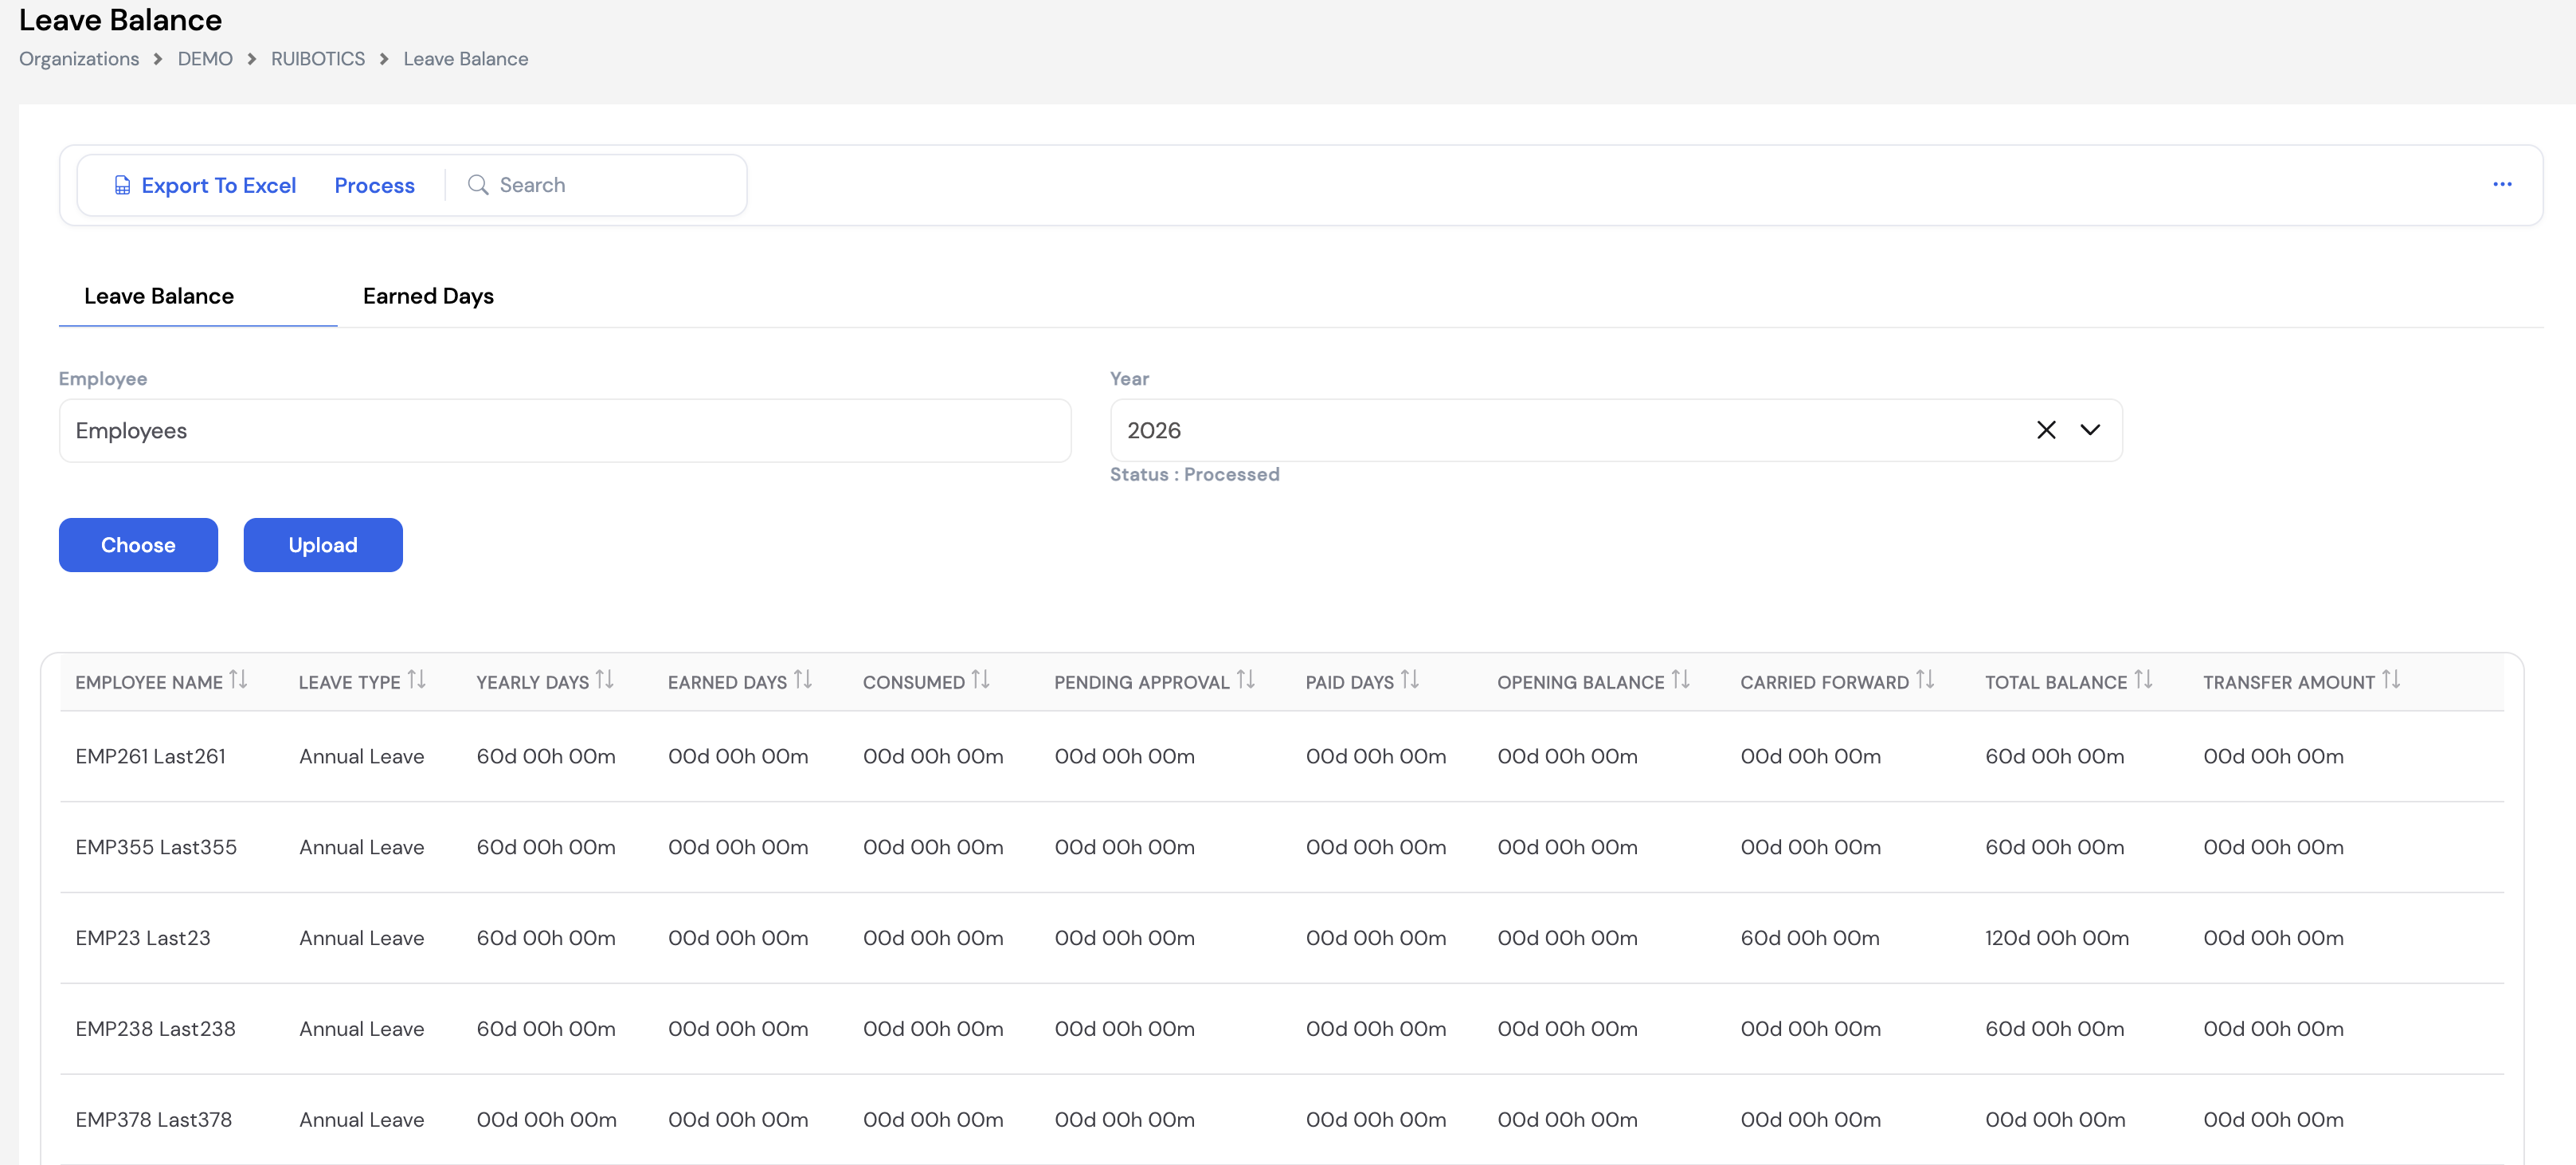
| Column | Description |
|---|---|
| Yearly Days | The total number of leave days the employee is entitled to for the year based on the Based Leave setup |
| Earned Days | The leave days accrued so far in the year through the monthly provision process |
| Consumed | Leave days already taken and approved |
| Pending Approval | Leave days requested but not yet approved |
| Paid Days | Leave days that have been encashed or paid out rather than taken |
| Opening Balance | The leave balance brought forward from a previous system at the start of the first processing year |
| Carried Forward | Unused leave balance carried over from the previous year (applied from the second year onwards) |
| Total Balance | The employee's current available leave balance (Earned Days + Opening Balance or Carried Forward − Consumed − Paid) |
| Transfer Amount | The amount transferred or adjusted against this leave balance |
How Leave Balance Processing Works
Leave balances are processed either manually (by clicking the Process button) or automatically at the beginning of each month. The system calculates each employee's earned days based on the Based Leave setup (Section 24.4) which defines the number of leave days per year according to the employee's grade and years of experience.
The calculation starts from the first current period defined in the Periods setup (Section 23.11) and accrues leave provisions month by month from that point forward.
Starting year — critical setup step. When you first go live on Magnar, you must identify the starting year for leave balance processing. This is important because:
- In the starting year, the system uses the Opening Balance field — which captures leave days carried over from your previous system.
- From the second year onwards, the system switches to using the Carried Forward column — the unused balance automatically rolled over from the previous Magnar-processed year.
Adding Leave Balance Manually or via Upload
HR administrators can add leave balance records manually using the + New button, or bulk-upload balances using the Upload button. Manual entries are also used to grant Earned Days — for example, when an employee worked on a holiday and is entitled to a compensatory leave day.
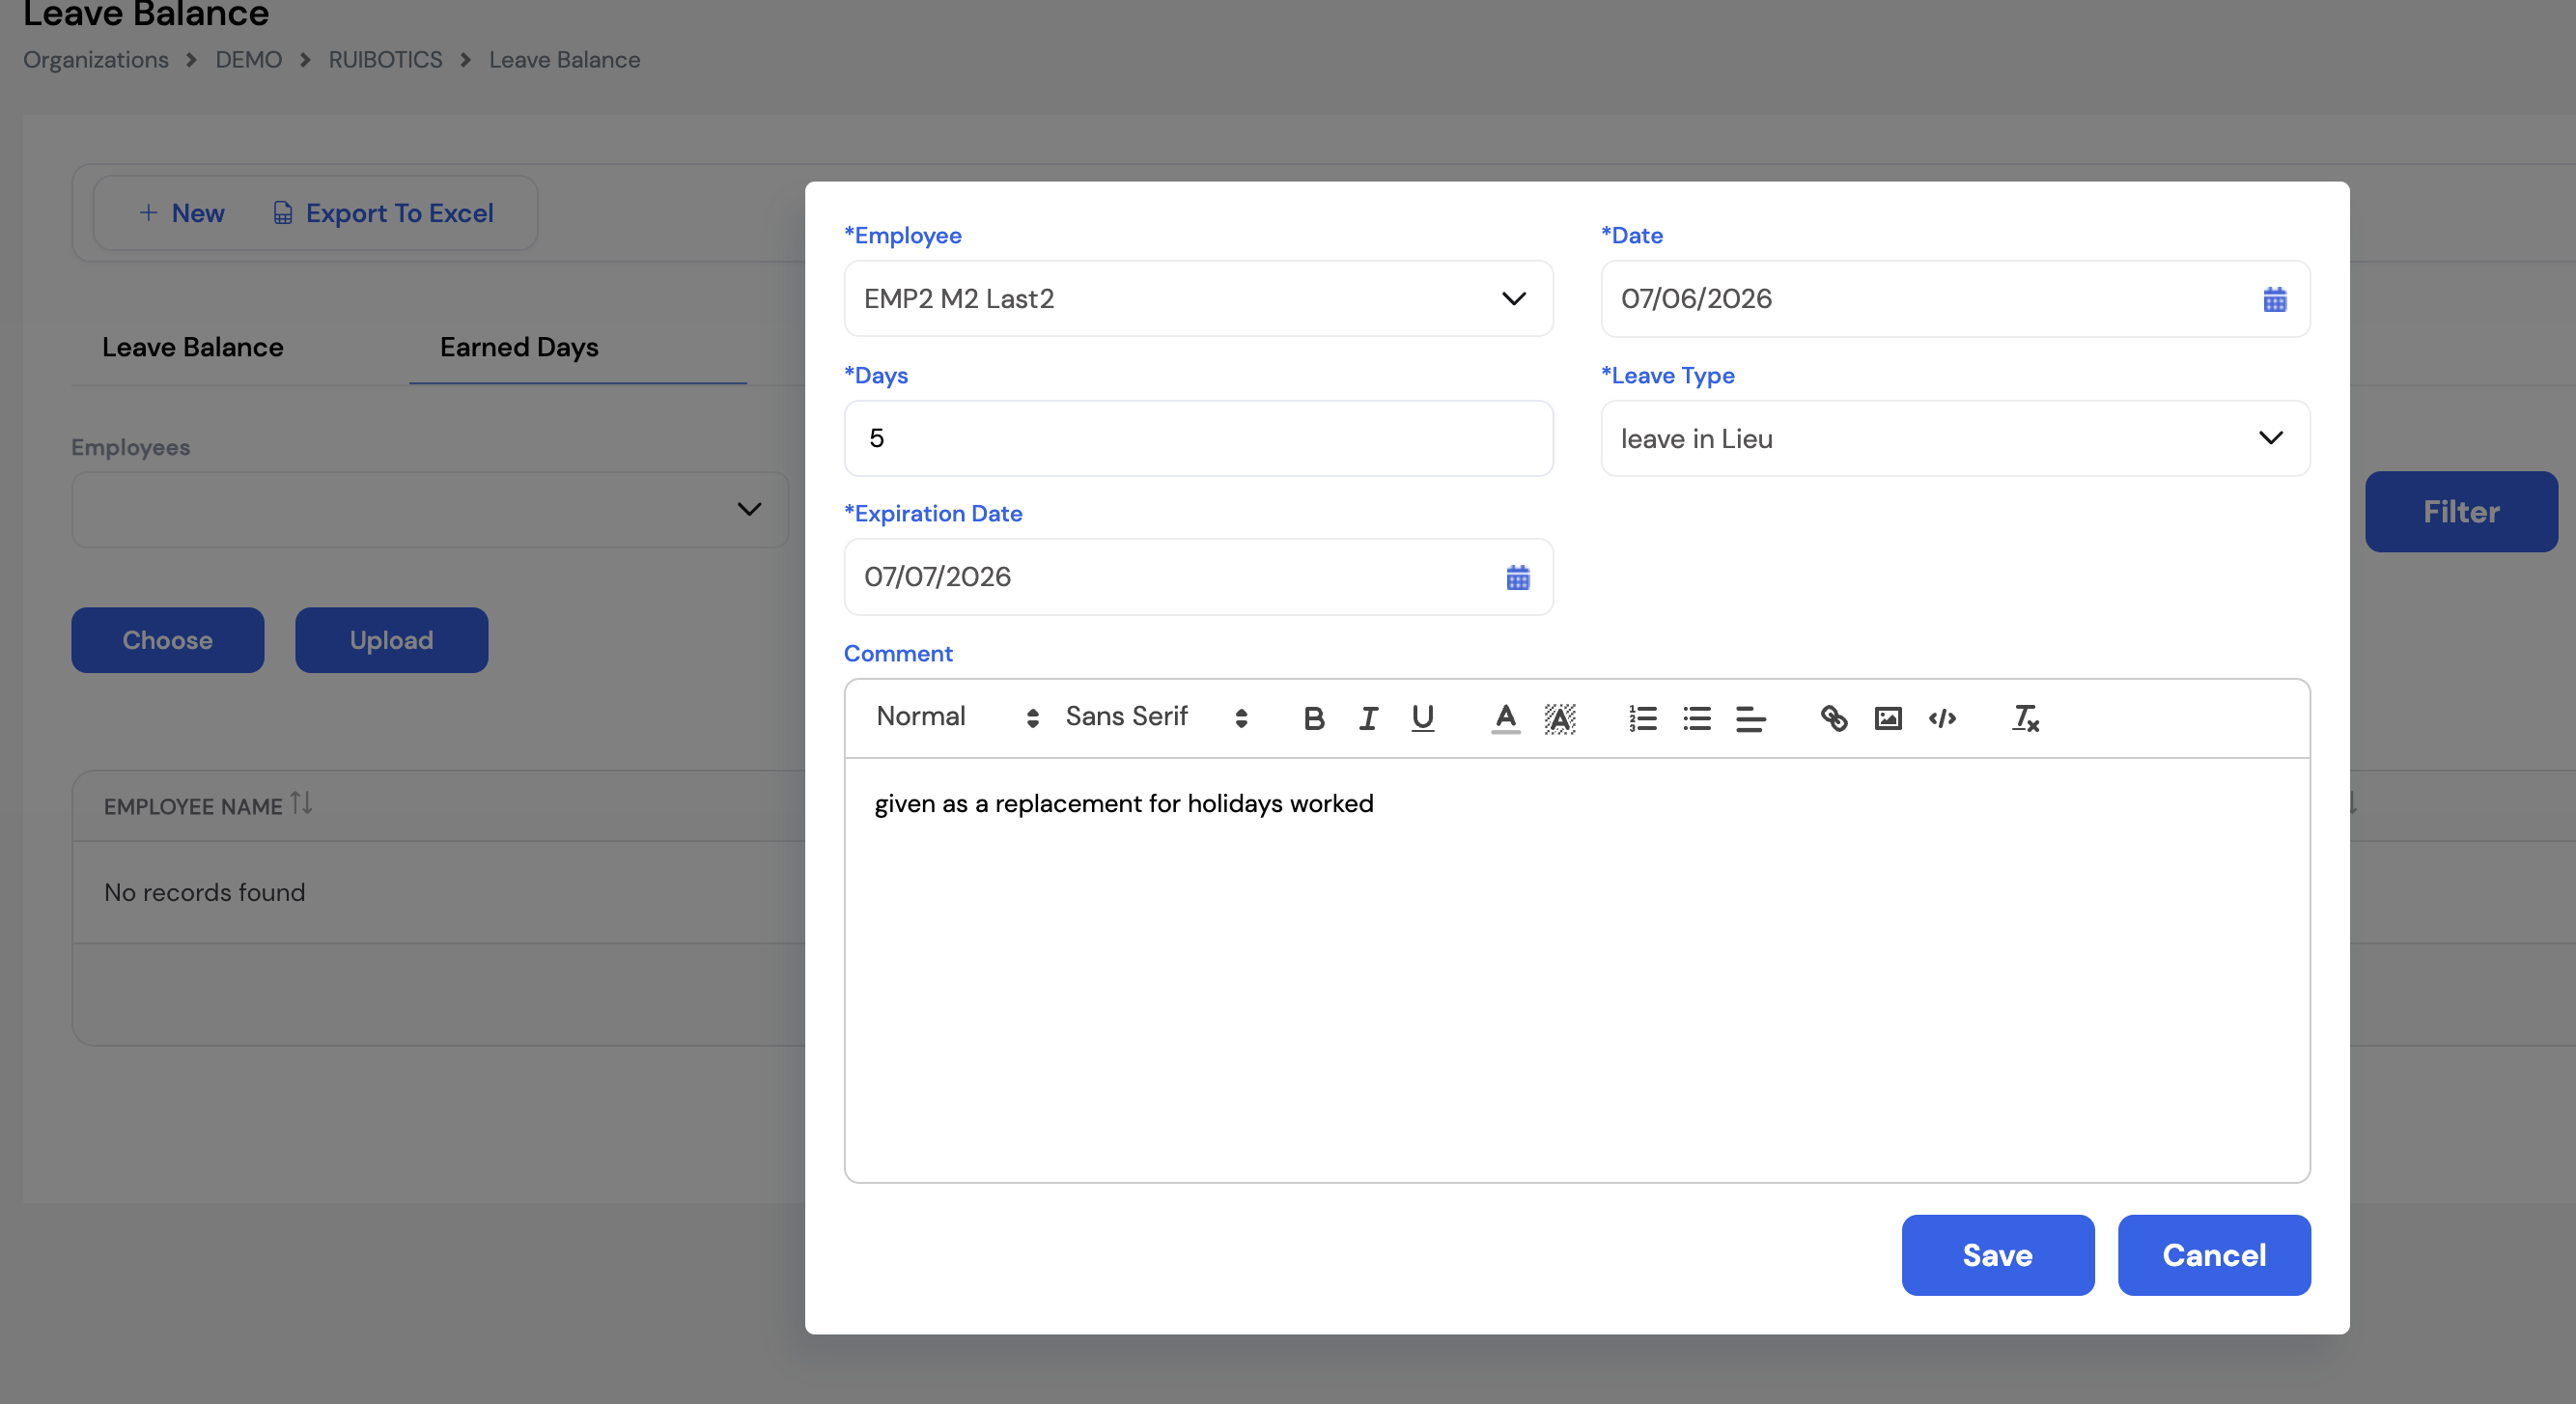
| Field | Description | Required |
|---|---|---|
| Employee | The employee receiving the additional leave balance | Required |
| Date | The date on which the leave balance is being granted | Required |
| Days | The number of leave days to add to the employee's balance | Required |
| Leave Type | The leave type to which these days are being added (e.g., Leave in Lieu, Annual Leave) | Required |
| Expiration Date | The date by which the granted days must be used — after this date the days will expire | Required |
| Comment | A note explaining why the leave days are being granted (e.g., "given as a replacement for holidays worked") | Optional |
24.4 Based Leaves
Based Leaves defines the annual leave entitlement rules per leave type and employee grade — specifying how many leave days an employee is entitled to per year based on their grade and months of service. This setup feeds directly into the leave balance processing (Section 24.3) and must be configured immediately after creating leave types and before processing leave balances or running payroll.
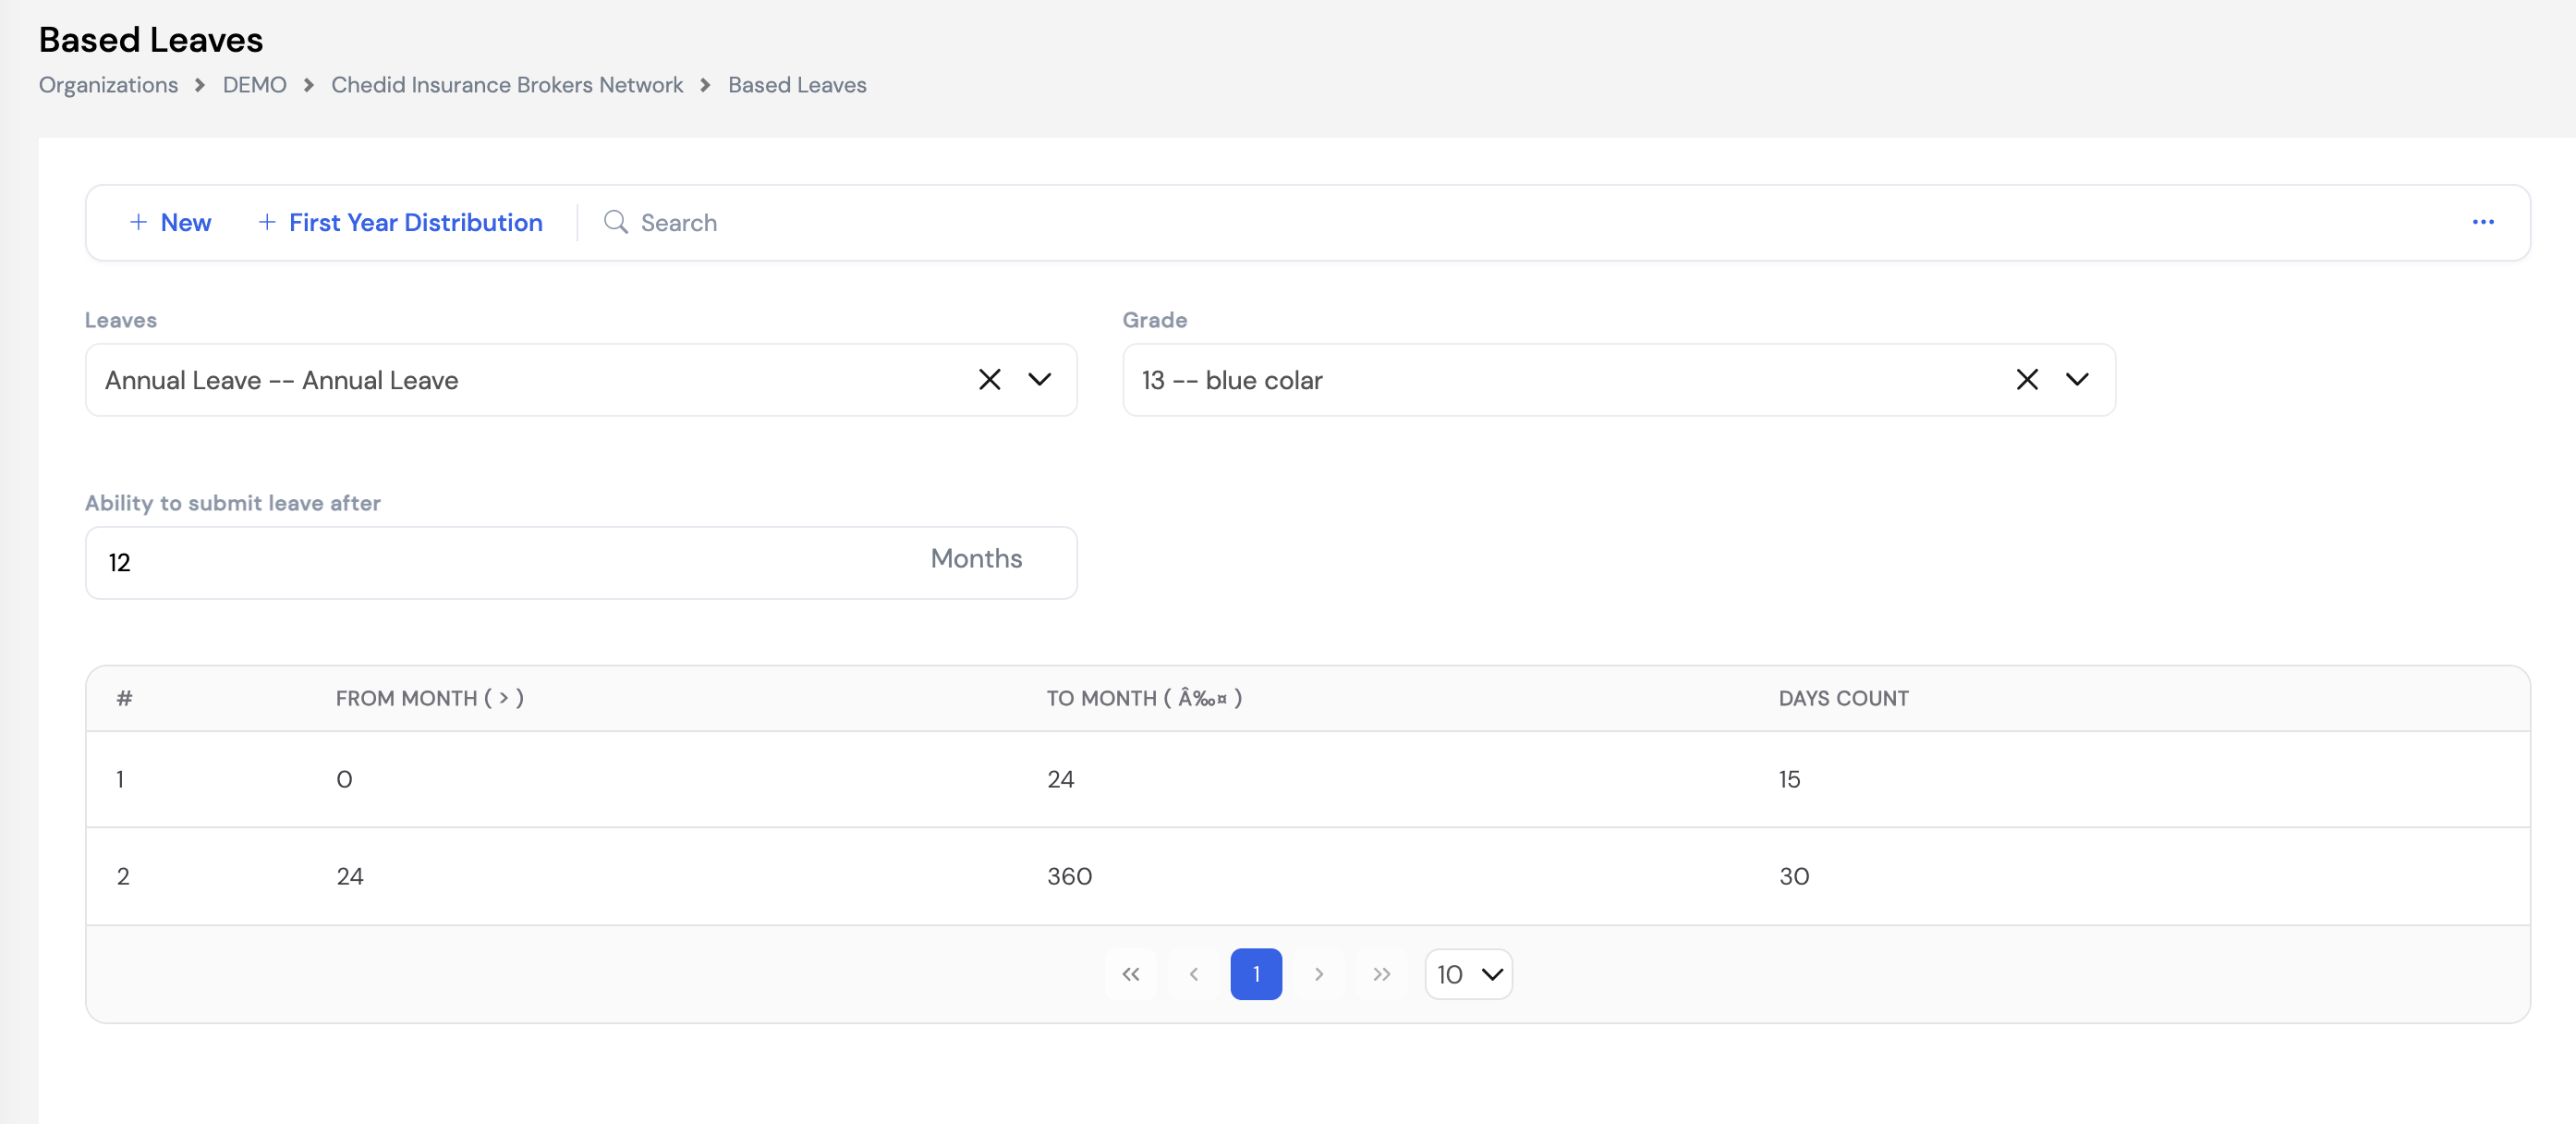
| Field / Column | Description | Required |
|---|---|---|
| Leaves | The leave type this rule applies to (e.g., Annual Leave) | Required |
| Grade | The employee grade this entitlement applies to. Different grades can have different annual leave allocations. | Required |
| Ability to Submit Leave After | The minimum number of months an employee must have worked before they can submit a leave request of this type (e.g., 12 months = employee must complete one year before taking annual leave) | Optional |
| From Month (>) | The start of the months-of-service band (exclusive). Entry of 0 means from the very first month. | Required |
| To Month (≤) | The end of the months-of-service band (inclusive). For example, 24 means up to and including month 24. | Required |
| Days Count | The number of annual leave days the employee is entitled to per year when their service falls within this band (e.g., 15 days for the first 2 years, 30 days after that) | Required |
Use the First Year Distribution button to configure how leave days are distributed during the employee's first year of service — useful when leave entitlement is prorated based on the joining month rather than being granted in full from day one.
Configure Based Leaves before processing leave balances or running payroll. Without this setup, the system cannot calculate how many leave days to accrue for each employee during the monthly leave balance process.
24.5 Leave Encashment
Leave Encashment is used when HR wants to pay out an employee's leave days in cash rather than having the employee take the time off. This can be initiated by HR directly from this screen, or by the employee through an encashment request via the ESS portal — which goes through the configured approval workflow before being recorded here.
Select an employee to view their current Leave Balance Till Date and their encashment history. Click the + button to record a new encashment.
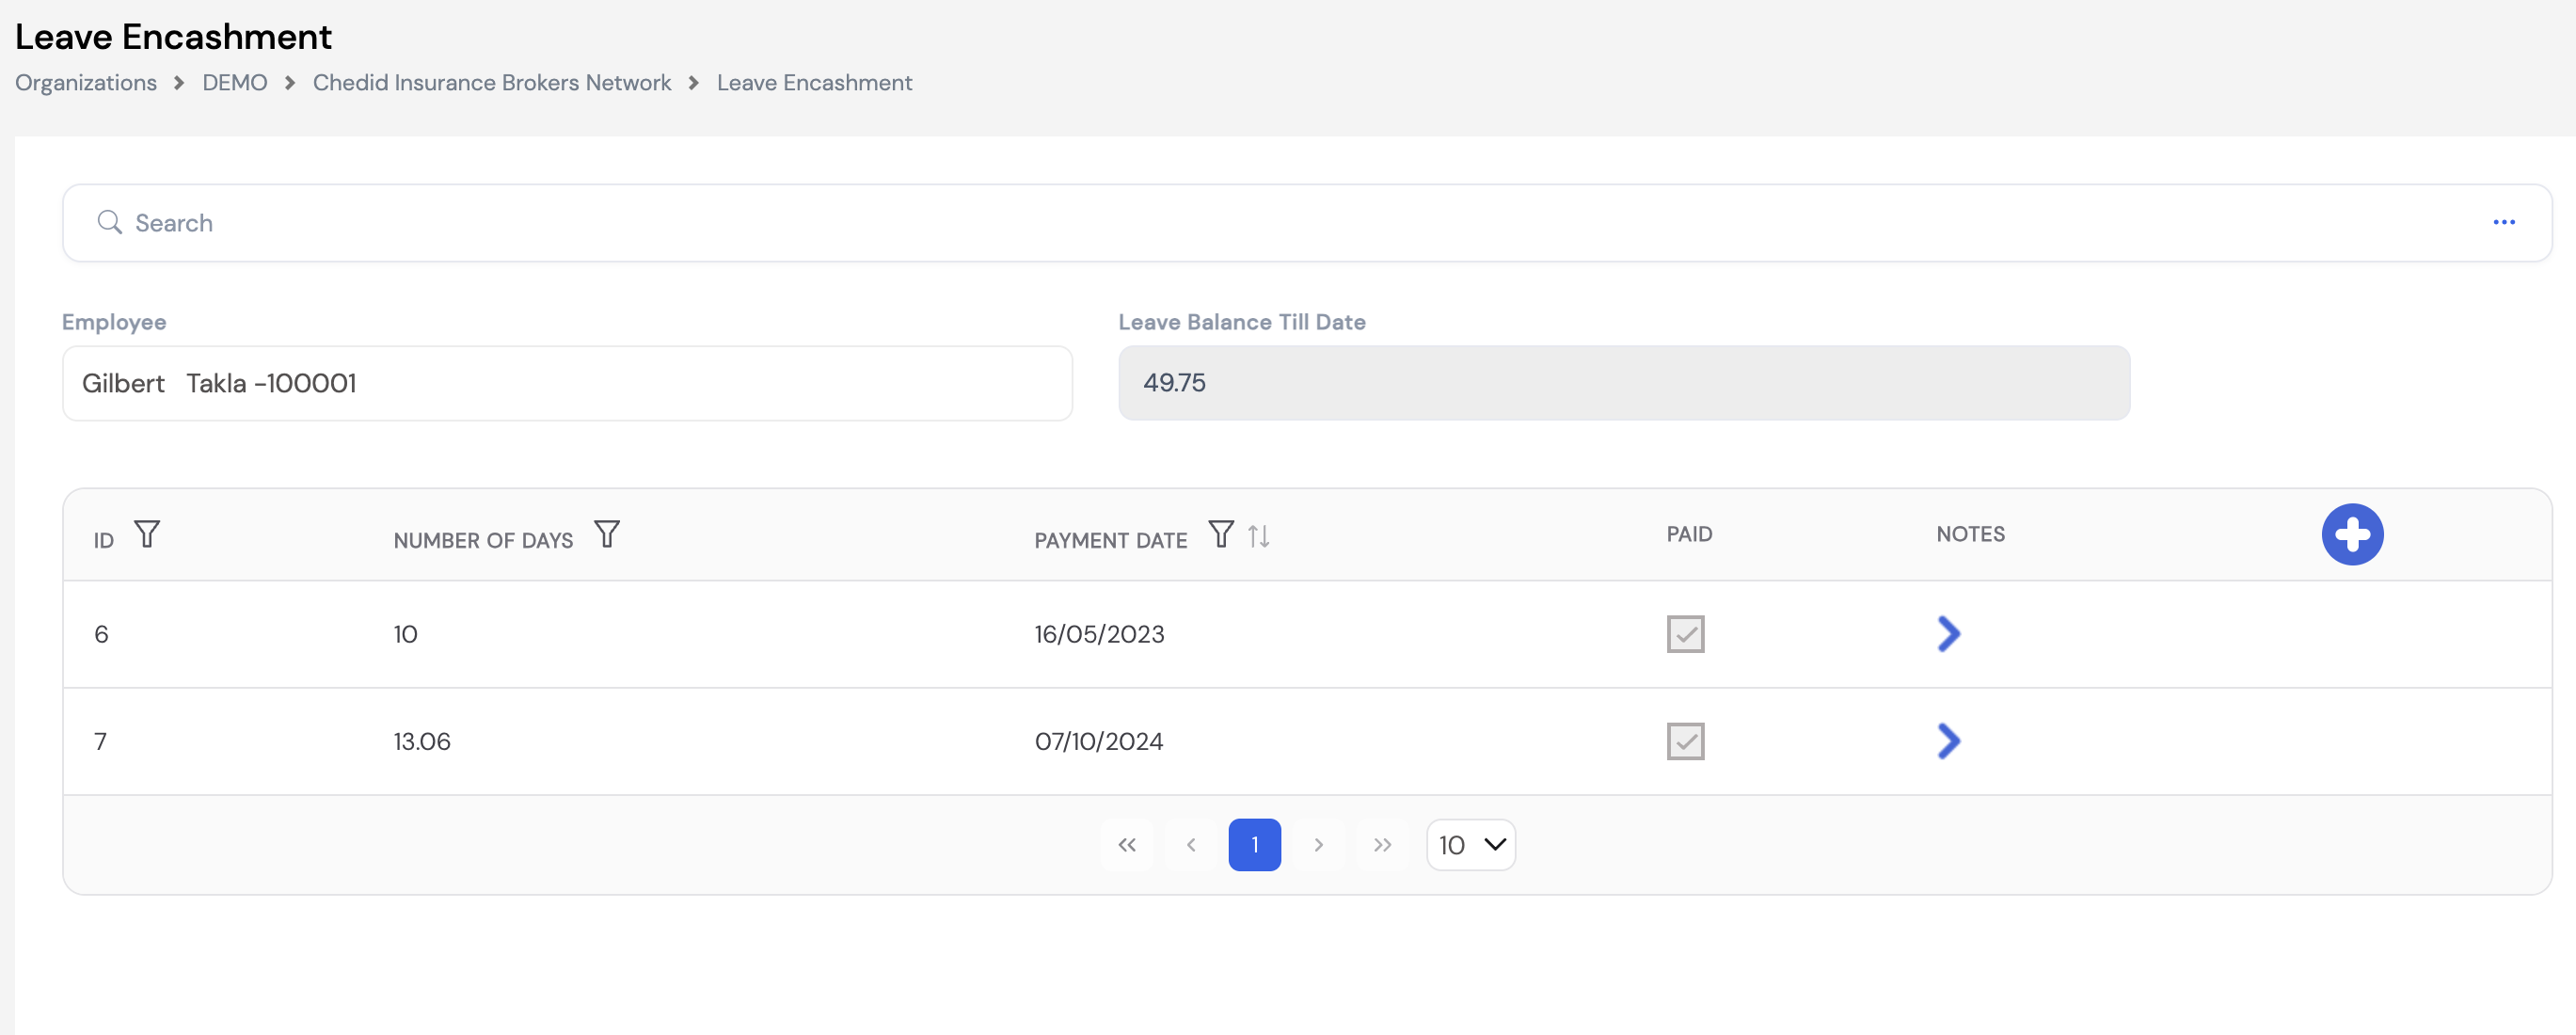

| Field | Description | Required |
|---|---|---|
| Number of Days | The number of leave days to be encashed (converted to cash payment) | Required |
| Payment Date | The date on which the encashed amount should be processed through payroll | Required |
| Notes | An optional note explaining the reason for or details of this encashment | Optional |
The Paid checkbox on each encashment record is automatically marked by the system once the encashment amount has been processed through the payroll run using the Leave Encashment Plugin (Section 12.4). The Leave Balance Till Date shown at the top reflects the employee's current total available leave balance.
24.6 Leaves Calendar
The Leaves Calendar is a company-level visual calendar that provides HR and management with a comprehensive view of all employee leave — both planned (pending approval) and taken (processed). It is the company-wide equivalent of the leave calendar available to individual employees in the ESS portal, giving HR a full picture of leave coverage across the organization at any point in time.
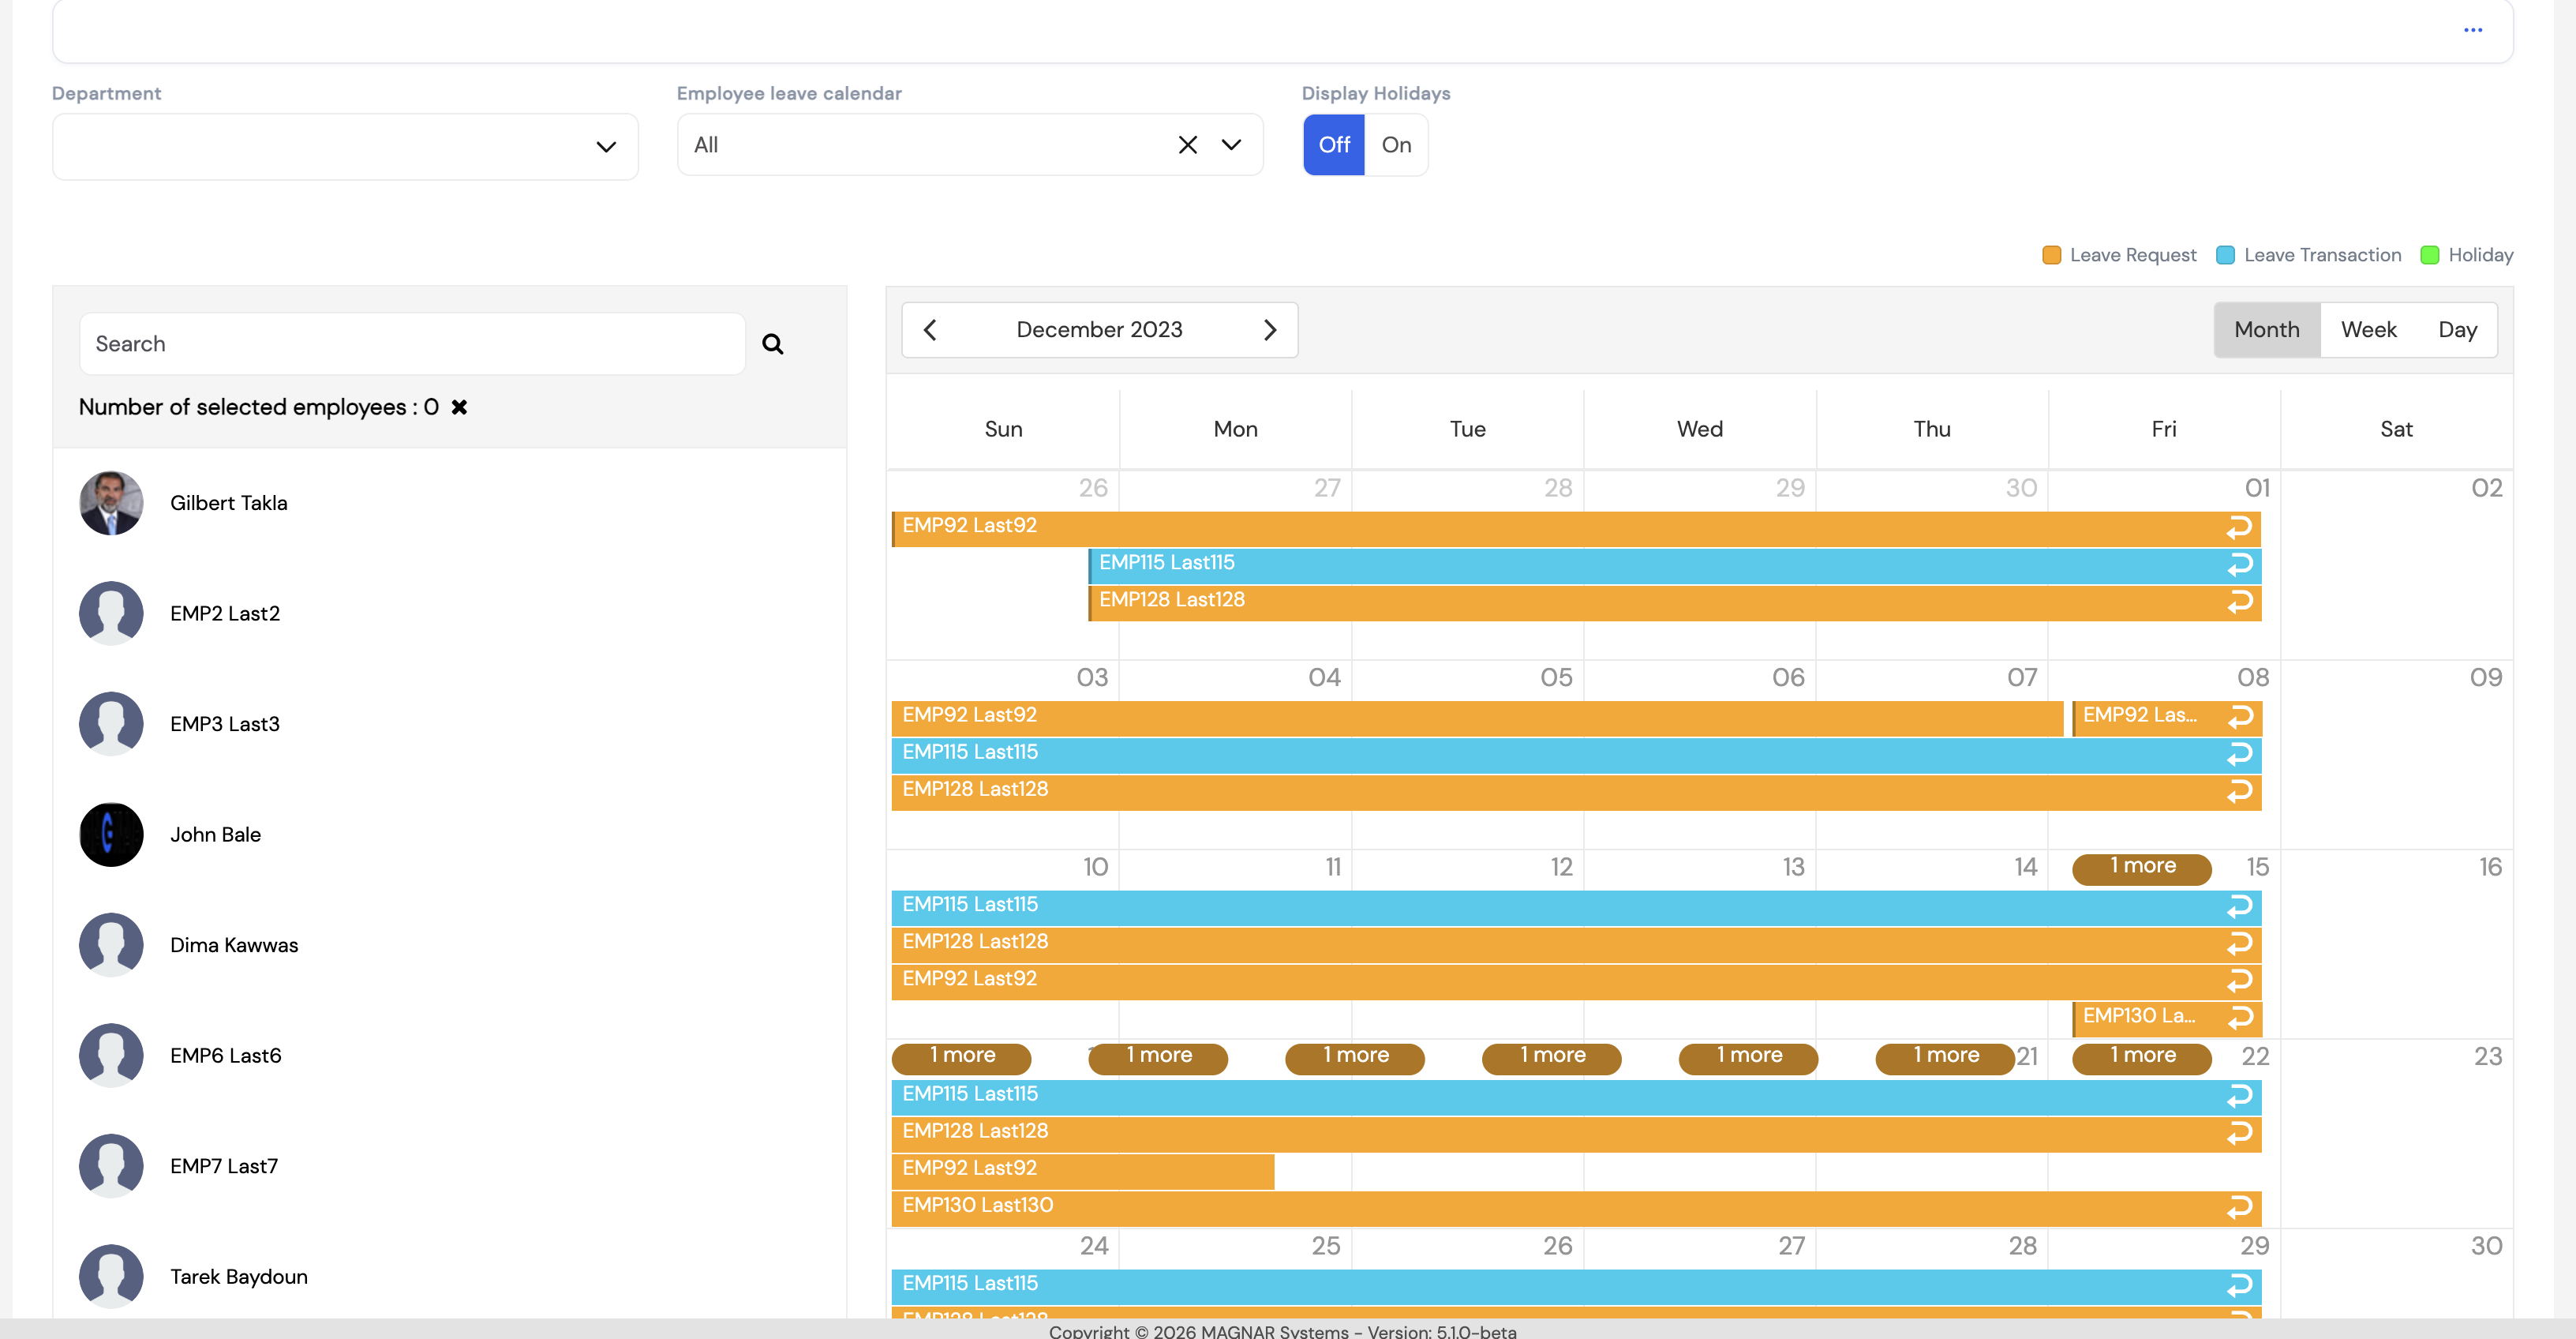
The calendar supports three view modes — Month, Week, and Day — and uses a colour-coded legend to distinguish leave types:
- ■ Orange — Leave Request: leave that has been submitted and approved through the workflow but not yet processed in payroll
- ■ Blue — Leave Transaction: leave that has been processed in the system (recorded directly by HR or processed through payroll)
- ■ Green — Holiday: public holidays (visible when Display Holidays is toggled On)
| Filter / Control | Description |
|---|---|
| Department | Filter the employee list and calendar to show only employees from a specific department |
| Employee Leave Calendar | Filter by leave type — show All leave types or focus on a specific leave type (e.g., Annual Leave only) |
| Display Holidays | Toggle On to overlay public holidays on the calendar view |
| Employee list (left panel) | Select one or more employees to focus the calendar on their leave. "1 more" indicators appear when multiple leave bars overlap on the same day. |
| Month / Week / Day | Switch between calendar granularity views |
Use the Leaves Calendar before approving new leave requests to check coverage — for example, to ensure that not too many employees in the same department are on leave at the same time.
25. End of Service
Configure Notice Period before recording any employee exits. The Notice Period setup (Section 25.1 below) must be completed first — it determines how the Notice Period Date is calculated on each exit record. Set it up before creating any termination records.
25.1 Notice Period Setup
Notice Period defines the minimum notice period an employee must serve before their last working day, based on their grade and years of service. The system uses this configuration to automatically calculate the Notice Period Date on each exit record.
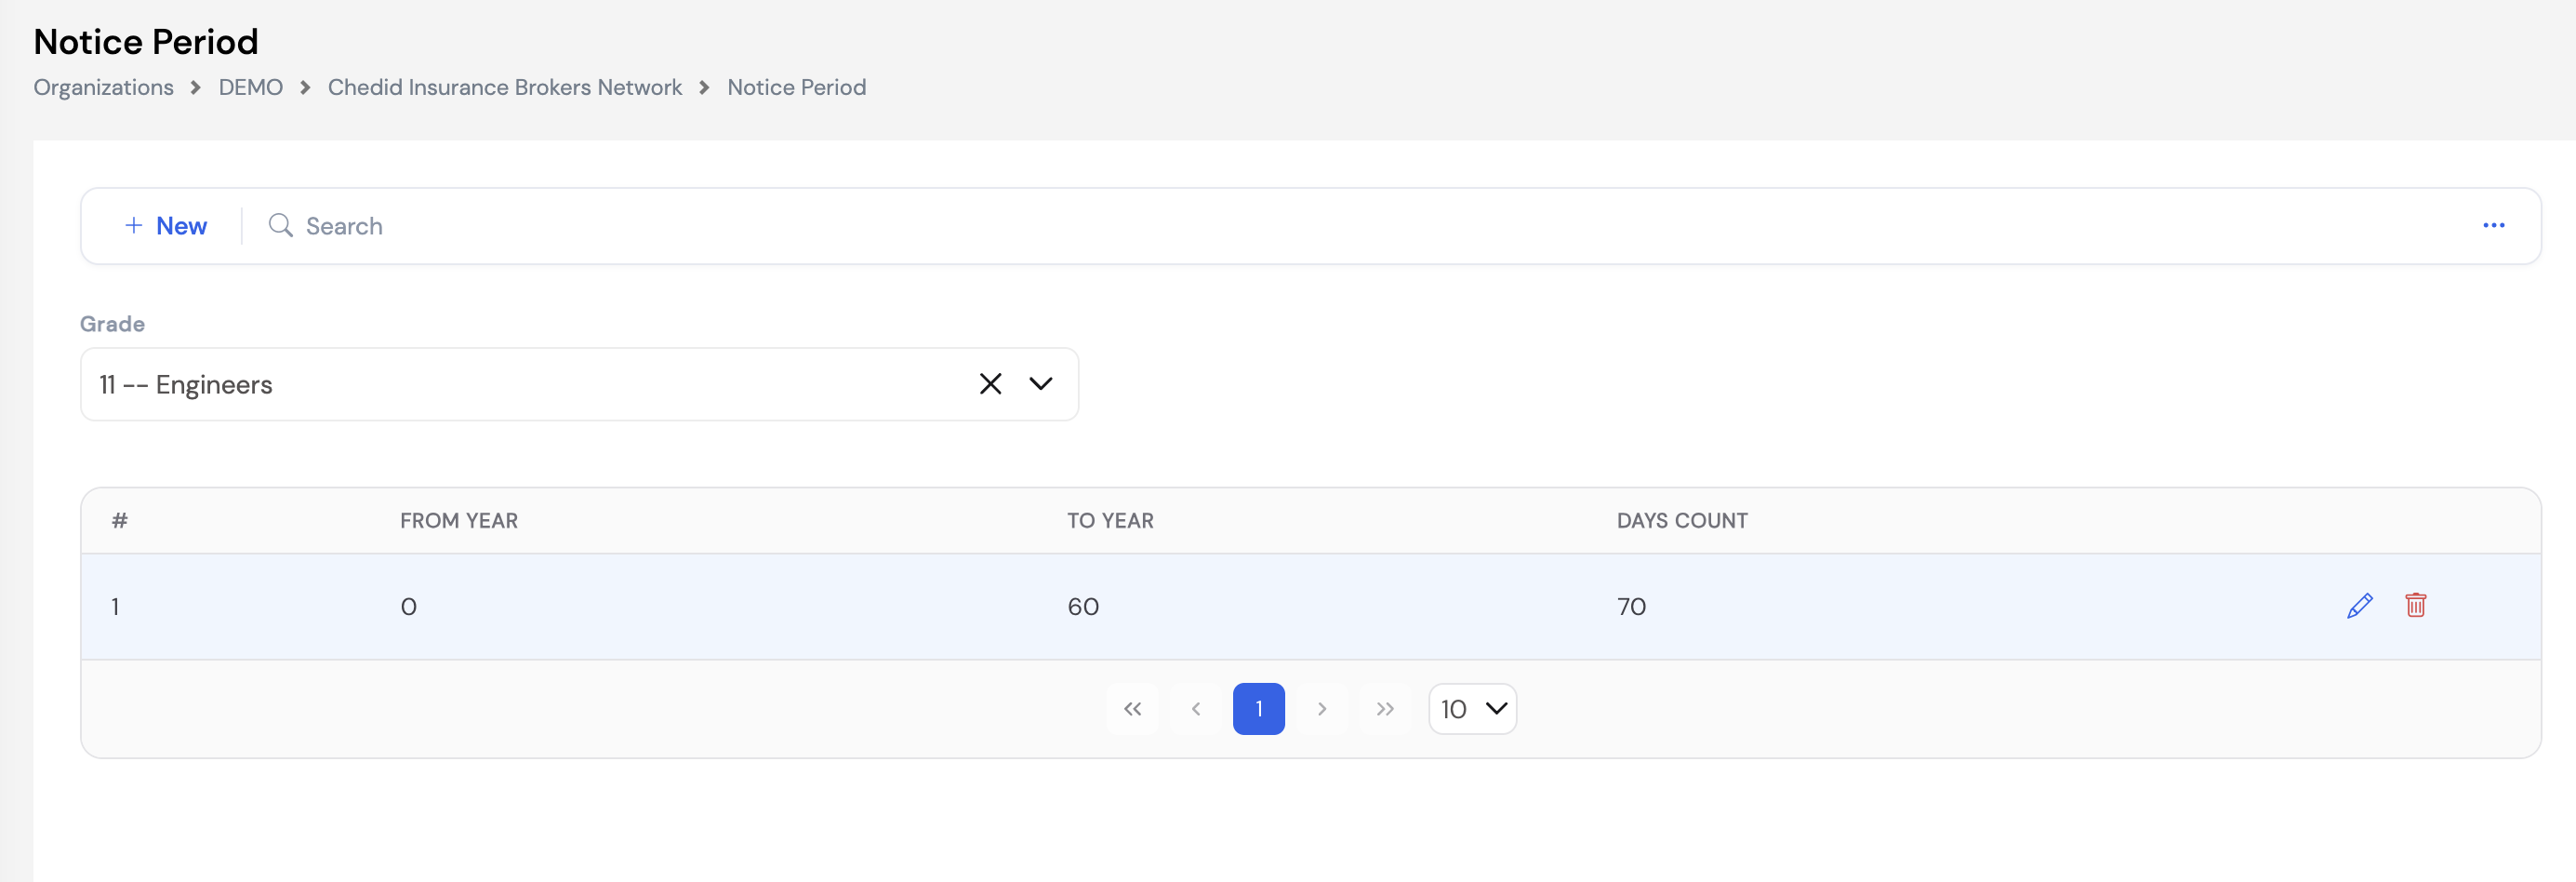
| Field / Column | Description | Required |
|---|---|---|
| Grade | The employee grade this notice period rule applies to. Filter by grade to view and manage each grade's rules separately. | Required |
| From Year | The start of the years-of-service band (e.g., 0 = from day one of employment) | Required |
| To Year | The end of the years-of-service band (e.g., 60 = up to 60 years of service) | Required |
| Days Count | The number of notice days required for employees in this grade and service band (e.g., 70 days for Engineers regardless of service length) | Required |
Multiple service bands can be configured per grade — for example, 30 days notice for the first 2 years, 60 days for 2–5 years, and 90 days thereafter. Click + New to add each band.
25.2 Exit Process List
The Exit Process is where HR administrators formally terminate an employee's record in Magnar HCM. Recording an exit here is the prerequisite for running the Employee Exit payroll (Final Settlement) in Section 22.5. Only employees with an active exit record will appear when loading the Employee Exit payroll run.
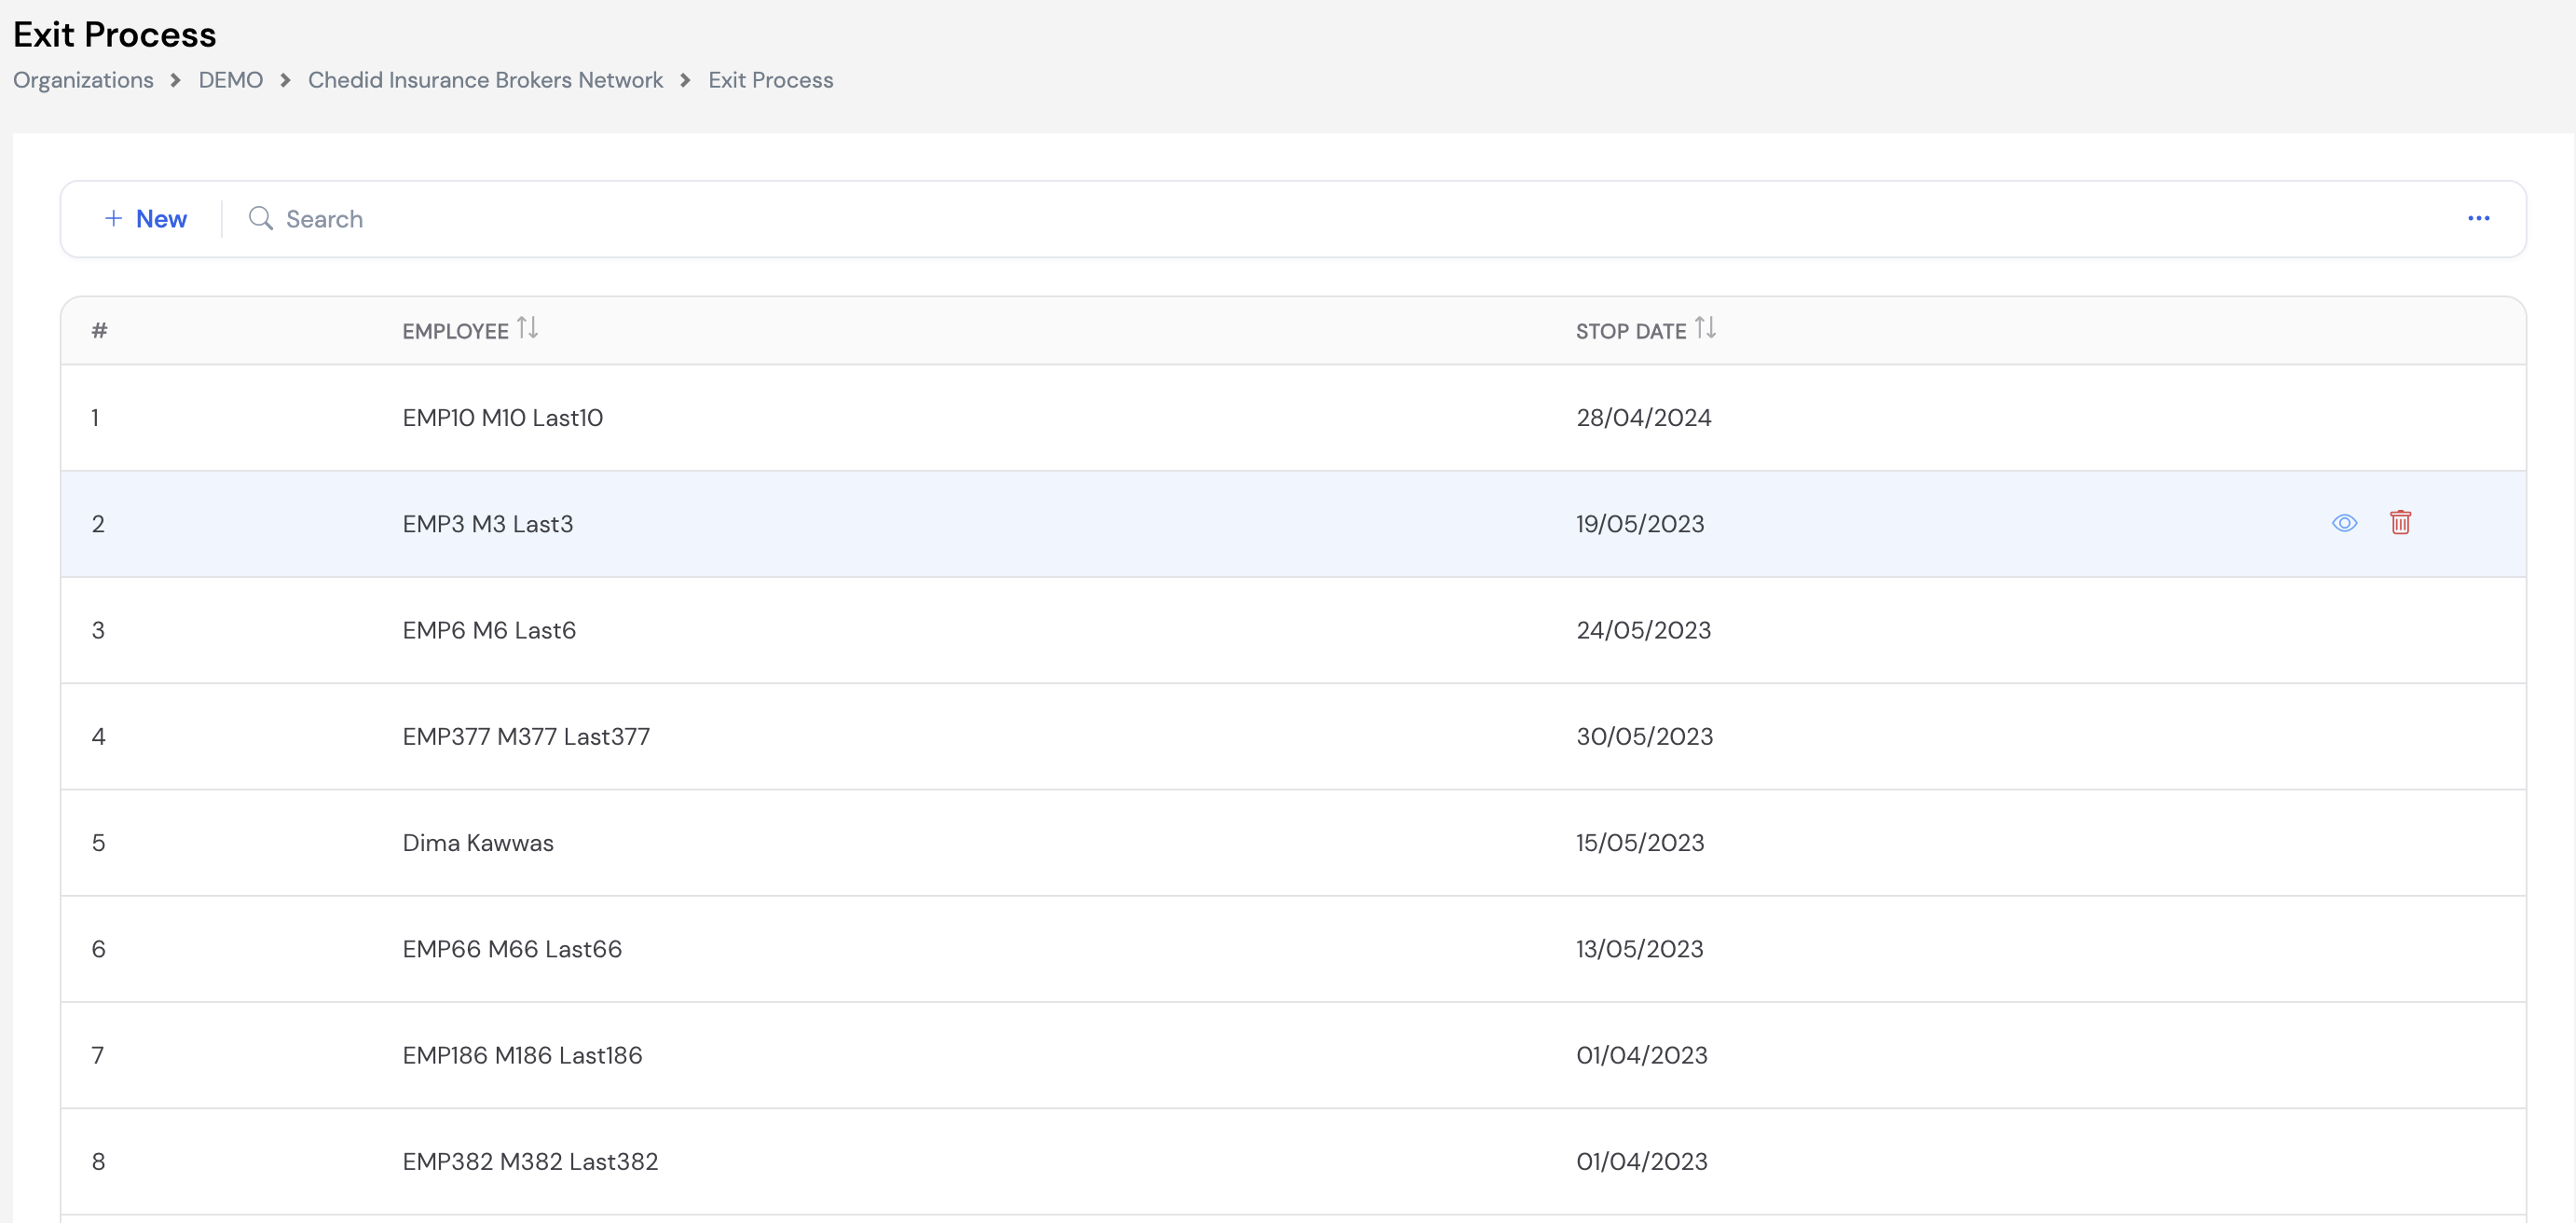
25.3 Recording an Employee Exit
Click + New to record an employee termination. Fill in the exit details and click Save.
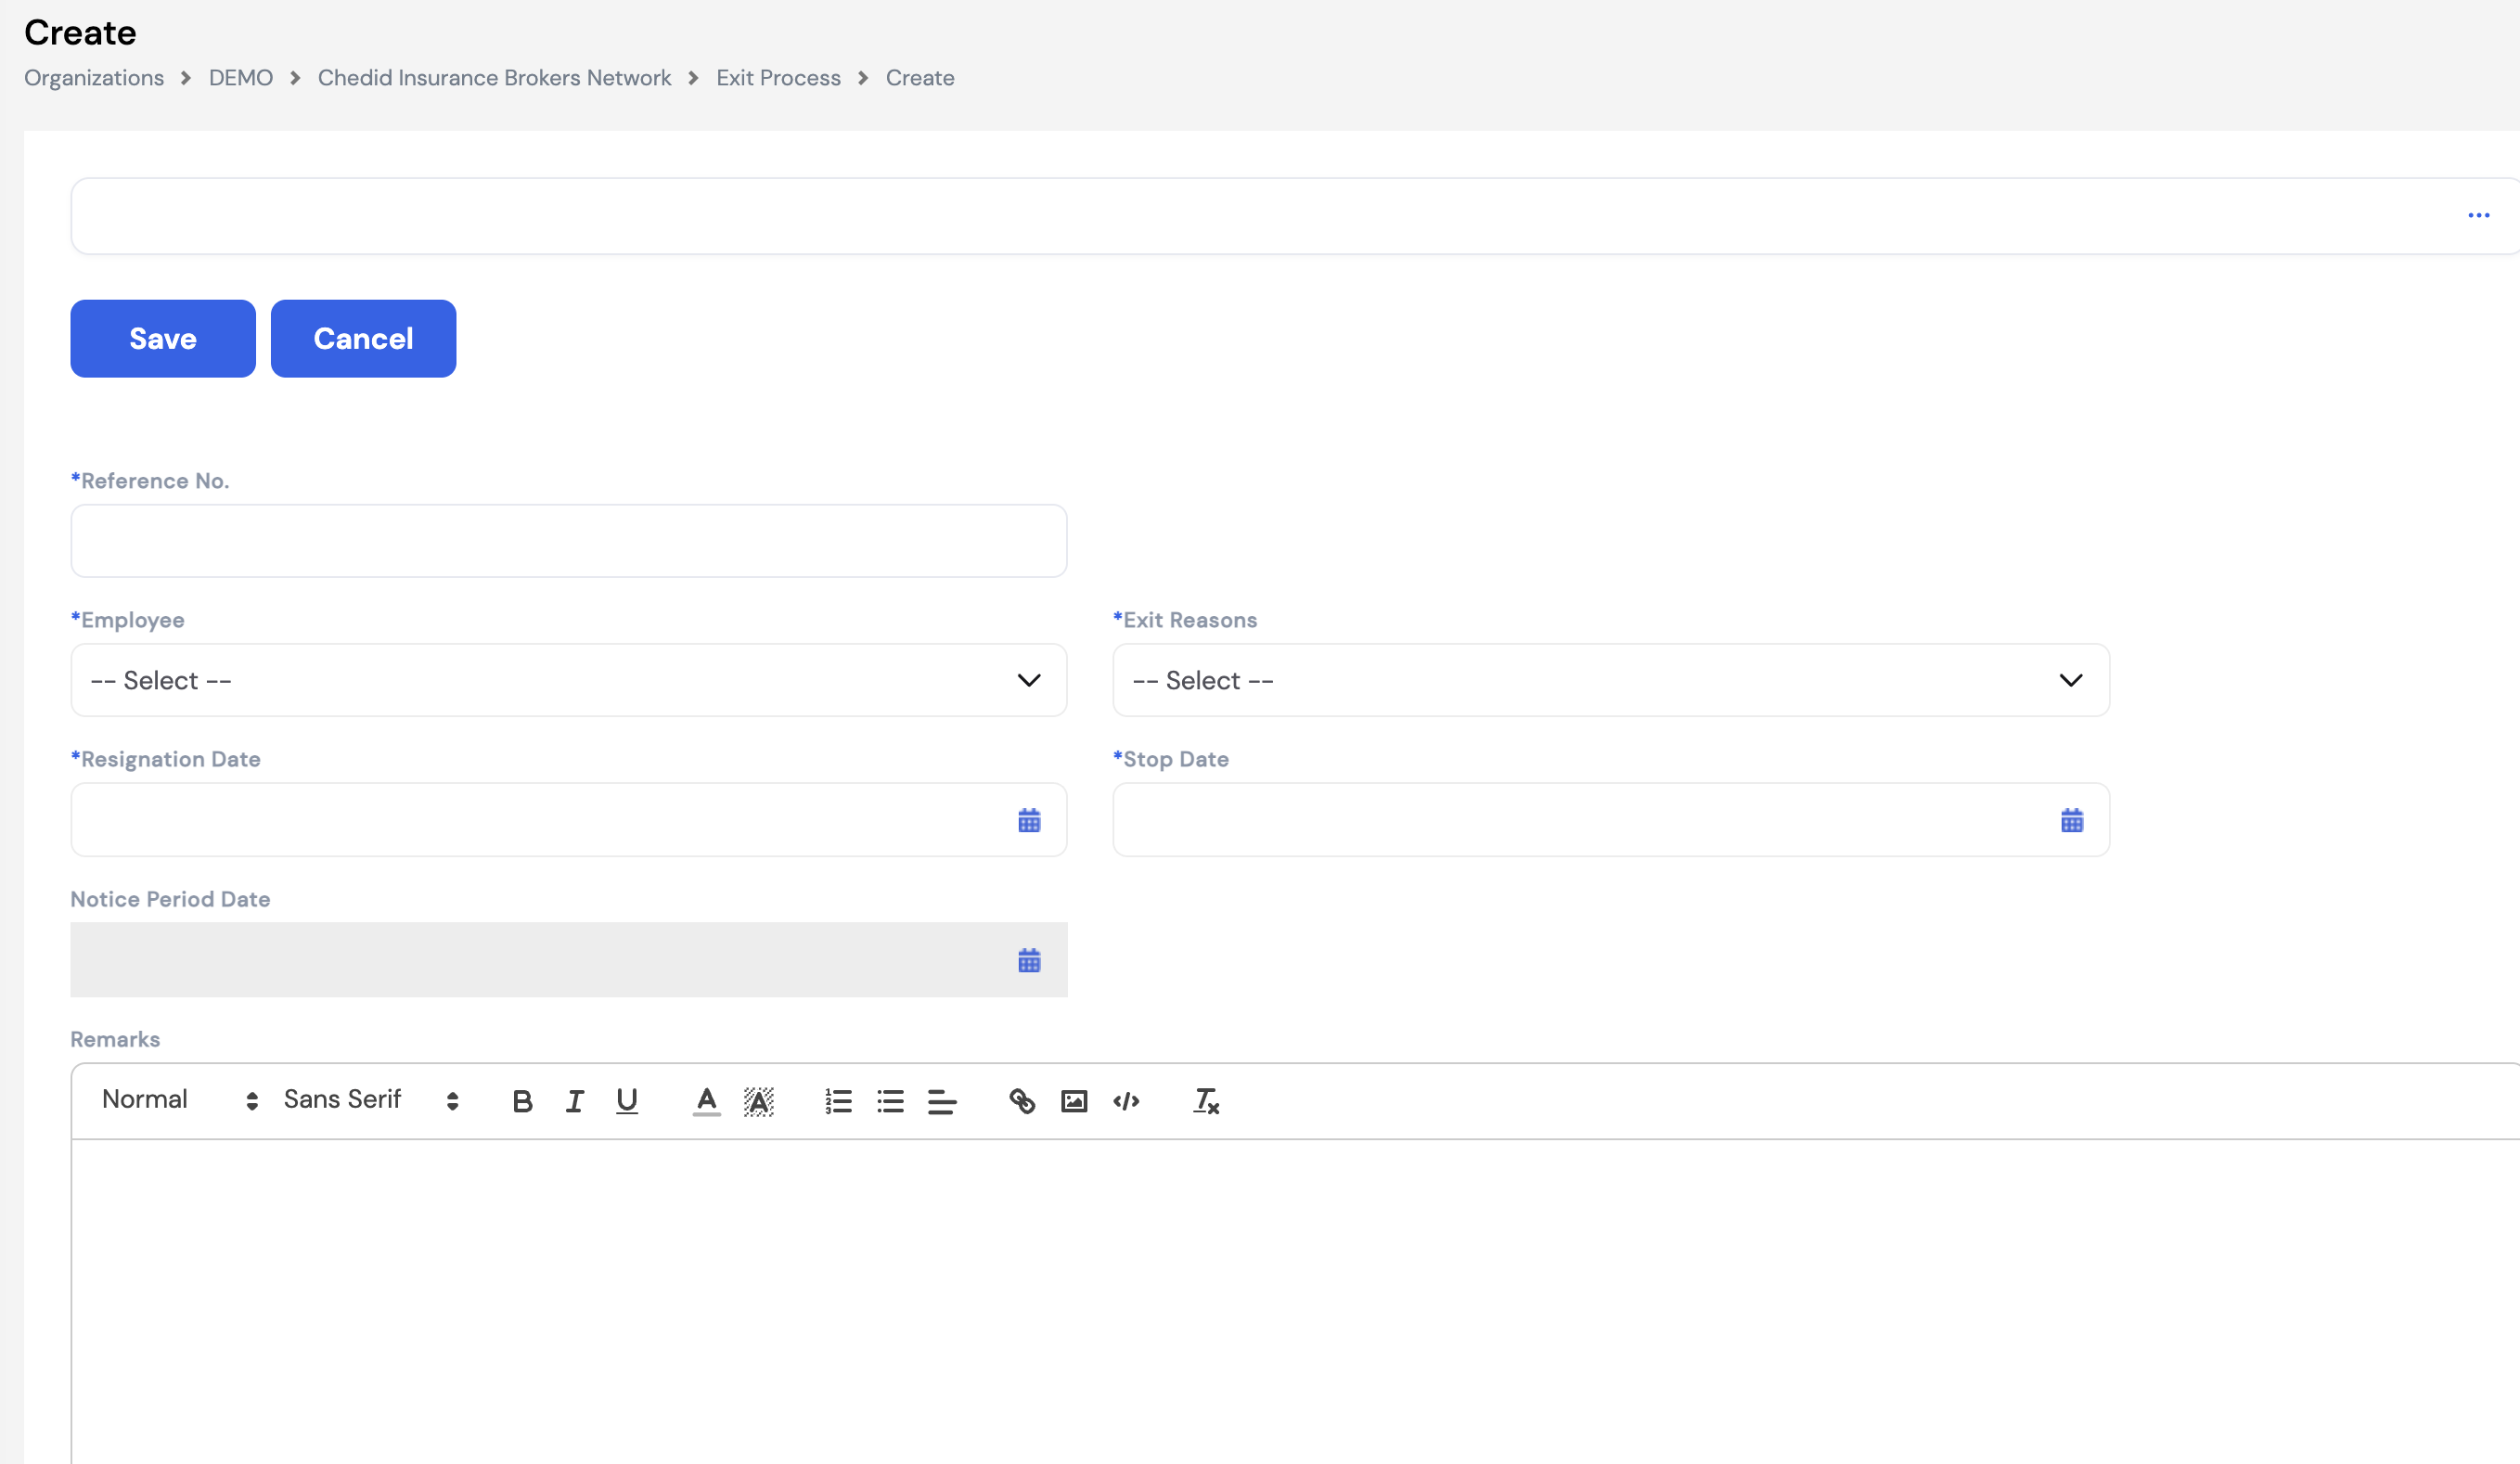
| Field | Description | Required |
|---|---|---|
| Reference No. | A unique reference number for this exit record — enter manually or leave for the system to assign | Required |
| Employee | The employee being terminated | Required |
| Exit Reasons | The reason for the termination (e.g., Resignation, Termination, Retirement) — from the Exit Reasons configured in EOS Setup (Section 16.2). This affects the EOS entitlement calculation. | Required |
| Resignation Date | The date the employee submitted their resignation or was notified of termination | Required |
| Stop Date | The employee's last working day — the date from which they are no longer active in payroll | Required |
| Notice Period Date | Auto-calculated based on the Resignation Date and the applicable notice period — the date the notice period ends | Auto |
| Remarks | Additional notes or context about the exit | Optional |
25.4 Reversing a Termination
A termination can be reversed depending on how far the final settlement payroll has progressed:
| Payroll Status | How to Reverse the Termination |
|---|---|
| Not yet processed | Simply delete the exit record from the Exit Process list. The employee will be reinstated immediately with no payroll impact. |
| Processed but not yet posted | First revert the Employee Exit payroll run in Section 22.5 (Payroll Process Tool → Employee Exit → Revert), then delete the exit record from this screen. |
| Posted (final settlement closed) | The termination cannot be deleted once the final settlement is posted. To reinstate the employee, HR must create a Rejoin Transaction — which reactivates the employee for future payroll runs. |
Always double-check the employee, stop date, and exit reason before saving an exit record — especially before running the final settlement payroll. Errors in these fields will directly affect the EOS entitlement calculation and the employee's final payslip.
25.5 Rejoining Process
The Rejoining Process handles two distinct scenarios where an employee needs to be reactivated in the system. It is accessed from the left navigation menu under End of Service → Rejoining Process.
Rejoining of Employees (Terminated)
The top section handles employees who were previously terminated and are rejoining the company. Rather than creating a new employee profile and code, the existing profile is reactivated — preserving the employee's history, documents, and records. This is useful for companies that allow former employees to rejoin, and avoids duplicate employee codes in the system.
Select the Employee from the list of terminated employees, enter the Rejoining Date, and click Rejoin. The employee's profile will be reactivated from that date.
Rejoining of Employees on Leave
The bottom section handles employees who are currently suspended due to an off-cycle leave payroll run or where leave resumption is configured and the employee is returning from leave. In both cases the employee must be formally rejoined before they can appear in the regular payroll run again.
Filter by Rejoining Month, Year, and optionally a specific Employee, then click Filter to load the employees due to return. Select the relevant employees and click Rejoin to reactivate them for payroll.
When an employee's off-cycle leave payroll is posted, they are automatically suspended in the system. They will not receive a salary in the regular payroll until the Rejoining Process is completed. See Section 22.6 — Off-Cycle Leave Process Wizard for more details.
Always use the Rejoining Process for returning former employees instead of creating a new profile. This preserves their complete employment history, EOS records, leave history, and payroll data in one place.
26. Time and Attendance
The Time and Attendance module manages employee clock-in/out records, timesheets, and project worksheets. It is accessed from the left navigation menu under Time and Attendance and contains the following sub-modules:
26.1 Connection Settings
Connection Settings configures the integration between Magnar HCM and an external biometric or time attendance device (e.g., fingerprint scanners, face recognition terminals). Once connected, the system automatically pulls attendance records from the device and populates the Attendance Records module. This eliminates manual data entry for clock-in and clock-out times.
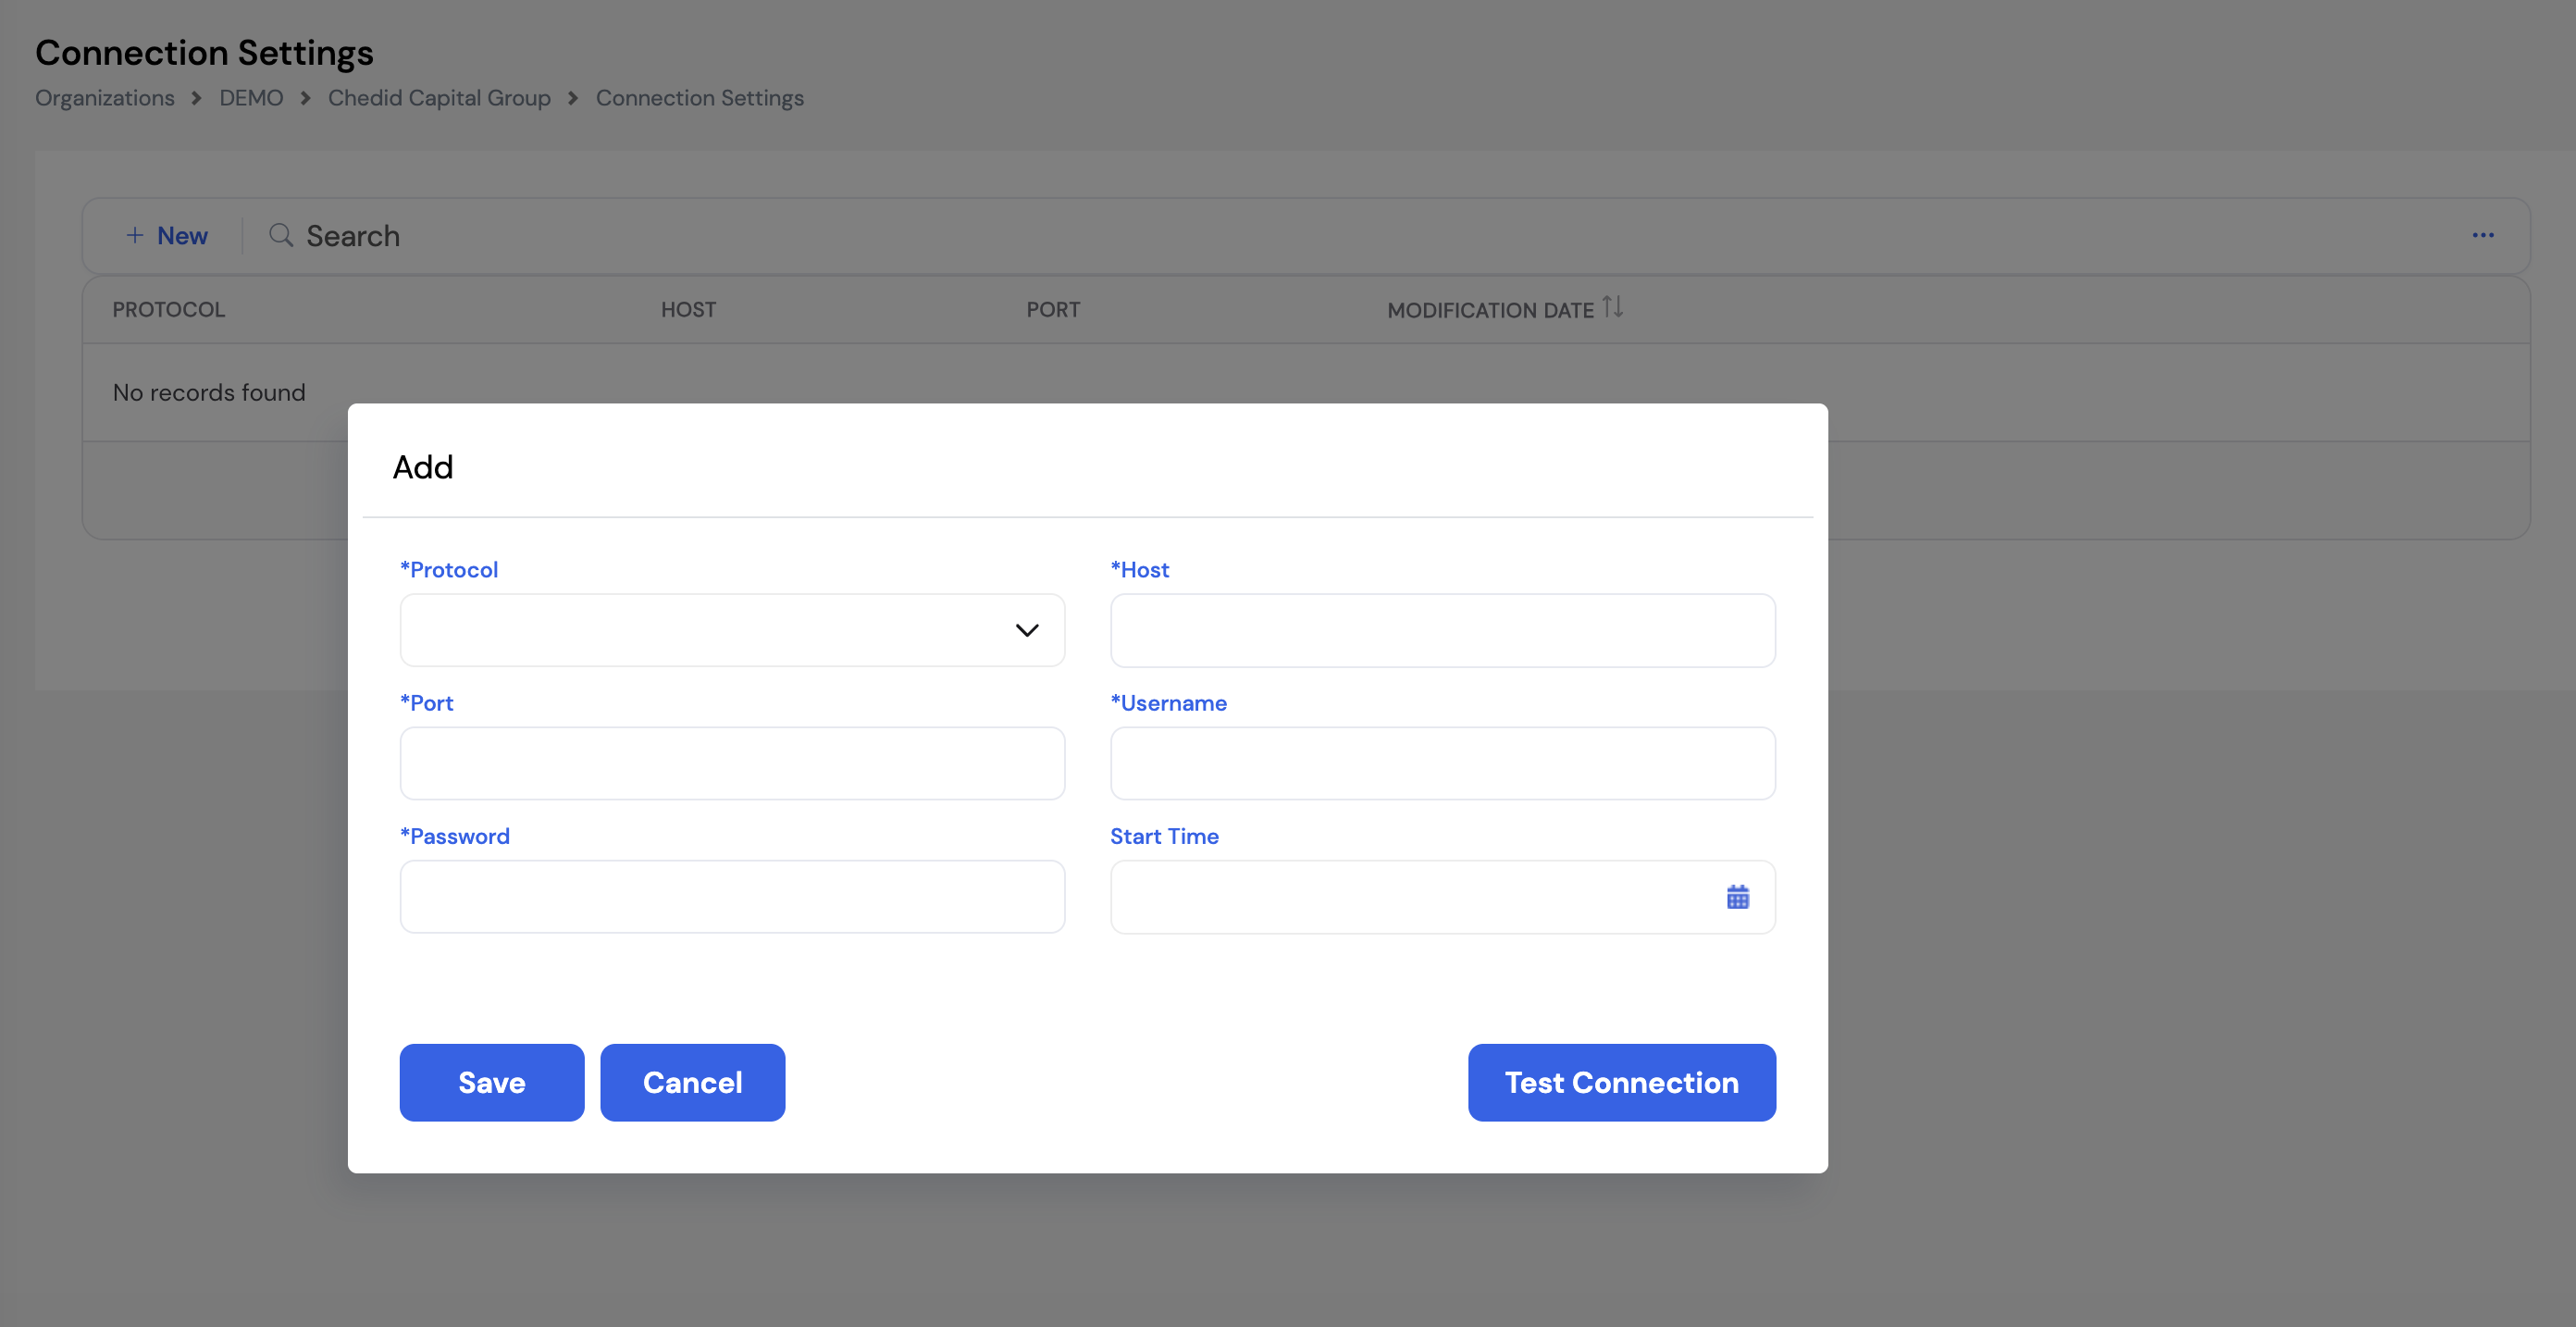
| Field | Description | Required |
|---|---|---|
| Protocol | The communication protocol used to connect to the attendance device (e.g., TCP/IP, HTTP) | Required |
| Host | The IP address or hostname of the attendance device on the network | Required |
| Port | The network port used to communicate with the device | Required |
| Username | The username required to authenticate with the attendance device | Required |
| Password | The password for the device connection | Required |
| Start Time | The date and time from which the system should begin pulling attendance records from the device | Optional |
Click Test Connection after entering the device credentials to verify the connection is working before saving. This confirms the device is reachable on the network with the provided credentials.
Connection Settings are typically configured once during implementation by the system administrator or network engineer who has access to the attendance device's network settings.
26.2 Timesheet
The Timesheet module is the central screen where HR and payroll administrators review, manage, and approve daily attendance records across all employees. Each row represents one day per employee, showing whether it was a working day, whether leave was taken, hours worked, overtime, deductions, and the day's overall status.
The Timesheet is primarily populated from Attendance Records (Section 26.3) — the raw clock-in/out data captured from the biometric device. The system applies the configured Attendance Rules (Section 23.2.3) to automatically calculate overtime hours, deduction hours, and absence types for each day based on the employee's expected shift and actual time logged.
In addition, employees can submit their own timesheet entries directly through the Timesheet screen on the ESS portal — which HR can then review and approve from this screen. Attendance data can also be entered manually or bulk-uploaded via Excel. Once records are reviewed and corrections made, they are closed — marking them as final for payroll processing.
Admin / HR View (All Employees)
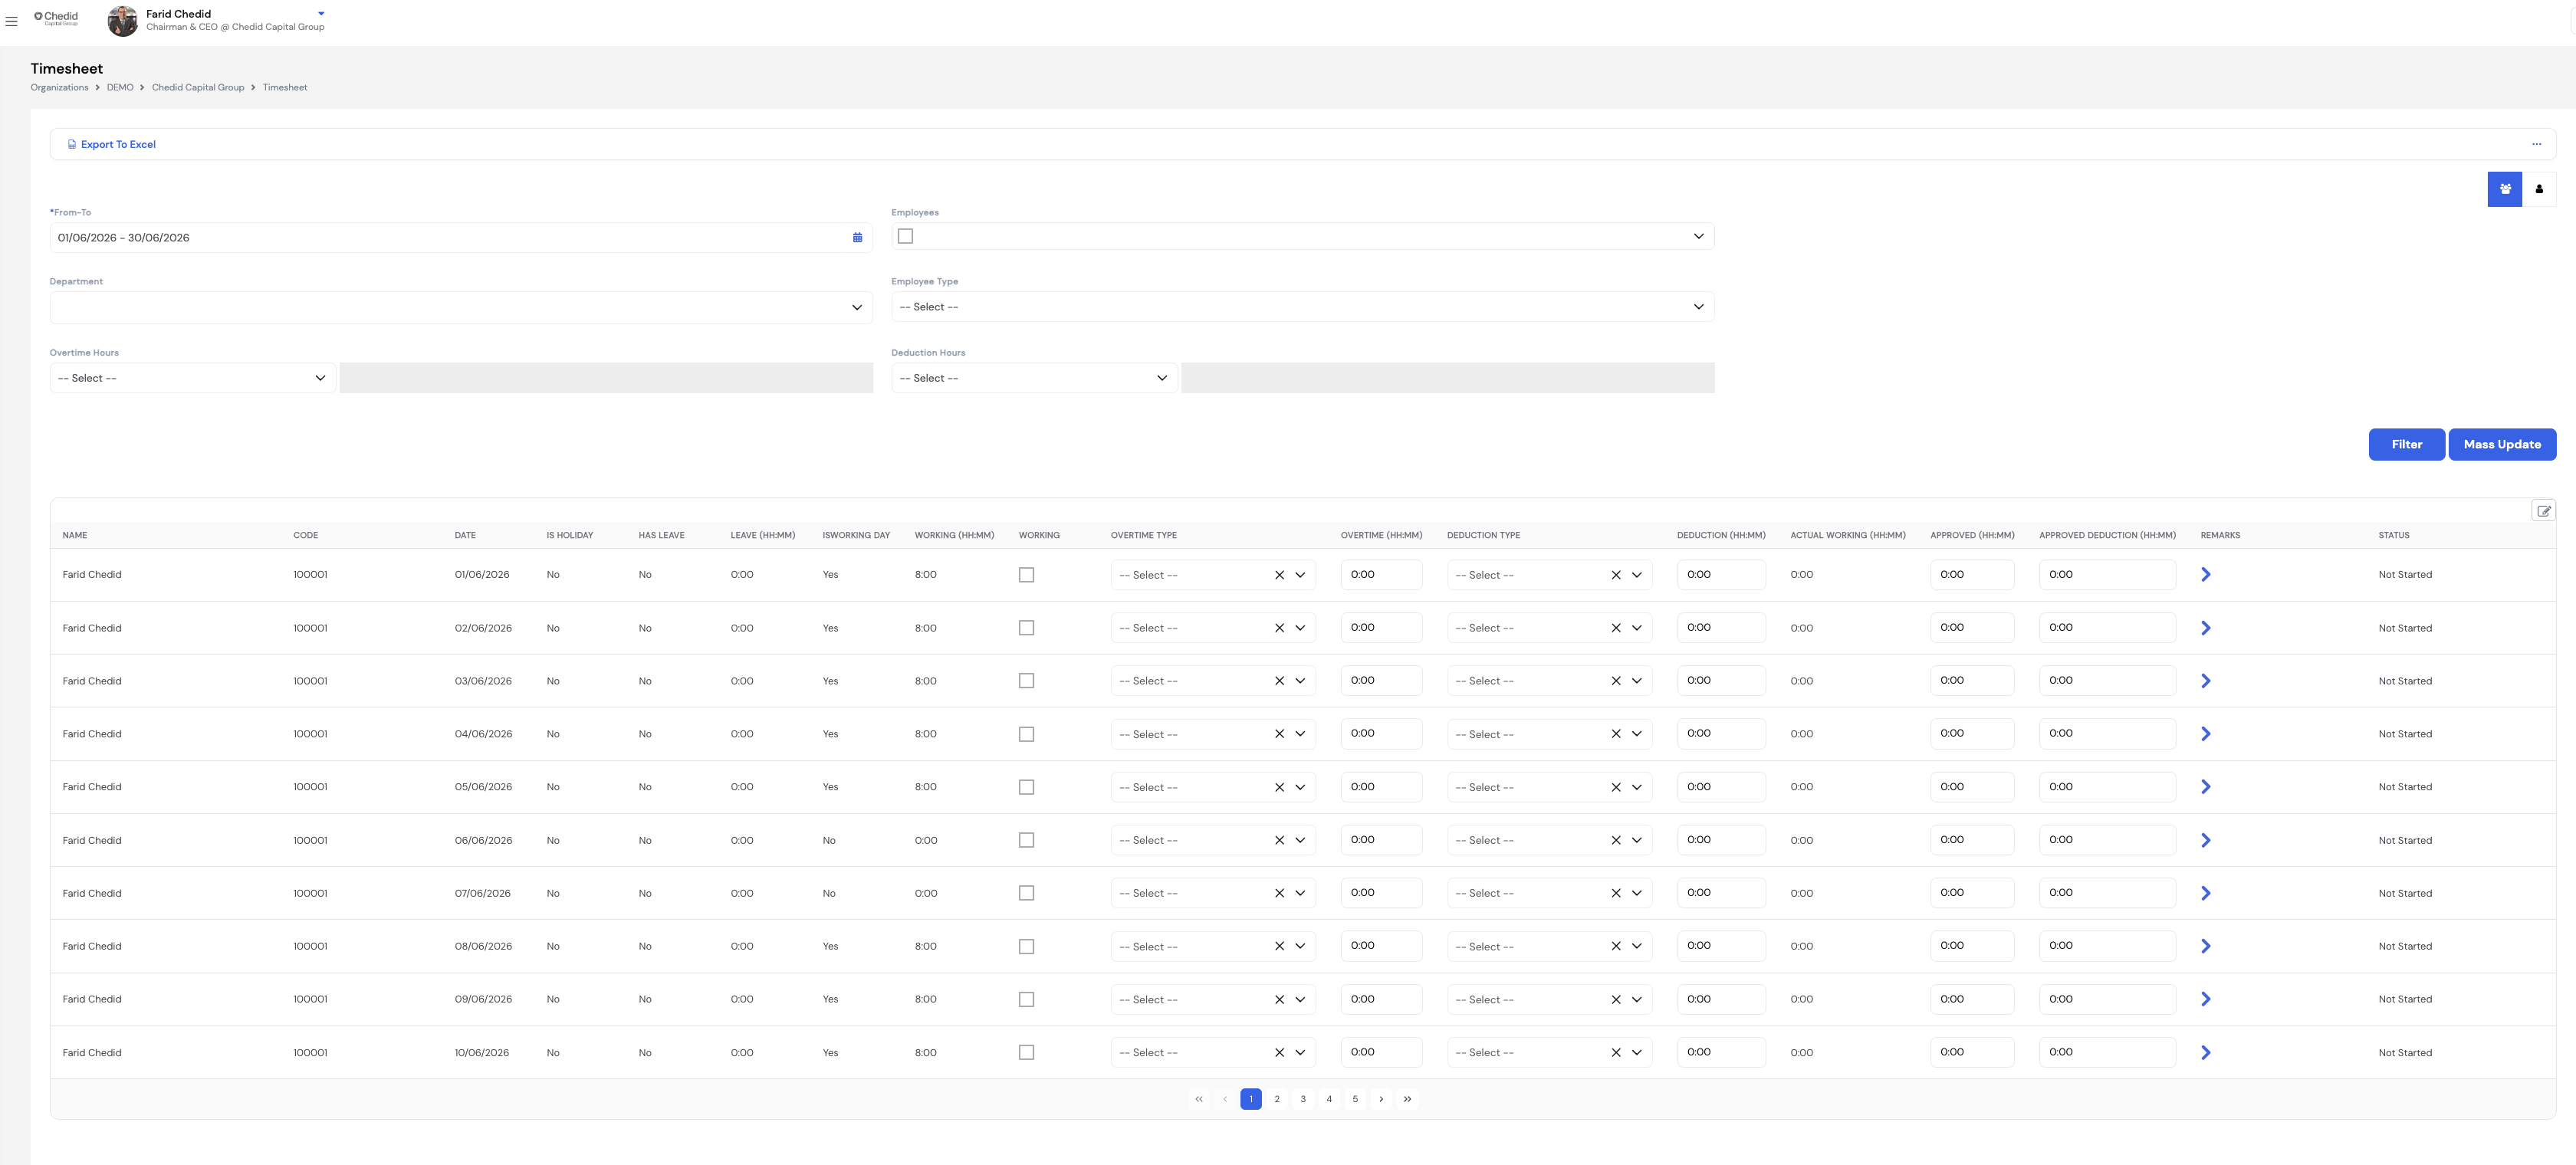
Individual Employee View
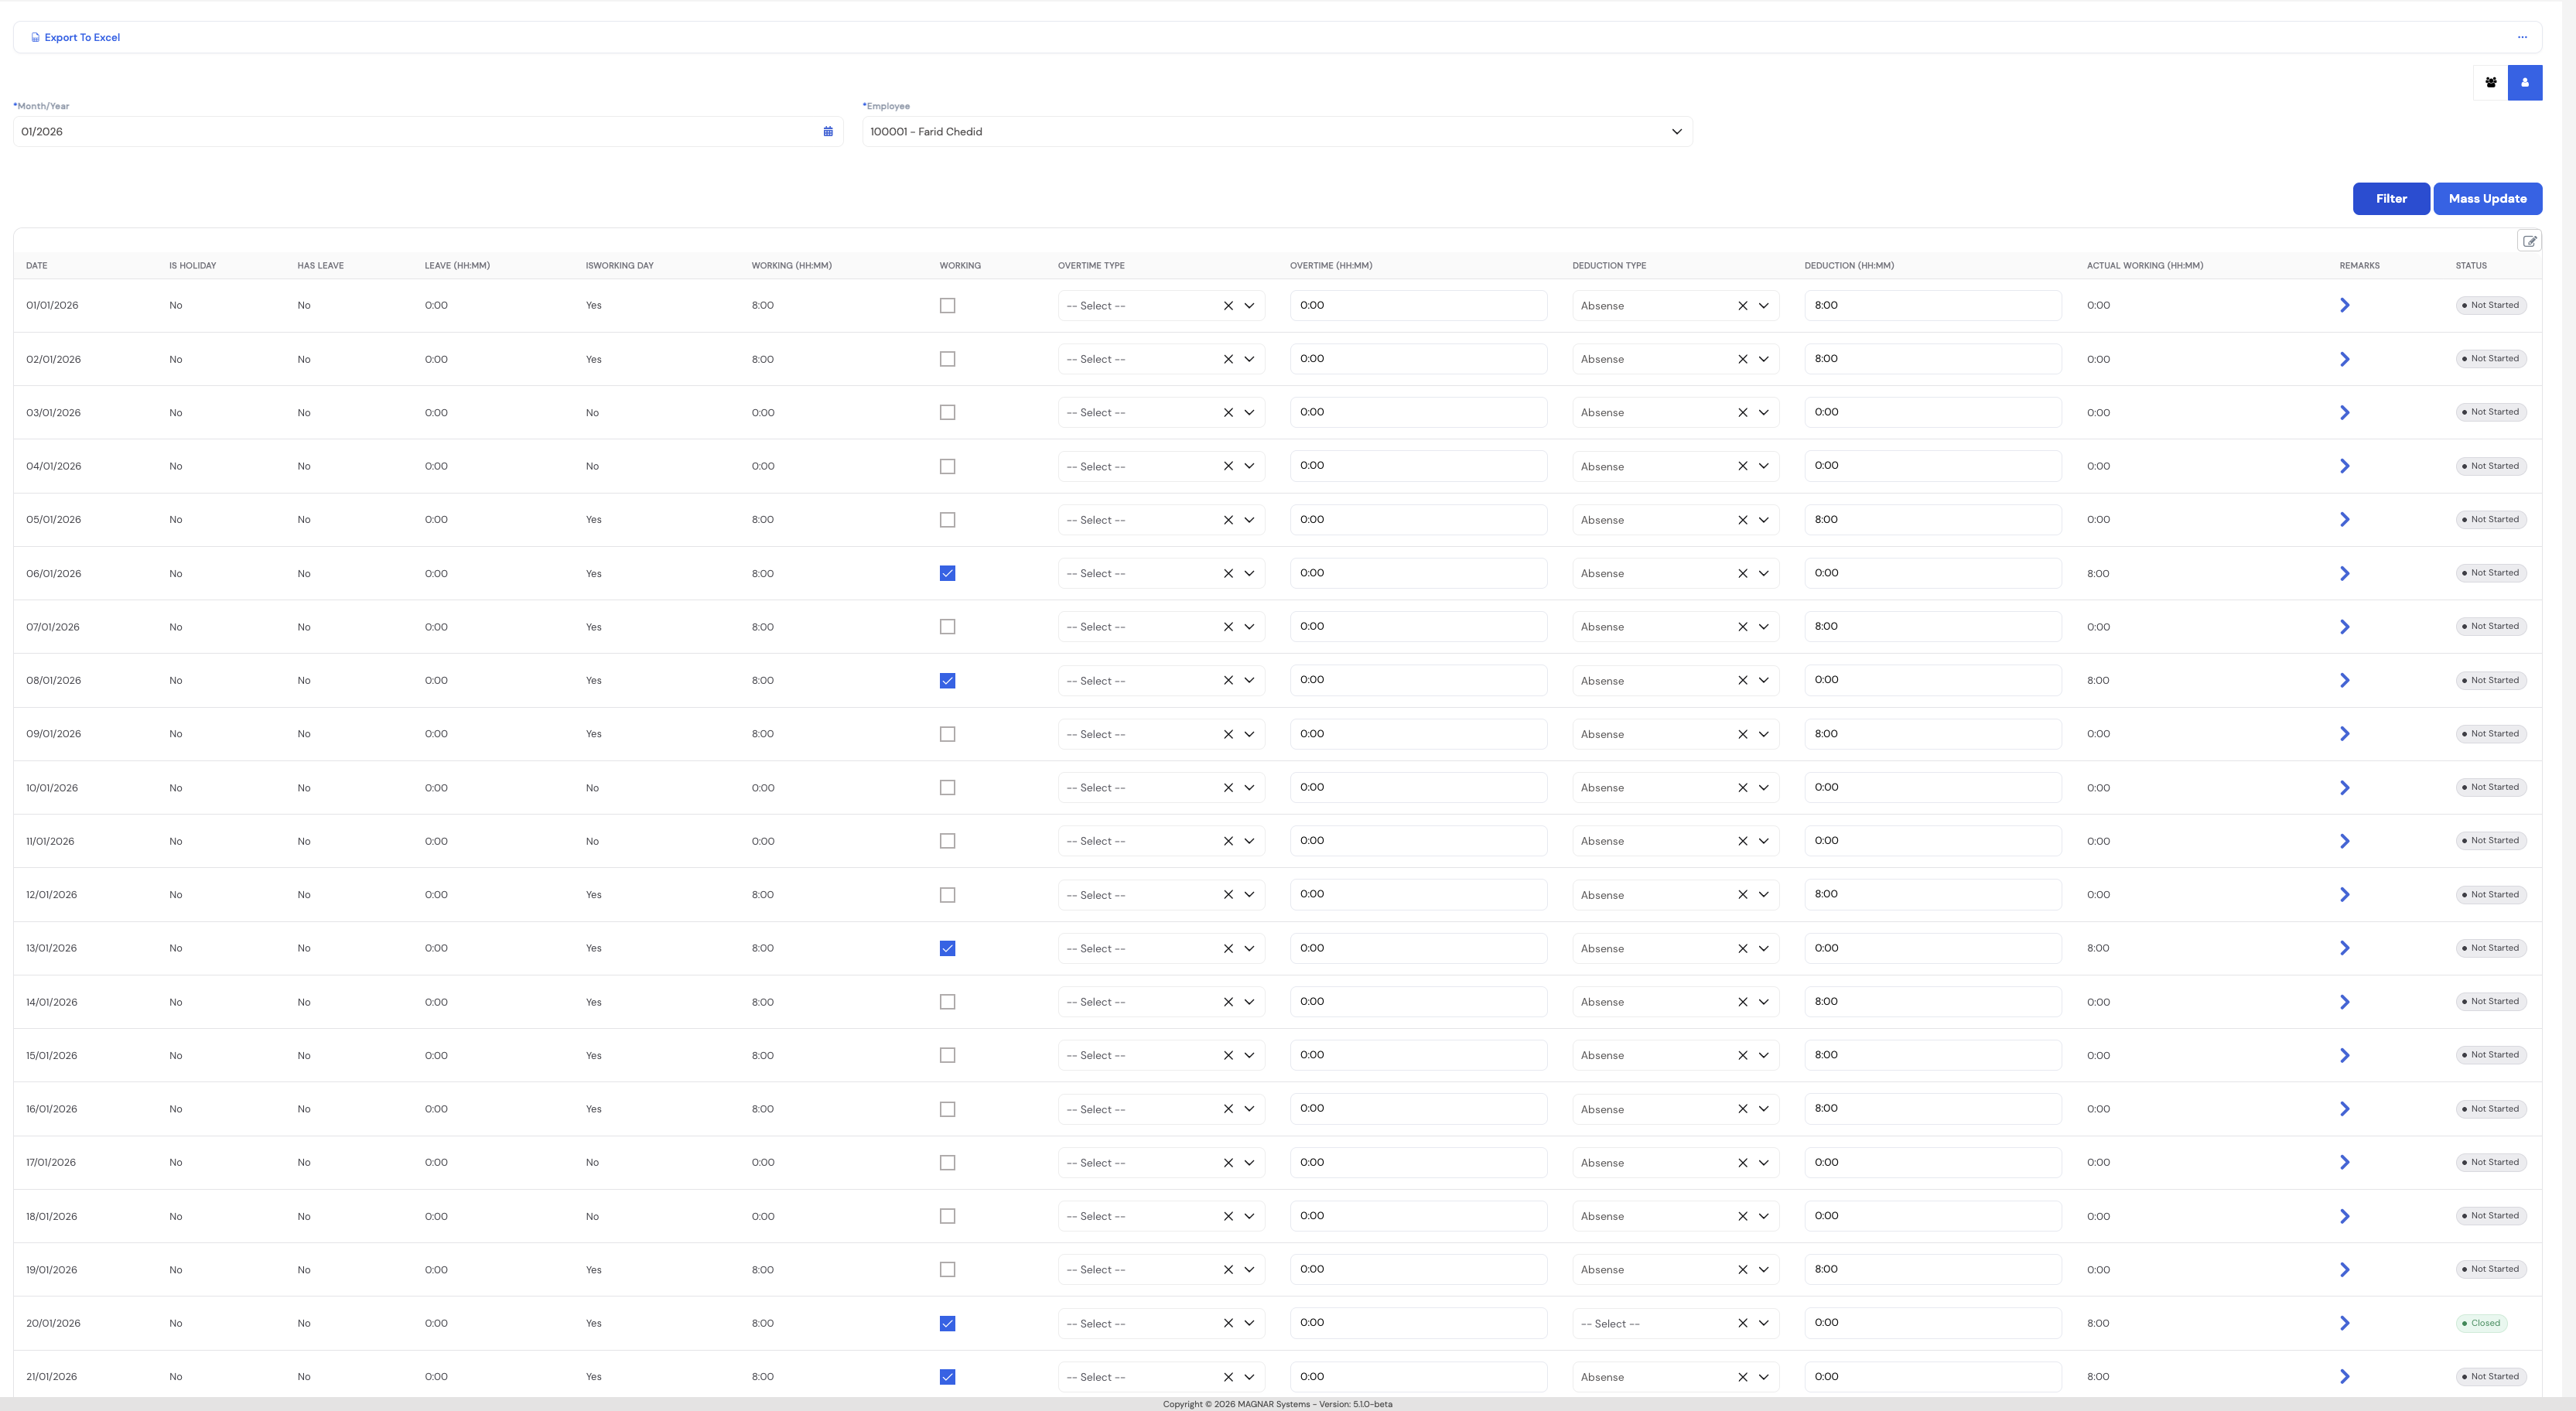
| Column | Description |
|---|---|
| Date | The calendar date for this attendance record |
| Is Holiday | Indicates whether this date is a public holiday based on the employee's calendar |
| Has Leave | Indicates whether the employee has an approved leave record on this day |
| Leave (HH:MM) | The number of leave hours recorded for this day |
| Is Working Day | Whether this date is a scheduled working day based on the employee's calendar |
| Working (HH:MM) | The actual hours the employee worked on this day (from biometric device or manual entry) |
| Working (checkbox) | Manually check to mark this day as worked — used when overriding or entering data manually |
| Overtime Type | Select the applicable overtime type if the employee worked overtime (e.g., Normal Rate, Weekend Overtime) |
| Overtime (HH:MM) | The number of overtime hours for this day |
| Deduction Type | Select the applicable deduction/absence type if the employee was absent or late |
| Deduction (HH:MM) | The number of hours to deduct for absence or lateness |
| Actual Working | The net actual hours worked after applying deductions |
| Approved / Approved Deduction | The approved working hours and deductions after manager/HR review |
| Remarks | Free-text notes for this day's record |
| Status | Not Started — record not yet reviewed; Closed — record finalized and locked for payroll |
Use the Mass Update button to apply the same overtime type, deduction type, or status to multiple rows at once. Before clicking Mass Update, use the Overtime Hours and Deduction Hours filters to narrow down the records you want to update — for example, filter all employees with overtime less than 2 hours and use Mass Update to clear or ignore those records in bulk, rather than editing each row individually.
Timesheet records feed directly into the Overtime Plugin and Deduction Plugin during payroll processing. Ensure all records are reviewed and closed before running the payroll for the period.
26.3 Attendance Records
Attendance Records is the raw data store for all employee clock-in and clock-out events. Records can be captured through multiple channels:
- Web Clock-In/Out — employees clock in and out through the browser-based ESS portal
- Mobile Clock-In/Out — employees clock in and out via the Magnar HCM mobile app (with optional geo-location validation)
- Attendance Device Integration — automatic pull from biometric devices (fingerprint, face recognition) configured in Connection Settings (Section 26.1)
- Excel Upload — bulk import of attendance records using the Download Template → Import workflow
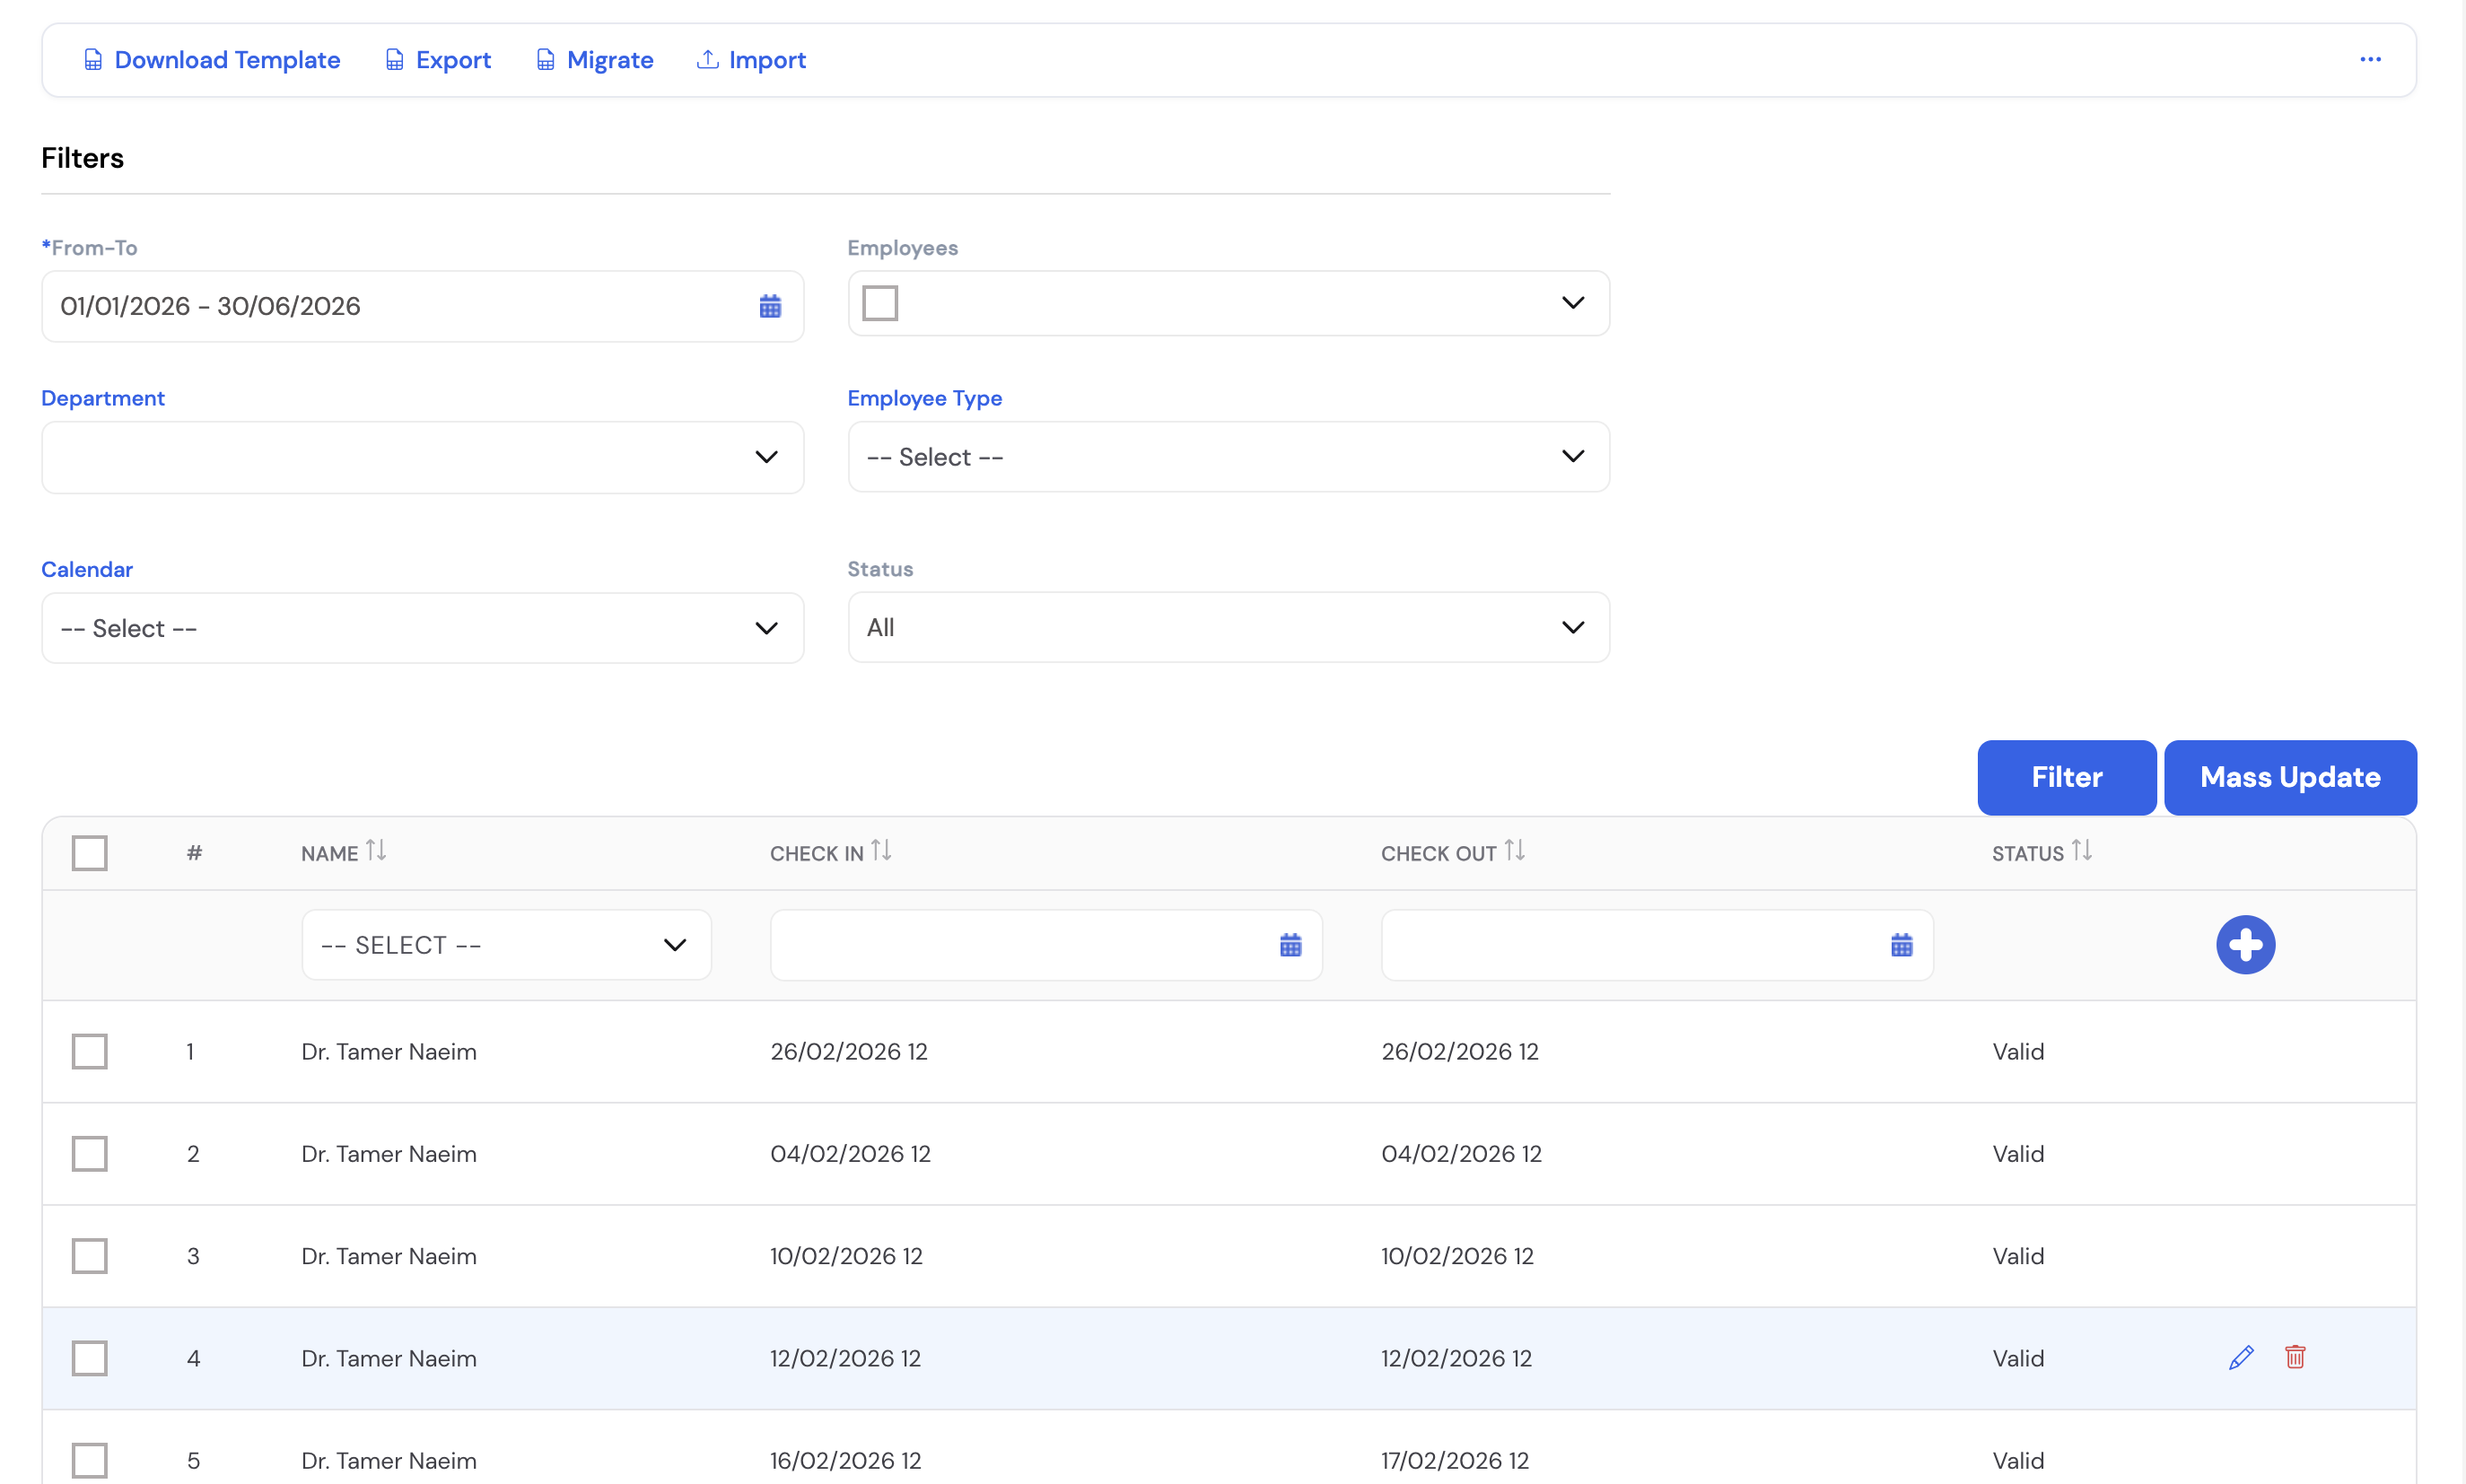
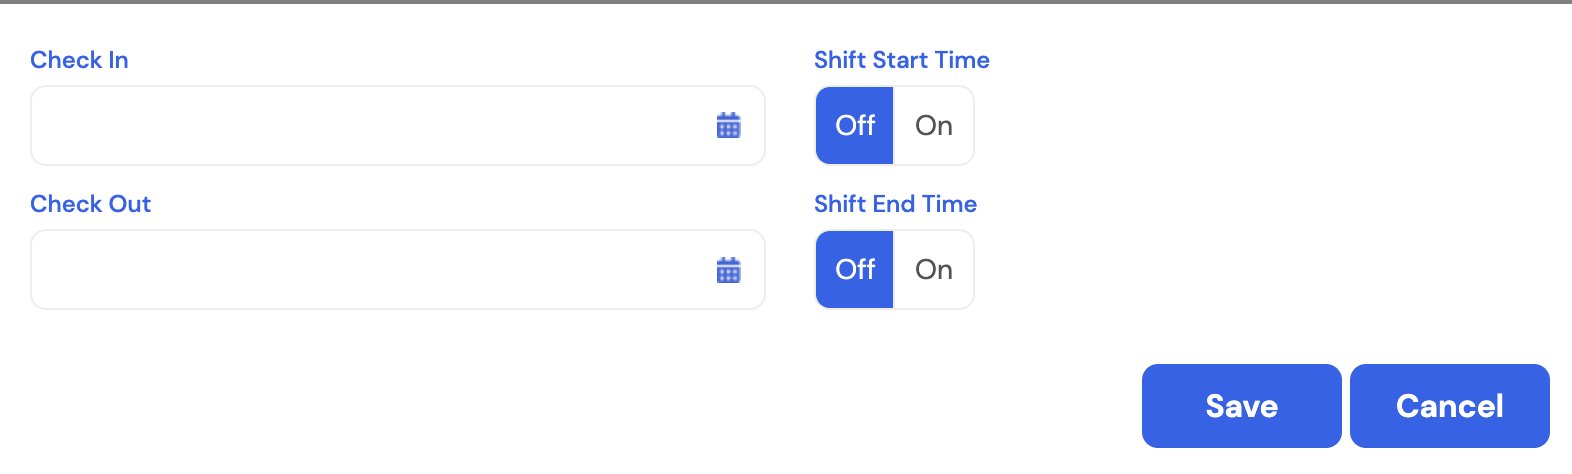
| Column / Field | Description |
|---|---|
| Name | The employee's name |
| Check In | The date and time the employee clocked in |
| Check Out | The date and time the employee clocked out |
| Status | Valid — record accepted; invalid or incomplete records are flagged for review |
Mass Update
Select filtered records and click Mass Update to apply bulk changes. The Mass Update dialog allows you to:
- Override the Check In or Check Out time for all selected records
- Toggle Shift Start Time or Shift End Time to On — which replaces the actual clock-in/out time with the employee's scheduled shift start or end time. Useful when a biometric record is missing or incorrect and you want to default to the scheduled time.
Migrating to Timesheet
Once attendance records have been reviewed and are ready, click the Migrate button to transfer them to the Timesheet (Section 26.2). During migration, the system applies the employee's shift schedule, calendar, and Attendance Rules (Section 23.2.3) to calculate working hours, overtime, and deductions — populating the Timesheet automatically.
Use Download Template → Import to bulk-upload attendance records from an external system or spreadsheet. The template ensures the data is in the correct format for the system to process.
Always review and validate attendance records before migrating to the Timesheet. Once migrated, corrections must be made in the Timesheet itself, not in the Attendance Records screen.
26.4 Project Worksheet
The Project Worksheet is used to record the hours employees work on specific projects — including regular working hours and overtime hours — broken down by day. It is particularly useful when an employee works across more than one project during the same month or even the same day, allowing accurate labor cost allocation per project.
The worksheet is filtered by a date range and a project, and shows all employees assigned to that project (Section 23.17). Each employee row can be expanded to enter their daily hours and overtime. Entries can be submitted for approval using the Send for Approval button.
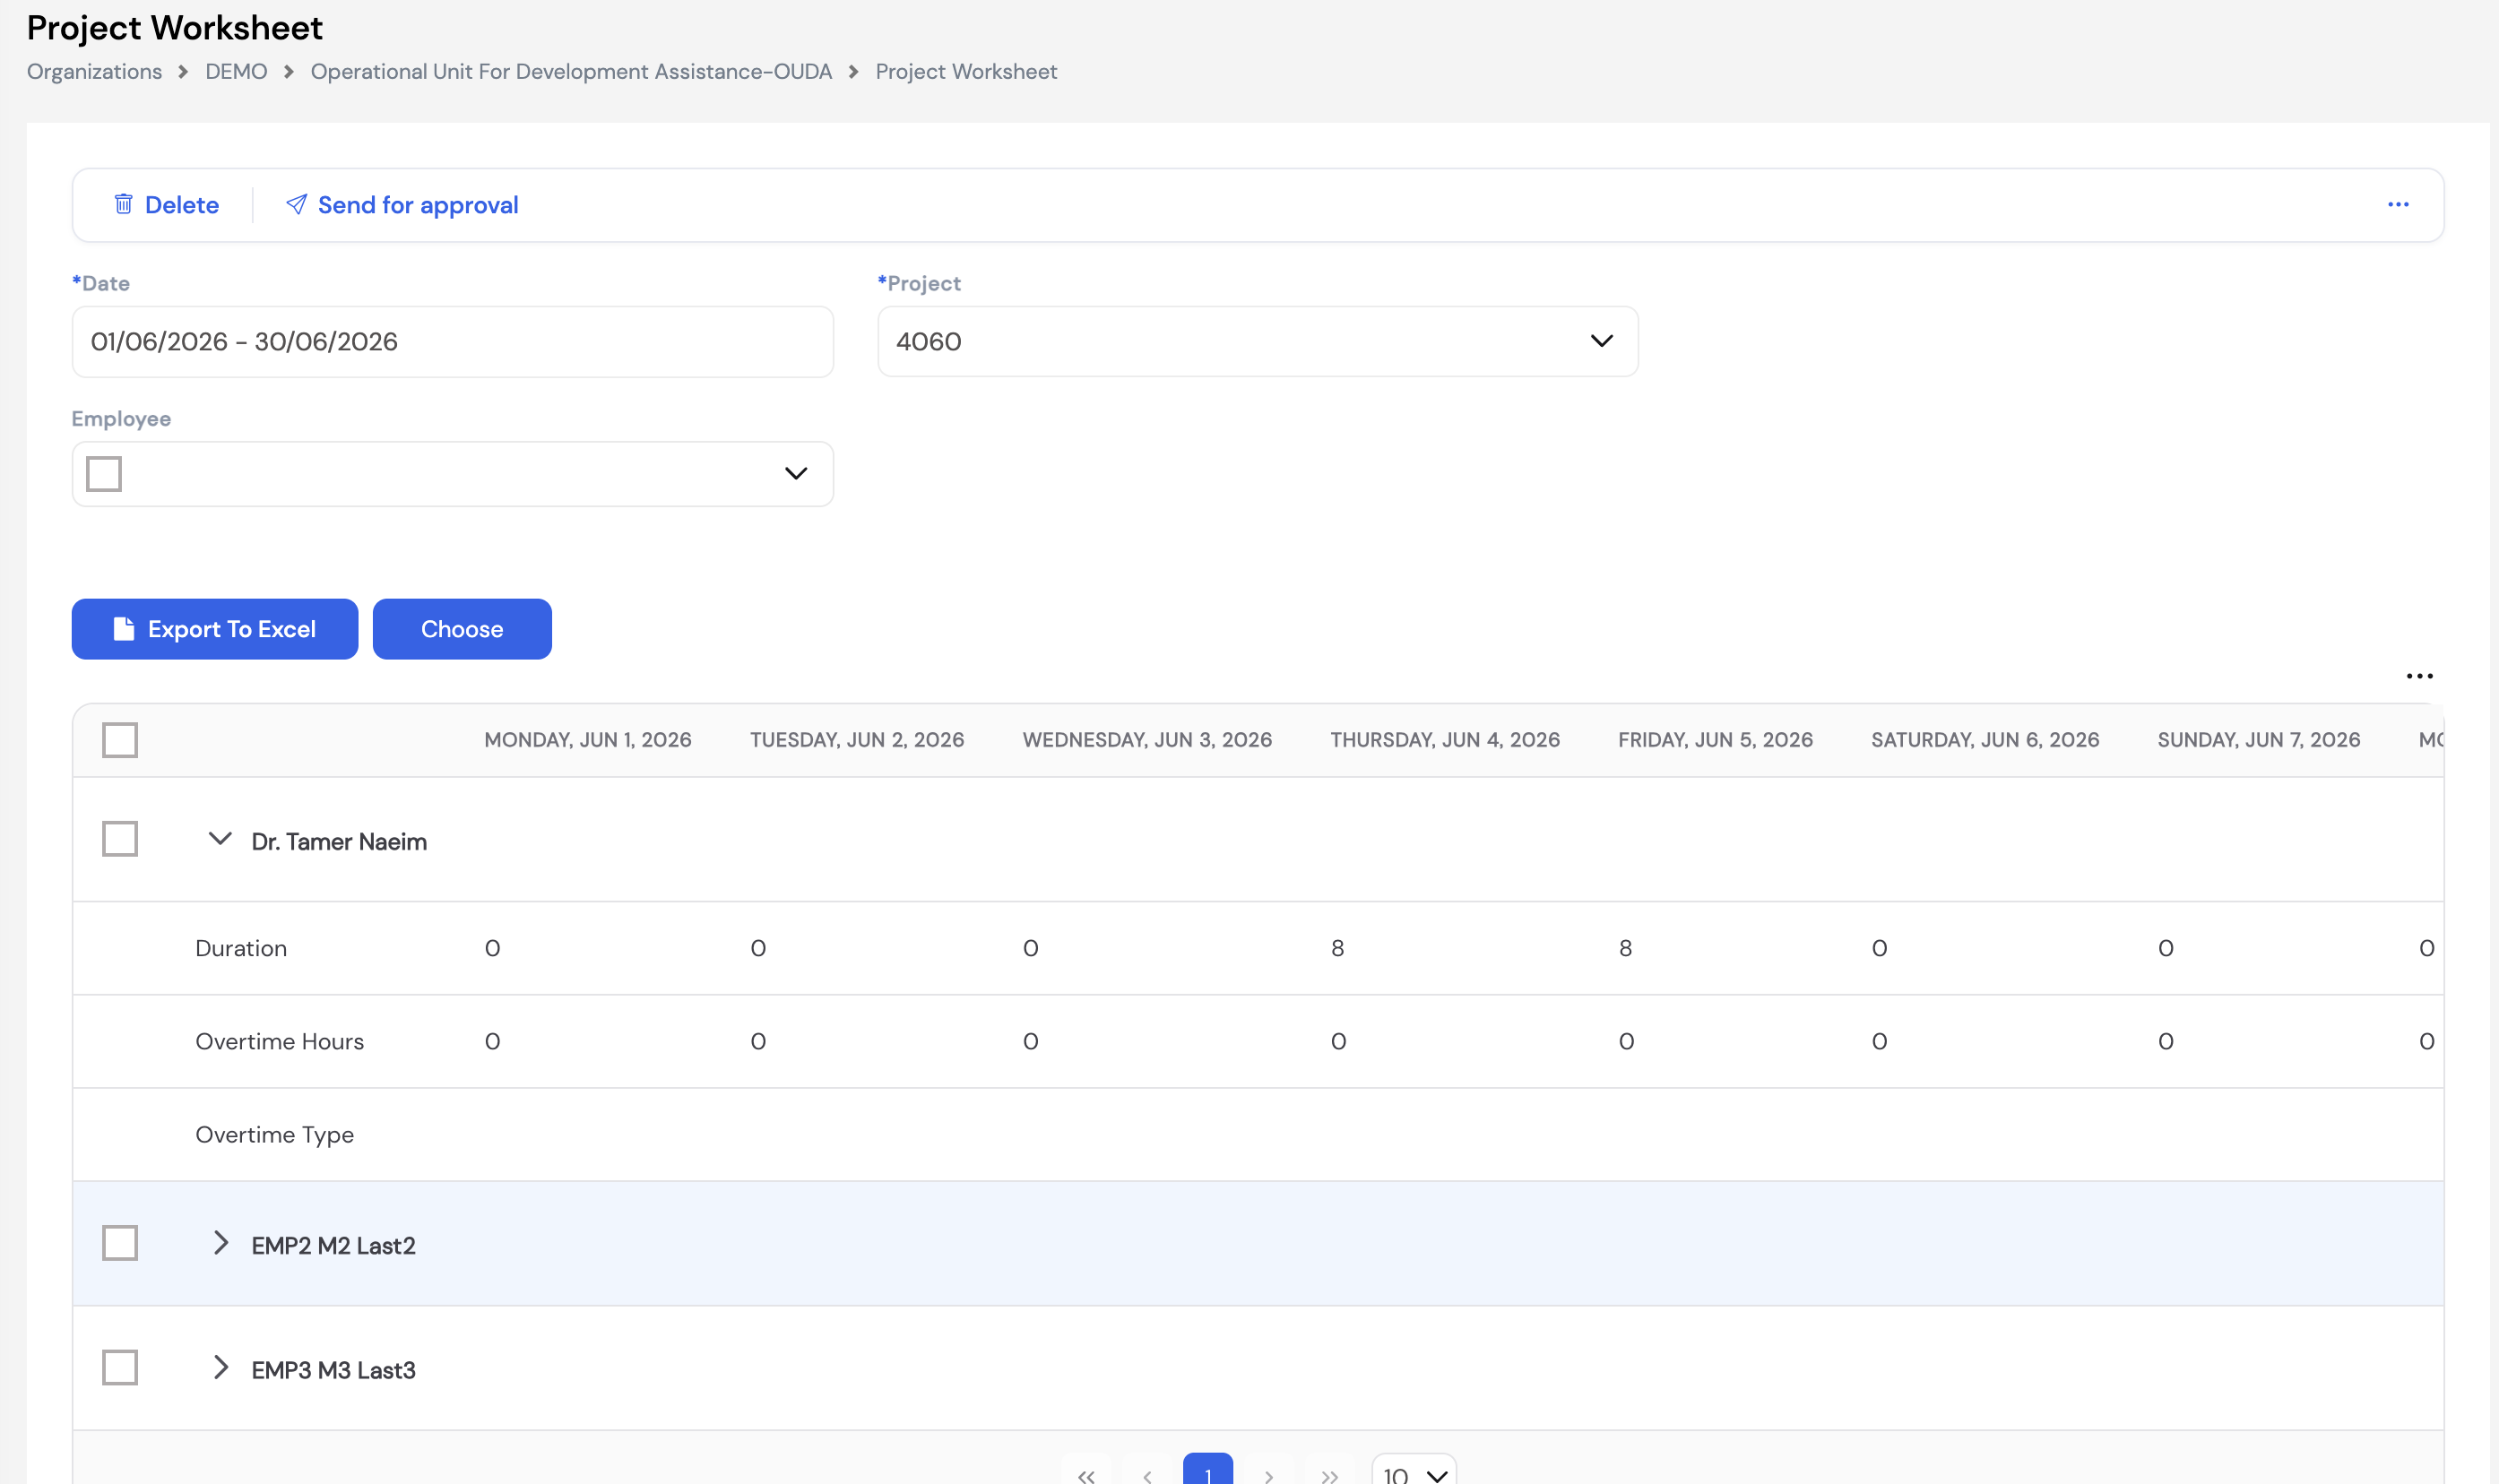
| Field / Column | Description |
|---|---|
| Date | The date range for this worksheet (e.g., full month) |
| Project | The project to log hours against — from the configured Projects list (Section 23.17) |
| Employee | Filter to a specific employee or use Choose to select multiple employees assigned to the project |
| Duration | The number of regular working hours logged for each day of the date range |
| Overtime Hours | The overtime hours worked on this project for each day |
| Overtime Type | The overtime type applicable for the overtime hours logged (e.g., Normal Rate, Weekend Overtime) |
Click the ▼ arrow next to an employee's name to expand their row and enter daily hours. Use Export to Excel to download the worksheet data for offline review or sharing with project managers.
Project Worksheet data is used by the Worksheet Working Hours Plugin and Worksheet Overtime Plugin (Section 12.6) during payroll to calculate pay for project-based employees. The worksheet must be submitted and approved before payroll is run.
27. Salaries and Allowances
The Salaries and Allowances module is where the basic salary and fixed allowances are defined and maintained for each employee. This is the data source used by the Basic Salary Plugin and Fixed Allowance Plugin (Section 12.1) to retrieve the correct salary values during each payroll run.
Each employee has a salary history — allowing salary changes to be tracked over time with effective dates, retroactive adjustments, and a full change log accessible via the history (🔄) button.
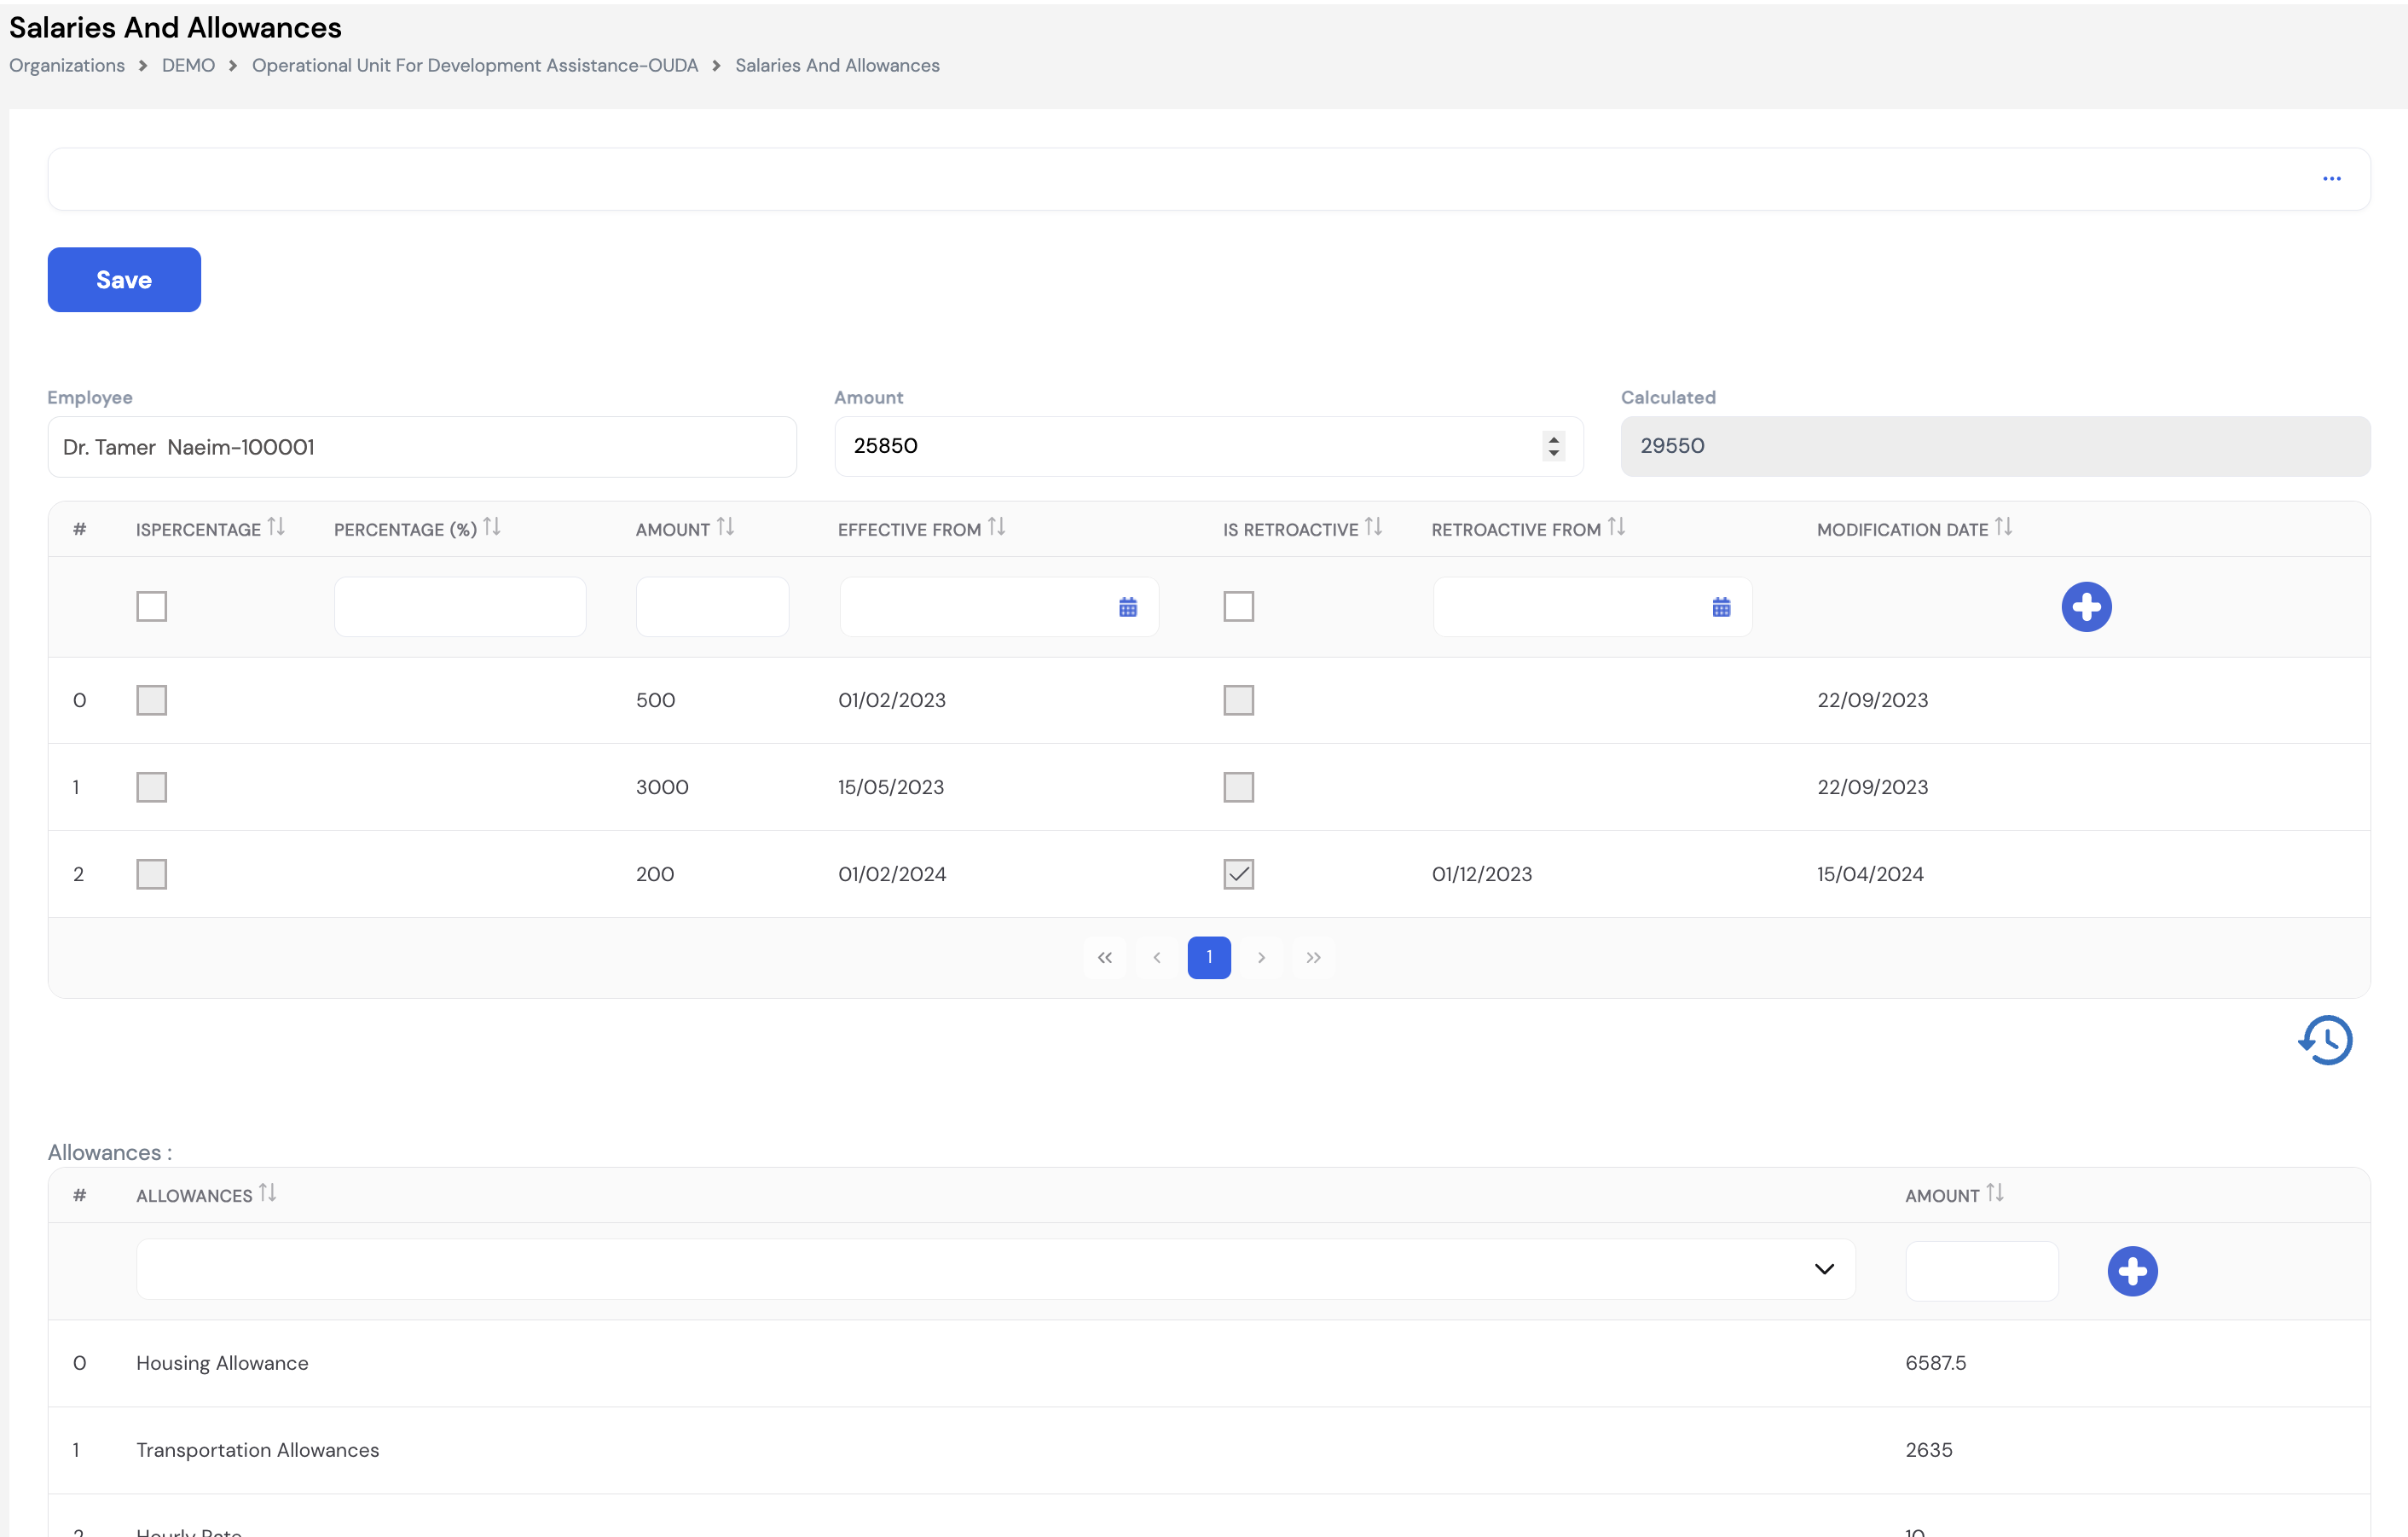
27.1 Salary
The top section displays the employee's salary records. The Amount field shows the current active salary, while Calculated shows the system's computed total (which may include retroactive adjustments or other computed components).
| Column | Description | Required |
|---|---|---|
| Is Percentage | Check this box if the salary entry is expressed as a percentage (e.g., a percentage increase over the previous salary rather than an absolute amount) | Optional |
| Percentage (%) | The percentage value — active when Is Percentage is checked | Optional |
| Amount | The salary amount for this entry (absolute value). Each row in the history represents a salary record at a given point in time. | Required |
| Effective From | The date from which this salary amount is effective. The system uses the most recent effective date that falls on or before the payroll period. | Required |
| Is Retroactive | Check this box to trigger a retroactive salary calculation. When enabled, the system calculates the back-pay amount owed from the Retroactive From date to the current payroll run. | Optional |
| Retroactive From | The date from which the retroactive calculation should begin — used in conjunction with the Retroactive Salary Plugin (Section 12.1) | Optional |
27.2 Fixed Allowances
The Allowances section at the bottom of the screen lists all fixed allowances assigned to the employee. Select an allowance type from the dropdown (from the Fixed Allowances configured in Section 23.18) and enter the Amount. Click the + button to add each allowance row.
These amounts are retrieved by the Fixed Allowance Plugin during payroll and passed to the linked pay element — for example, Housing Allowance, Transportation Allowances, or Hourly Rate.
Click the 🔄 (history/clock) button at the bottom-right of the screen to view a complete audit log of all changes made to this employee's salary and allowances — including who made the change, when, and what the previous value was. This is invaluable for compliance and payroll dispute resolution.
Salary records are additive — each row represents a salary entry at a specific point in time. The system always uses the entry with the most recent Effective From date that falls within or before the current payroll period. Older records are retained as historical data and are not deleted.
28. Expenses
The Expenses module manages employee expense claims — from defining the types of expenses that can be submitted to reviewing and processing approved expense transactions. It is accessed from the left navigation menu under Expenses.
28.1 Expense Types
Expense Types define the categories of expenses that employees can claim through the ESS portal. Each type is linked to a Pay Element, so when an expense claim is approved the Expense Plugin (Section 12.7) automatically retrieves the approved amount and passes it to the linked element during the payroll run.
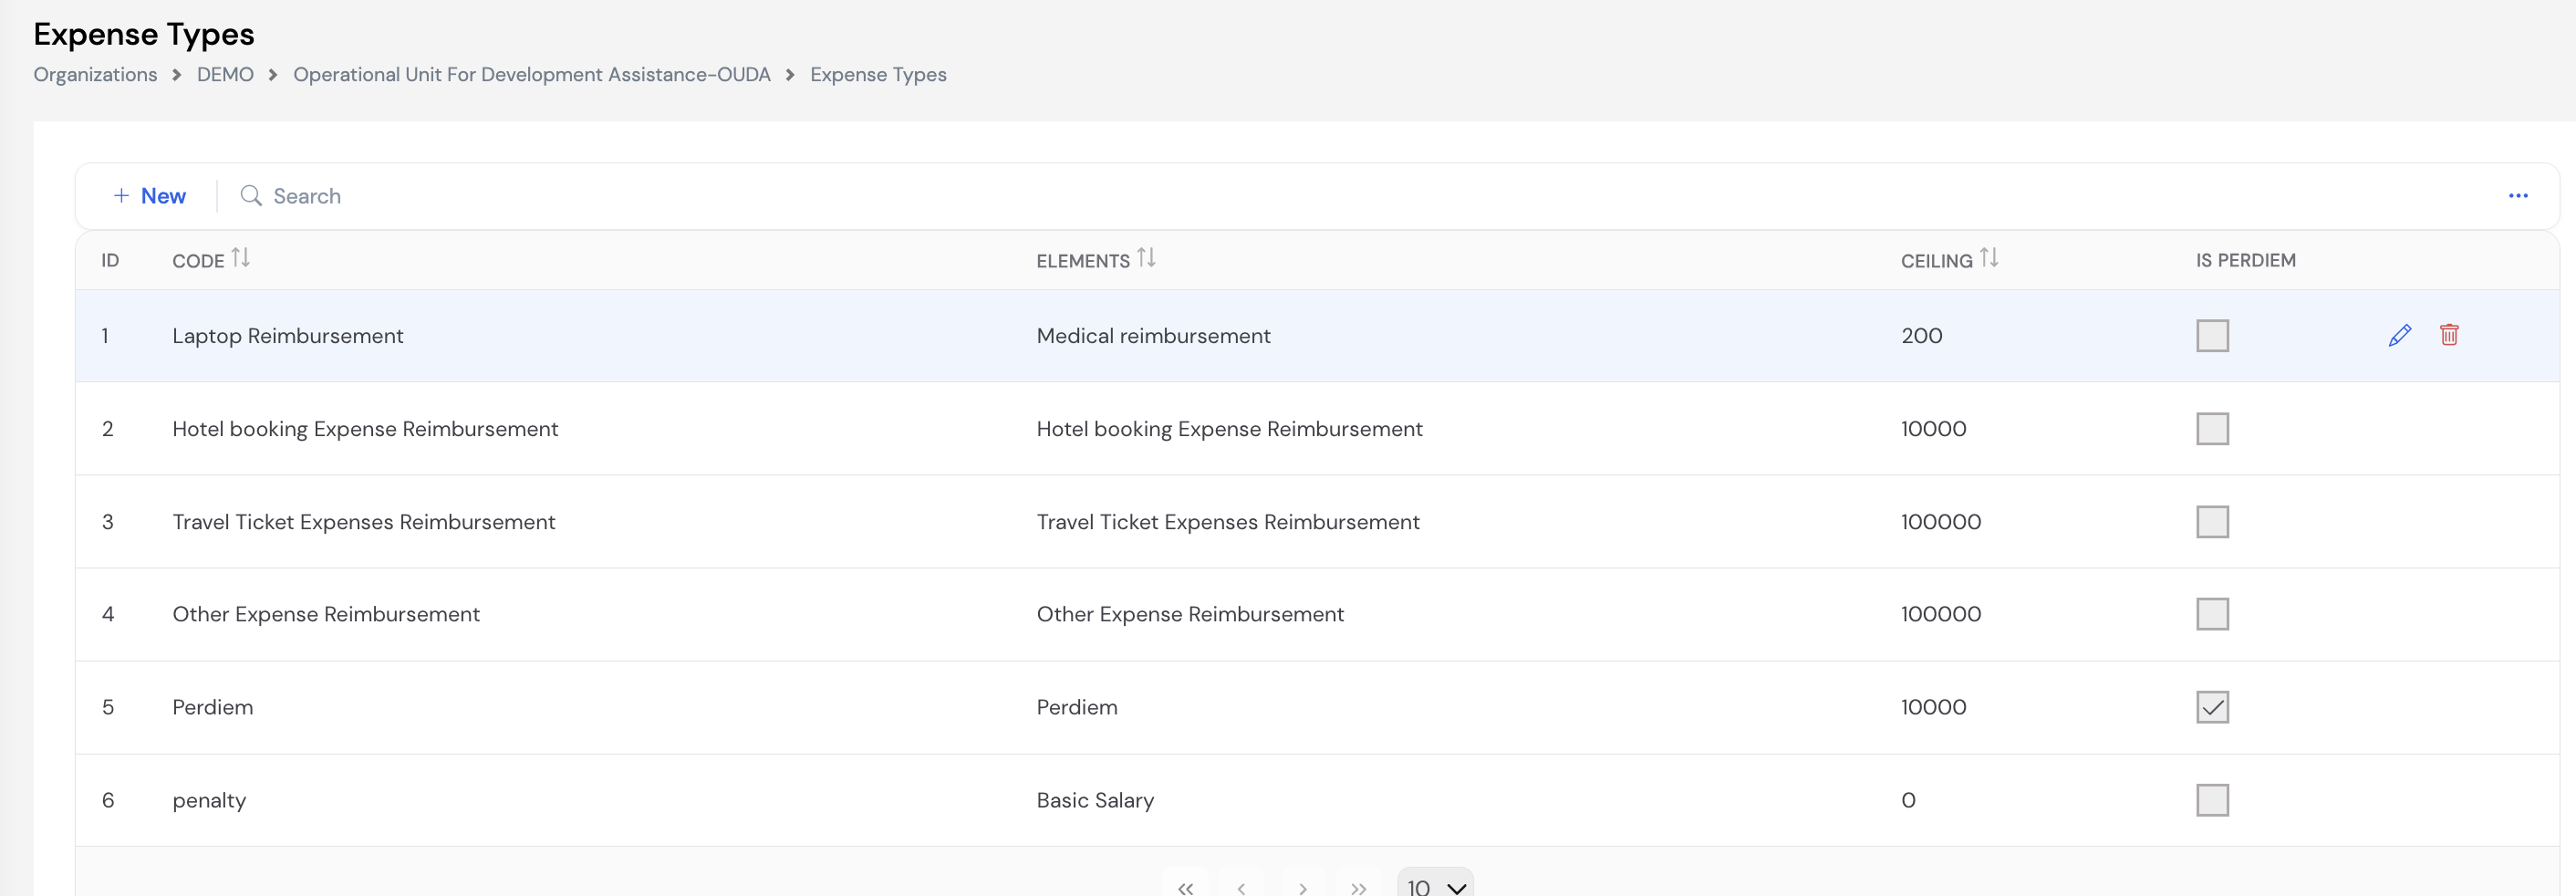
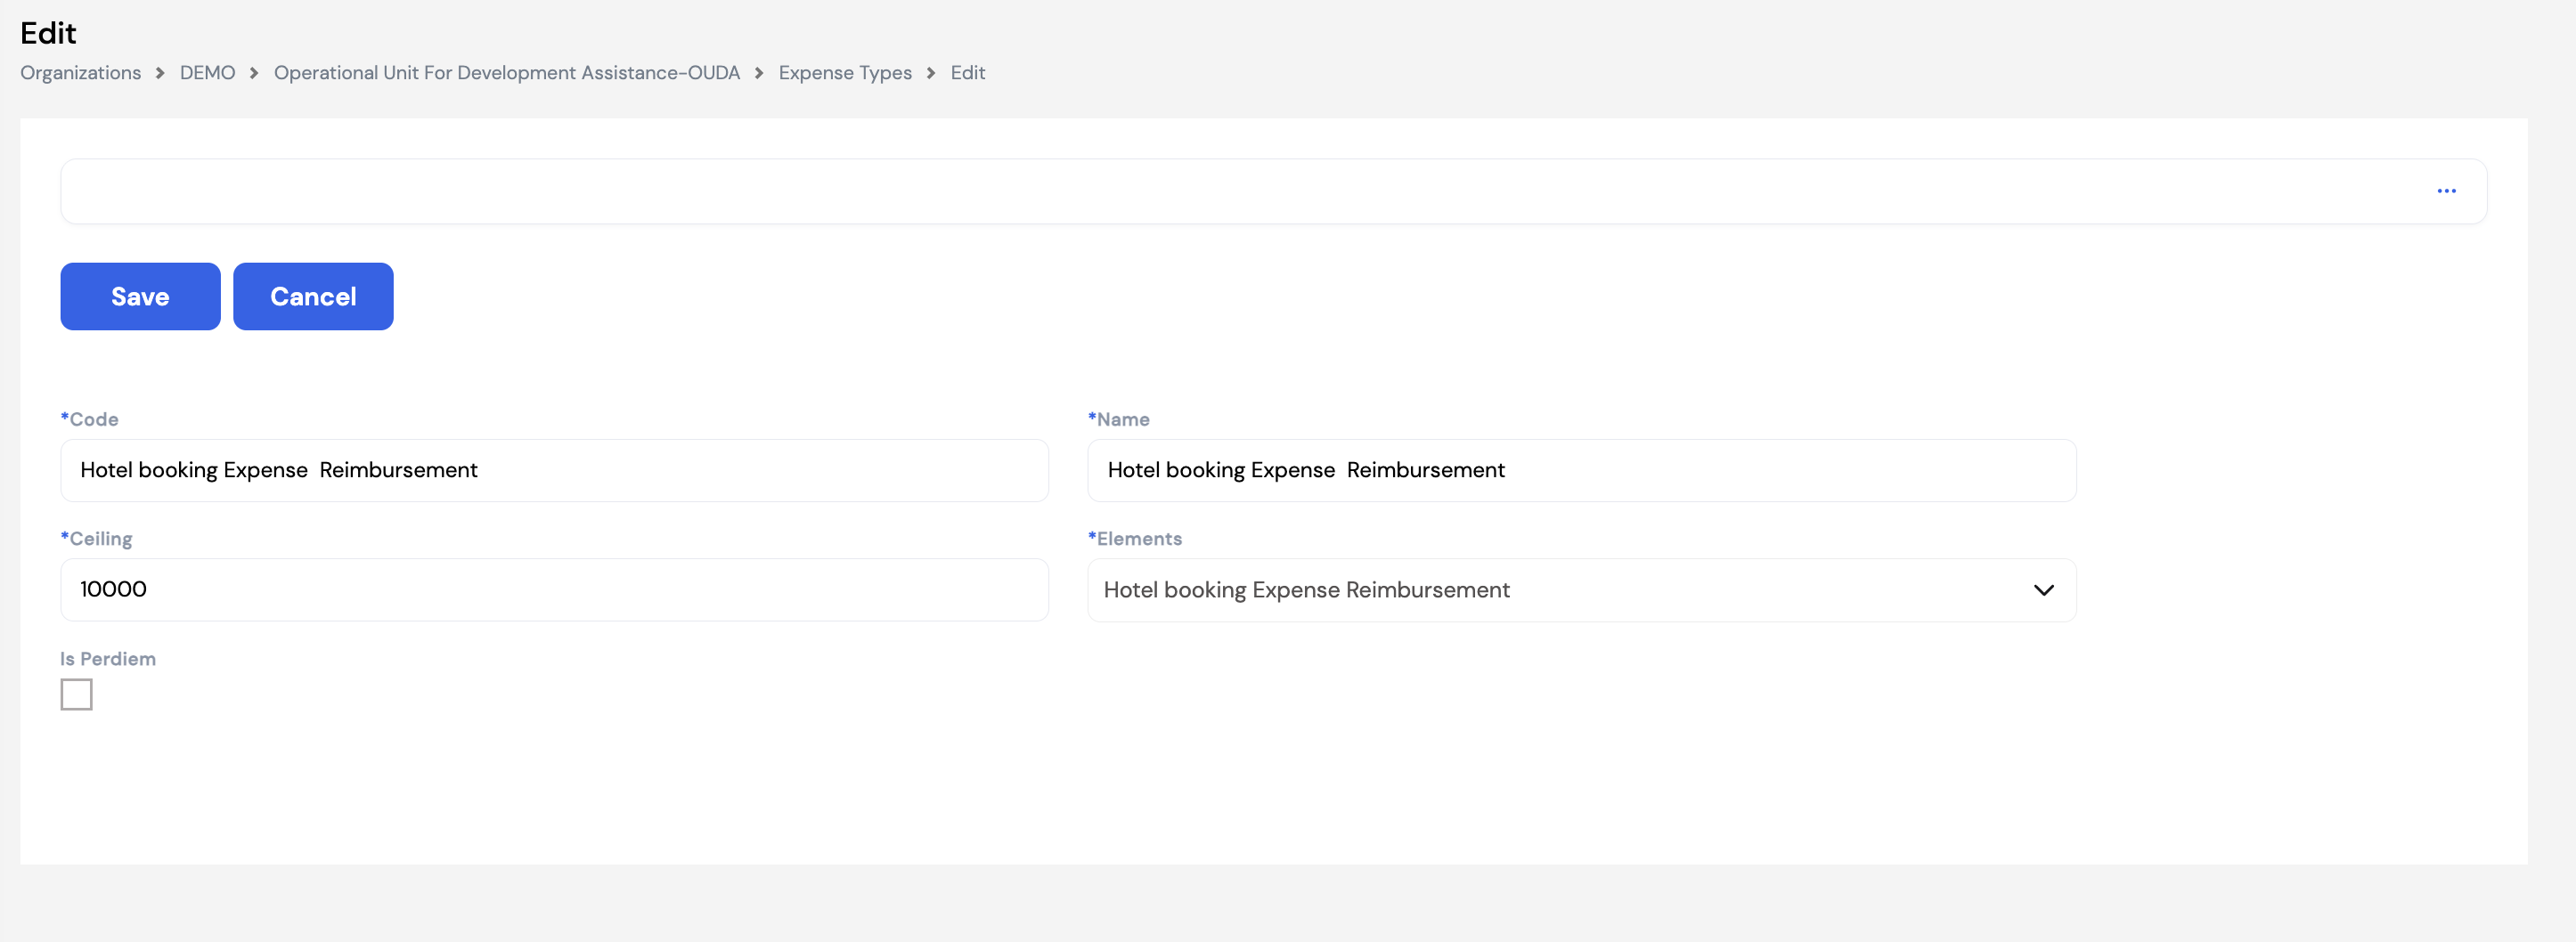
| Field | Description | Required |
|---|---|---|
| Code | A unique code for this expense type (e.g., Hotel booking Expense Reimbursement) | Required |
| Name | The display name of the expense type as it appears to employees in ESS | Required |
| Ceiling | The maximum amount that can be claimed under this expense type per transaction. Set to 0 for no ceiling (unlimited). The system will prevent claims from exceeding this amount. | Required |
| Elements | The Pay Element this expense type is linked to. The Expense Plugin passes the approved claim amount to this element during payroll processing. | Required |
| Is Perdiem | Check this box if this expense type represents a per diem allowance. When checked, the system automatically calculates the per diem amount based on the Per Diem setup (Section 23.14) rather than requiring the employee to enter an amount manually. | Optional |
Only one expense type can be marked as Per Diem. The Is Perdiem checkbox should be checked on the single dedicated per diem expense type. When an employee submits an expense claim that includes per diem, the system will automatically populate the amount based on the destination and grade rules configured in Section 23.14.
28.2 Expense Transactions
Expense Transactions is the HR-side equivalent of the expense claim submission in the ESS portal. HR administrators can create expense claims directly on behalf of employees — following the same structure as employee-submitted claims. Each transaction can contain multiple expense line items of different types, supports multi-currency amounts, and can be optionally linked to an approved travel transaction.
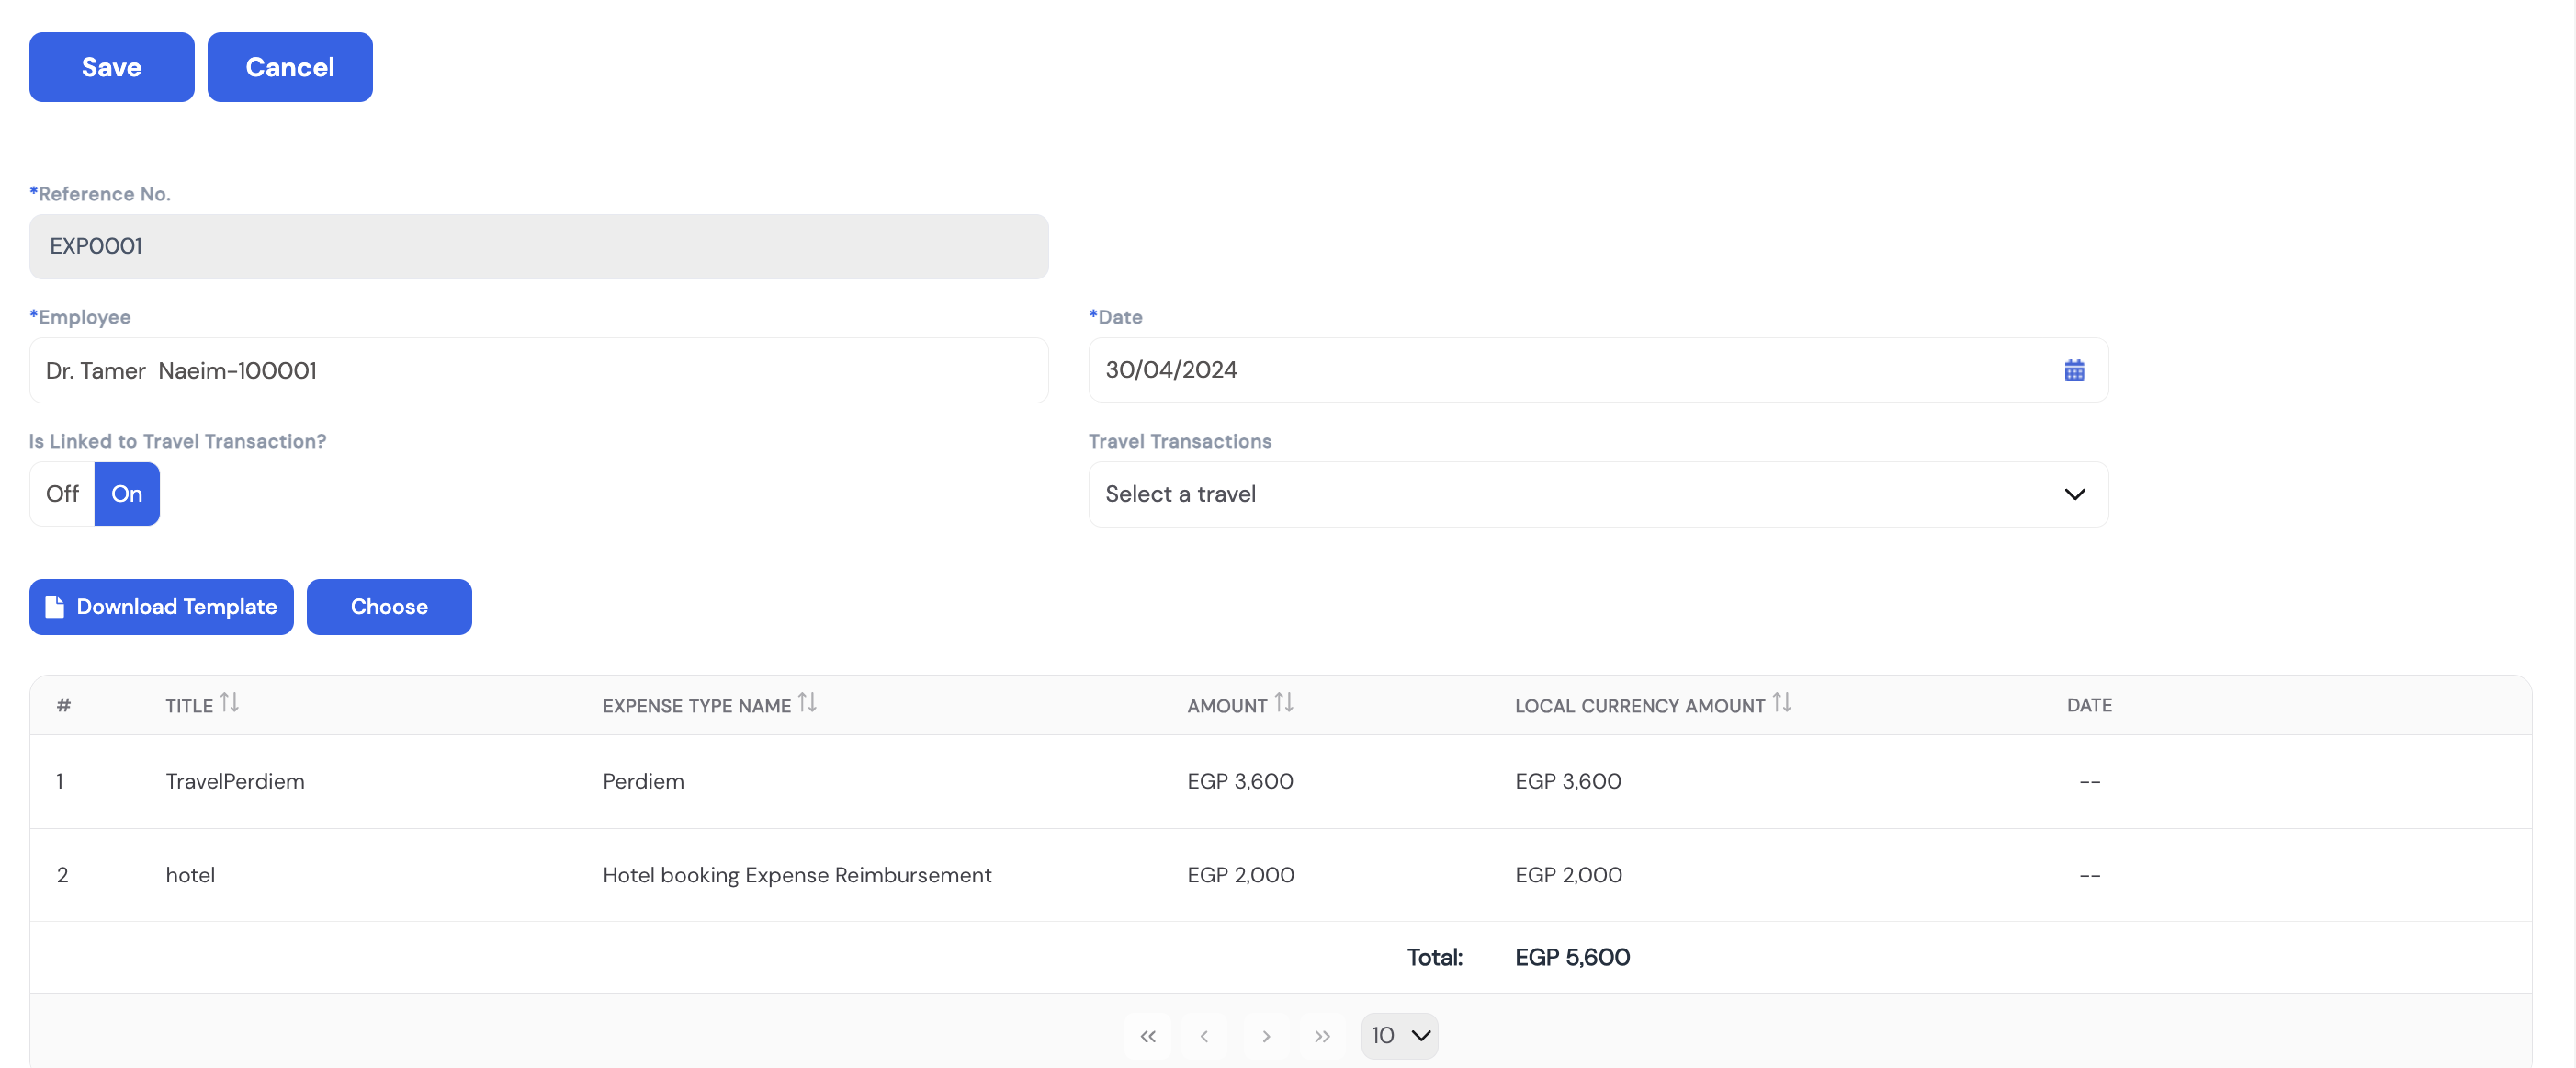
| Field | Description | Required |
|---|---|---|
| Reference No. | Auto-generated unique reference for this expense claim (e.g., EXP0001) | Auto |
| Employee | The employee for whom the expense claim is being submitted | Required |
| Date | The date of the expense claim | Required |
| Is Linked to Travel Transaction | Toggle — set to On to link this expense claim to an approved travel request. When linked, the per diem amount is automatically calculated based on the travel destination and employee grade (Section 23.14). | Optional |
| Travel Transactions | Select the approved travel transaction this expense claim is associated with — active when Is Linked to Travel Transaction is On | Optional |
Expense Line Items
Each expense transaction can contain multiple line items — one per expense type claimed. Click the + button or use Choose to add items, or use Download Template to bulk-upload line items via Excel.
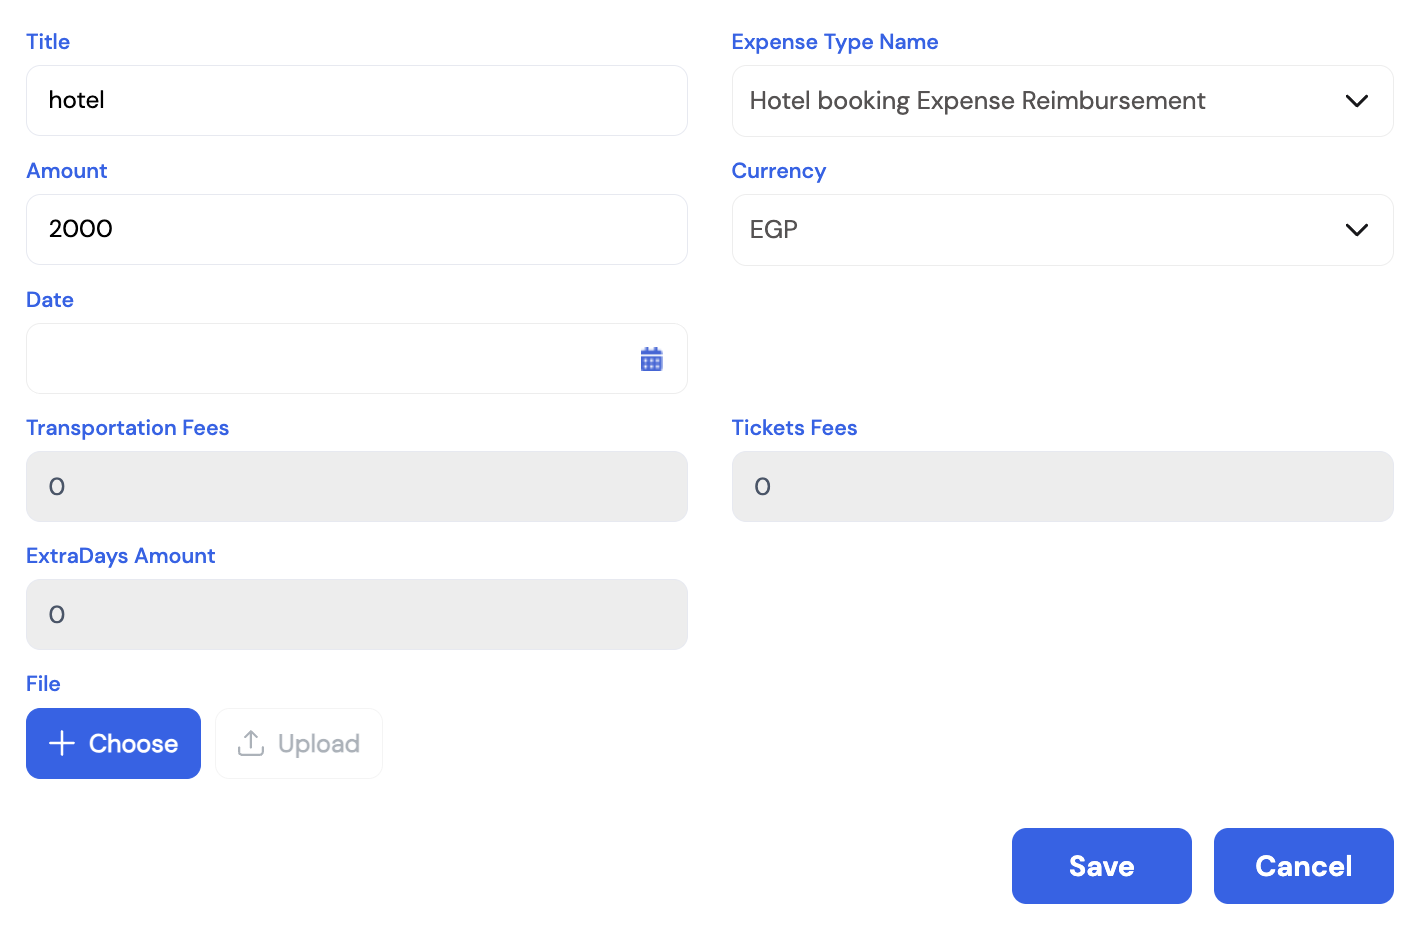
| Field | Description | Required |
|---|---|---|
| Title | A short description of this expense item (e.g., hotel, flight ticket) | Required |
| Expense Type Name | The expense type from Section 28.1 (e.g., Hotel booking Expense Reimbursement) | Required |
| Amount | The expense amount claimed for this item | Required |
| Currency | The currency of the expense — supports multi-currency claims. The system converts to the base currency using the configured exchange rates. | Required |
| Date | The date on which this specific expense was incurred | Optional |
| Transportation Fees / Tickets Fees / Extra Days Amount | Auto-populated from the Per Diem setup (Section 23.14) when the expense type is a per diem item — not entered manually | Auto |
| File | Upload the receipt or supporting document for this expense item | Optional |
When the expense claim is approved and the payroll run is executed, the Expense Plugin (Section 12.7) retrieves the total approved amount for each expense type and passes it to the linked Pay Element automatically.
29. Send Payslip
The Send Payslip module allows payroll administrators to distribute payslips to employees by email directly from Magnar HCM. Payslips are generated from a .repx report template configured in the system's application settings by the administrator or implementation team. Each payslip is sent to the employee's registered email address.
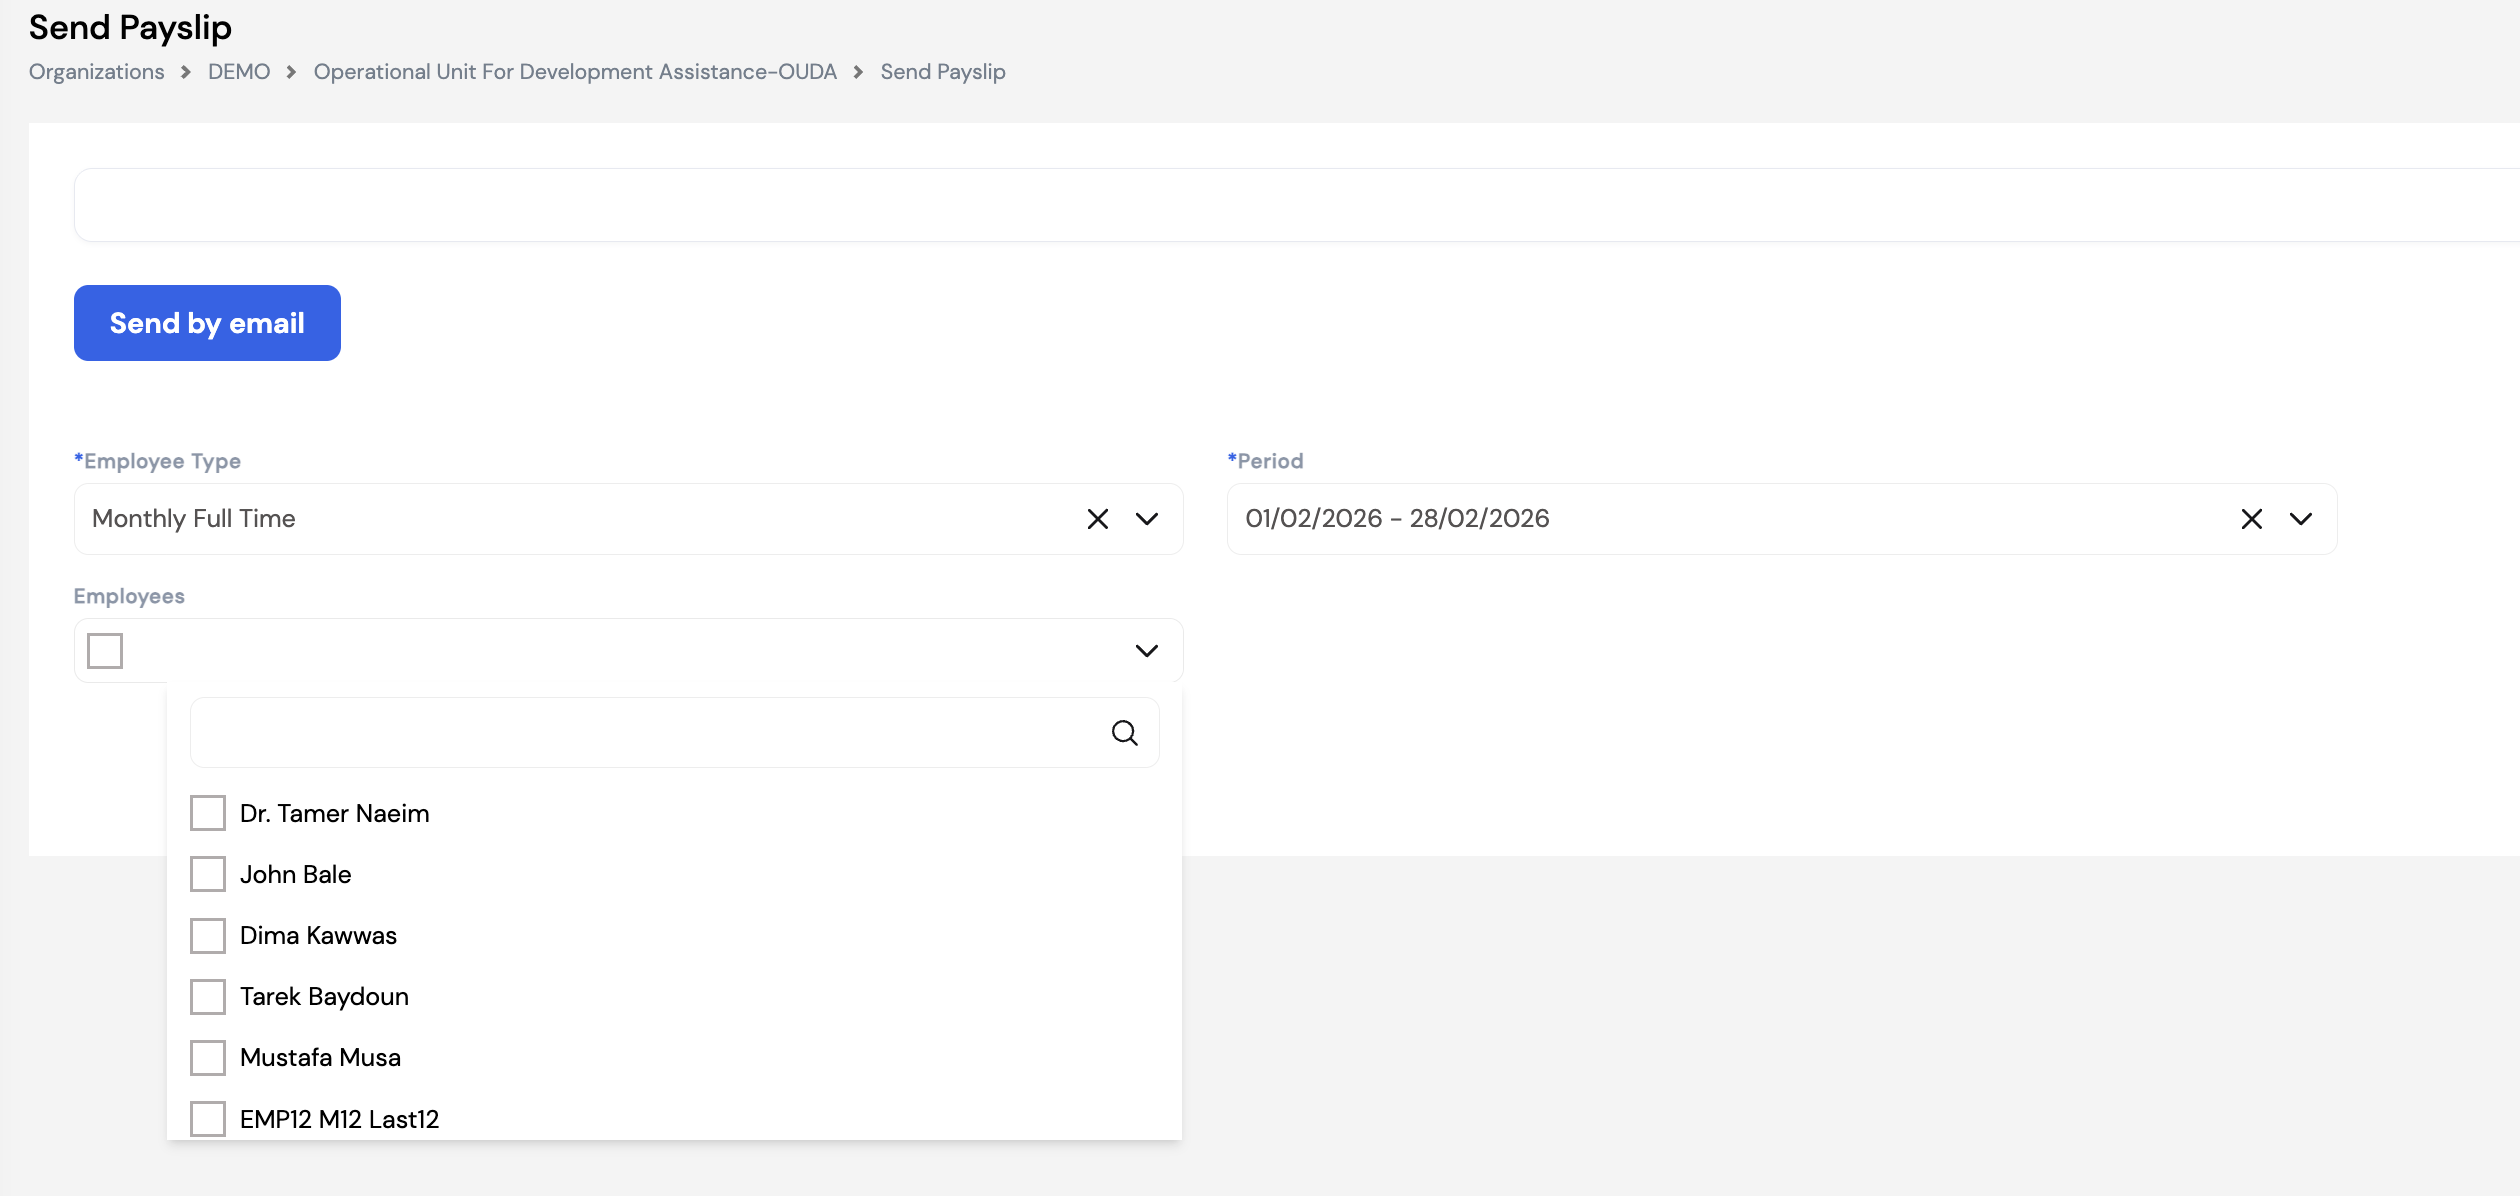
| Field | Description | Required |
|---|---|---|
| Employee Type | Select the employee type group whose payslips you want to send. Only employees of the selected type for the selected period will be included. | Required |
| Period | Select the payroll period for which payslips should be sent (e.g., 01/02/2026 – 28/02/2026). Only posted payroll periods will be available. | Required |
| Employees | Optionally narrow the send to specific employees. Leave blank to send to all employees of the selected type for the period. Use the search box in the dropdown to find employees quickly. | Optional |
Once the filters are set, click Send by email to dispatch the payslips. Each employee will receive their individual payslip at the email address on their employee profile.
Payslips can only be sent for posted payroll periods. Ensure the payroll run for the selected period has been fully processed, reviewed, and posted before sending payslips. Also verify that the Outgoing Email Configuration (Section 23.1.7) is correctly set up — without a valid mail server configuration, emails will not be delivered.
Employees can also view and download their own payslips at any time through the ESS portal — provided the payslip report template is marked as Is ESS in Reports Setup (Section 23.5.1). Sending by email is an additional convenience, not the only way employees can access their payslips.
30. Configuration
The Configuration module contains advanced system-level settings for the company. It is accessed from the left navigation menu under Configuration and is typically managed by system administrators during implementation or when system behavior needs to be adjusted.
30.1 Company Configurations
Company Configurations is a key settings screen that controls how specific parts of the system behave — from notifications and workflow approvals to leave rules, payroll settings, and hierarchy levels. Changes here affect system-wide behavior and should be reviewed carefully during implementation.
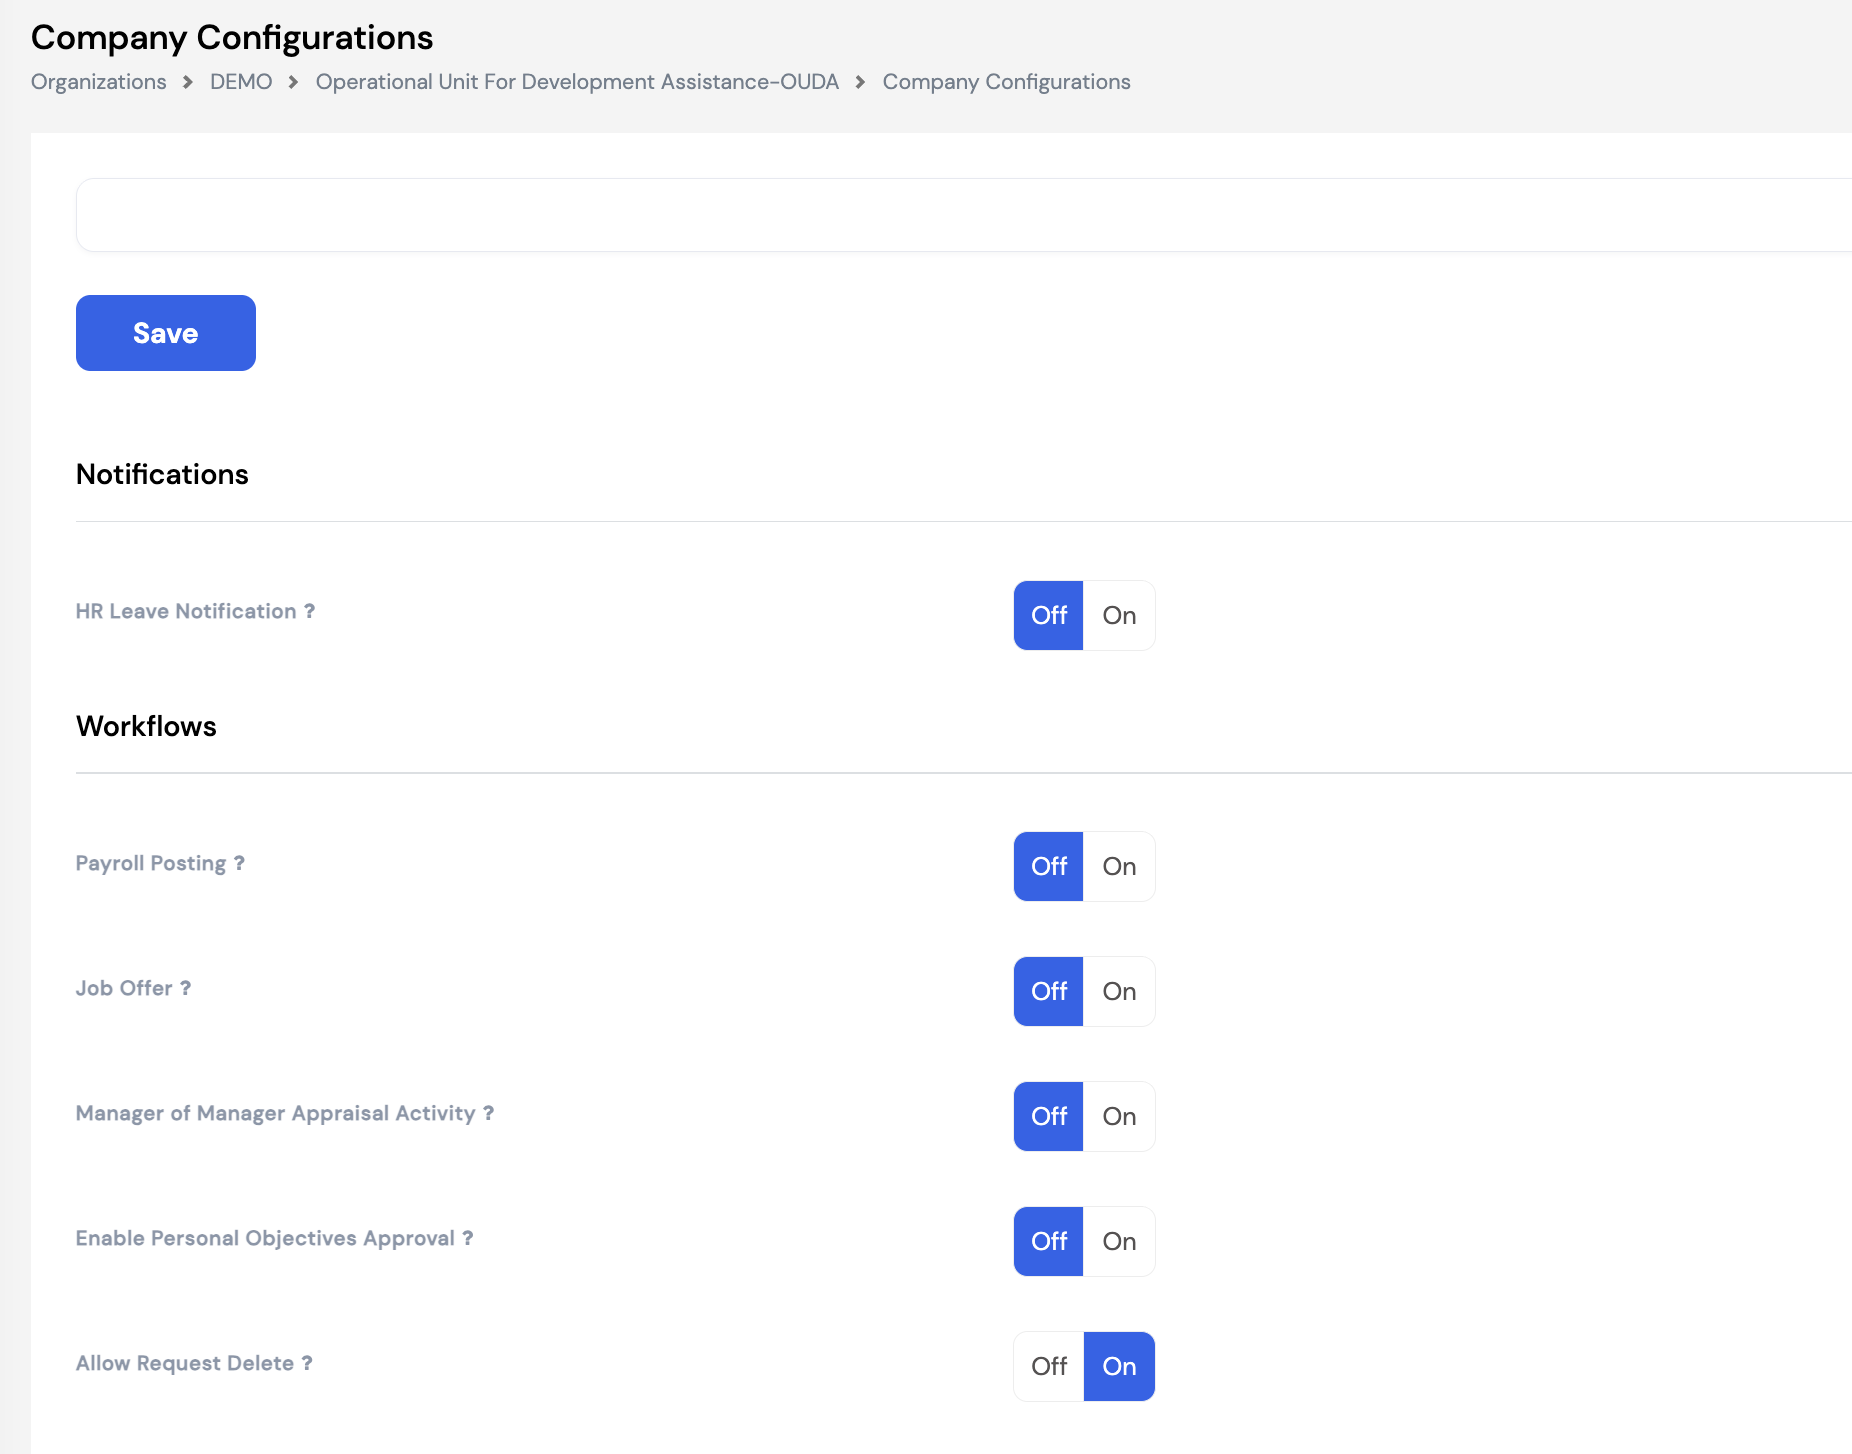
Notifications
| Setting | Description |
|---|---|
| HR Leave Notification | When On, HR receives a notification each time an employee submits a leave request, regardless of whether HR is in the approval chain |
Workflows
| Setting | Description |
|---|---|
| Payroll Posting | When On, the payroll posting action is subject to a workflow approval — a designated approver must sign off before payroll is posted and closed |
| Job Offer | When On, job offer letters generated through the recruitment module require approval before being sent to candidates |
| Manager of Manager Appraisal Activity | When On, the manager's manager is included as an activity participant in the appraisal process |
| Enable Personal Objectives Approval | When On, employee personal objectives submitted through ESS require manager approval before being activated |
| Allow Request Delete | When On, employees are permitted to delete their own submitted requests (e.g., leave, overtime) before they are processed or approved |
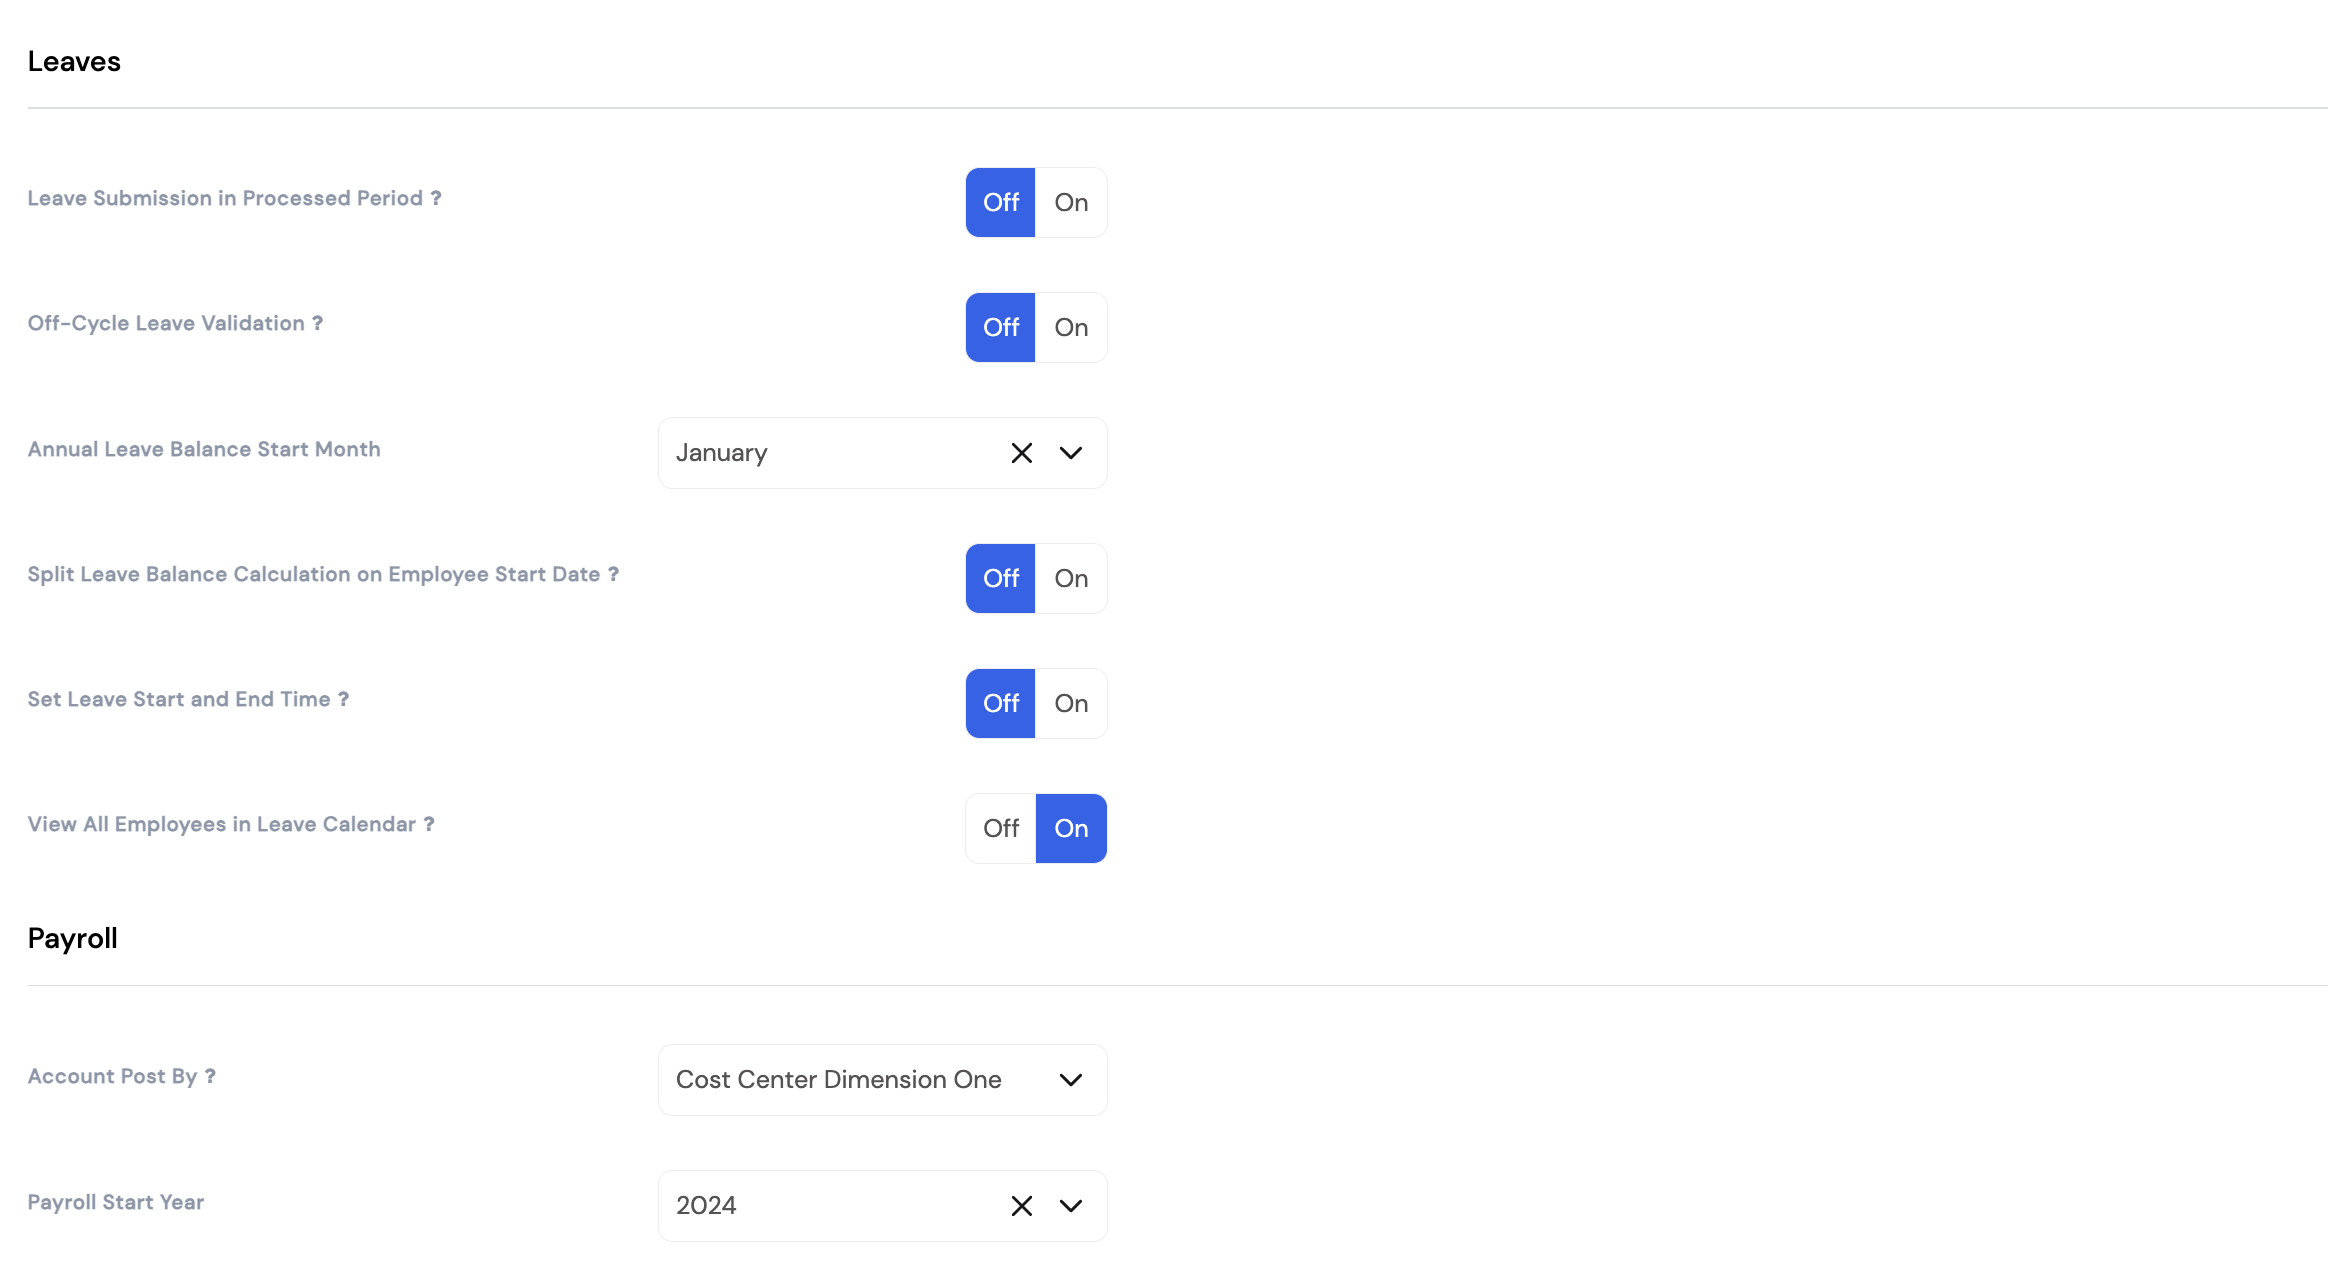
Leaves
| Setting | Description |
|---|---|
| Leave Submission in Processed Period | When On, employees can submit leave requests for periods that have already been processed in payroll. When Off, leave submissions are blocked for closed payroll periods. |
| Off-Cycle Leave Validation | When On, a Minimum Days threshold is enforced — an employee's leave request must be for at least this number of days in order to qualify for off-cycle salary payment (advance leave pay). Requests below the minimum will not be eligible for the off-cycle leave payroll run. This prevents very short leave periods from triggering an off-cycle payroll processing. |
| Annual Leave Balance Start Month | Defines the month in which the annual leave balance year starts (e.g., January = leave year runs January–December). This affects how leave balances are reset and carried forward. |
| Split Leave Balance Calculation on Employee Start Date | When On, the leave balance for the first year is prorated based on the employee's start date rather than granting the full annual entitlement from day one |
| Set Leave Start and End Time | When On, employees can specify the exact start and end time of their leave (e.g., half-day leave) when submitting a leave request |
| View All Employees in Leave Calendar | When On, all employees can view the leave calendar for all their colleagues in the ESS portal. When Off, the calendar is restricted to the employee's own leave only. |
Payroll
| Setting | Description |
|---|---|
| Account Post By | Defines which cost center dimension is used as the primary allocation axis when posting payroll to the ERP accounting system (e.g., Cost Center Dimension One = Branch) |
| Payroll Start Year | The year in which Magnar HCM started processing payroll for this company. This is critical for leave balance processing — the system uses the Opening Balance for this year and Carried Forward for all subsequent years. See Section 24.3 for details. |

General
| Setting | Description |
|---|---|
| Attachment Extensions | Controls which file types are allowed when employees upload attachments (e.g., Any = all file types, or restrict to specific extensions such as PDF, JPG) |
| Human Resource Manager | The designated HR Manager for this company — used as a dynamic approver reference ([HR]) in workflow setups and notifications |
| Timesheet Submitter | Defines who is responsible for submitting timesheets — either the employee themselves or a designated Time Keeper role |
| Magnar Recruitment Integration | When On, enables integration with the Magnar Recruitment module for end-to-end hiring workflows |
Hierarchy Level
The Hierarchy Level section defines the number of management levels above an employee that are involved in various system activities. A value of 1 means only the direct line manager is involved; a value of 2 means the manager and the manager's manager are both included.
| Activity | Value | Meaning |
|---|---|---|
| Initialize Appraisal | 1 | Only the direct manager can initiate the appraisal process |
| Objectives | 1 | Only the direct manager can set and approve employee objectives |
| Timesheet Submission | 2 | Timesheets are submitted to two levels of management (direct manager + manager's manager) |
| Request on Behalf | 1 | Only the direct manager can submit requests on behalf of an employee |
| Employee Schedule | 1 | Only the direct manager can view and modify an employee's schedule |
| Leave Calendar | 1 | Only the direct manager's level is included in the leave calendar visibility scope |
Changes to Company Configurations take effect immediately after saving. Modifying settings like Payroll Start Year, Annual Leave Balance Start Month, or Account Post By can have significant impact on existing payroll and leave data. Consult your implementation team before making changes to these settings on a live system.
30.2 Workflows Mapping
Workflows Mapping is where you link each request type to its corresponding Workflow Setup (Section 23.13). Rather than selecting the workflow on each individual leave type, loan, or general request configuration, this screen provides a centralized view of all request types and their assigned workflows — making it easy to review and update the approval chains for every module from one place.
Click the ✏️ edit icon on any row to assign or change the workflow for that request type.
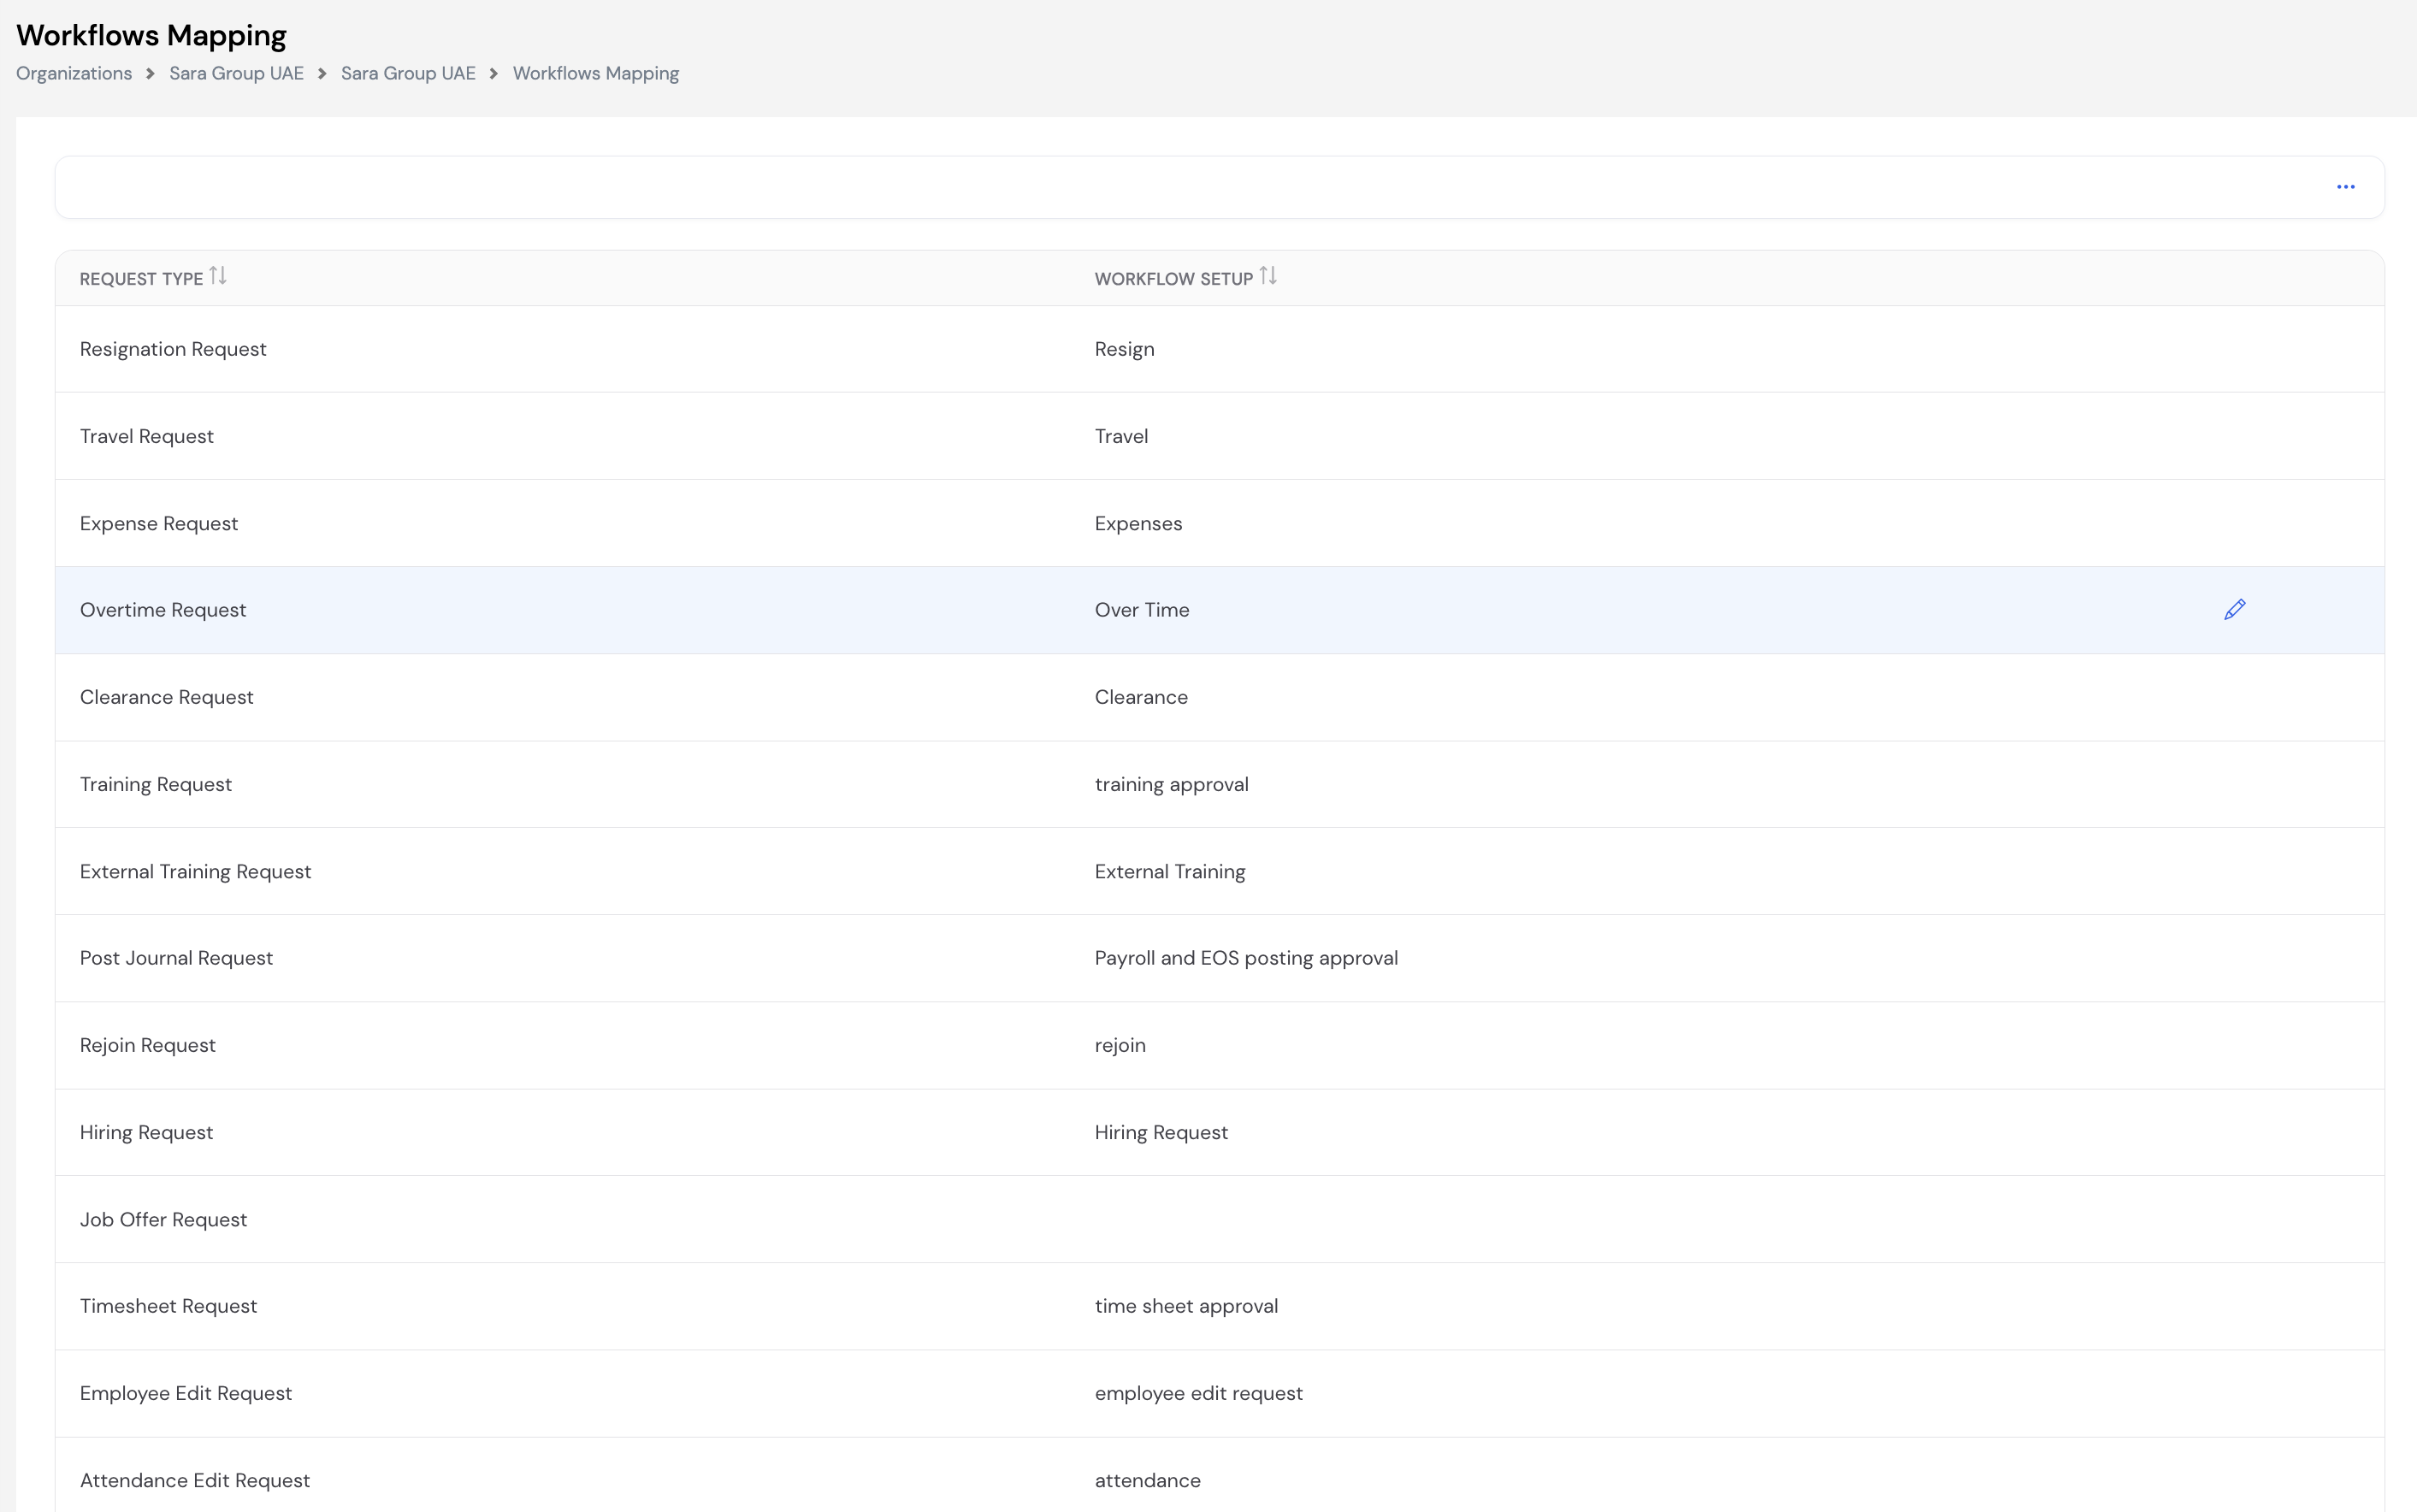

Request types with an empty Workflow Setup column have no approval workflow assigned — requests of that type will be processed without requiring approval. Assign a workflow if approvals are required for that request type.
The Post Journal Request mapping controls the approval workflow for payroll and EOS posting — if Payroll Posting is enabled in Company Configurations (Section 30.1), this mapping determines who must approve before payroll is posted.
30.3 Timer Job
Timer Job allows administrators to create automated scheduled tasks that run at configurable intervals — sending alert emails to selected employees or HR staff based on custom data queries. This is used to build proactive notifications such as contract expiry alerts, visa expiry warnings, ID renewal reminders, or any other date-based or condition-based alert the organization needs.
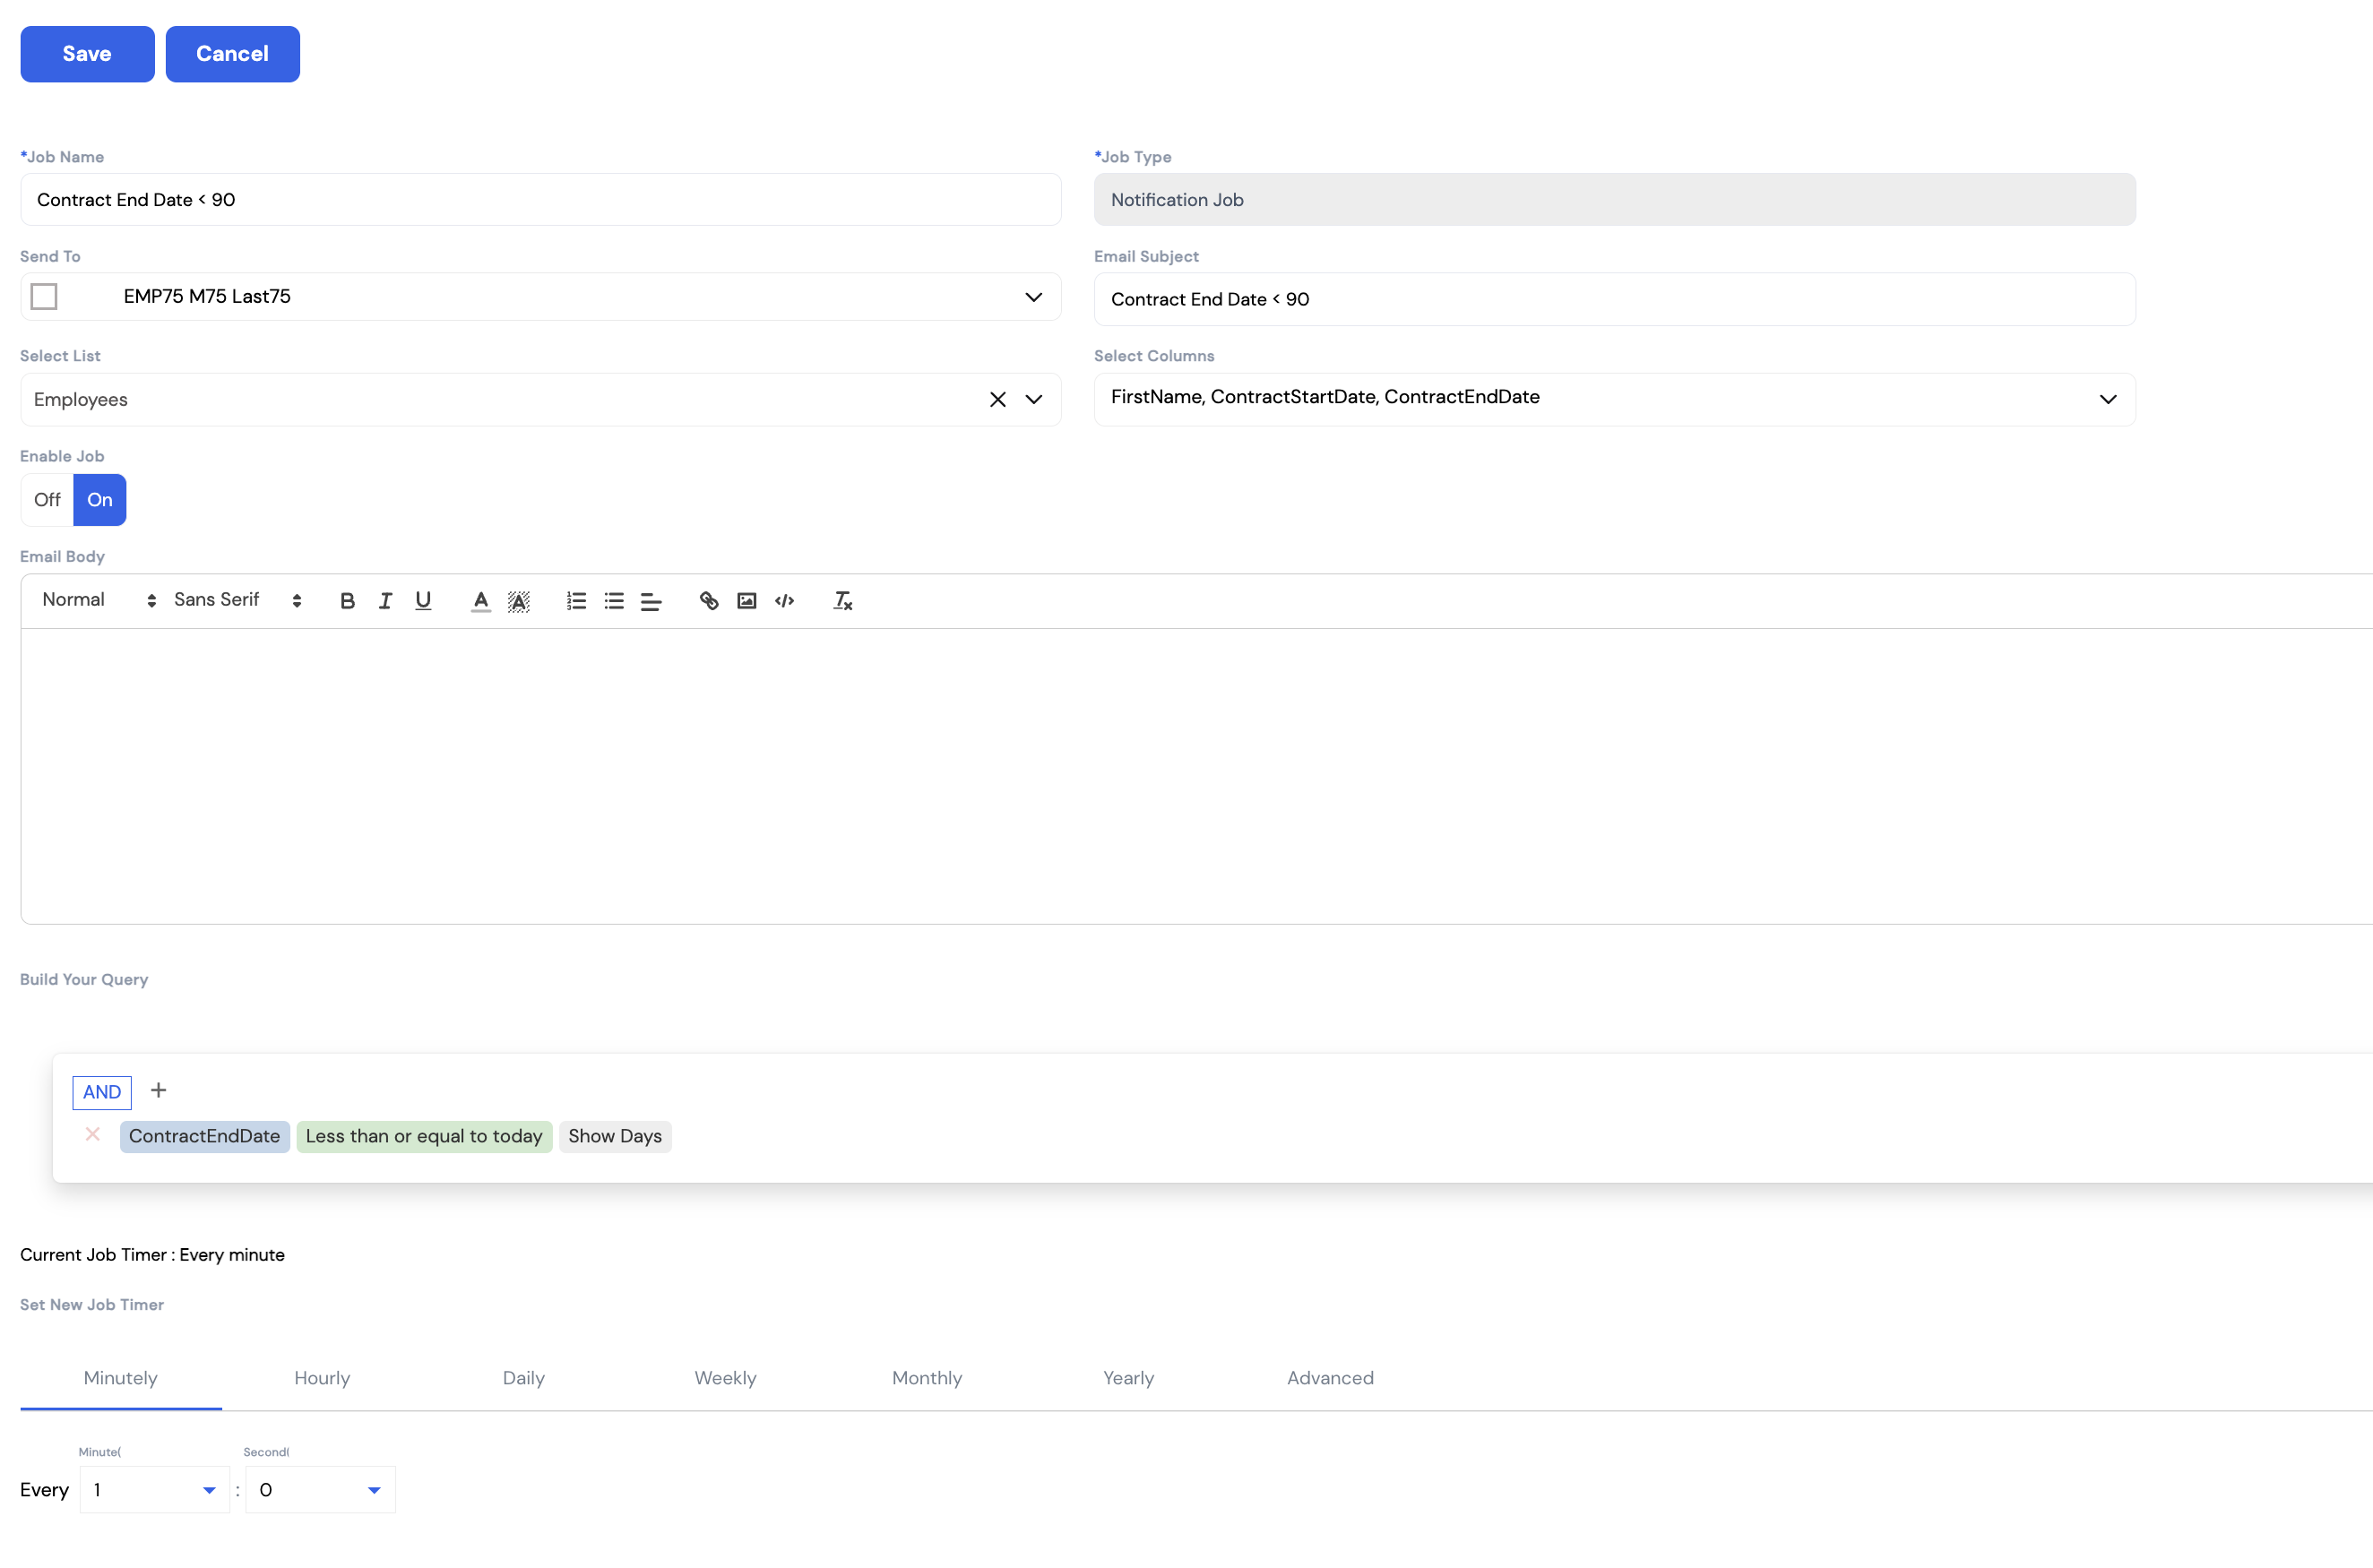
| Field | Description | Required |
|---|---|---|
| Job Name | A descriptive name for this timer job (e.g., Contract End Date < 90). Used to identify the job in the list. | Required |
| Job Type | The type of job — currently Notification Job, which sends an email alert to the selected recipients | Required |
| Send To | Select one or more employees who will receive the notification email. Multiple recipients can be chosen. | Required |
| Email Subject | The subject line of the notification email (e.g., Contract End Date < 90) | Required |
| Select List | The data source the query runs against (e.g., Employees). Defines what records the job checks when evaluating conditions. | Required |
| Select Columns | The fields to include in the email body — the data columns from the selected list that will be displayed in the notification (e.g., FirstName, ContractStartDate, ContractEndDate) | Optional |
| Enable Job | Toggle — set to On to activate this job. When Off, the job is disabled and will not run even if the timer fires. | Optional |
| Email Body | The content of the notification email — write the message to be sent to recipients using the rich text editor | Optional |
Build Your Query
The Build Your Query section is a visual query builder that defines the condition under which the notification is triggered. Click the + button to add a condition. For example:
- ContractEndDate → Less than or equal to today → Show Days — triggers the alert for all employees whose contract end date is approaching or has passed
Conditions can be combined with AND / OR logic to create complex filters.
Set New Job Timer
The timer defines how frequently the job runs. Select a frequency tab and configure the interval:
| Frequency | Description |
|---|---|
| Minutely | Runs every N minutes and M seconds (e.g., every 1 minute) |
| Hourly | Runs every N hours |
| Daily | Runs once per day at a specified time |
| Weekly | Runs on specific days of the week |
| Monthly | Runs on a specific day of each month |
| Yearly | Runs on a specific date each year |
| Advanced | Custom cron expression for complex schedules |
Common use cases for Timer Jobs include: contract expiry alerts (notify HR 90 days before contract end), visa/ID expiry reminders, probation period end notifications, and birthday or service anniversary alerts. Any date-based field on the employee record can be used as a query condition.
30.4 Extended Properties
Extended Properties allow administrators to add custom user-defined fields to any form in the system — without any development work. This is a powerful tool for capturing additional data that is specific to your organization's requirements, such as extra employee attributes, custom transaction fields, or company-specific information.
To create an extended property, navigate to Configuration → Extended Properties and click Create. Once saved, the new field will appear in the designated section of the target form for all users.

| Field | Description |
|---|---|
| Entity Name * | The form or module where this custom field will appear (e.g., Employees, transactions, etc.). |
| Section Name | The section within the form where the field will be grouped (e.g., Common). Used to organize multiple custom fields visually. |
| Value Selector Type * | The input type for the field. See the table below for all available types. |
| Name * | The label displayed on the form for this custom field. |
| Order | Controls the display order of this field relative to other extended properties in the same section. Lower numbers appear first. |
| CSS Class | Optional. Space-separated CSS class names for advanced styling of the field (typically used by implementers). |
| Is Mandatory | When set to On, users must fill in this field before saving the form. |
| Is Unique | When set to On, the system will not allow duplicate values for this field across records. |
Value Selector Types
| Type | Description |
|---|---|
| SingleLine | A single-line text input. Suitable for short text values such as a reference code or a name. |
| MultiLine | A multi-line text area. Suitable for longer text such as notes or descriptions. |
| DateTime | A date and time picker. Use for fields that capture a specific date or timestamp. |
| Checkbox | A true/false toggle. Use for binary yes/no attributes. |
| Choice | A dropdown list. Allows the user to select one option from a predefined list of values. |
| Number | A numeric input field. Use for quantities, counts, or any numeric data. |
| Attachment | A file upload field. Allows users to attach a document or file directly to the record. |
| DataSource | A lookup field linked to another entity in the system. Allows selecting a value from a related data set (e.g., a project, department, or custom list). |
30.5 Special Permissions
Advanced Permissions Security allows administrators to grant or deny access to specific high-impact system actions on a per-security-group basis. Unlike menu-level permissions (which control visibility of screens), special permissions control whether a user can execute critical operations regardless of their general role.
To configure special permissions, navigate to Configuration → Special Permissions, select or create a security group, and set each action to either Permit or Deny.
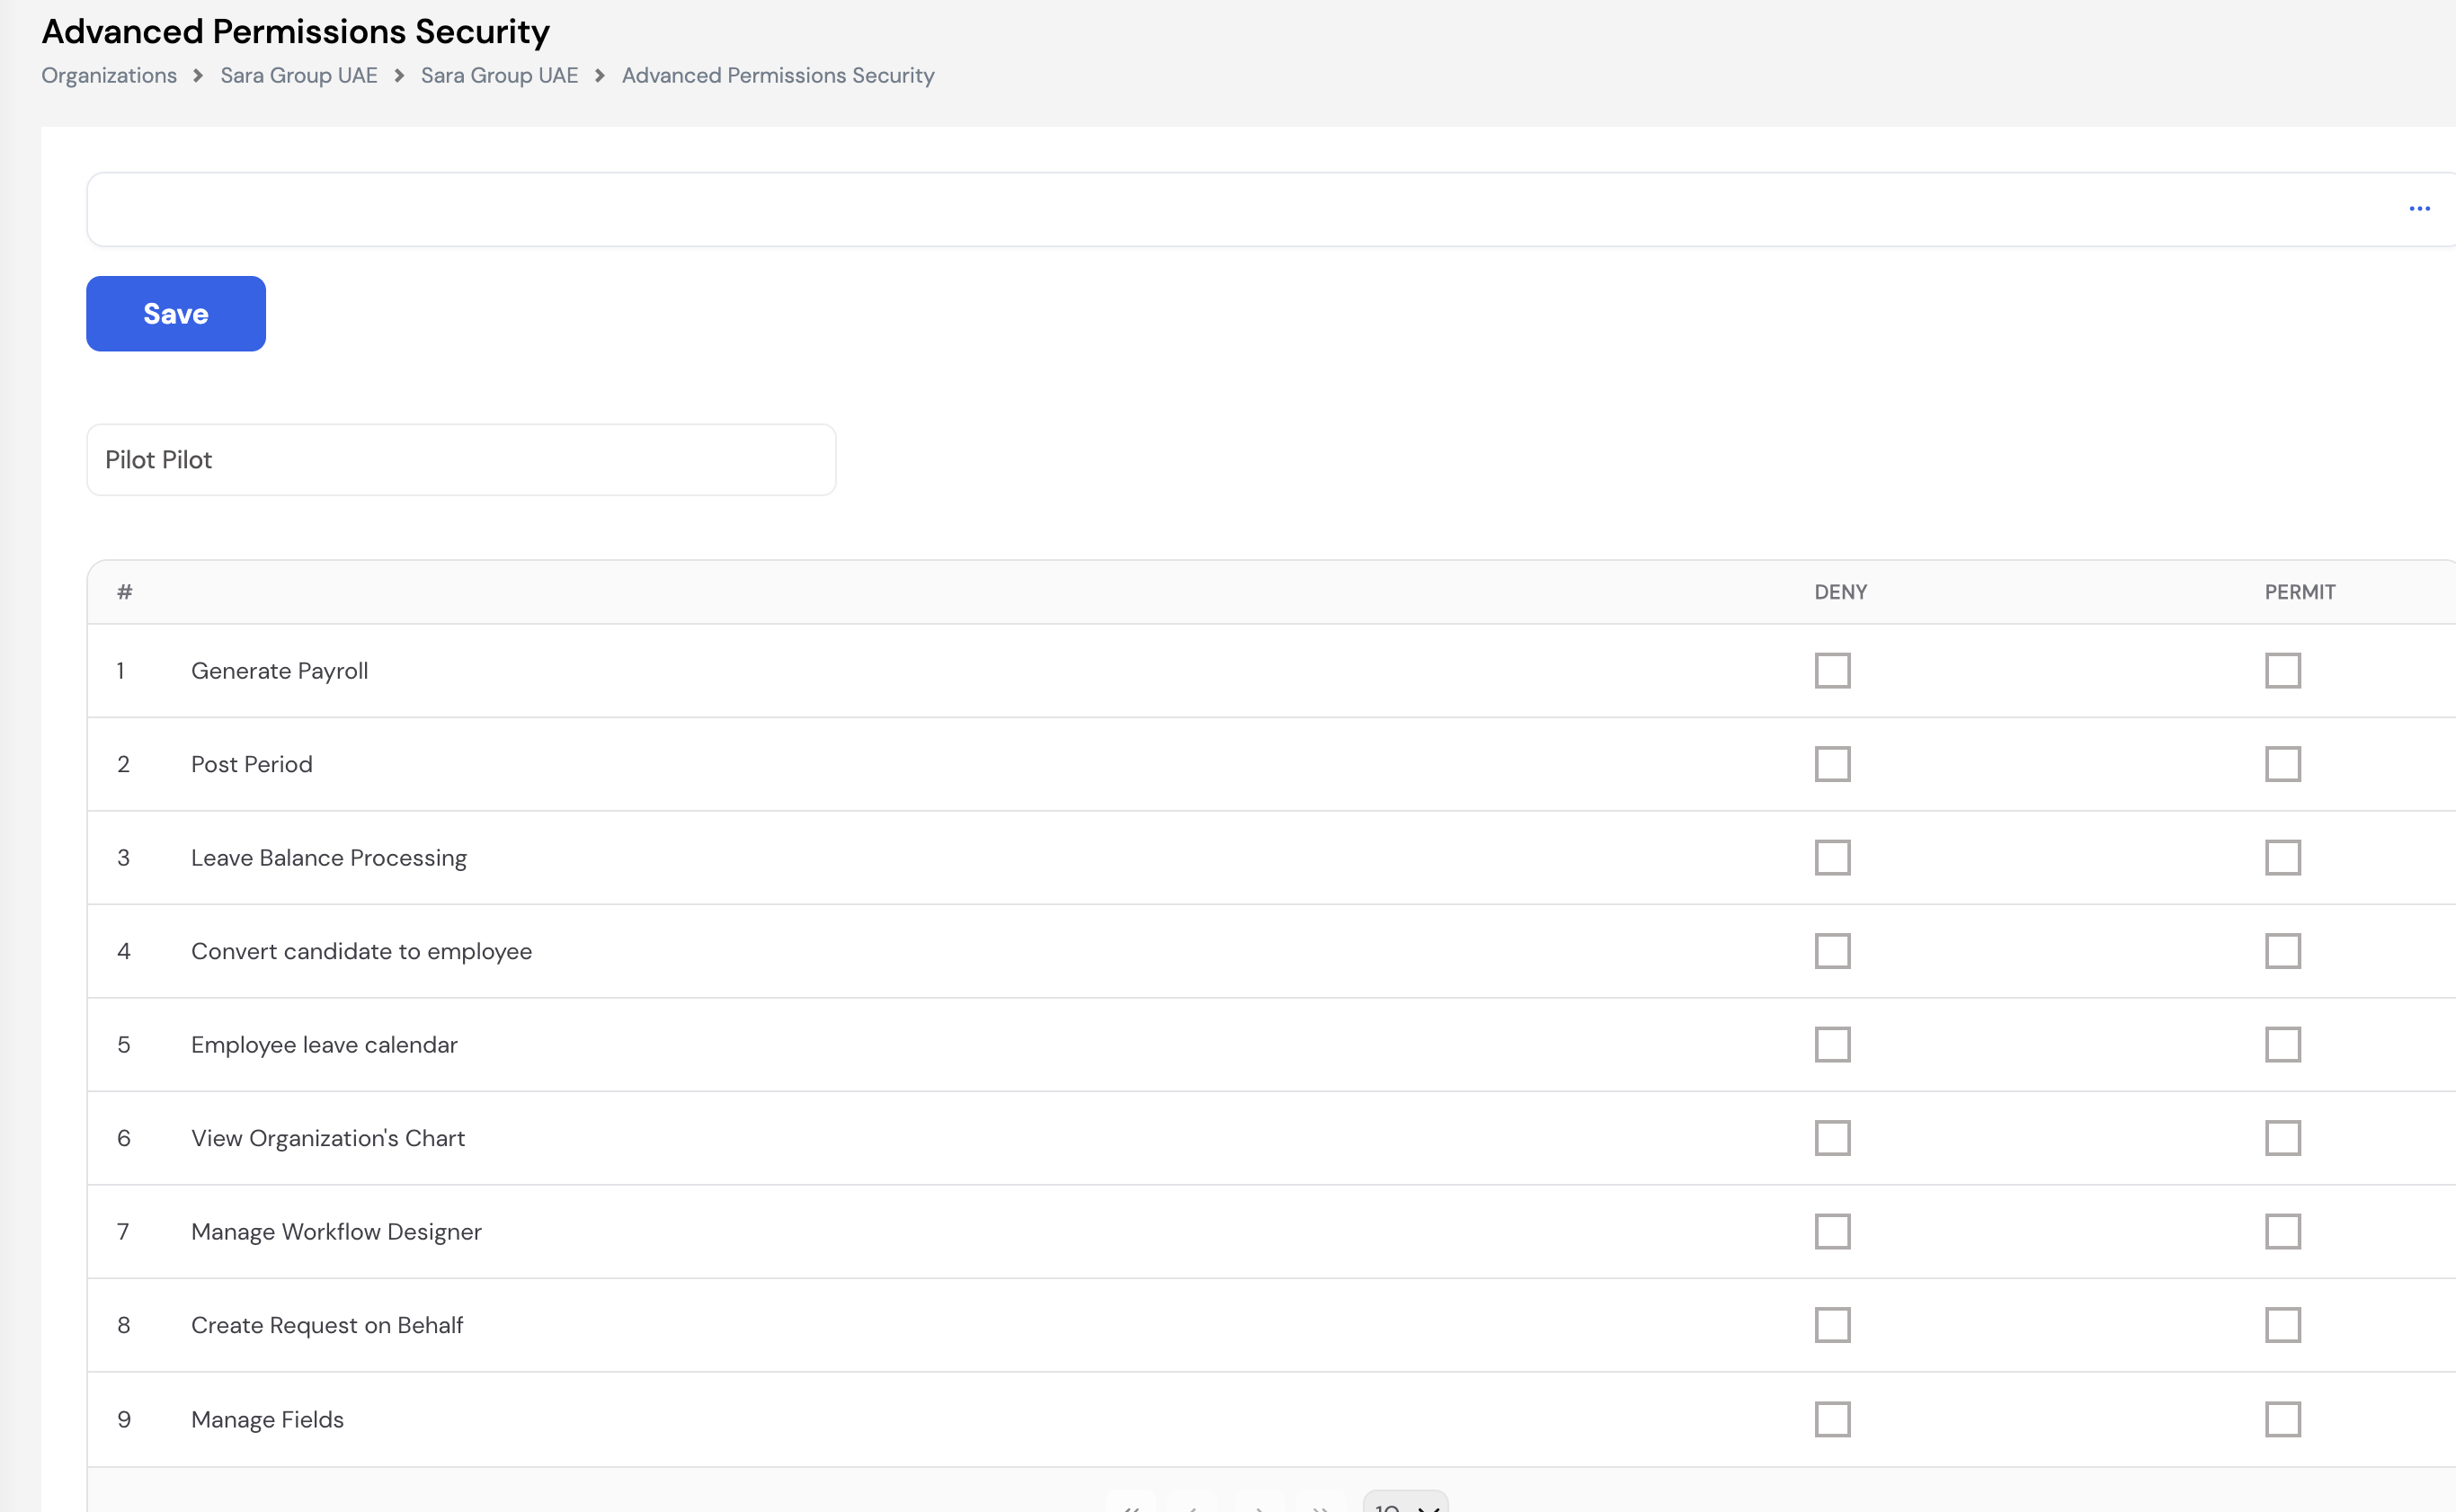
The following special permissions are available:
| # | Permission | Description |
|---|---|---|
| 1 | Generate Payroll | Allows the user to run the payroll generation process. |
| 2 | Post Period | Allows the user to post/finalize a payroll period. |
| 3 | Leave Balance Processing | Allows the user to run leave balance calculations and accruals. |
| 4 | Convert Candidate to Employee | Allows converting a candidate record into a full employee profile. |
| 5 | Employee Leave Calendar | Grants access to view the company-wide leave calendar for all employees. |
| 6 | View Organization's Chart | Grants access to view the organizational hierarchy chart. |
| 7 | Manage Workflow Designer | Allows creating and modifying workflow definitions in the Workflow Designer. |
| 8 | Create Request on Behalf | Allows an HR user to submit requests (leave, expense, etc.) on behalf of another employee. |
| 9 | Manage Fields | Allows access to manage Extended Properties (custom user-defined fields). |
30.6 Menu
The Menu configuration section allows administrators to control which menu items are visible to users at the company level. This is useful for hiding modules or screens that are not relevant to the company's workflow, keeping the interface clean and focused for end users.
To manage the menu, navigate to Configuration → Menu and select a menu type (e.g., Payroll, Setup, Appraisals). The system displays a hierarchical tree of all available menu items for that type. You can then add specific items to the company's active menu list or remove ones that should not be visible.

| Field | Description |
|---|---|
| Type | The top-level module category to configure (e.g., Payroll, Setup, Appraisals). Select the type first to load the available menu items. |
| Menu | A hierarchical dropdown of all screens and sub-menus under the selected type. Expand parent items (e.g., Payroll Process Tool) to reveal individual pages such as Periodic Movement, Payroll Generation, Off-Cycle Periodic Movement, Employee Exit, etc. |
| Item list | The table of menu items currently added to this company's menu. Items in this list will be visible to users; items not added will be hidden. |
31. Insurance
The Insurance module allows HR administrators to manage employee insurance policies and track coverage details including insurance class, contribution amounts, policy dates, and enrolled dependents or beneficiaries.
31.1 Insurance Policies
Insurance Policies is where HR can create and manage individual insurance records for employees. Each policy captures the employee's coverage period, insurance class, contribution, and a list of covered members (such as dependents) with their type, member ID, and insured amount.
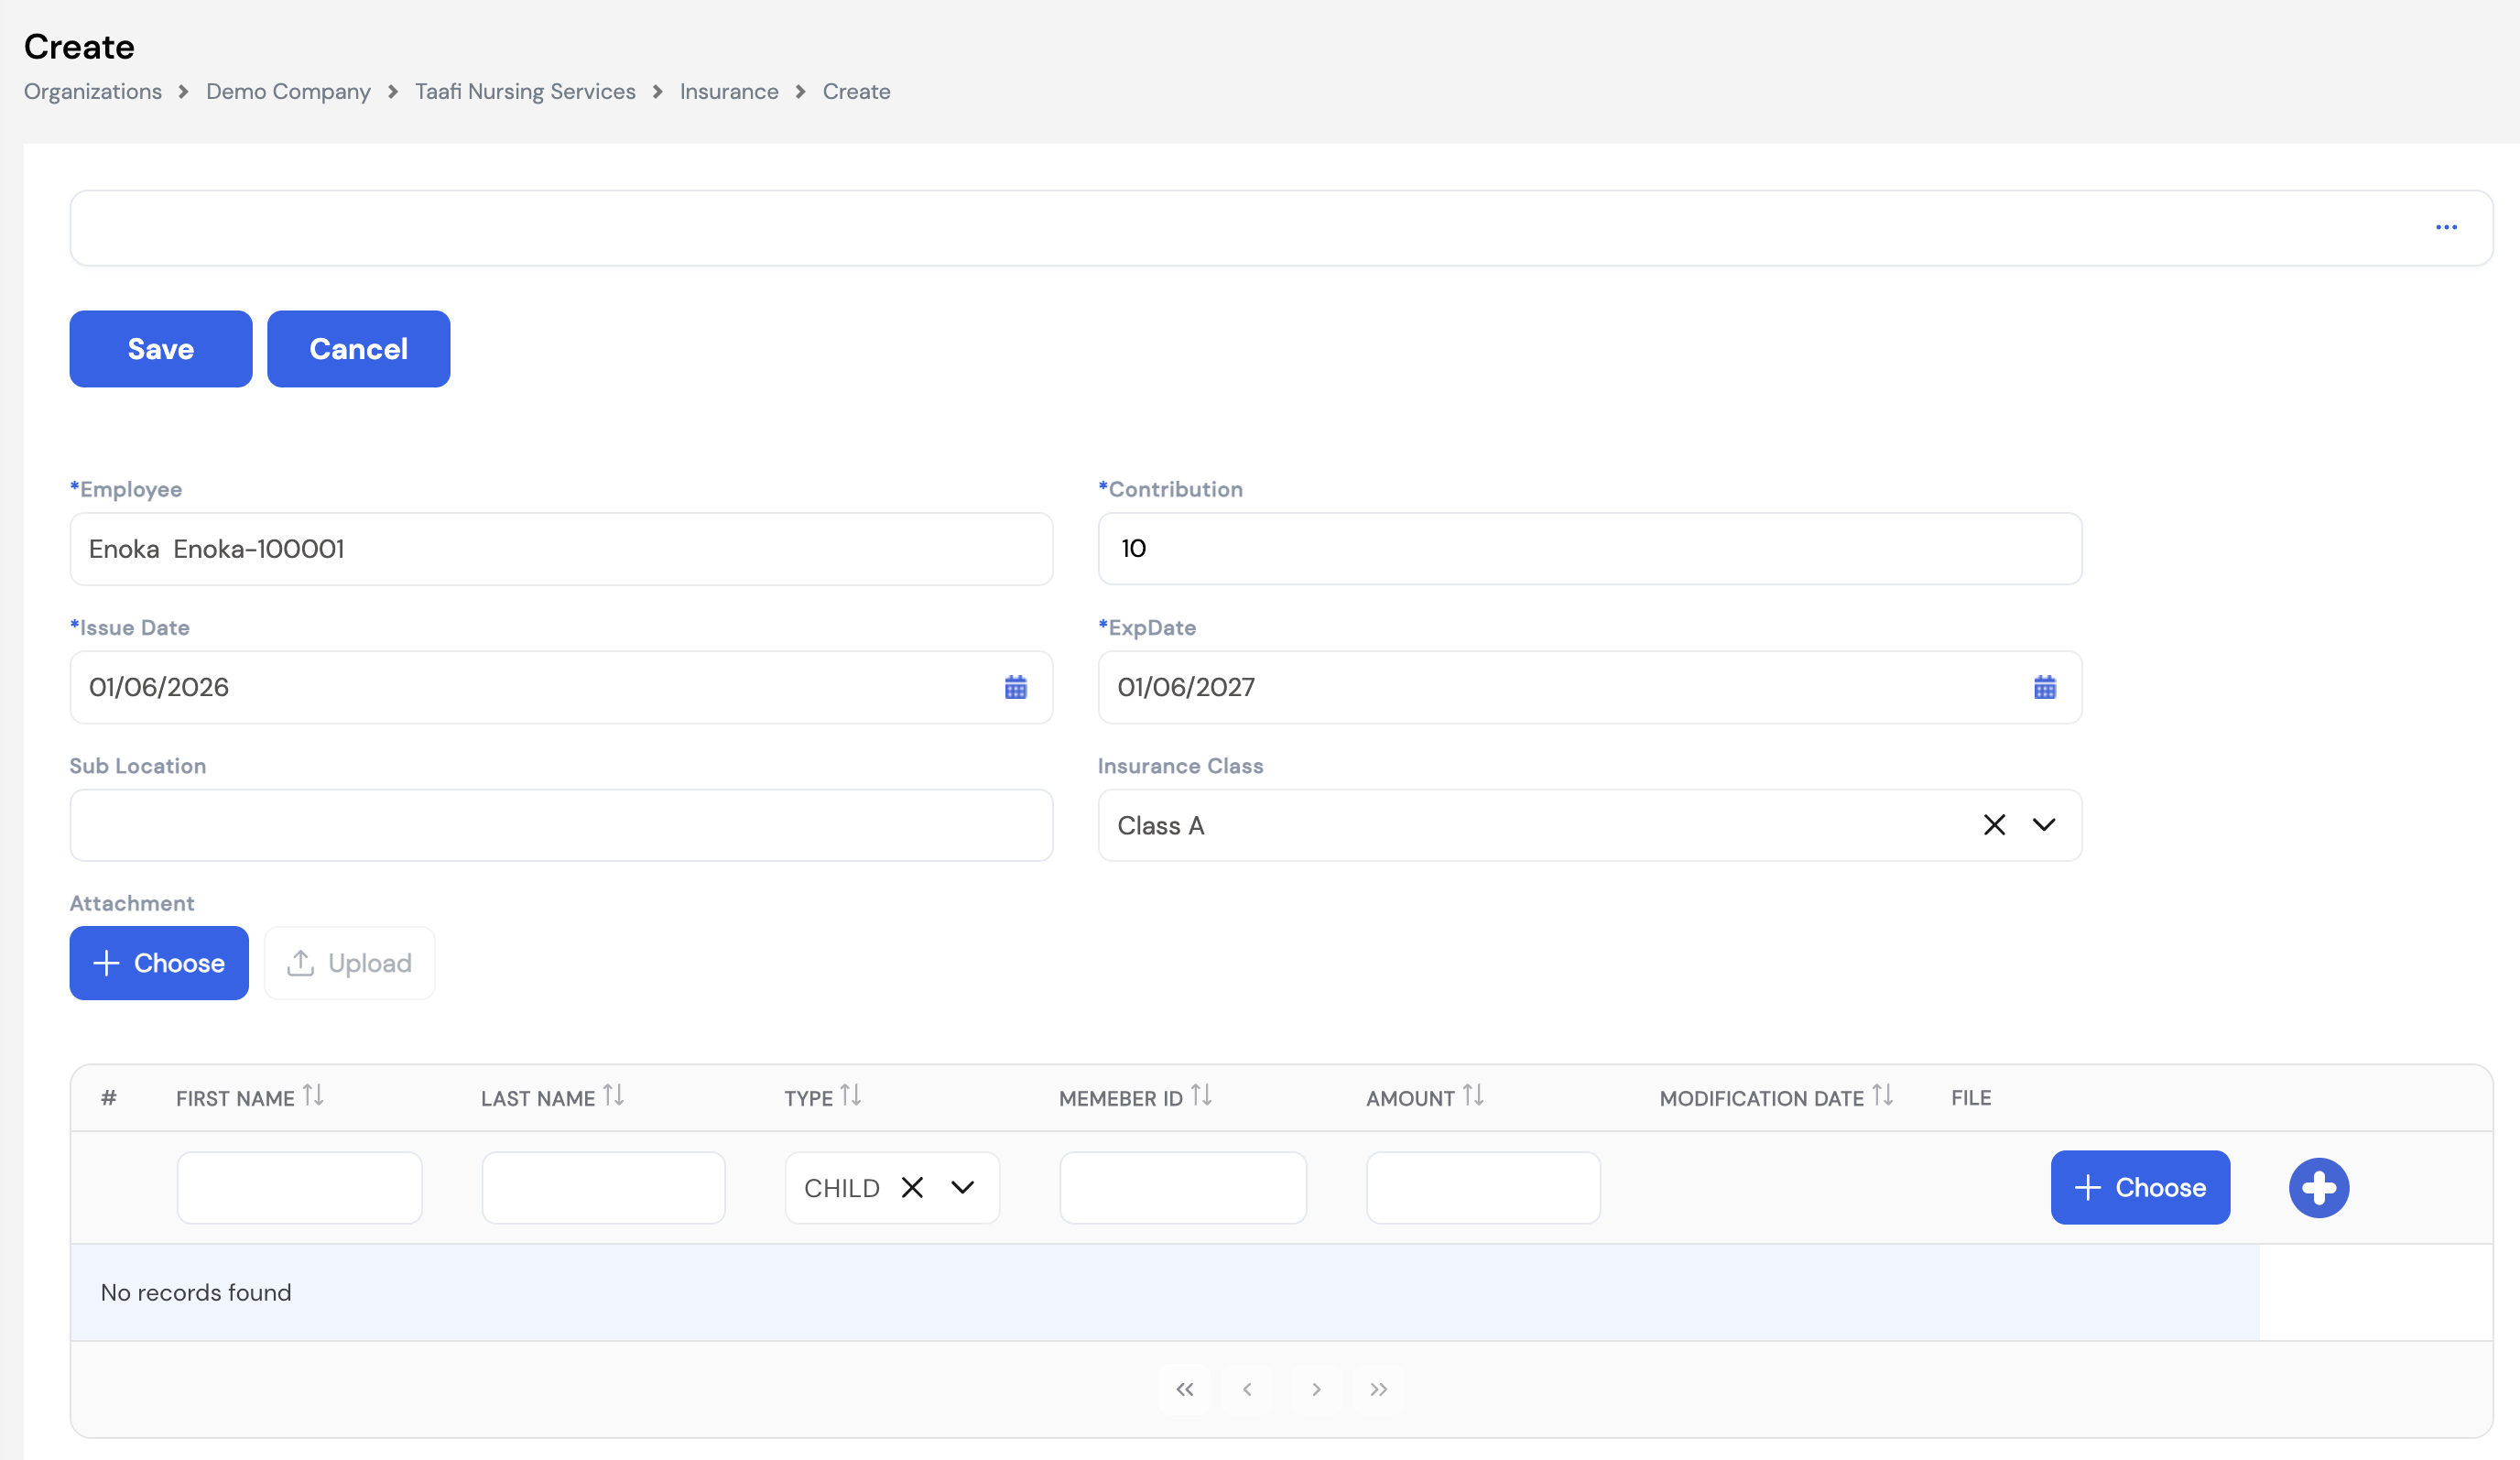
| Field | Description |
|---|---|
| Employee * | The employee this insurance policy belongs to. |
| Contribution * | The contribution amount associated with this policy (e.g., monthly premium or employer contribution value). |
| Issue Date * | The date the insurance policy was issued / became effective. |
| Exp Date * | The expiry date of the policy. Used for renewal tracking and alerts. |
| Sub Location | Optional field to record a sub-location or branch associated with this policy. |
| Insurance Class | The insurance class tier assigned to the employee (e.g., Class A, Class B). Insurance classes are configured in the Lookups section. |
| Attachment | Upload the insurance policy document or any supporting file for record-keeping. |
Covered Members
The lower section of the form allows HR to add covered members under the employee's policy, such as children or other dependents. Each member row captures:
| Column | Description |
|---|---|
| First Name | First name of the covered member. |
| Last Name | Last name of the covered member. |
| Type | Relationship type of the covered member (e.g., Child, Spouse). |
| Member ID | The insurance member ID or card number issued to this person. |
| Amount | The insured amount or coverage limit for this member. |
| Modification Date | The date this member record was last modified. |
| File | Attach a document specific to this covered member (e.g., ID copy). |
32. Recruitment Process
This section covers the full recruitment workflow in Magnar HCM, from job openings and applicant tracking through interviews, job offers, and the recruitment portal. Content coming soon.
32.1 Applicants
Content coming soon.
32.2 Job Opening
Job Openings are the starting point of the recruitment process. Each job opening represents a vacancy the organization needs to fill. Once created, applicants can be linked to the opening, interviewed, scored, and offered positions — all from within the system.
To create a new job opening, navigate to Recruitment Process → Job Opening and click + New. The form has two tabs: Details (vacancy information) and Candidates (linked applicants and their progress).
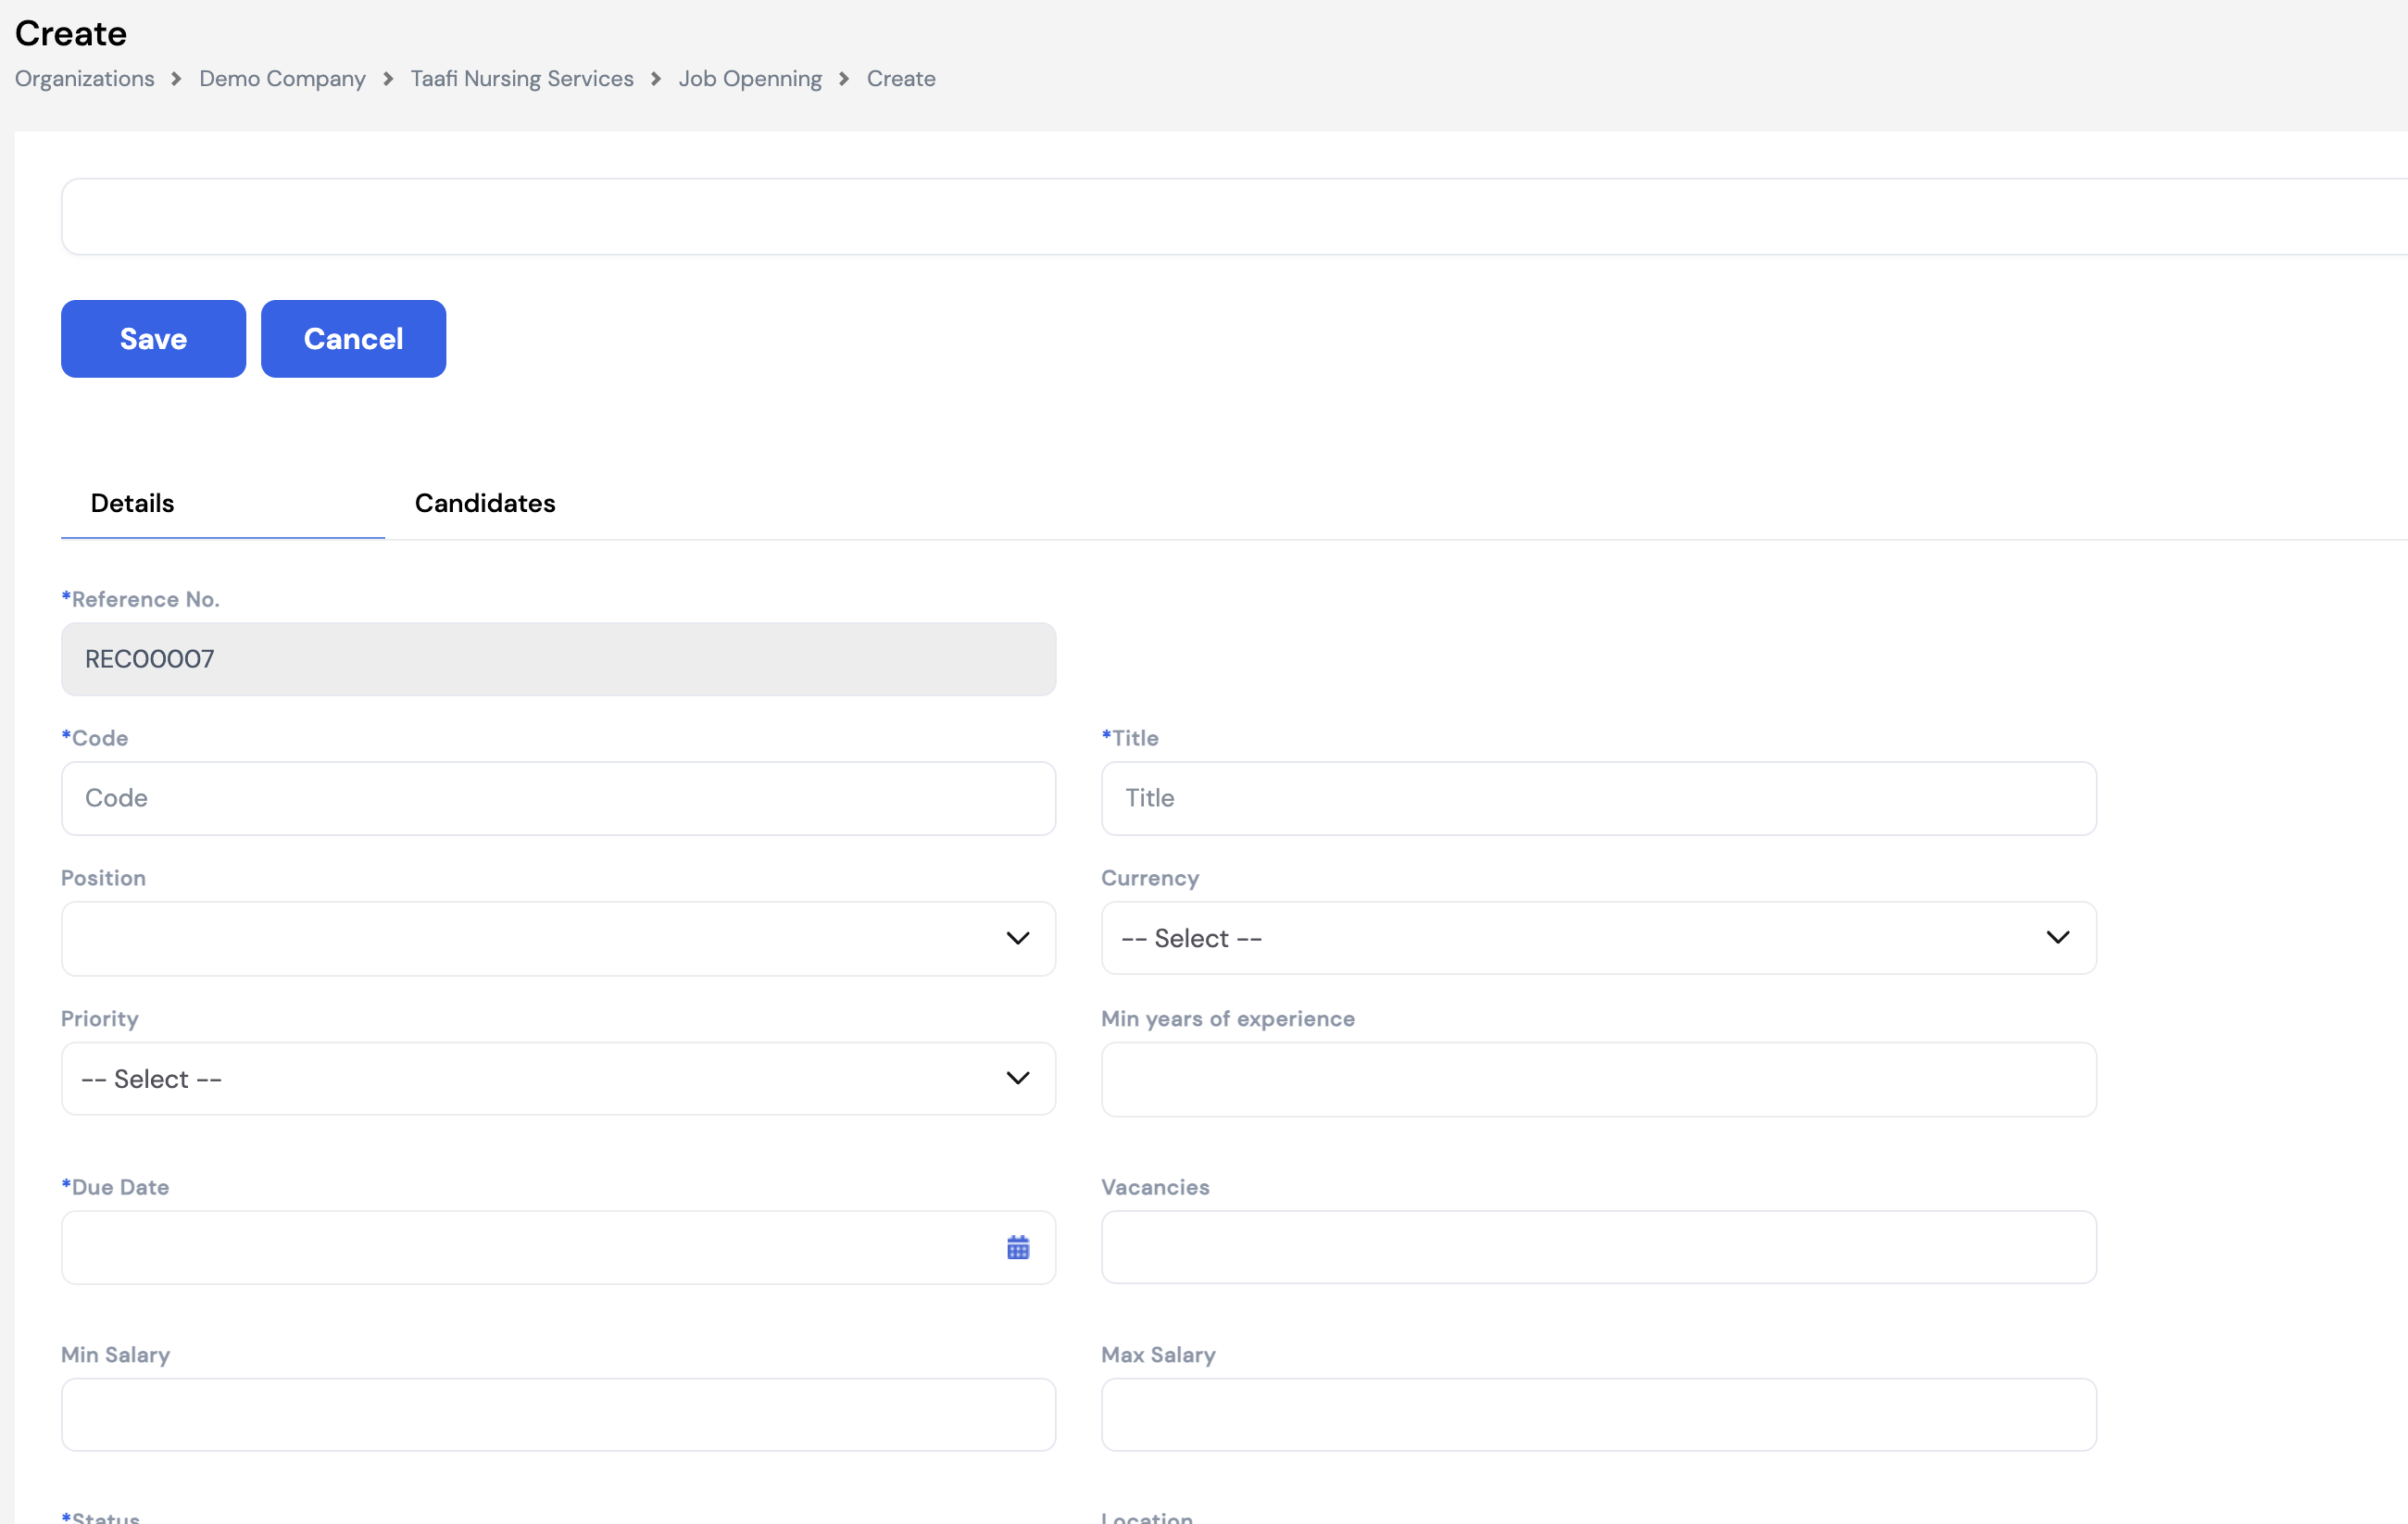
Details Tab
| Field | Description |
|---|---|
| Reference No. * | Auto-generated reference number for the job opening (e.g., REC00007). Read-only. |
| Code * | A short internal code to identify this opening. |
| Title * | The job title for this vacancy (e.g., Senior Nurse, Accountant). |
| Position | Link this opening to an existing position in the organization chart. |
| Currency | The currency in which the offered salary will be denominated. |
| Priority | Urgency level of this opening (e.g., High, Medium, Low) to help HR prioritize recruitment efforts. |
| Min Years of Experience | Minimum work experience required for this role. |
| Due Date * | The closing date for applications for this vacancy. |
| Vacancies | Number of open seats for this role. |
| Min Salary | Minimum salary range offered for this position. |
| Max Salary | Maximum salary range offered for this position. |
| Status * | Current status of the opening (e.g., Open, On Hold, Closed). |
| Location | Work location or branch for this vacancy. |
| Contract From / Contract To | If the role is a fixed-term contract, specify the contract start and end dates. |
| Gender | Optional gender preference for the role, where applicable. |
| Project | Link the opening to a specific project if the hire is project-based. |
| Attachment | Upload supporting documents such as the approved headcount request or job description file. |
| Job Description | A rich-text editor to enter or paste the full job description. Use the Get Job Description button to auto-populate the description from the linked position's predefined job description. |
Posting to the Recruitment Portal
Once the job opening details are complete and saved, you can publish it to the Magnar e-Recruitment portal by clicking the Post to Magnar Recruitment button. This makes the vacancy visible to external or internal candidates through the recruitment portal, allowing them to apply directly online.
Managing Candidates
The Candidates tab inside a job opening is where HR manages all applicants for that vacancy. Click Add Candidate to link an applicant from the Applicants list (Section 32.1), or candidates may appear automatically if they applied via the Recruitment Portal.
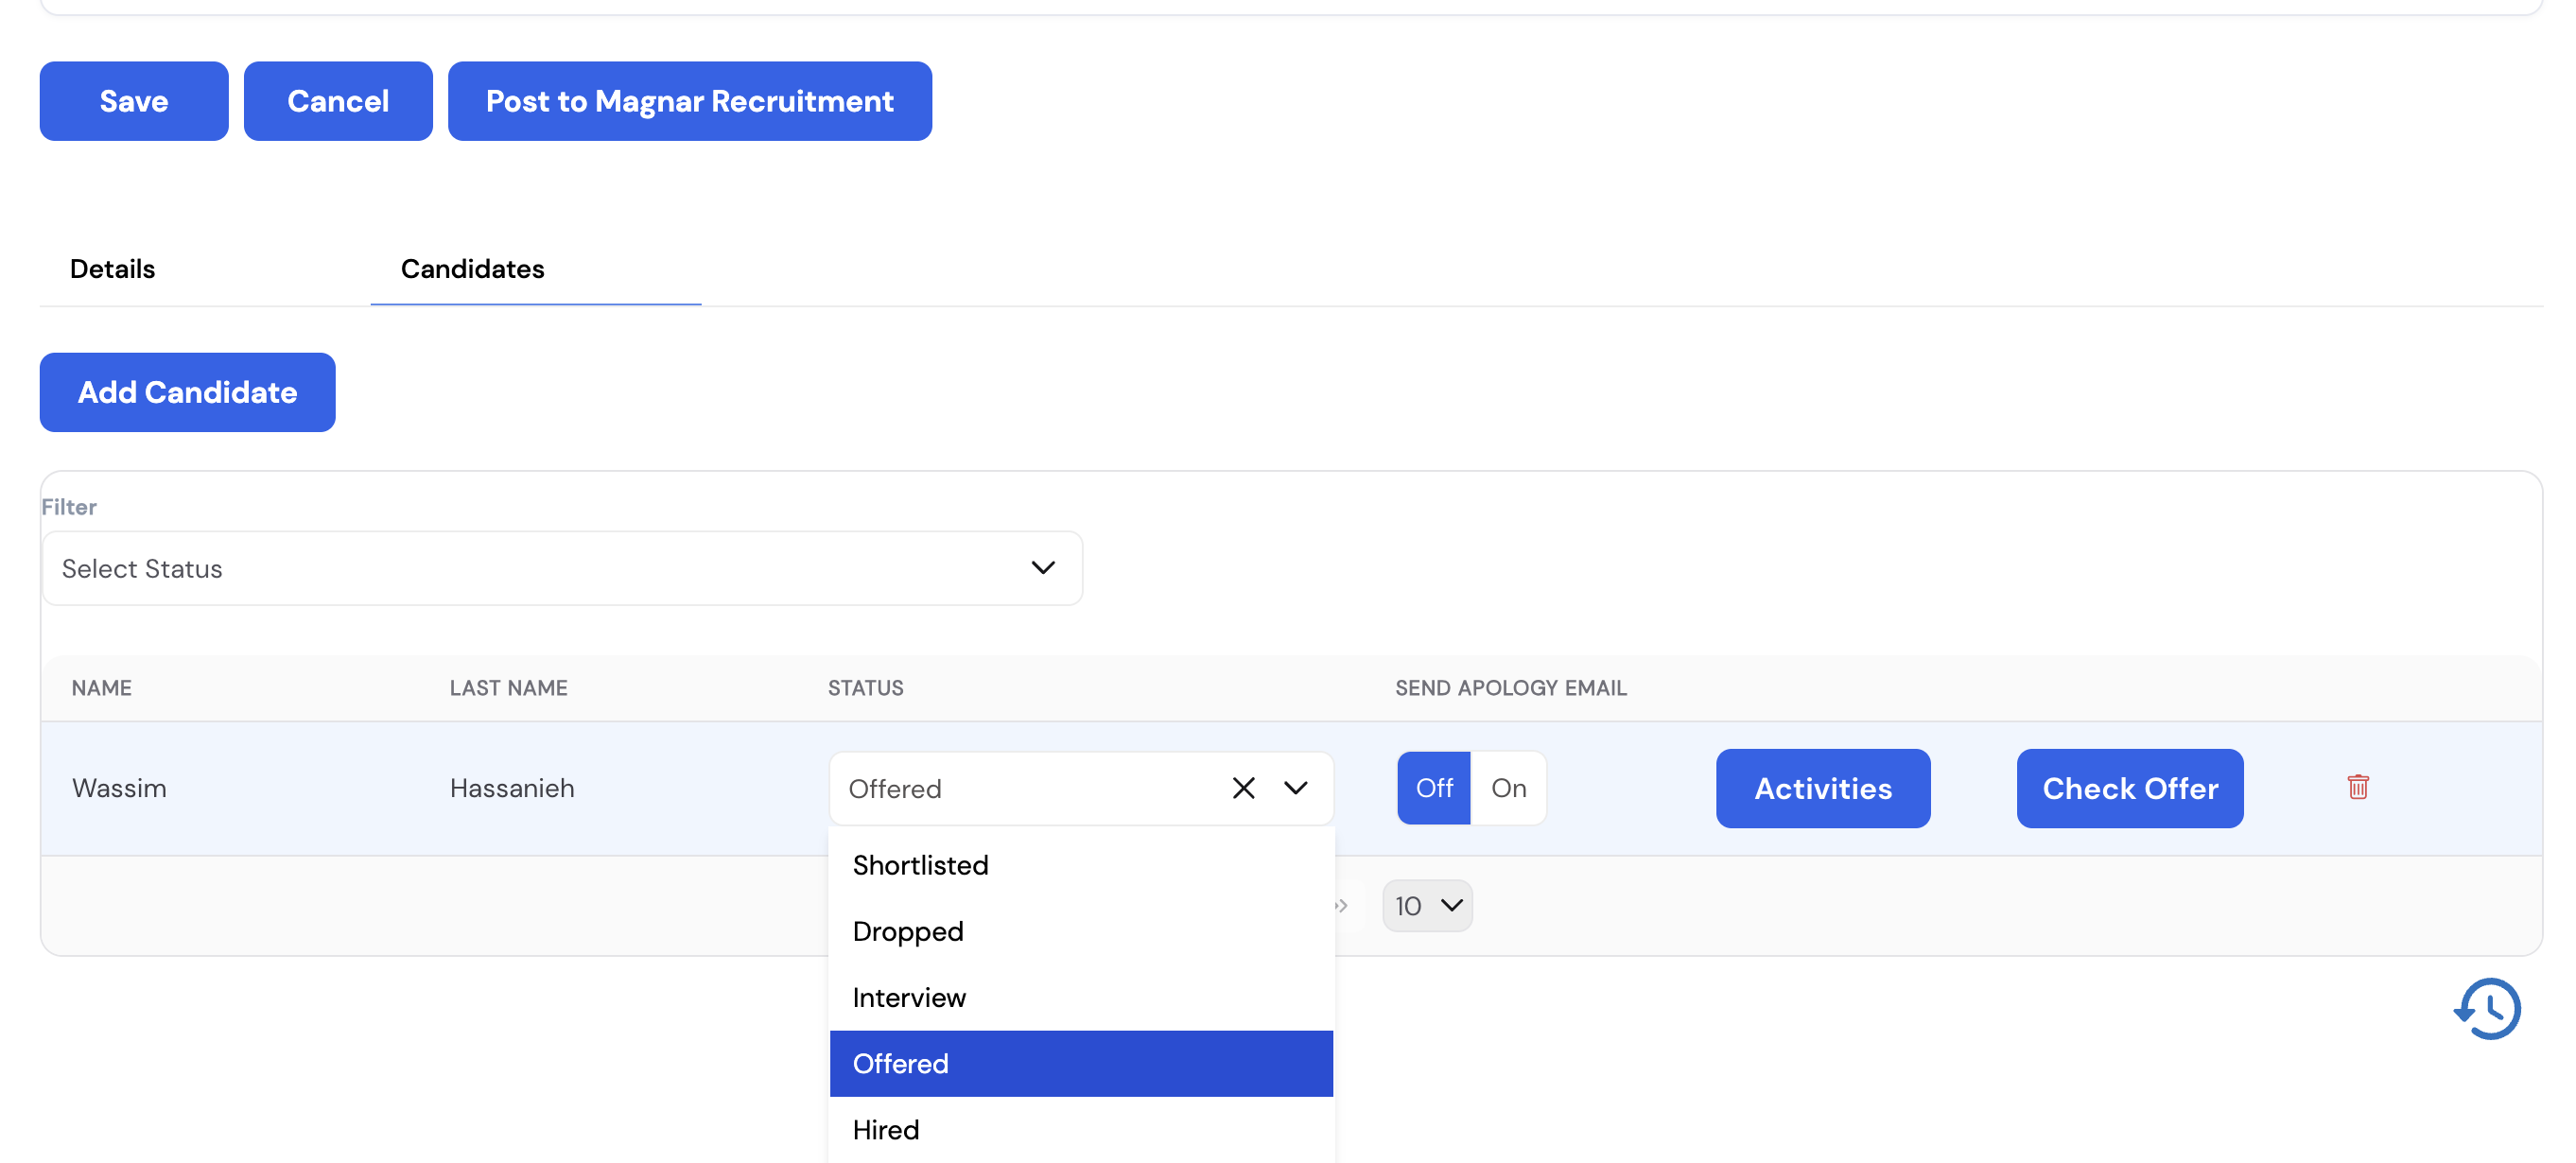
Each candidate row shows their name and current status. Use the Filter by Status dropdown at the top to narrow the list. For each candidate the following actions are available:
| Field / Action | Description |
|---|---|
| Status | The current stage of the candidate in the recruitment pipeline. Options: Shortlisted, Dropped, Interview, Offered, Hired. Update the status as the candidate progresses. |
| Send Apology Email | Toggle On to automatically send a rejection / apology email to the candidate when their status is set to Dropped. |
| Activities | Opens the interview activities log for this candidate — view scheduled interviews, scores, and interviewer feedback recorded against this opening. |
| Check Offer | Opens the linked job offer for this candidate, allowing HR to review, edit, or issue the formal offer letter. |
| Delete (🗑) | Remove the candidate from this job opening. |
32.3 Activities
The Activities screen is a calendar-based view that allows HR to schedule and manage recruitment-related events for candidates — primarily interviews and tasks. It provides a central place to coordinate interview schedules, assign interviewers, and automatically notify all participants.
Activities can be accessed directly from the main Recruitment menu, or from the Activities button on a candidate row within a Job Opening (Section 32.2).

The calendar supports Month, Week, Day, and List views. On the left, a searchable employee panel lets you filter the calendar to show a specific employee's scheduled activities.
Creating an Interview Activity
Click New Activity → Interview to schedule an interview. The interview form allows you to specify:
| Field | Description |
|---|---|
| Interviewee | The candidate being interviewed (linked from the Applicants list). |
| Interviewers | One or more employees who will conduct the interview. The event will appear in each interviewer's calendar. |
| Date & Time | The scheduled date and start/end time of the interview. |
| Job Opening | The vacancy this interview is associated with. |
| Notes / Agenda | Optional description or agenda for the interview session. |
Once saved, the interview is added to the Activities calendar and an email notification is automatically sent to the interviewee with the interview details, date, and time.
Creating a Task
Click New Activity → Task to create a recruitment-related follow-up task (e.g., reference check, document collection). Tasks appear on the calendar and can be assigned to a responsible HR team member.
32.4 Job Offer Types
Job Offer Types is an optional but recommended prerequisite before issuing job offers. It allows you to define the different categories of offer letters your organization uses — for example, Local Offer for locally hired employees and Expat Offer for expatriate hires. Each type is later linked to a specific offer letter template, allowing the system to automatically generate the correct document when a job offer is issued.
The offer letter templates are .repx report files designed by the BI developer or implementer, based on predefined layouts agreed with the HR team. Once uploaded and linked to an offer type, they can be generated directly from the job offer screen.
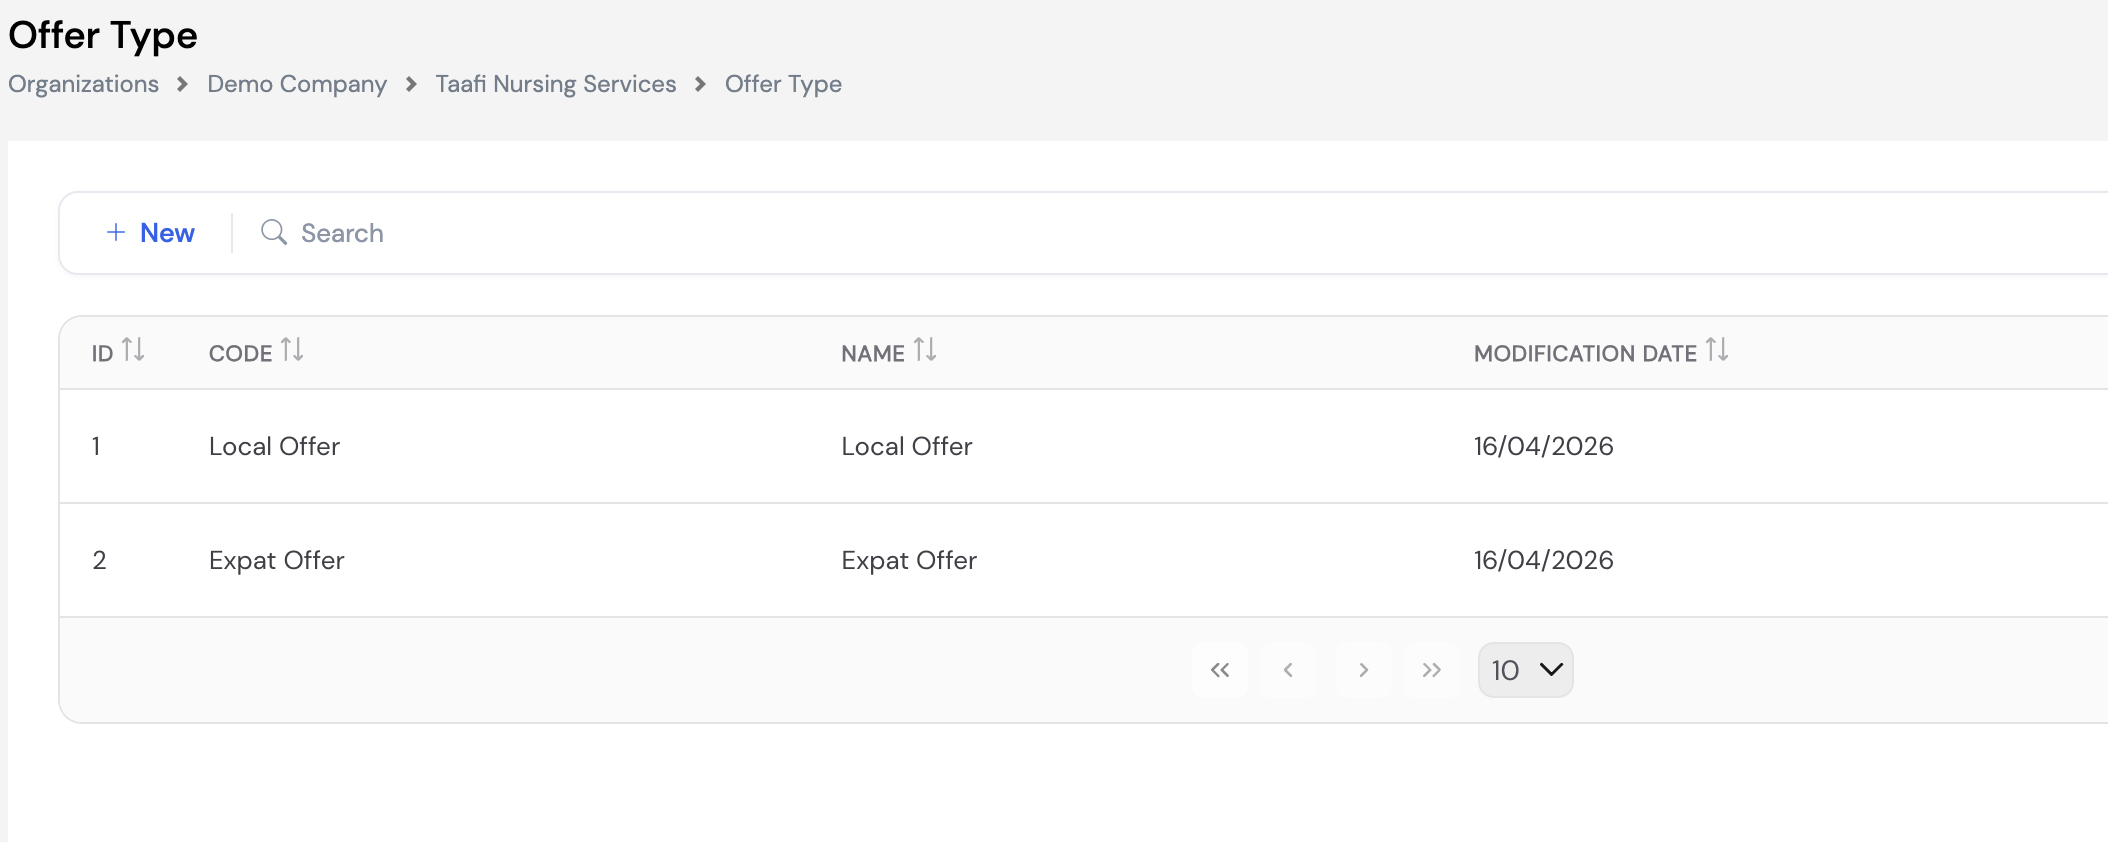
To create a new Job Offer Type, navigate to Recruitment Process → Job Offer Types and click + New. Enter a Code and Name (e.g., Local Offer) and save.
32.5 Job Offer
The Job Offer screen allows HR to create and send a formal offer letter to a selected candidate. The offer includes the job, salary, currency, allowances, and offer type, and can be sent directly to the candidate's email. The candidate can then accept or reject the offer, and HR can track the response status from within the system.
Job offers can be created from the Check Offer button on a candidate row in a Job Opening (Section 32.2), or directly from Recruitment Process → Job Offer.
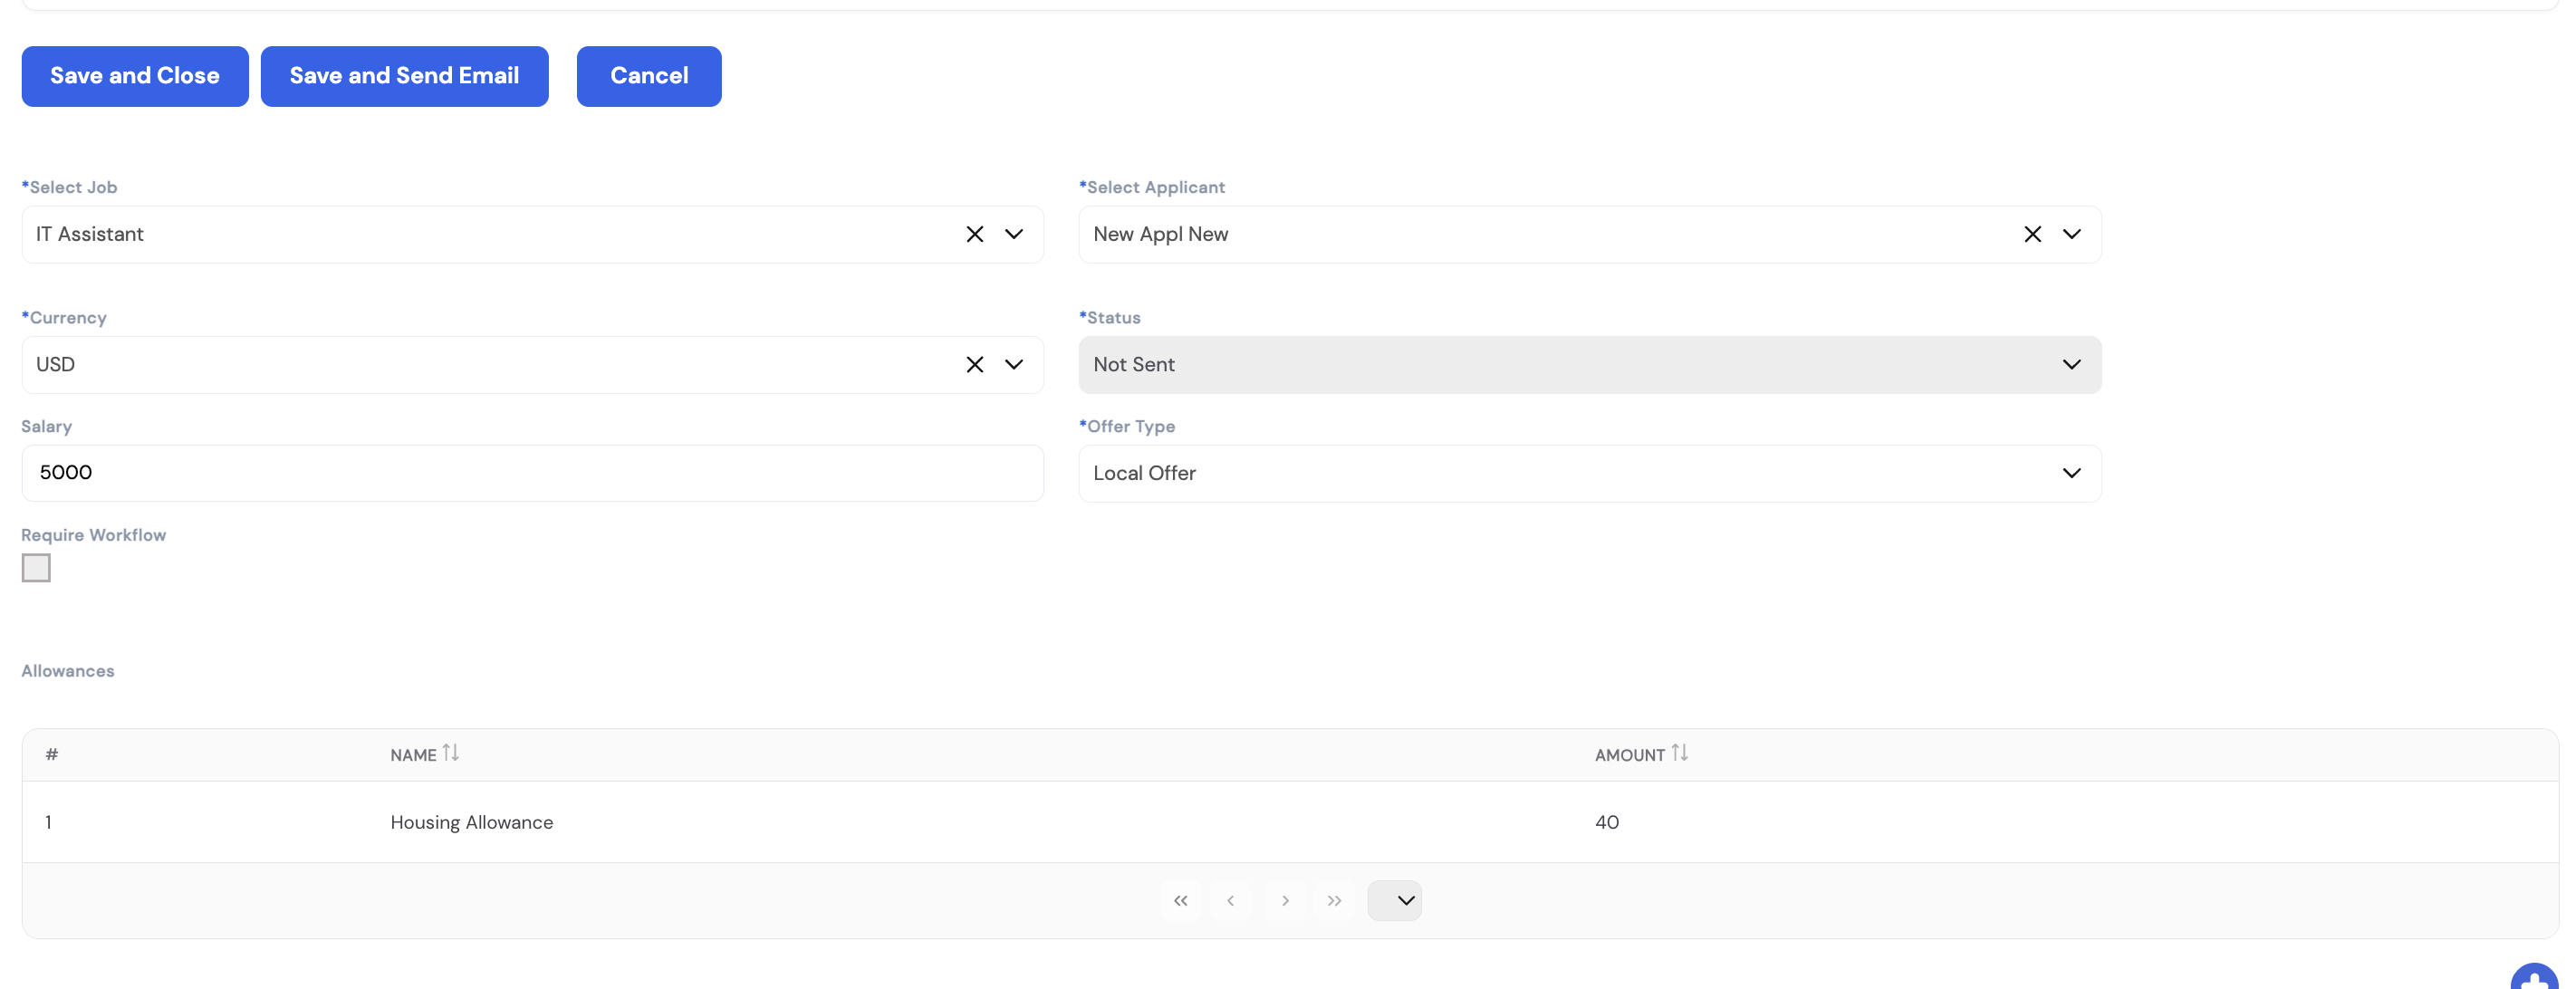
| Field | Description |
|---|---|
| Select Job * | The job opening this offer is linked to. |
| Select Applicant * | The candidate receiving the offer. |
| Currency * | The currency in which the offered salary is denominated. |
| Status * | Tracks the offer lifecycle: Not Sent, Sent, Accepted, Rejected. |
| Salary | The base salary amount being offered to the candidate. |
| Offer Type * | The offer template type (e.g., Local Offer, Expat Offer) configured in Section 32.4. Determines which offer letter template is used. |
| Require Workflow | Check this box if the offer must go through an approval workflow before it can be sent to the candidate. |
| Allowances | List of additional allowances included in the offer (e.g., Housing Allowance). Each row has a Name and Amount. |
Use the action buttons at the top to manage the offer:
| Button | Action |
|---|---|
| Save and Close | Save the offer without sending — useful for drafting or pending approval. |
| Save and Send Email | Save the offer and immediately send the offer letter to the candidate's email. The status automatically updates to Sent. |
Counter Offers
If a candidate rejects the offer, HR can issue a revised counter offer. To do this:
- Open the existing offer and set the Status to Rejected, then save.
- Click the New Offer button that appears once the offer is marked as rejected.
- A new offer form opens — adjust the salary or allowances as needed and send the revised offer.
Hiring the Candidate
Once the offer status is updated to Accepted, HR can initiate the formal hiring process directly from the applicant record. Navigate to the applicant, open the edit screen, and click the Hire button at the top left. This launches a 3-step wizard to convert the applicant into an employee:
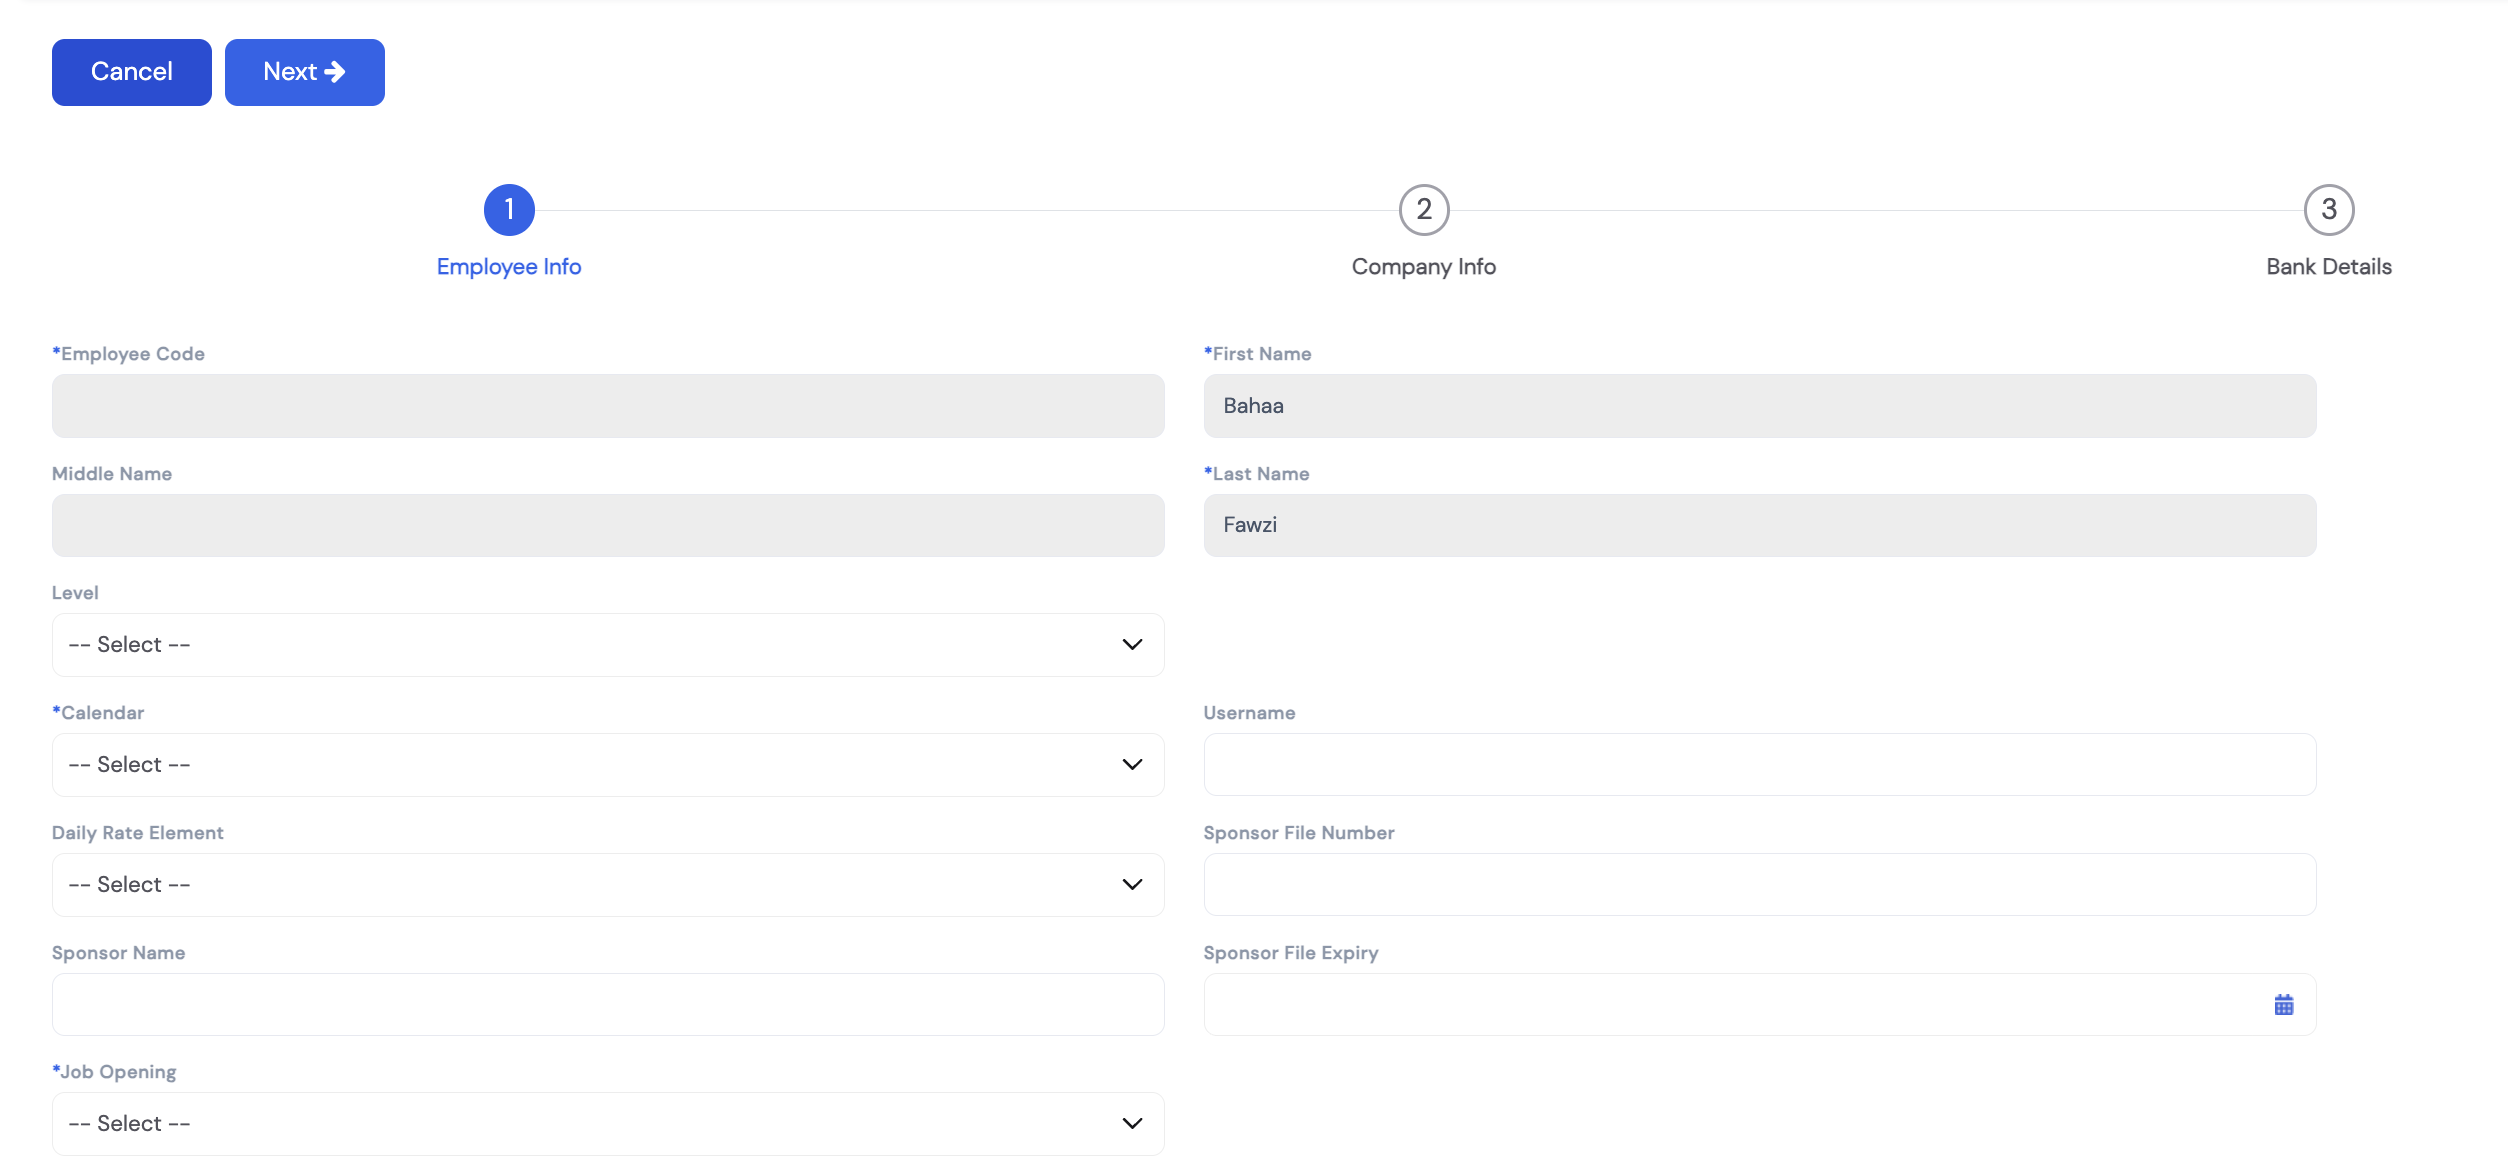
- Step 1 — Employee Info: Enter the employee's basic details including Employee Code, First Name, Last Name, Level, Calendar, Daily Rate Element, Username, Sponsor File Number, Sponsor Name, Sponsor File Expiry, and the linked Job Opening. Some fields like name are pre-populated from the applicant record.
- Step 2 — Company Info: Set the employee's company-related information such as start date, department, position, job title, direct manager, and salary details.
- Step 3 — Bank Details: Enter the employee's bank account information for payroll payment processing.
Click Next to advance through each step. Once all three steps are completed and saved, the applicant is converted to a full employee record in the system.
32.6 Interview Criteria
Interview Criteria are the evaluation categories used to assess candidates during the interview process. Each criterion represents a dimension of assessment — such as Education, Experience, or General Work Field knowledge — and will be used to score candidates when the system's interview scoring feature is enabled.
Criteria defined here are later linked to specific positions via Position Interview Criteria (Section 32.7), allowing each job to have a tailored set of evaluation dimensions. This is optional — only relevant if your organization uses Magnar HCM to conduct and score structured interviews.
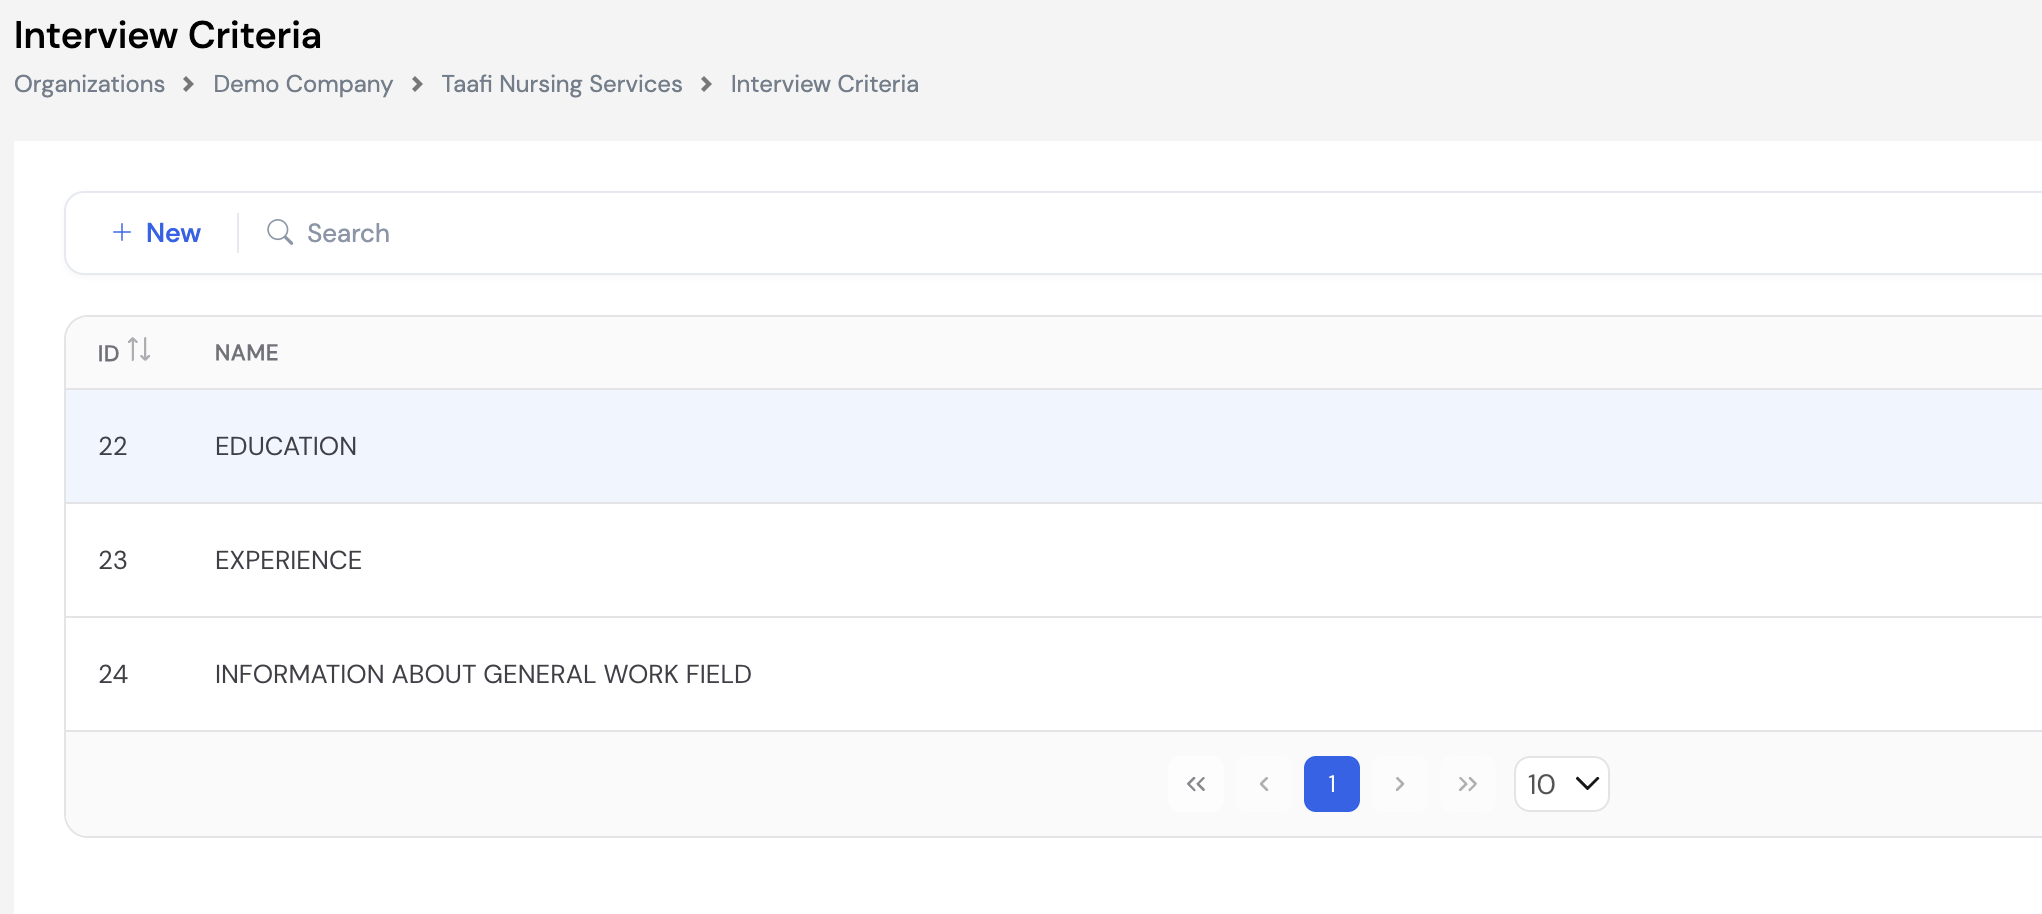
To add a new criterion, navigate to Recruitment Process → Interview Criteria and click + New. Enter the criterion name and save. Examples of commonly used criteria:
| Example Criterion | Description |
|---|---|
| Education | Assesses the candidate's academic qualifications and relevance to the role. |
| Experience | Evaluates the depth and relevance of the candidate's prior work experience. |
| Information About General Work Field | Tests the candidate's general knowledge and awareness of the industry or work domain. |
32.7 Position Interview Criteria
Position Interview Criteria links the general interview criteria (defined in Section 32.6) to a specific position, and assigns a weight percentage to each criterion. This determines how much each evaluation category contributes to the candidate's overall interview score for that position.
For example, a clinical position might weight Education at 50% and Experience at 50%, while a managerial role might distribute weight differently across more criteria. The total weights across all criteria for a position should add up to 100%.

| Field | Description |
|---|---|
| Position | Select the job position this criteria set applies to. Positions must be configured in the Lookups / Organization setup before they appear here. |
| Name | Select an interview criterion from the dropdown (populated from Interview Criteria — Section 32.6). |
| Weight (%) | The percentage weight this criterion carries in the overall interview score for the position. All criteria weights for a position should total 100%. |
Click the + button to add each criterion row. Multiple criteria can be added per position. Click Save when done.
32.8 Interview Rating
Interview Ratings define the scoring scale used when evaluating candidates against interview criteria. Each rating has a Name, a numeric Value, and an optional Description. When interviewers score a candidate, they select from these predefined ratings — the system then uses the associated values together with the criteria weights (Section 32.7) to calculate the candidate's total interview score.
| Name | Value | Description |
|---|---|---|
| Poor | 20 | Candidate does not meet the expectations for this criterion. |
| Good | 60 | Candidate meets basic expectations with acceptable performance. |
| Excellent | 90 | Candidate clearly exceeds expectations and demonstrates strong capability. |
| Exceptional | 100 | Candidate performs at the highest possible level for this criterion. |
To add or modify ratings, navigate to Recruitment Process → Interview Rating and click + New. Enter the Name, numeric Value, and a Description, then save.
32.9 Recruitment Portal
The Magnar e-Recruitment Portal is an external job board powered by Magnar HCM, available at jobs.magnarsystems.com. It allows companies to publish vacancies publicly so that candidates can browse openings, create a profile, upload their CV, and apply directly online — without any involvement from HR until the application is submitted.
To access the portal from within the HCM system, navigate to Recruitment Process → Recruitment Portal. This opens the public portal in a new window.
The portal provides candidates with the following features:
| Feature | Description |
|---|---|
| Home / Job Listings | Displays all active job openings posted via Post to Magnar Recruitment from within the HCM system. Each listing shows the job title, company, location, work type, and required years of experience. |
| Filters | Candidates can filter vacancies by Job Title, Location Type (On Site / Hybrid / Remote), Location, Position Type, Company, and Industry. |
| My CV | Candidates can build and maintain their online CV / profile within the portal. |
| My Applications | Candidates can track the status of their submitted applications. |
| My Saved Jobs | Candidates can save jobs they are interested in for later review. |
| Sign In / Register | Candidates create a portal account to apply. Applications submitted through the portal flow directly into the Applicants section of Magnar HCM (Section 32.1). |
| Language | The portal supports multiple languages (e.g., English, Arabic). Candidates can switch the interface language from the top-right selector. |
33. Appraisals
This section covers the full performance appraisal module in Magnar HCM, including objectives setup, appraisal configuration, and initiating appraisal cycles. Content coming soon.
33.1 Objectives Setup
Objectives Setup is where administrators define the building blocks used in the appraisal process — the categories of personal objectives, company-wide business objectives, department-specific objectives, and job competencies. These must be configured before appraisal cycles can be initiated.
33.1.1 Personal Objectives Categories
Personal Objective Categories are used to classify personal development goals that employees set during the appraisal cycle (e.g., Soft Skills, Hard Skills). When an employee or manager enters a personal objective — either from the ESS portal or the employee profile — they must select a category from this list.
Personal Objective Categories are managed through Appraisals → Objectives Setup → Personal Objectives Categories, or alternatively via Company Lookups by selecting the Personal Objective Category lookup type.
33.1.2 Business Objectives
Business Objectives represent company-wide strategic goals that employees are measured against during the appraisal (e.g., Achieve department sales target 10M, Employee Retention 95%, Maintain double digit Growth). These are defined centrally and then assigned with weights to departments via Department Objectives (Section 33.1.3).
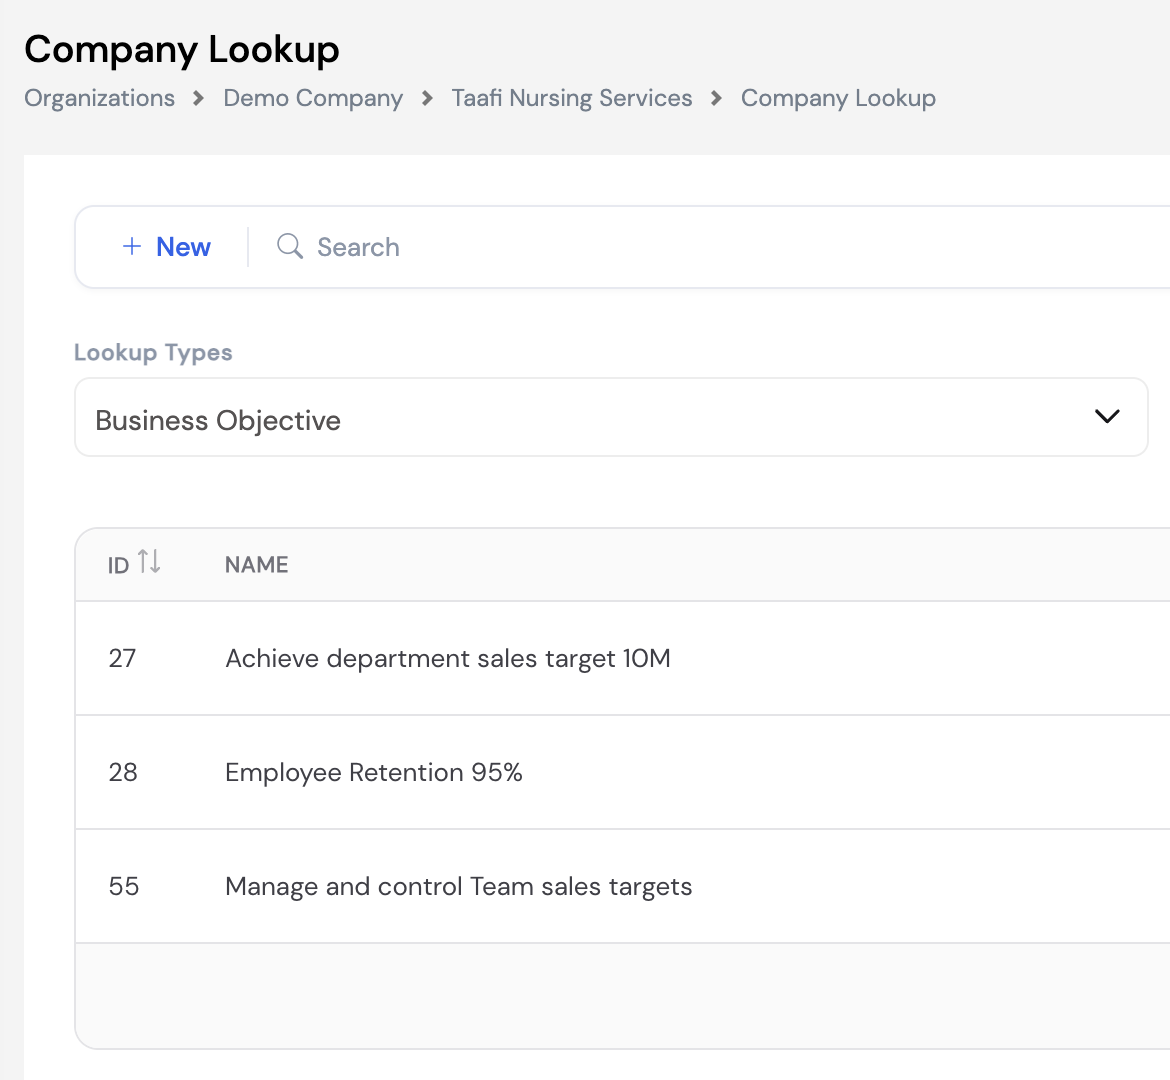
Business Objectives can be managed from Appraisals → Objectives Setup → Business Objectives, or from Company Lookups by selecting the Business Objective lookup type.
33.1.3 Department Objectives
Department Objectives link Business Objectives to a specific department and assign a weight to each objective, determining how much each goal contributes to the appraisal score for employees in that department. The total weights across all objectives for a department should add up to 100%.
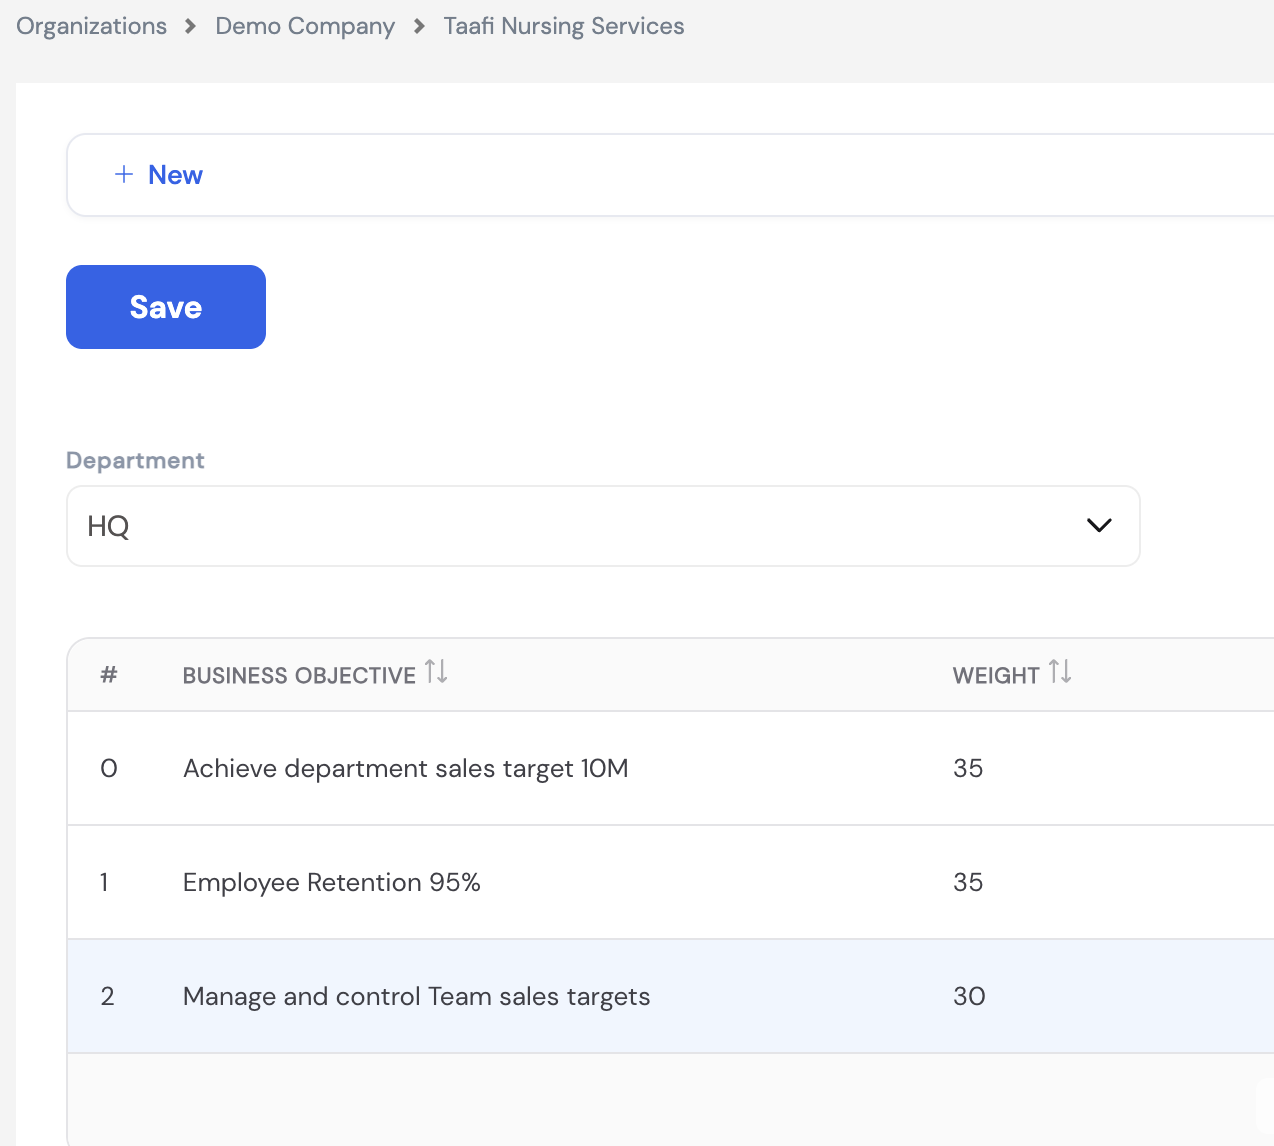
To configure department objectives, navigate to Appraisals → Objectives Setup → Department Objectives, select the Department, then add each Business Objective with its weight. Click + New to add rows and Save when done.
33.1.4 Competencies
Competencies define the behavioral and performance KPIs that are evaluated as part of the appraisal process (e.g., Major Events, Maintain double digit Growth, Increase Brand Positioning, Insure Leadership in the Market). Each competency is assigned a category (e.g., JOB KPI Category) and is linked to specific jobs.
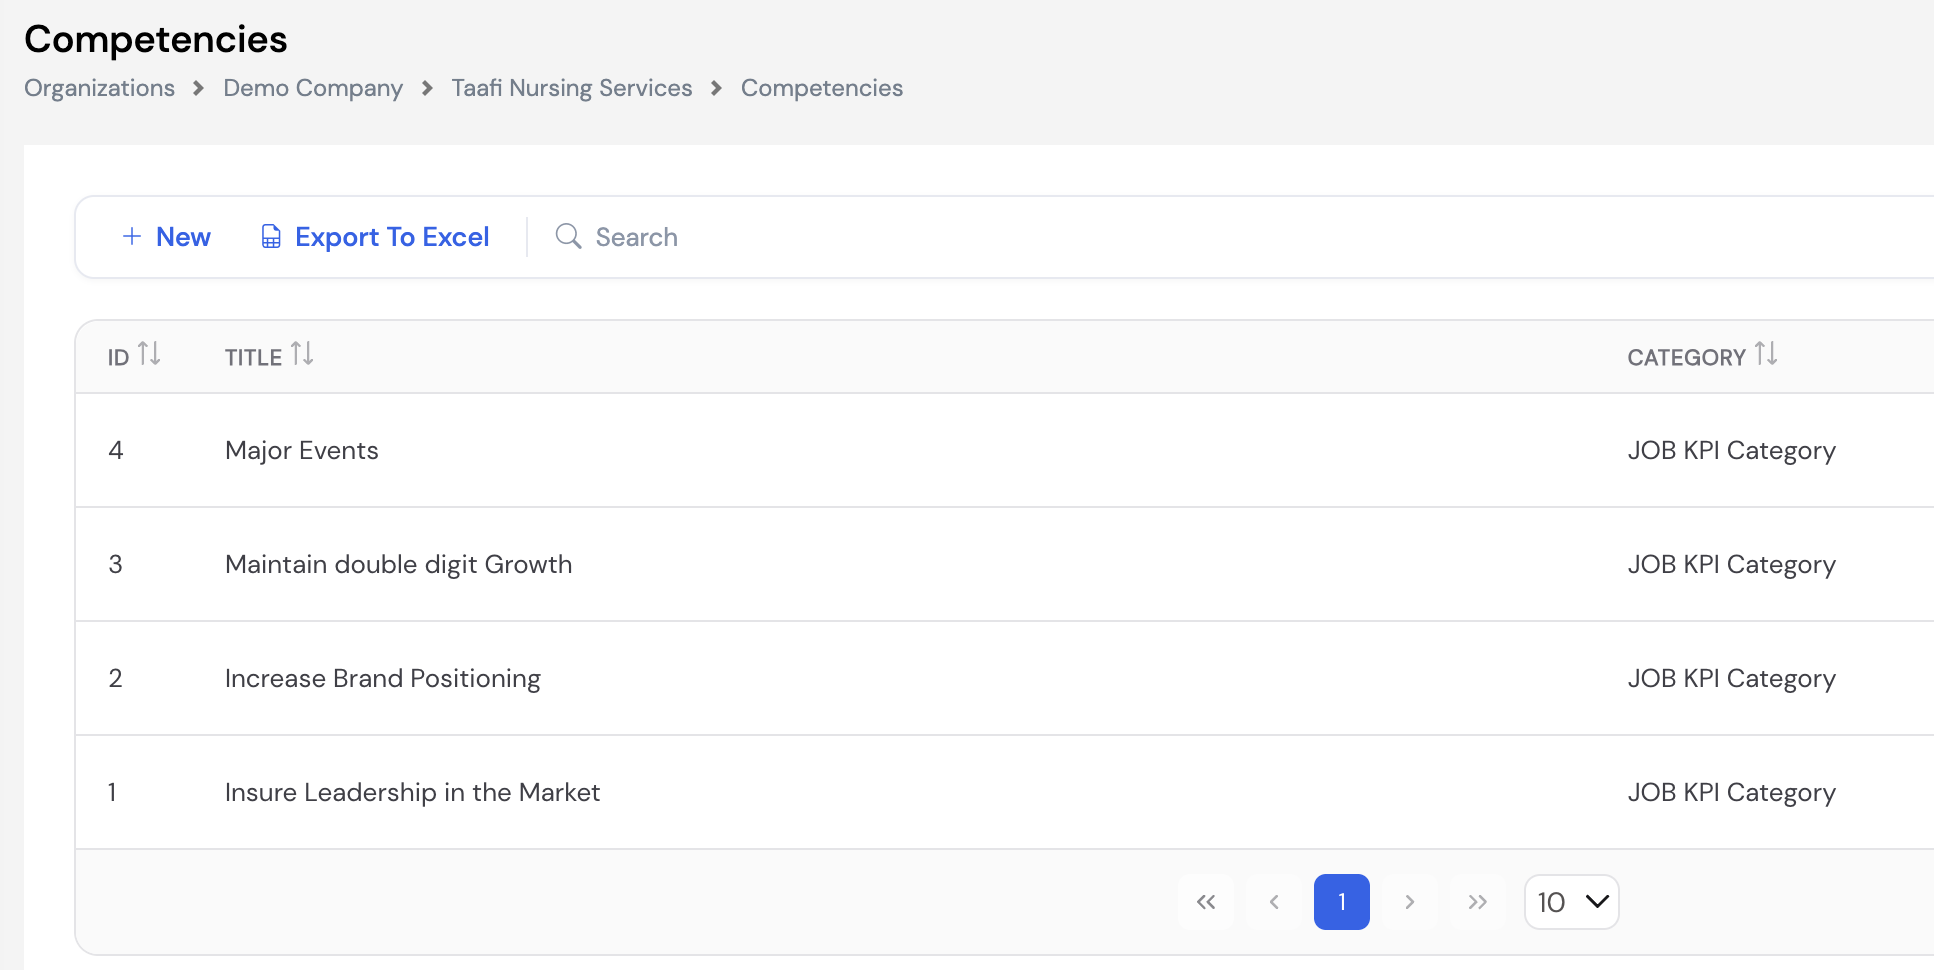
To add a competency, navigate to Appraisals → Objectives Setup → Competencies and click + New. Enter the Title and assign a Category, then save.
33.2 Appraisal Setup
Appraisal Setup covers the configuration required before an appraisal cycle can be initiated — including the appraisal period, scoring ratings, result ranges, and how objectives are weighted and calculated.
33.2.1 Periods
Appraisal Periods define the time window for each appraisal cycle. Each period has a code, name, date range, period type, and a readiness flag that controls whether the period is active and available for use in the appraisal process.
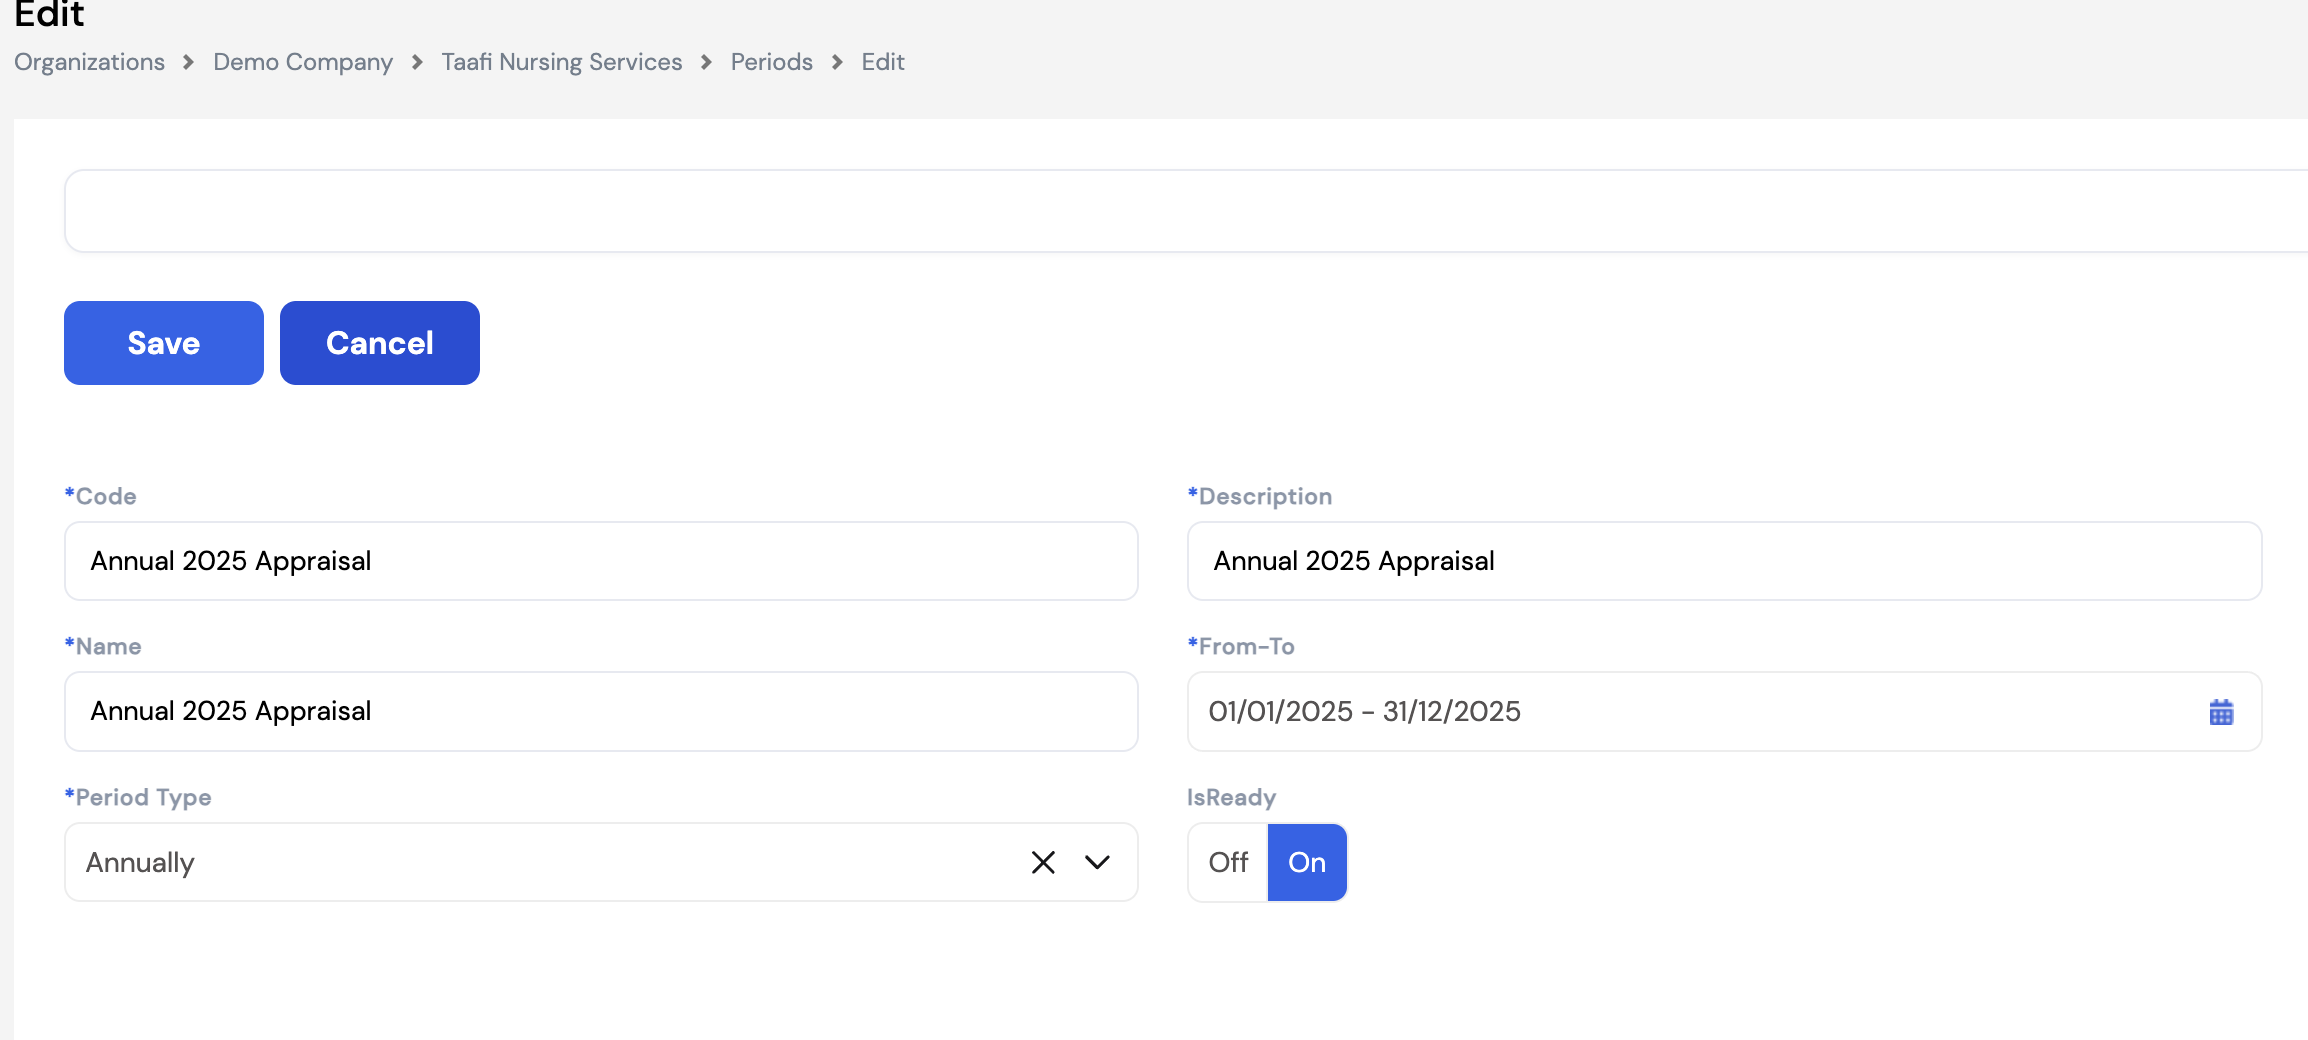
| Field | Description |
|---|---|
| Code * | A unique identifier for the appraisal period (e.g., Annual 2025 Appraisal). |
| Description * | A descriptive label for the period, displayed in appraisal screens and reports. |
| Name * | The display name of the period. |
| From–To * | The start and end dates of the appraisal cycle (e.g., 01/01/2025 – 31/12/2025). |
| Period Type * | The frequency of the appraisal cycle. Options include Annually, Semi-Annually, Quarterly, etc. |
| IsReady | Toggle to On when the period is fully configured and ready to be used for initiating appraisals. Periods set to Off will not be available in the Initiate screen. |
33.2.2 Rating
Appraisal Ratings define the scoring scale used by managers and employees when evaluating performance against objectives and competencies. Each rating has a Name, a numeric Value, and a Description. The numeric value is used by the system to calculate the final appraisal score.
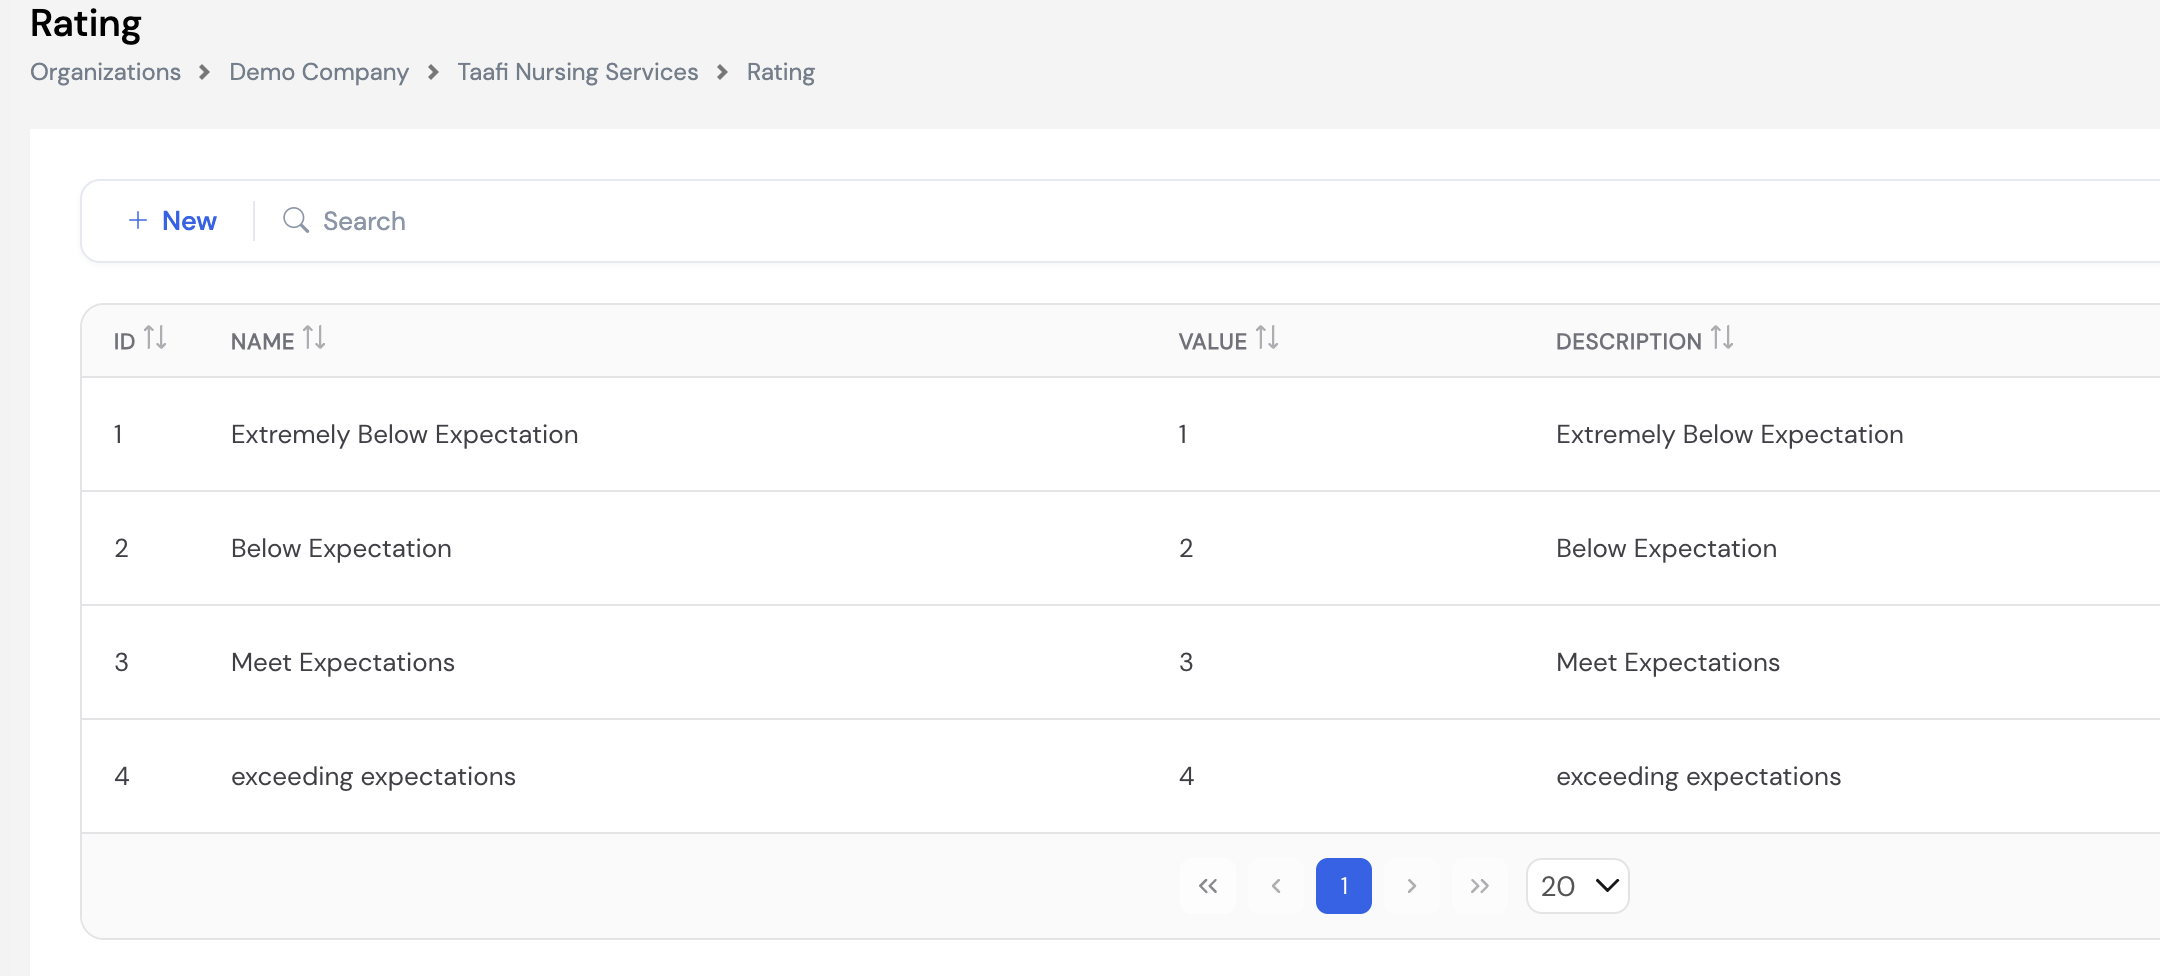
| Name | Value | Description |
|---|---|---|
| Extremely Below Expectation | 1 | Employee performance is significantly below the required standard. |
| Below Expectation | 2 | Employee performance falls short of expectations in key areas. |
| Meet Expectations | 3 | Employee consistently meets the required performance standards. |
| Exceeding Expectations | 4 | Employee consistently goes beyond what is expected in their role. |
To add or modify ratings, navigate to Appraisals → Appraisal Setup → Rating and click + New. Enter the Name, numeric Value, and Description, then save.
33.2.3 Result Range
Result Ranges map the final weighted average appraisal score to a meaningful outcome or recommendation. Once an appraisal cycle is completed and all ratings are submitted, the system calculates an overall score. That score is then matched against the defined result ranges to display the corresponding description — such as whether the employee's job is at risk, they need to improve, or they qualify for a salary raise.
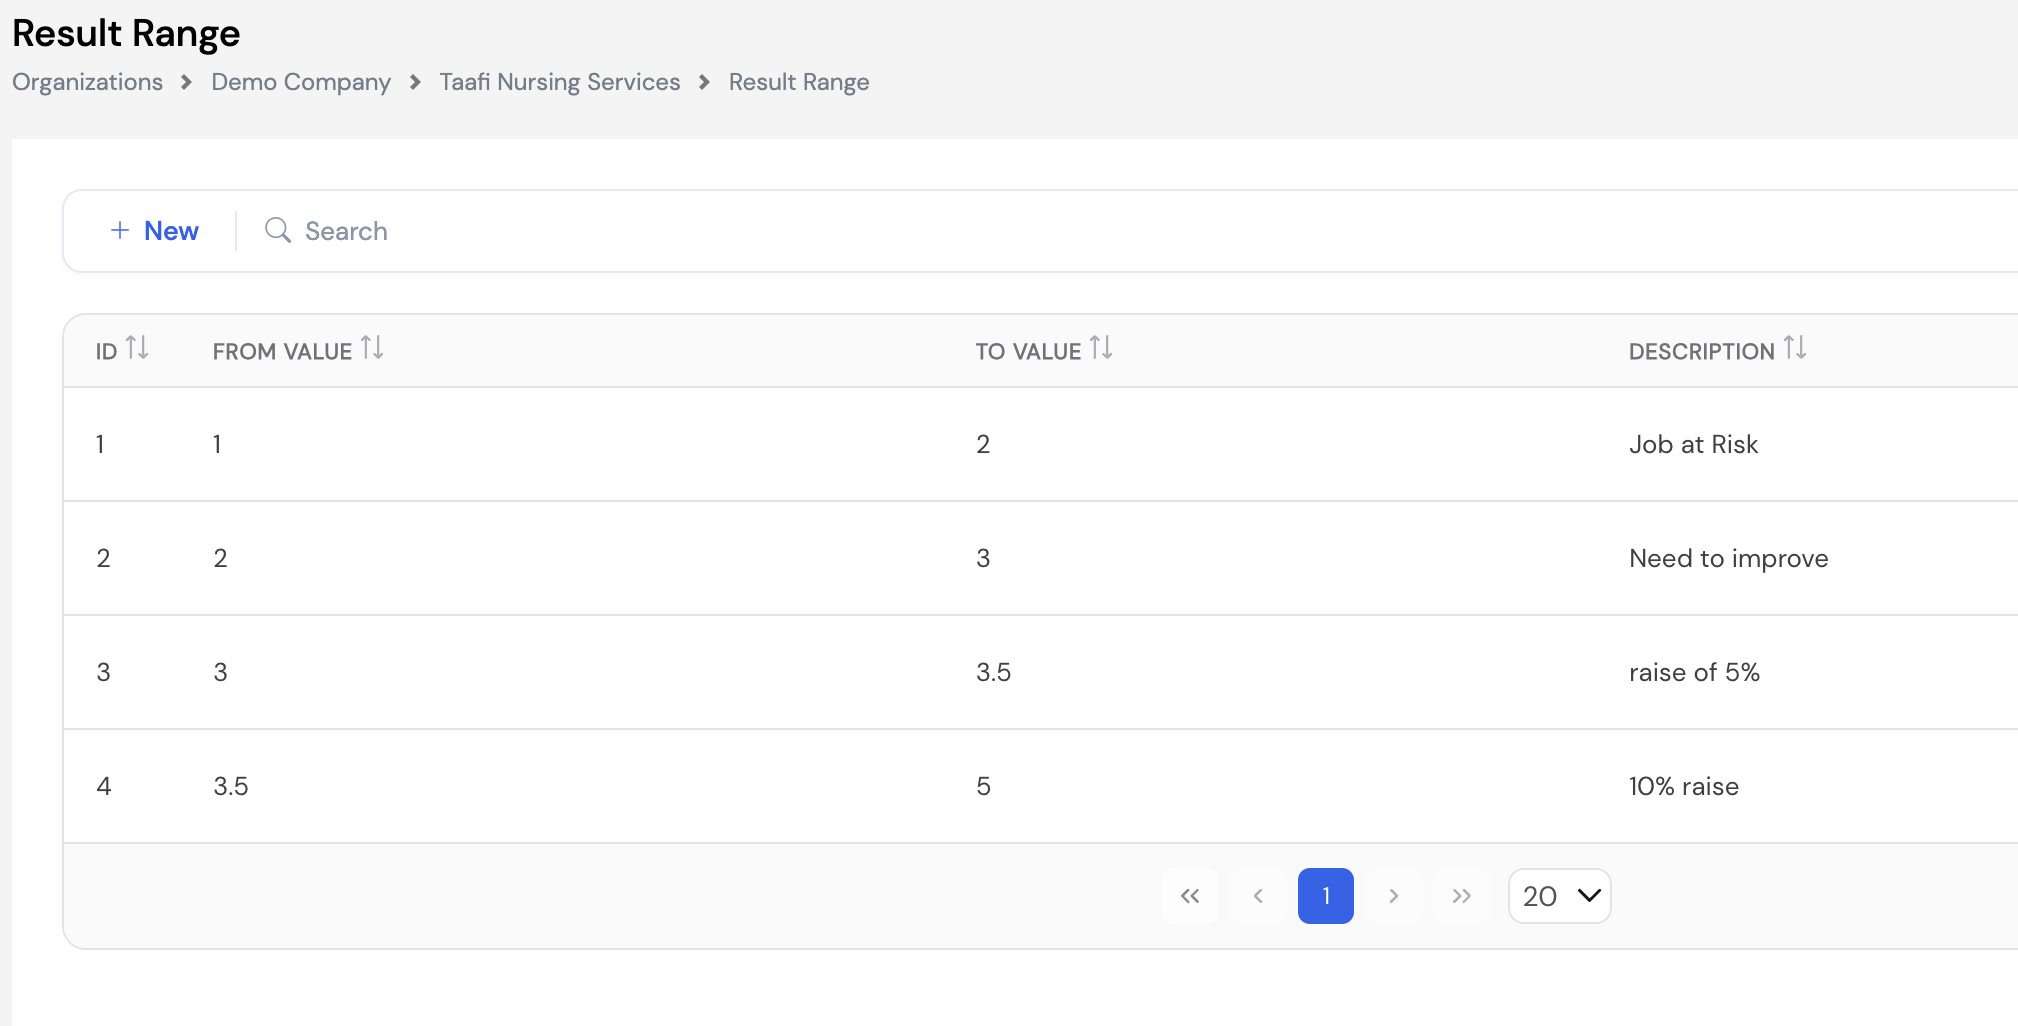
| From Value | To Value | Description |
|---|---|---|
| 1 | 2 | Job at Risk — employee performance is critically below expectations. |
| 2 | 3 | Need to Improve — performance is below the required standard and a development plan is recommended. |
| 3 | 3.5 | Raise of 5% — employee meets expectations and qualifies for a moderate salary increase. |
| 3.5 | 5 | 10% Raise — employee exceeds expectations and qualifies for a higher salary increase. |
To add or edit ranges, navigate to Appraisals → Appraisal Setup → Result Range and click + New. Enter the From Value, To Value, and a Description, then save.
33.2.4 Objective Calculation Distribution
Objective Calculation Distribution defines how much weight the employee's own self-assessment versus the manager's evaluation carries in the final appraisal score. This setting directly affects the weighted average and the final result range outcome for each employee.
The distribution can be configured per Grade, allowing different employee levels to have different self-assessment weights. A Default grade applies to all employees not assigned a specific grade configuration.
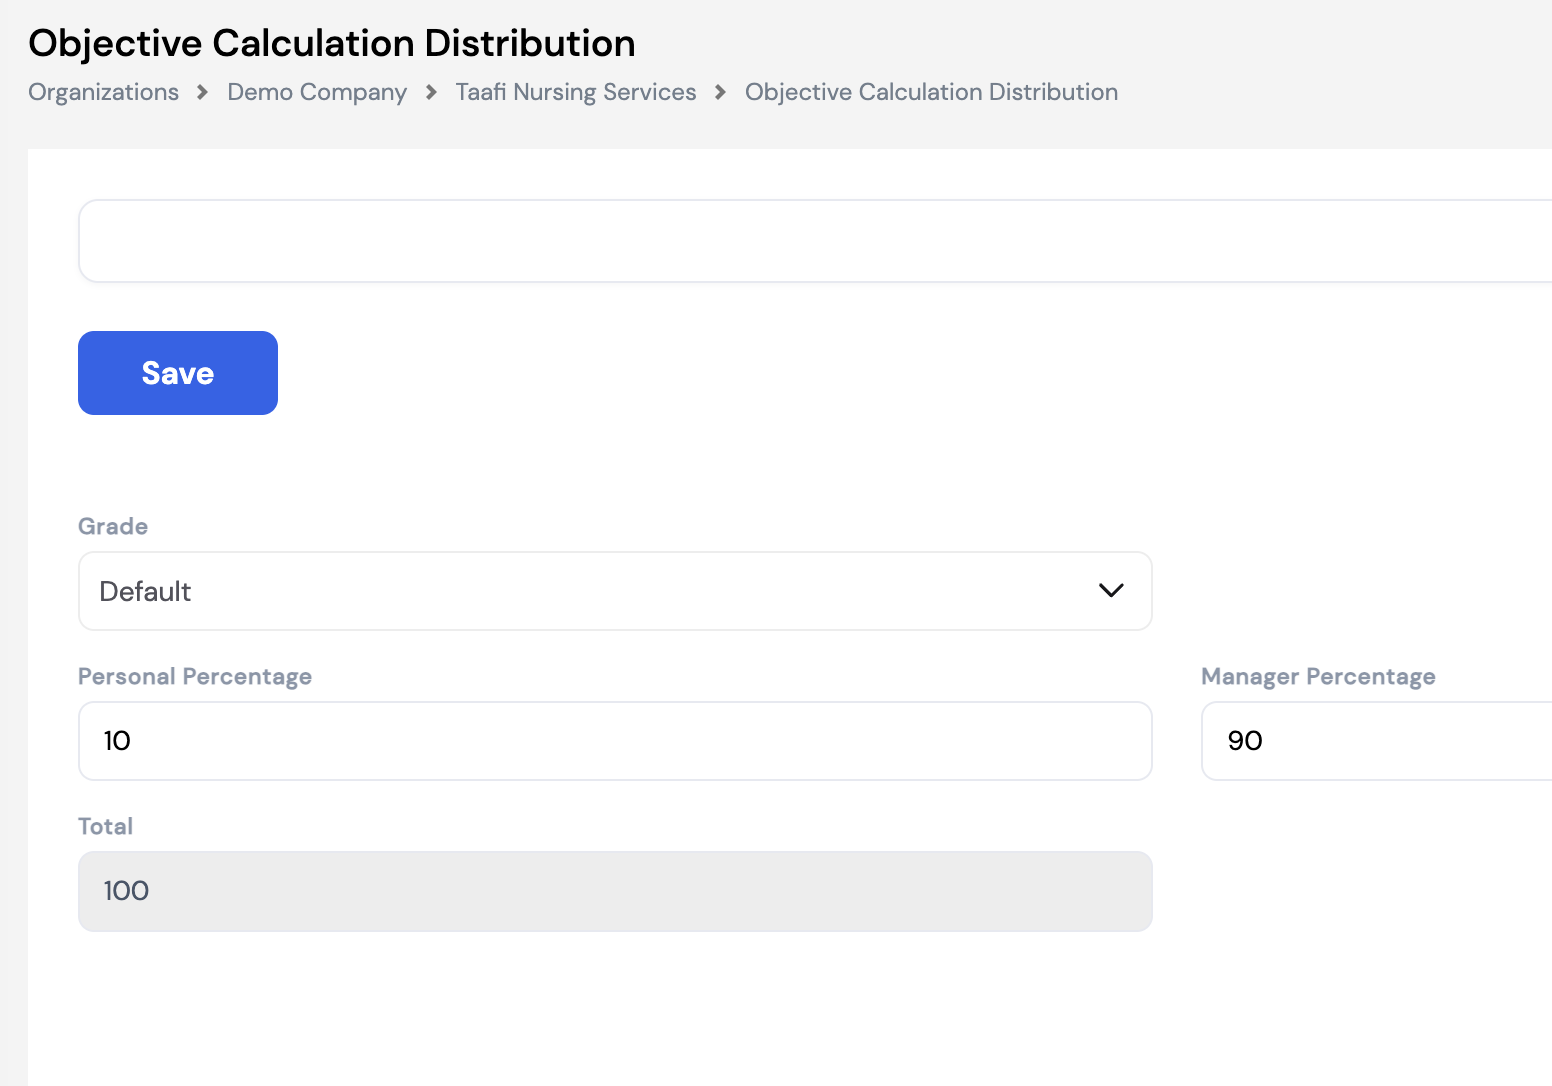
| Field | Description |
|---|---|
| Grade | The employee grade this distribution applies to. Use Default for a company-wide setting, or select a specific grade to override for that level. |
| Personal Percentage | The weight (%) given to the employee's own self-rating when calculating the final score. |
| Manager Percentage | The weight (%) given to the manager's rating when calculating the final score. |
| Total | Auto-calculated. Must equal 100%. The system will not save if Personal + Manager percentages do not total 100. |
33.2.5 Objective Calculation by Type
Objective Calculation by Type defines how the overall appraisal score is distributed across the three KPI categories — Personal Objectives, Business Objectives, and Competencies. The split can differ by employee role type (Head of Department, Regular, etc.) and by Grade, allowing the organization to weigh KPIs differently based on an employee's level and responsibilities.
For example, a Head of Department may have Business Objectives as a significant part of their appraisal, while a Regular employee may be assessed primarily on Personal Objectives and Competencies, with no Business Objective component.
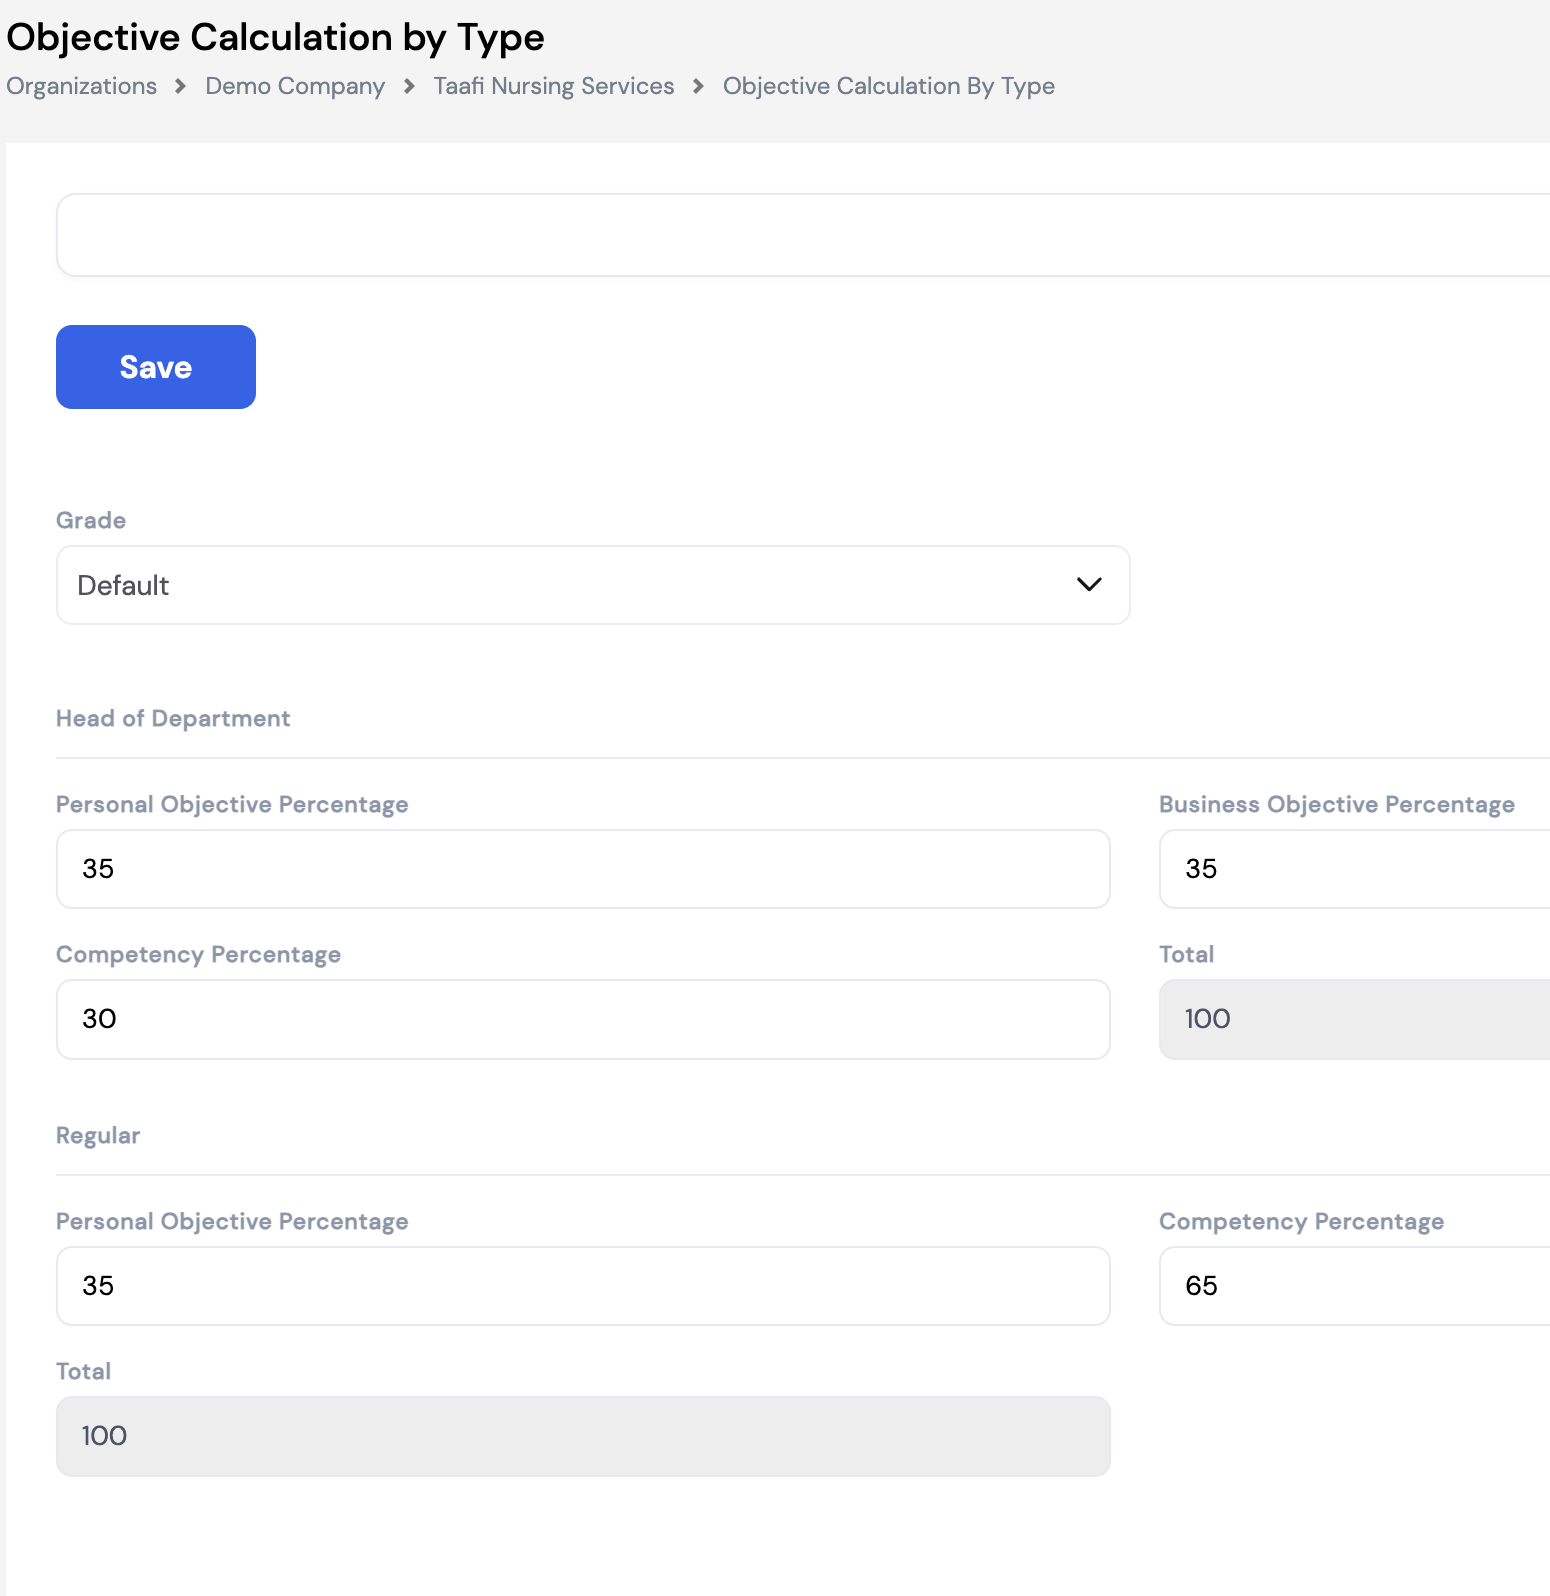
| Role Type | Personal Objective % | Business Objective % | Competency % | Total |
|---|---|---|---|---|
| Head of Department | 35% | 35% | 30% | 100% |
| Regular | 35% | — | 65% | 100% |
To configure, navigate to Appraisals → Appraisal Setup → Objective Calculation by Type, select the Grade, and enter the percentage split for each role type. The Total must equal 100% for each row before saving.
33.3 Initiate
The Initiate screen is used to launch an appraisal cycle for one or more employees. It allows HR administrators to select the appraisal type, period, and a target group of employees, then click Initialize to create the appraisal records and make them available for completion.
Unlike the ESS portal — where managers can only initiate appraisals for their direct reports — HR administrators using this screen can initiate appraisals for any employee in the company, regardless of reporting structure.
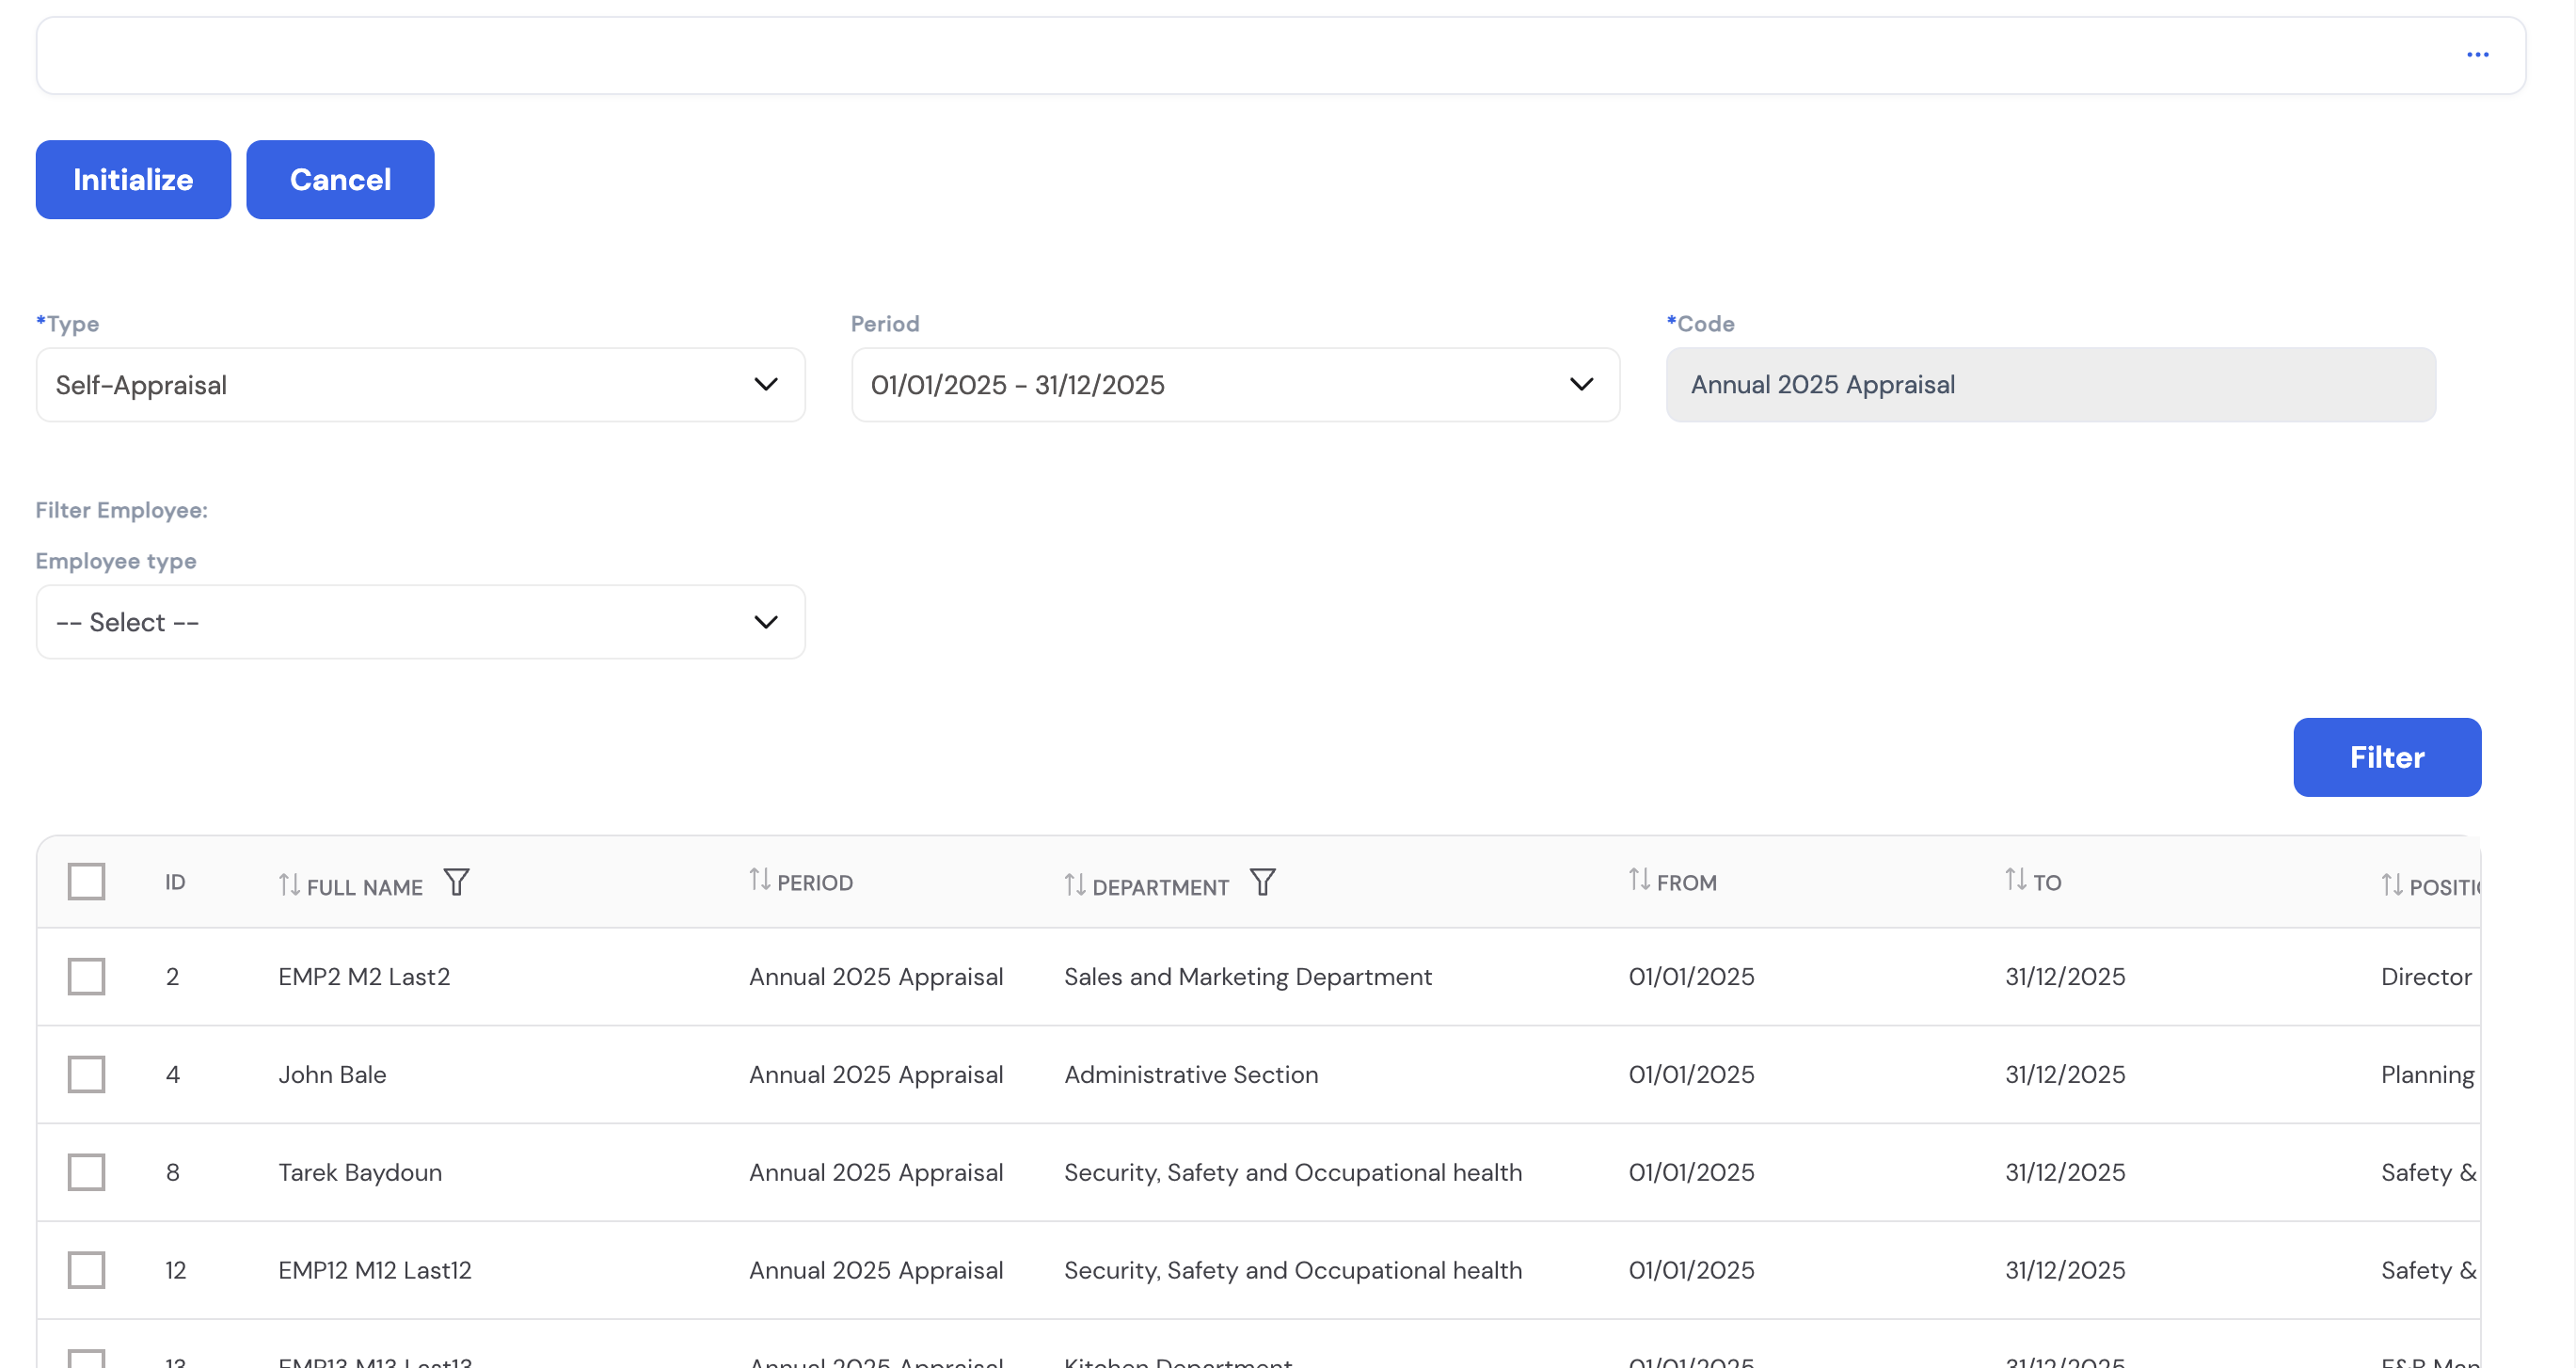
| Field | Description |
|---|---|
| Type * | The type of appraisal to initiate. Options include Self-Appraisal (employee rates themselves), Manager Appraisal (manager rates the employee), or combined types depending on system configuration. |
| Period | Select the appraisal period configured in Section 33.2.1. Only periods with IsReady = On will appear here. |
| Code | Auto-populated from the selected period. Read-only. |
| Employee Type | Optional filter to limit the employee list to a specific employee type (e.g., Monthly Full Time). Leave blank to include all types. |
| Filter button | Click to refresh the employee list based on the selected filters. |
The employee grid shows all employees matching the filter — with their Full Name, Department, Period, From/To dates, and Position. Use the checkboxes to select individual employees or select all, then click Initialize to create their appraisal records.
Quick Reference — Common Tasks
This section lists the most frequently performed tasks in Magnar HCM as step-by-step guides. Use the search bar at the top of this page, or expand any task below.
Login & Navigation
How do I log in and navigate to HR & Payroll?
- Open your browser and go to hcm.magnarsystems.com.
- Enter your email and password, then click Log In.
- Select your company if prompted.
- You land on the ESS Dashboard. Click the gear icon (top right) → Go to Payroll.
Employee Management
How do I create a new employee?
- Ensure Employee Type, Profession, Employee Group, Year, and Calendar are set up first.
- Navigate to Employees → click + New.
- Fill in personal details: name, date of birth, nationality, gender.
- Set Employee Type, Job, Position, Grade, Start Date, and Calendar.
- Save, then complete the remaining tabs: Dependents, Education, Skills, Address, Cost Centers, and Salary.
How do I assign an employee to a cost center?
- Open the employee profile → go to the Cost Centers tab.
- Click + New, select the Dimension and Cost Center.
- Enter the allocation percentage. Repeat for multiple cost centers (must total 100%).
- Save.
Payroll Processing
How do I run the monthly payroll?
- Add any manual adjustments: Payroll Process Tool → Periodic Movement → add bonus, deduction, or allowance rows.
- Go to Payroll Process Tool → Payroll Generation, select Employee Type and Period → click Generate.
- Review results in Periodic Movement — verify net pay, deductions, and tax.
- When satisfied, go to Payroll Process Tool → Post Period → Post to finalize.
- Send payslips via Send Payslip → select Period → Send by Email.
How do I run an off-cycle payroll?
- Navigate to Payroll Process Tool → Off-Cycle Periodic Movement.
- Select the employee and the pay element(s) to include.
- Enter the amount or let the system calculate it.
- Save and process. The payment is issued outside the regular payroll run.
How do I process a final settlement (EOS)?
- Navigate to Payroll Process Tool → Employee Exit.
- Select the employee and the Exit Reason (determines EOS formula).
- Enter the Last Working Day.
- Review the calculated EOS amount.
- Run the EOS off-cycle to issue the final payment.
Leave Management
How do I create a leave transaction for an employee?
- Navigate to the employee profile → Transactions tab, or use Leaves → Leave Transactions.
- Click + New, select the Leave Type.
- Enter From Date and To Date. The system calculates days (excluding weekends/holidays based on leave setup).
- Save. The leave balance updates automatically.
How do I process leave encashment?
- Navigate to Leaves → Leave Encashment → click + New.
- Select the employee and enter the number of days to encash.
- The system calculates the payout based on the employee's daily rate.
- Save. The amount is included in the next payroll run or processed as off-cycle.
Recruitment
How do I post a job opening and hire a candidate?
- Go to Recruitment Process → Job Opening → create the vacancy with all details and job description.
- Click Post to Magnar Recruitment to publish it on the portal.
- Add candidates in the Candidates tab. Move their status: Shortlisted → Interview → Offered → Hired.
- Issue an offer: Recruitment Process → Job Offer → fill in salary and offer type → Save and Send Email.
- Once accepted, open the applicant → click Hire → complete the 3-step wizard (Employee Info, Company Info, Bank Details).
Appraisals
How do I set up and initiate an appraisal cycle?
- Set up Objectives: Personal Categories, Business Objectives, Department Objectives, Competencies (link to Jobs).
- Set up Appraisal Setup: create a Period, configure Rating scale, Result Ranges, Calculation Distribution, and Calculation by Type.
- Set the Period IsReady = On.
- Go to Appraisals → Initiate, select Type and Period, filter employees, select all, click Initialize.
Configuration
How do I add a custom field to any form?
- Navigate to Configuration → Extended Properties → click + New.
- Select the Entity Name (target form) and Section Name.
- Choose a Value Selector Type (SingleLine, DateTime, Checkbox, Choice, Number, Attachment, DataSource, etc.).
- Enter the field Name and Order. Toggle Is Mandatory / Is Unique as needed.
- Save — the field appears immediately in the target form.
How do I restrict or grant a user permission to run payroll?
- Navigate to Configuration → Special Permissions.
- Select the user's Security Group.
- Find Generate Payroll and set to Permit or Deny.
- Repeat for Post Period to also control who can finalize payroll.
- Save.
How do I set up an automated email notification?
- Navigate to Configuration → Timer Job → click + New.
- Enter a Name and the trigger condition/query (e.g., documents expiring within 30 days).
- Set the schedule (daily, weekly, or custom cron).
- Select the recipient employees or groups and compose the email message.
- Save and enable the timer job.
Frequently Asked Questions (FAQ)
This section covers the most common questions from HR and Payroll administrators using Magnar HCM. Questions are grouped by topic. Click any question to expand the answer.
Login & Access
I forgot my password. How do I reset it?
On the login page, click Forgot Password? below the login button. Enter your registered email address and click Submit. You will receive a password reset link by email. Click the link, enter your new password, and log in.
How do I switch the interface language to Arabic or Spanish?
On the login page, use the language selector in the top-right corner before logging in. You can choose from English, Arabic (RTL), or Spanish. Your language preference is saved per session.
I logged in but I only see the ESS portal. How do I get to HR & Payroll?
From the ESS Dashboard, click the gear/settings icon in the top-right corner and select Go to Payroll. This switches you to the HR & Payroll system. If this option is not visible, your account may not have HR/Payroll access — contact your system administrator.
How do I switch between multiple companies?
After logging in, if you have access to multiple companies, you will be prompted to select a company on the company selection screen. To switch companies later, click the company name or the settings icon and choose Switch Company. Each company has its own data and configuration.
A user cannot log in. What should I check?
- Confirm the user's email address is correctly entered.
- Check that the user account is active in the system.
- Verify the user belongs to a security group with appropriate access.
- Have the user use Forgot Password? to reset their credentials.
- If the issue persists, contact your Magnar support team.
Navigation & Dashboard
What do the different dashboards on the home screen show?
The HR & Payroll home screen displays several dashboard tabs including employee counts, headcount by department, leave summaries, payroll cost charts, and pending approvals. Each tab can be exported to Excel, PDF, or an image using the export button in the top-right corner of the dashboard widget.
How do I export a dashboard chart or report to Excel or PDF?
On any dashboard screen, click the Export button in the top-right corner of the dashboard widget and select the desired format: Excel, PDF, or Image. This works on any tab, dashboard, or sub-dashboard throughout the system.
How do I go back to the ESS portal from HR & Payroll?
Click the gear icon in the top-right corner of the HR & Payroll system and select Go to ESS. This returns you to the Employee Self-Service portal.
Organization & Company Setup
What is the correct order to set up a new company in Magnar HCM?
- Create the Year in Lookups (this is the first mandatory step).
- Set up Currencies and Exchange Rates (if multi-currency).
- Configure Employee Types, Professions, Employee Groups, Nationalities.
- Set up the Organization: Departments, Jobs, Grades, Positions.
- Configure Calendars and Attendance Rules.
- Set up Pay Elements and Plugins.
- Configure EOS Setup, Elements Mapping, and Tax Brackets.
- Complete Company Setup details.
- Create Security Groups and assign users.
- Begin entering Employees.
How do I edit company details after the initial setup?
Navigate to Company → Company Details and click Edit. You can update the company name, address, registration number, logo, and other details. Changes take effect immediately.
What is a Dimension and how is it different from a Cost Center?
A Dimension is a classification category (e.g., Department, Project, Branch). A Cost Center is a specific value within a dimension (e.g., Sales Department, Project Alpha). First create the dimension, then create cost centers under it. Cost centers are then assigned to employees to track payroll expenses.
What is the Year lookup and why must I create it first?
The Year lookup defines the fiscal year used by the system for leave accruals, payroll periods, and other calculations. It is the first mandatory step when setting up a company — without it, calendars, leave balances, and payroll periods cannot be created.
Pay Elements & Plugins
What is the difference between a Fixed and Variable pay element?
Fixed elements have the same value every payroll period (e.g., Basic Salary, Housing Allowance). Variable elements change from period to period (e.g., Overtime, Commission, Bonus). Use Variable for any element whose amount is entered or recalculated each run.
What is the difference between Manual, Calculated, and Plugin element options?
- Manual: Amount is entered by HR each payroll period in Periodic Movement.
- Calculated: Amount is derived from a formula built in the Formula Builder (e.g., Basic × 0.25).
- Plugin: Amount is computed by a specialized engine (e.g., tax, EOS, overtime) that follows complex logic beyond a simple formula.
What does the Tax Generic plugin do?
The Tax Generic plugin is a cumulative annual income tax calculator. It calculates tax based on the employee's total annual income to date, applying the configured tax brackets. It ensures the correct progressive tax is deducted each month so that the total annual tax is accurate, regardless of whether income varies month to month.
What does the Daily Rate plugin do?
The Daily Rate plugin calculates an employee's average daily rate based on a specified pay element (typically Basic Salary). The element ID to use as the base is configured in the plugin's parameter field. This daily rate is then used by other calculations such as leave encashment, overtime, and deductions.
What does the End of Service plugin do?
The EOS plugin calculates the gratuity/end-of-service entitlement based on the employee's years of service, exit reason, and the EOS setup rules configured in the system. It uses the exit reason to determine the applicable entitlement percentage and computes the final payout amount.
Why should tax brackets always be set on annual income even if tax is calculated monthly?
Magnar HCM uses cumulative annual tax calculation. Even if the tax is deducted monthly, the brackets define thresholds on annual income. The system divides or annualizes the income internally to apply the correct bracket. Setting brackets on monthly figures would produce incorrect tax deductions.
What is an element category and does it affect payroll calculations?
Element categories (Earning, Deduction, Leave, Leave Prorate, Element Prorate, Parameter) classify what the element represents. The category does not directly affect the calculation logic — it is used for grouping, reporting, and payslip display purposes. The actual calculation behavior is determined by the element option (Manual, Calculated, Plugin) and any assigned formula or plugin.
Employee Profiles
What must be set up before I can create an employee?
Mandatory prerequisites: Employee Type, Profession, Employee Group, Year, and Calendar must exist. Recommended: Jobs, Grades, and Positions should also be created so they can be assigned during employee creation.
How do I add dependents to an employee's profile?
- Open the employee profile and navigate to the Dependents tab.
- Click + New.
- Enter the dependent's First Name, Last Name, Relationship, Date of Birth, and Nationality.
- Save. Dependents can also be linked to insurance policies.
How do I upload a document or attachment to an employee record?
- Open the employee profile → go to the Attachments tab.
- Click + New.
- Select the document type, enter a description, and choose the file.
- Click Upload, then Save.
How do I track an employee's skills and certifications?
In the employee profile, navigate to the Skills tab. Click + New to add a skill or certification, specifying the skill name, level, and any expiry date. This is informational and used for HR reporting and talent management.
How do I change an employee's salary?
- Open the employee profile → navigate to the Salary tab.
- Click Edit or + New (depending on whether you are updating an existing element or adding a new one).
- Enter the new amount and the effective date.
- Save. The change will be reflected in the next payroll run. Previous salary history is retained for audit purposes.
Can I assign an employee to multiple cost centers?
Yes. In the employee profile's Cost Centers tab, you can add multiple rows — each with a different cost center and a percentage allocation. The total across all rows must equal 100%. Payroll costs will be split across the assigned cost centers according to these percentages.
Payroll Processing
What is the difference between Periodic Movement and Payroll Generation?
Periodic Movement is used to add manual adjustments before payroll runs and to view results after a payroll run. Payroll Generation is the action that executes the payroll calculation for a period. You add adjustments in Periodic Movement first, then run Payroll Generation, then return to Periodic Movement to review results.
What does "Post Period" mean and can it be undone?
Posting a period finalizes the payroll results, locks the period from further edits, and makes the data available for accounting and reporting. Posted periods cannot be edited. If a correction is needed after posting, it must be handled through an off-cycle adjustment in the next period or by contacting your system administrator to unpost (if permitted).
How do I view what was paid to an employee in a previous month?
- Navigate to Payroll Process Tool → Payroll History by Period.
- Select the Employee Type and the historical period.
- Find the employee in the list to view their detailed payslip breakdown for that period.
What is an off-cycle payroll and when should I use it?
An off-cycle payroll is a payment run outside the regular monthly cycle. Use it for: corrections after a posted period, bonus payments, termination settlements, advance salary payments, or any payment that cannot wait until the next regular run. Navigate to Payroll Process Tool → Off-Cycle Periodic Movement.
How does the Off-Cycle Leave Process Wizard work?
This wizard pays an employee their salary in advance before they go on leave. It is applicable in specific countries only. When processed, the employee is temporarily suspended from the regular payroll run for the period covered by the advance payment to avoid double payment. The employee resumes normal payroll after returning from leave.
An employee's payslip shows the wrong tax amount. What should I check?
- Verify the Tax Brackets are correctly configured with annual income thresholds.
- Check the Tax Exclusions (self, spouse, children) are correctly set.
- Confirm the correct Tax Plugin is assigned to the tax element.
- Ensure the employee's nationality and tax profile are correctly set in their profile.
- Review the cumulative income-to-date in Periodic Movement to verify the running total is correct.
How do I process a salary retroactive adjustment?
Use the Retroactive Salary plugin on a pay element. This plugin calculates the difference between what was previously paid and what should have been paid (e.g., after a backdated salary increase), and adds the adjustment amount to the current period's payroll automatically.
Leave Management
How do public holidays and weekends affect leave calculations?
This is controlled by the leave type setup. Depending on configuration, the system can either include or exclude weekends and public holidays from the leave day count. For example, if an employee takes leave from Monday to Sunday and the leave type excludes weekends, only 5 days will be deducted from their balance. Check the leave type settings under Setup → Leave Setup.
What is leave encashment and how is it different from taking leave?
Leave encashment is when an employee is paid out for accumulated leave days instead of actually taking time off. The days are converted to a cash value based on the employee's daily rate. This is processed under Leaves → Leave Encashment and the amount is paid through payroll. It does not affect attendance records.
What is the Off-Cycle Leave Validation setting?
This setting defines the minimum number of leave days an employee must request in order to be eligible for advance salary payment via the Off-Cycle Leave Process Wizard. For example, if set to 10 days, employees requesting fewer than 10 days of leave will not qualify for advance salary payment.
How do I see which employees are on leave on a specific date?
Navigate to Leaves → Leaves Calendar. The calendar view shows all planned and approved leave across the company. You can filter by department, employee type, or date range to see who is absent or scheduled to be off on any given day.
What is a Based Leave and when do I need to set it up?
Based Leave is the foundational leave configuration that determines how leave is accrued, calculated, and managed for different leave types (Annual Leave, Sick Leave, etc.). It must be set up in Setup → Leaves → Based Leave before employees can use the leave module. Settings include accrual method, maximum balance, carry-forward rules, and whether the leave is paid or unpaid.
Recruitment
Can I create a job offer for a candidate who applied through the recruitment portal?
Yes. Candidates who apply via the portal appear in Recruitment Process → Applicants. Open the applicant record, link them to the relevant Job Opening, move their status to Offered, then create a Job Offer record for them under Recruitment Process → Job Offer.
Can I have multiple active job offers for the same vacancy at the same time?
No. Only one in-process job offer can be active per vacancy at a time. To issue an offer to a different candidate for the same position, you must first set the current offer's status to Rejected or Closed, then create a new offer.
A candidate rejected our offer. How do I send a counter offer?
- Open the existing job offer record.
- Change the Status to Rejected and save.
- Click the New Offer button that appears.
- Adjust the salary, allowances, or terms in the new offer form.
- Click Save and Send Email to send the revised offer.
How do I schedule an interview for a candidate?
- In the Job Opening's Candidates tab, click Activities on the candidate's row.
- Click New Activity → Interview.
- Select the interviewers, the interviewee, and the interview date and time.
- Save. The interview appears in the Activities calendar and an email notification is automatically sent to the interviewee.
What does "Convert Candidate to Employee" mean?
This is the process triggered by clicking the Hire button on an applicant's record (after their offer is accepted). It launches a 3-step wizard to create a full employee record from the applicant data: Step 1 (Employee Info), Step 2 (Company Info including start date and salary), and Step 3 (Bank Details). This requires the Convert Candidate to Employee special permission.
What is the difference between Interview Criteria, Position Interview Criteria, and Interview Rating?
- Interview Criteria: The general evaluation categories (e.g., Education, Experience). Think of these as the "what" being assessed.
- Position Interview Criteria: Links specific criteria to a position with a weight percentage — defining how much each category counts toward the final score for that role.
- Interview Rating: The scoring scale (e.g., Poor=20, Good=60, Excellent=90) used when assigning a score to each criterion for a candidate.
End of Service & Employee Exit
How does the exit reason affect the EOS calculation?
Each exit reason (e.g., Resignation, Termination, Retirement, End of Contract) is linked to a specific EOS entitlement rule in the EOS Setup. The rule defines the percentage of final salary per year of service the employee is entitled to receive. An employee who resigns may receive a different entitlement than one who is terminated — the system applies the correct formula based on the exit reason selected.
What is the Elements Mapping section used for?
Elements Mapping is a critical configuration that tells the system which pay elements correspond to which payroll components (Basic Salary, Housing, Transport, etc.) for the purpose of EOS and other calculations. Without correct elements mapping, the EOS calculation will not be able to identify the correct salary base to compute the gratuity.
What happens to an employee's payroll during the notice period?
During the notice period (configured under Exit Process → Notice Period Setup), the employee remains on regular payroll and continues to receive their normal salary. The notice period configuration defines how many days/months of notice are required based on the employee's grade or contract type. At the end of the notice period, the final settlement (EOS) is processed.
Can a terminated employee be rehired in Magnar HCM?
Yes. Magnar HCM supports employee rejoining through the Exit Process → Rejoining section. There are two types of rejoining: one where the employee retains their previous service history and another where a fresh service calculation begins. The appropriate type depends on the company's HR policy and the gap between termination and rehiring.
Time & Attendance
How is the timesheet populated?
The timesheet is automatically populated from attendance records captured via Web Clock In/Out, Mobile Clock In/Out, or imported from a physical attendance device. The system applies the configured attendance rules (shift times, grace periods, overtime thresholds) to generate the timesheet entries. HR can review and make corrections before payroll processing.
What is the Project Worksheet used for?
The Project Worksheet allows HR or project managers to allocate employee hours to specific projects. This is used for project-based costing — tracking how many hours each employee worked on each project, which can then be tied to project cost centers for financial reporting.
How do I update timesheet records for multiple employees at once?
Navigate to Time & Attendance → Mass Update. Filter the records you need to update (by date, department, or employee type), then apply the bulk update. This is useful for correcting systematic errors or applying global changes like a public holiday across all employee timesheets.
How do I import attendance data from a fingerprint or access control device?
Navigate to Time & Attendance → Attendance Records and use the import function. Configure the connection to your physical device under Time & Attendance → Connection Settings first. The import maps device timestamps to employee records and populates the attendance grid automatically.
Appraisals
What is the correct setup order for appraisals?
- Define Competencies and link them to Jobs.
- Set up Personal Objective Categories (via Objectives Setup or Company Lookups).
- Define Business Objectives and assign them to departments via Department Objectives.
- Configure Appraisal Period (dates, period type).
- Set up Rating scale (e.g., 1–4).
- Define Result Ranges tied to the rating scale.
- Configure Objective Calculation Distribution (employee vs. manager weight).
- Configure Objective Calculation by Type (Personal vs. Business vs. Competency split per role type).
- Set Period IsReady = On.
- Go to Initiate and launch the appraisal cycle.
What is the difference between Objective Calculation Distribution and Objective Calculation by Type?
- Objective Calculation Distribution controls who scores: the split between the employee's self-rating and the manager's rating (e.g., 10% employee / 90% manager).
- Objective Calculation by Type controls what is scored: the weight of each KPI category (Personal Objectives, Business Objectives, Competencies) in the final score, split by role type (Head of Department vs. Regular).
Why are competencies not appearing in an employee's appraisal?
Competencies must be linked to the employee's assigned Job before they appear in appraisals. Navigate to Setup → Jobs, open the relevant job, and add the competencies in the Competencies tab. Once linked to the job, they will appear in appraisals for all employees in that job.
Can managers initiate appraisals for their team from the ESS portal?
Yes, but only for their direct reports. Managers can initiate appraisals for employees who report directly to them via the ESS portal. HR administrators using the Appraisals → Initiate screen in the HR & Payroll system can initiate appraisals for any employee in the company, regardless of reporting structure.
What does the Result Range outcome mean for the employee?
After all ratings are submitted and the appraisal cycle is closed, the system calculates a final weighted average score. This score is matched against the configured Result Ranges to produce an outcome description — for example, a score between 3.5 and 5 might result in "10% Raise", while 1 to 2 might result in "Job at Risk". This outcome is informational and guides HR decisions on compensation, development, or performance management actions.
Insurance
How do I track insurance policy renewals?
Each insurance policy has an Expiry Date field. You can use the Timer Job feature (Configuration → Timer Job) to set up an automated email alert that notifies HR when insurance policies are approaching their expiry date (e.g., 30 days before expiry). This ensures renewals are not missed.
Can I add dependents to an employee's insurance policy?
Yes. In the insurance policy form, the Covered Members grid at the bottom allows you to add any number of covered individuals — such as spouse or children. For each member, enter their First Name, Last Name, Type (relationship), Member ID, and insured Amount. Click + to add additional rows.
Configuration & System Settings
How do I configure the outgoing email server for payslips and notifications?
Navigate to Setup → Company Setup → Outgoing Email (Section 23.1.7). Enter the SMTP server details: host, port, sender email address, and credentials. Test the connection before saving. Without a valid outgoing email configuration, payslip emails and timer job notifications will not be delivered.
What are Security Groups and how do they control access?
Security Groups define what a set of users can see and do in the system. Each group has a configured set of module and screen permissions. Users assigned to a group inherit those permissions. Navigate to Setup → Security Groups to create and configure groups, then assign employees to groups via their user profile. Use Configuration → Special Permissions for action-level controls (e.g., who can generate payroll).
What are Extended Properties and how do I use them?
Extended Properties let you add custom user-defined fields to any form in the system — without development work. Navigate to Configuration → Extended Properties → + New. Choose the target Entity (form), Section, field type (SingleLine, DateTime, Checkbox, Choice, Number, Attachment, DataSource, etc.), and a label. The field appears immediately in the target form. Access requires the Manage Fields special permission.
How do I configure a workflow approval for leave requests?
- Design the workflow in Setup → Workflow Designer (define approval stages and approvers).
- Navigate to Configuration → Workflows Mapping.
- Find the Leave Request workflow entry.
- Select the workflow template you designed.
- Save. All future leave requests will now route through the configured approval chain.
How do I hide a module or screen from users?
Navigate to Configuration → Menu. Select the menu Type (e.g., Payroll). Remove the items you want to hide from the active list. Items not in the list will not appear in the navigation for users in that company. This is company-level — each company can have a different menu structure. Hiding an item does not delete any data.
What is the Timer Job and what can it do?
Timer Jobs are scheduled automated tasks that run in the background and send email notifications to selected employees based on data conditions you define. Examples include: notifying HR when employee documents are expiring, sending birthday wishes, alerting managers of pending approvals, or reminding payroll teams of upcoming period deadlines. Configure them under Configuration → Timer Job.
How do I set up the company logo and branding in Magnar HCM?
Navigate to Company → Company Details and click Edit. Upload the company logo in the Logo field. The logo appears on payslips, reports, and printed documents. Ensure the image is in a supported format (PNG or JPG) and is appropriately sized for print quality.
General
Can I use Magnar HCM in multiple languages simultaneously?
Yes. Each user can select their preferred interface language (English, Arabic, Spanish) independently from the login page. The system supports RTL (right-to-left) layout when Arabic is selected. Data entered by users (names, descriptions) is stored as entered and does not auto-translate.
Where can I find audit logs for changes made in the system?
The clock/history icon (🕐) present on most screens opens a change log showing who made what change and when. For payroll-specific logs, review the Setup → Logs section (Section 23.21). For salary changes, the Salary tab on the employee profile retains a history of all previous salary records with effective dates.
Does Magnar HCM support multi-currency payroll?
Yes. Multi-currency is supported for both payroll and expenses. Configure the currencies under Setup → Currencies and define monthly exchange rates under Setup → Exchange Rates. Individual pay elements can be assigned a specific currency. Exchange rates must be entered each month before running payroll if the company uses multiple currencies.
What is the difference between the HR & Payroll system and the ESS portal?
The HR & Payroll system is the administrative back-end used by HR managers, payroll administrators, and system administrators to manage all aspects of the organization. The ESS (Employee Self-Service) portal is the employee-facing front-end where individual employees can view their payslips, apply for leave, submit expenses, complete appraisals, and manage their personal profile. Both are part of Magnar HCM and share the same data.
How do I contact Magnar support?
For technical support, implementation queries, or licensing questions, contact Magnar Systems through the official support channels at magnarsystems.com. Your implementation team can also be reached through the support portal or your designated account manager.
Additional Sections — Coming Soon
Further sub-sections of Setup and additional modules will be added as the manual continues to develop.